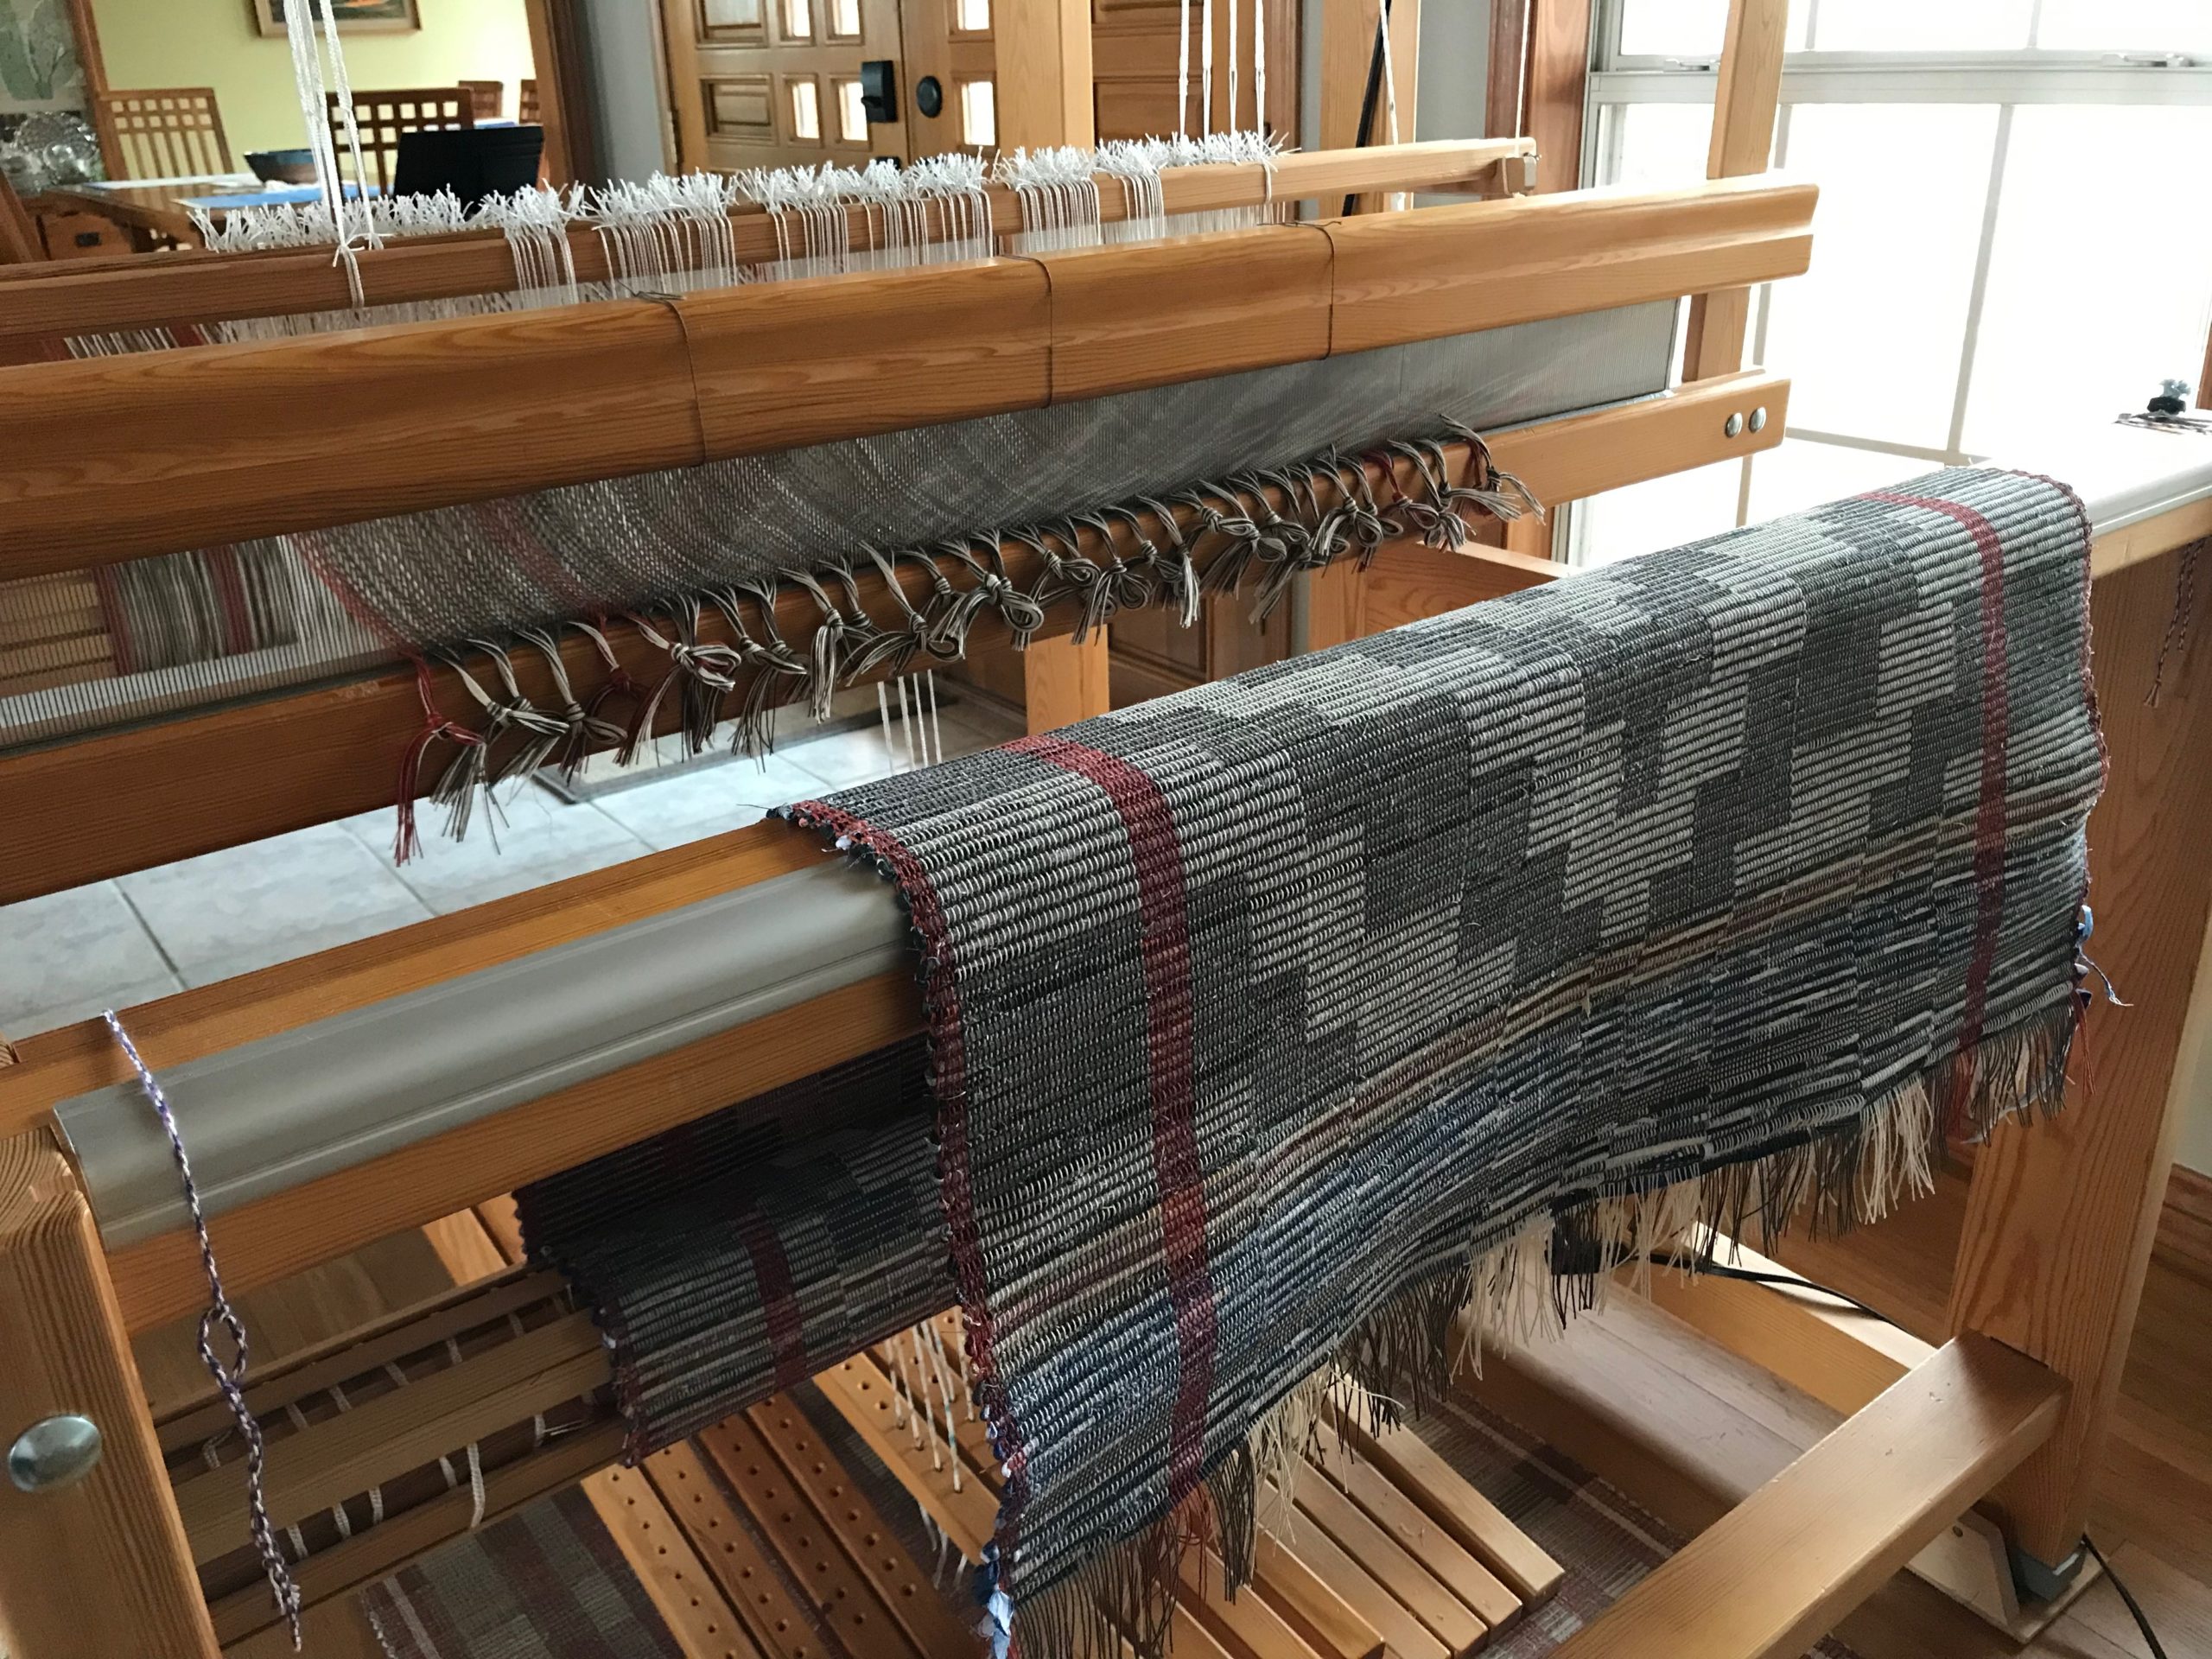
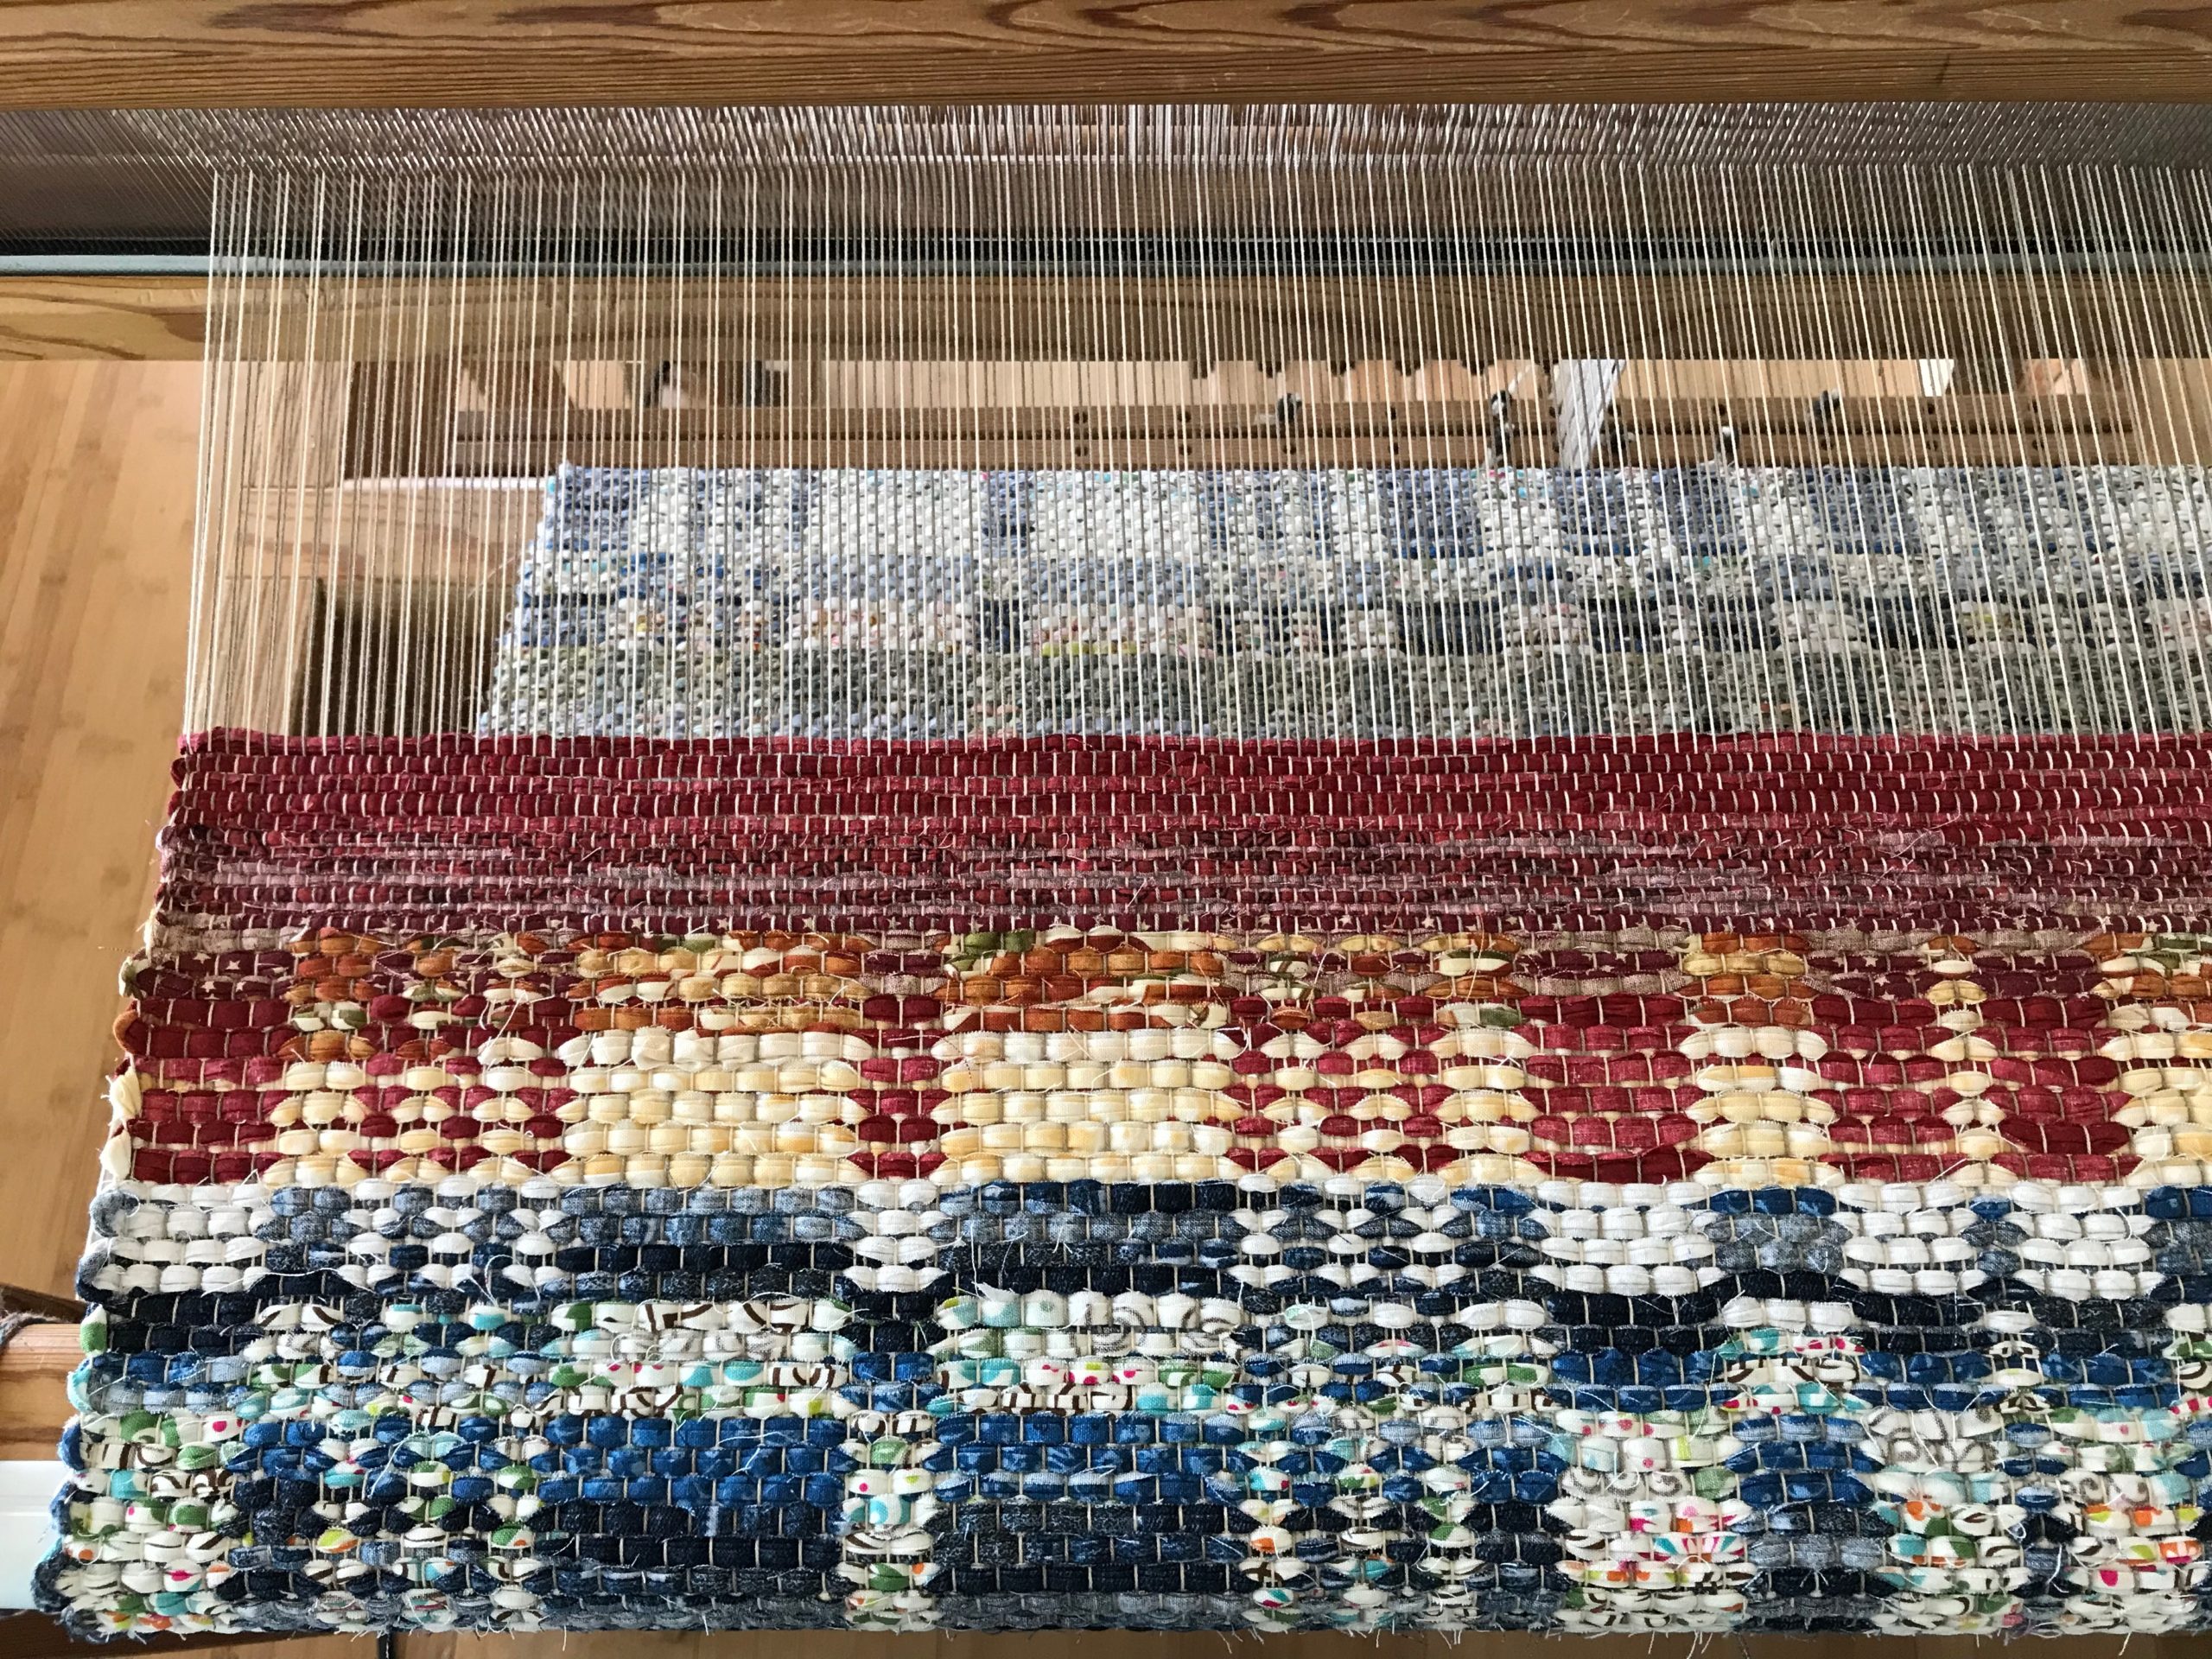
I’ve been working on this spaced rep rag rug for a while. I should know what it looks like. So why does unrolling the cloth beam make me feel like a child on Christmas morning awaiting a surprise? It’s because I see only a small portion of the rug at any one time while I am weaving.
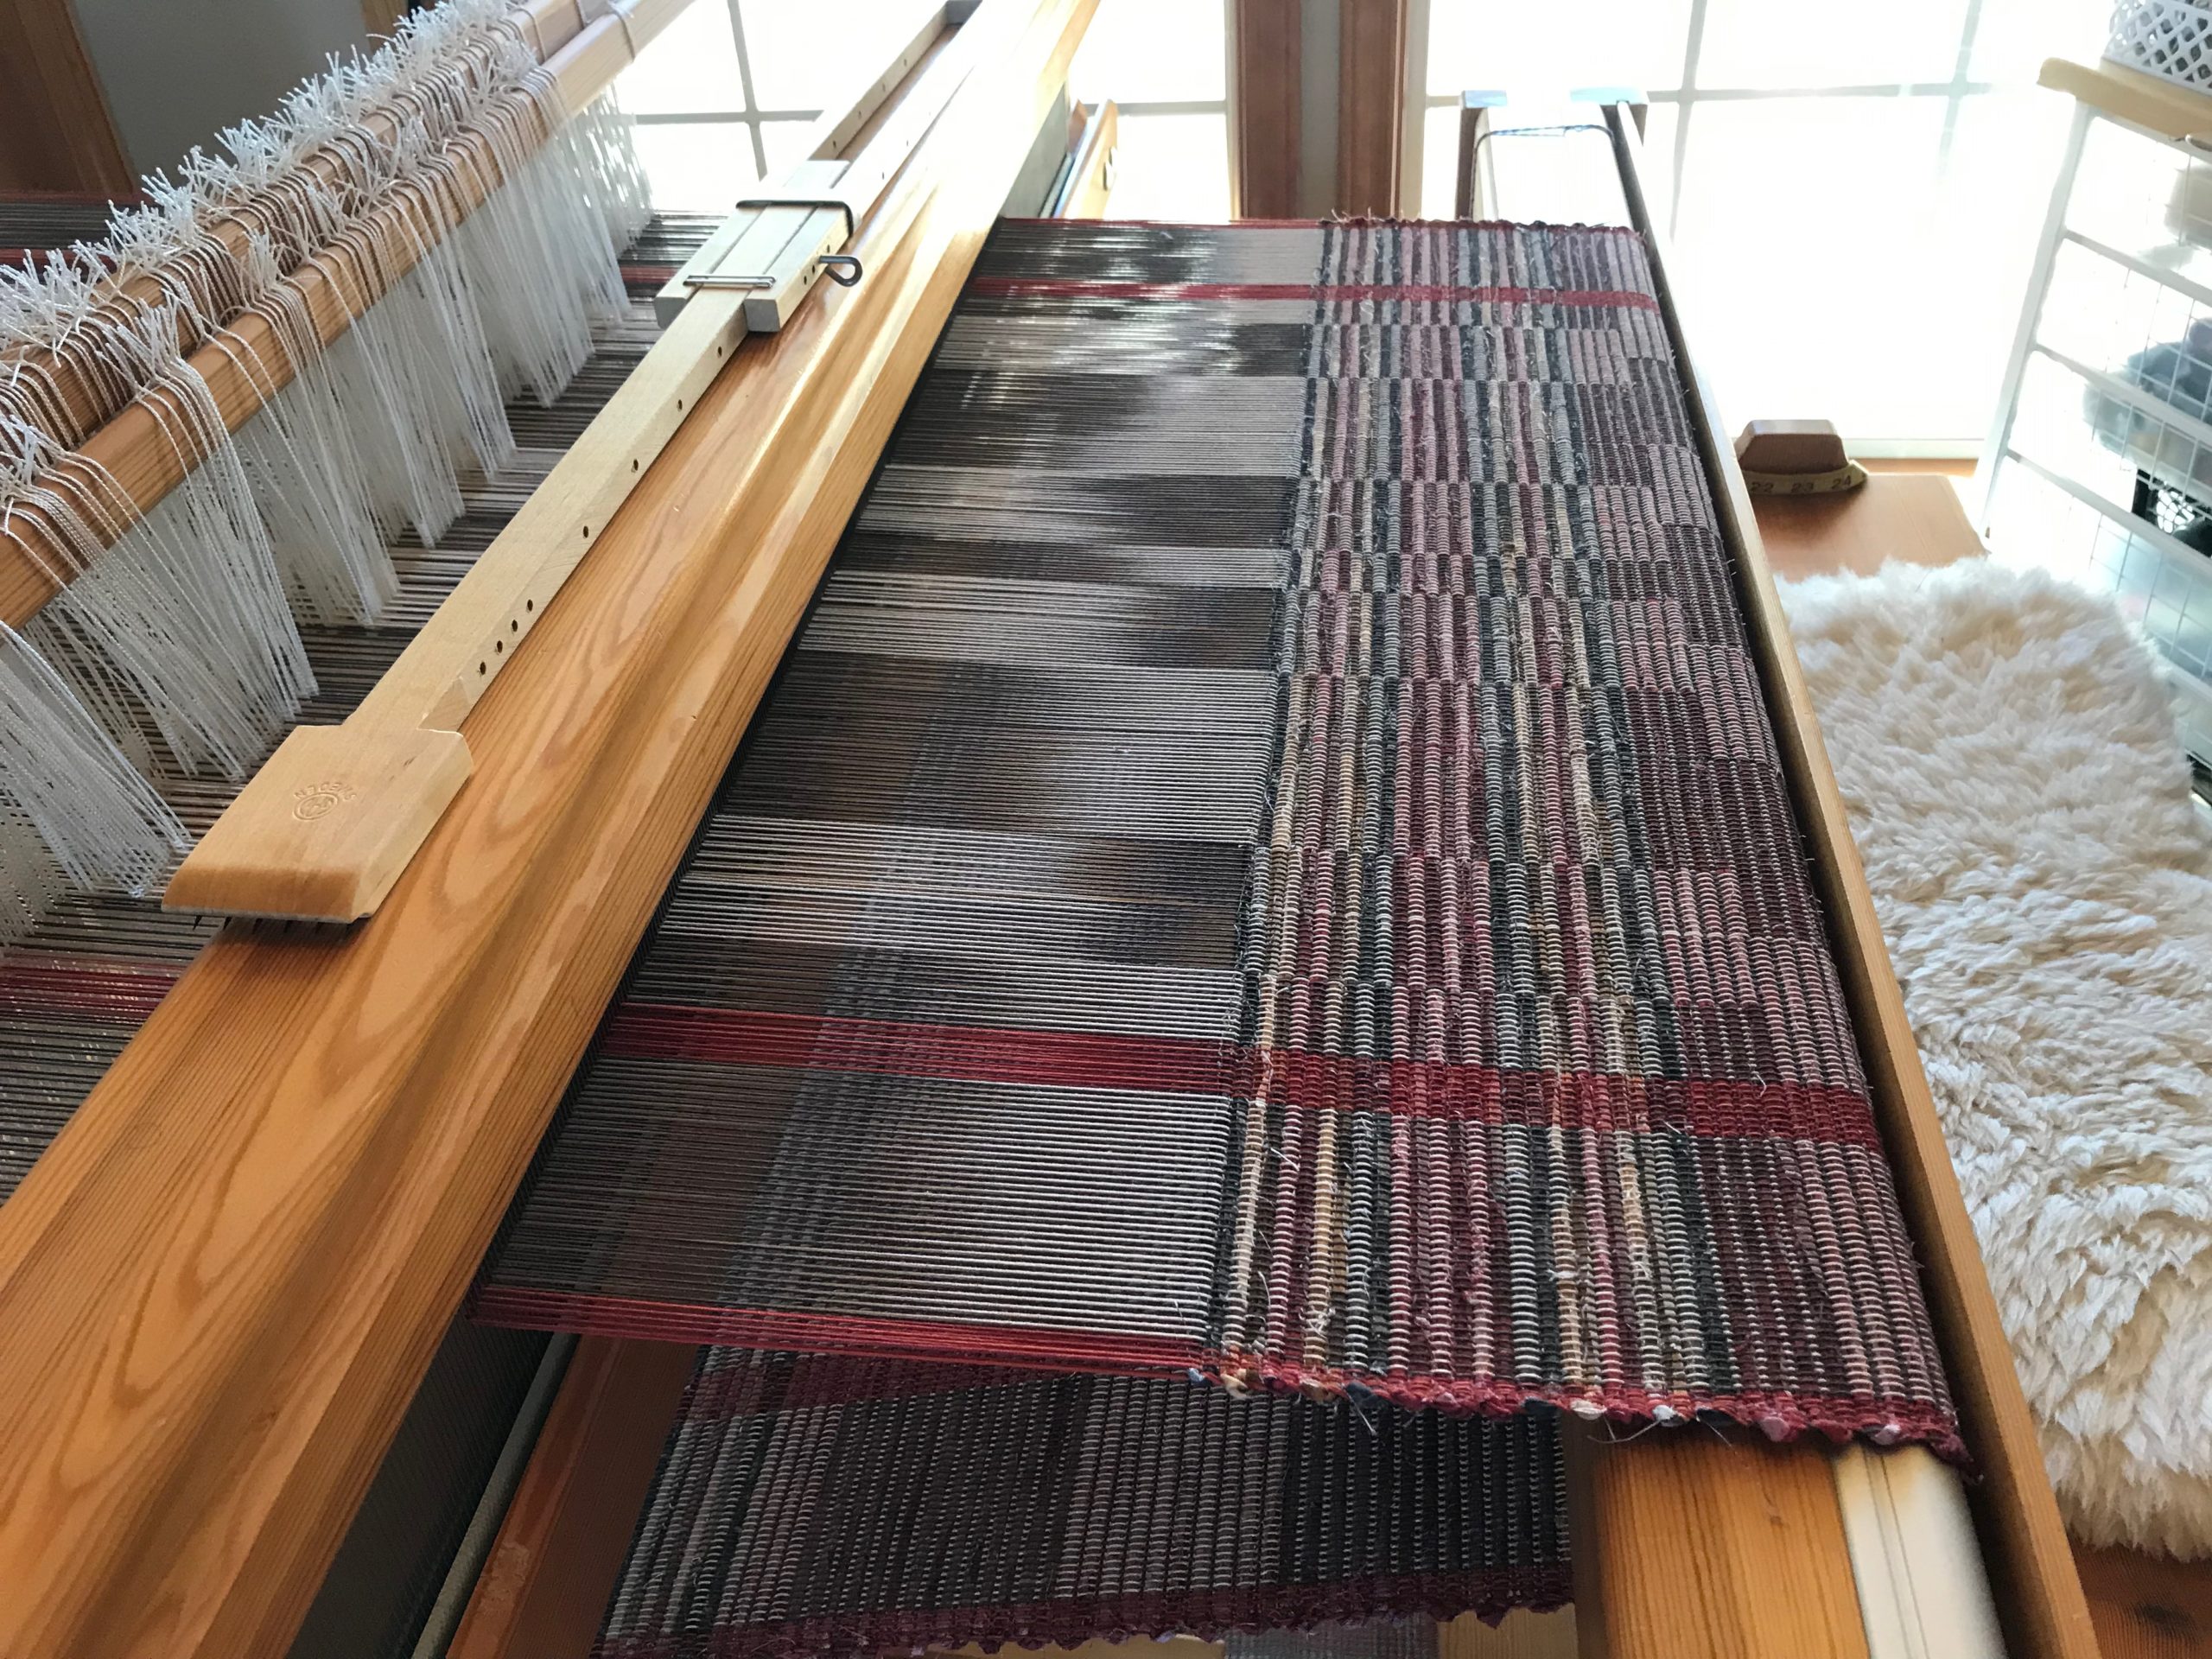
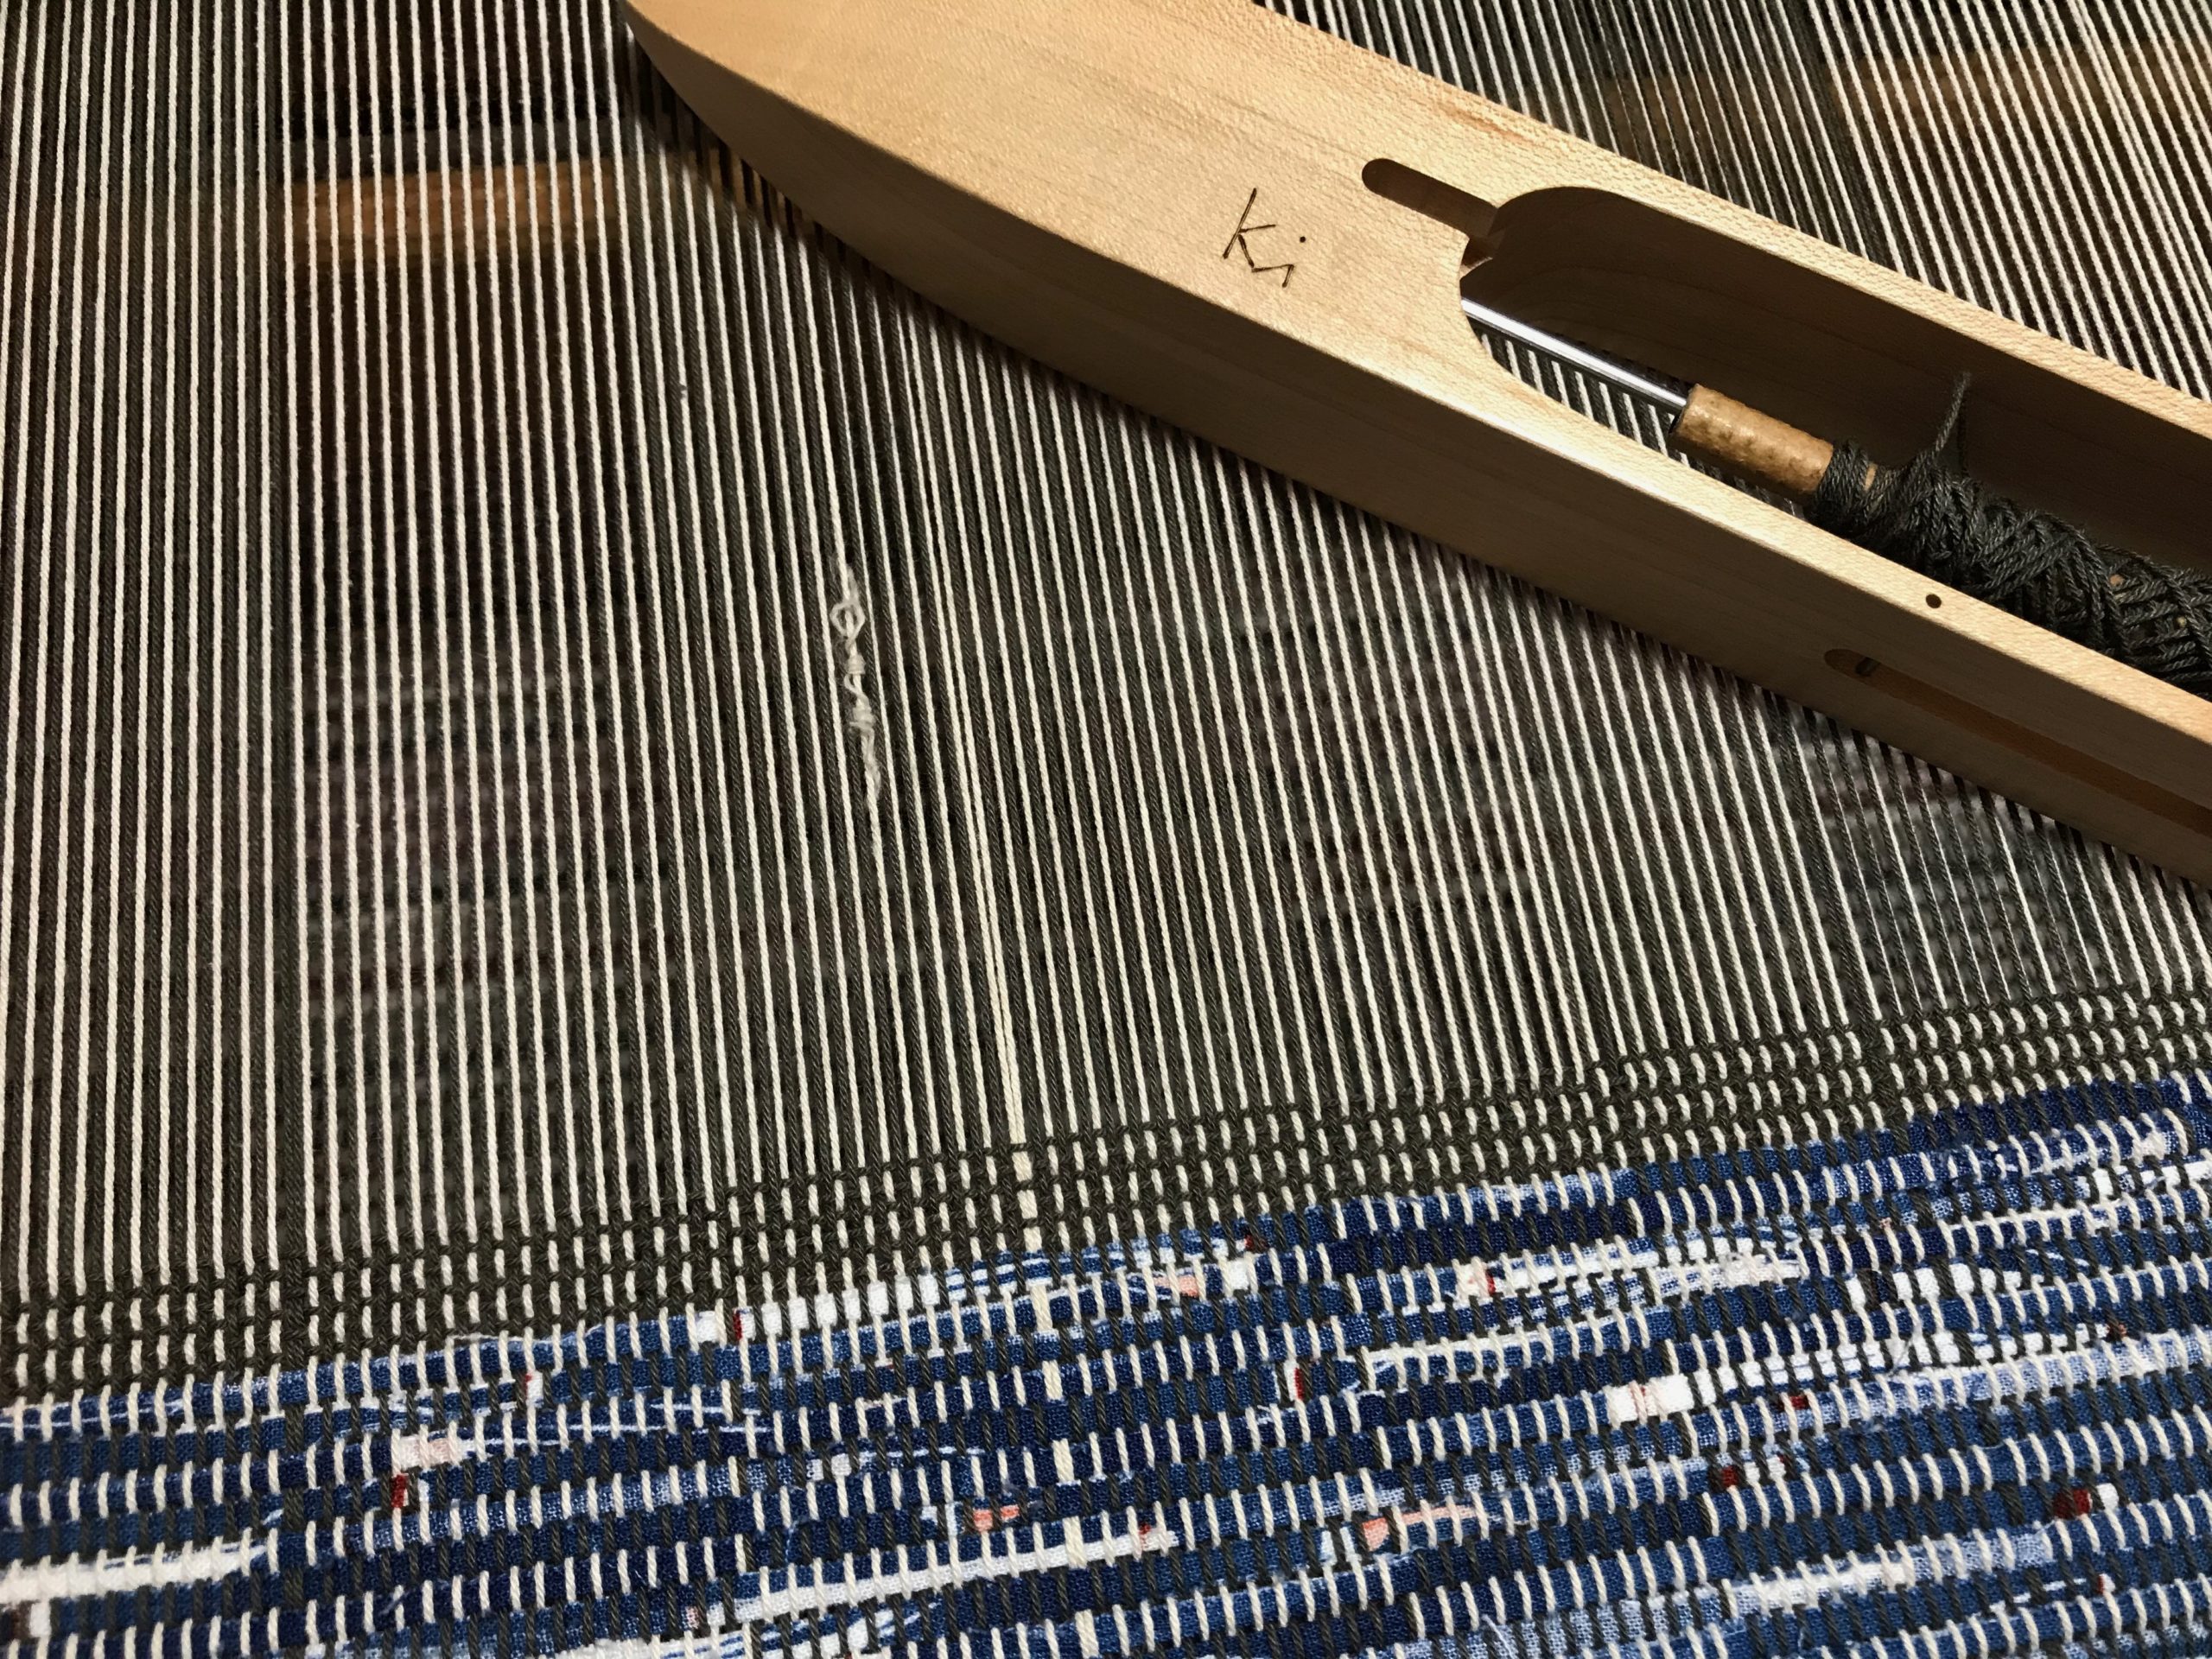
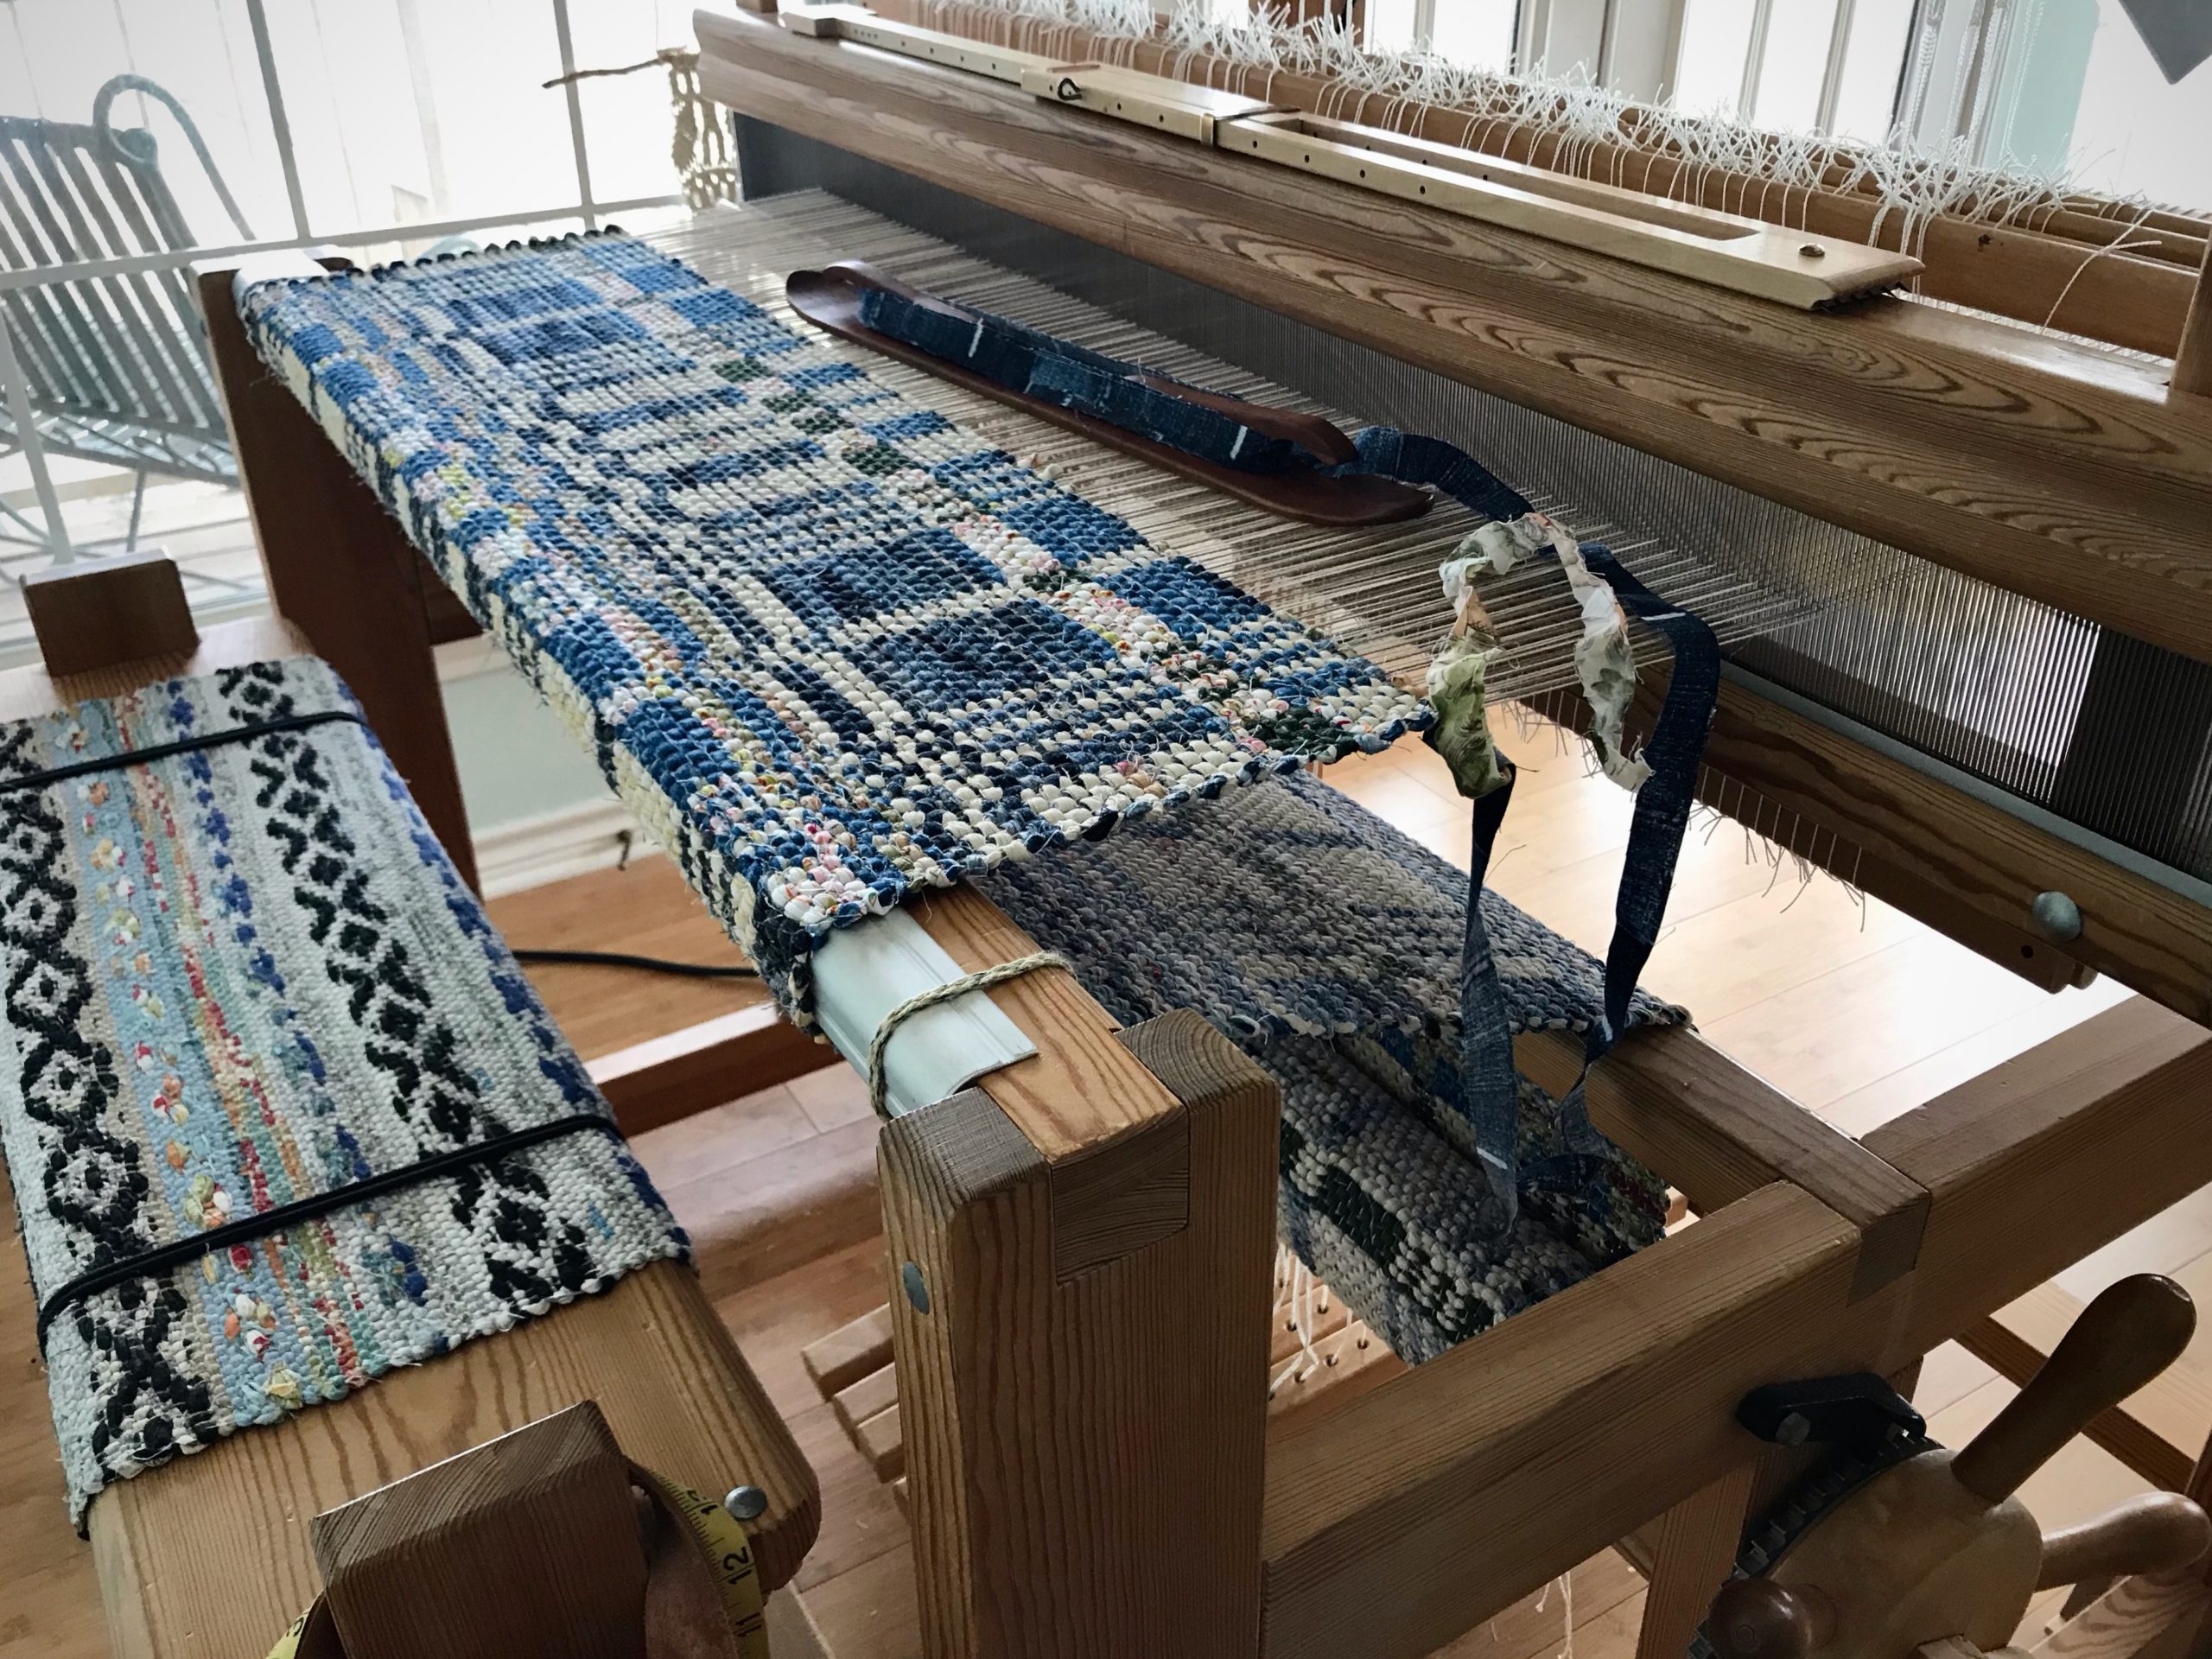
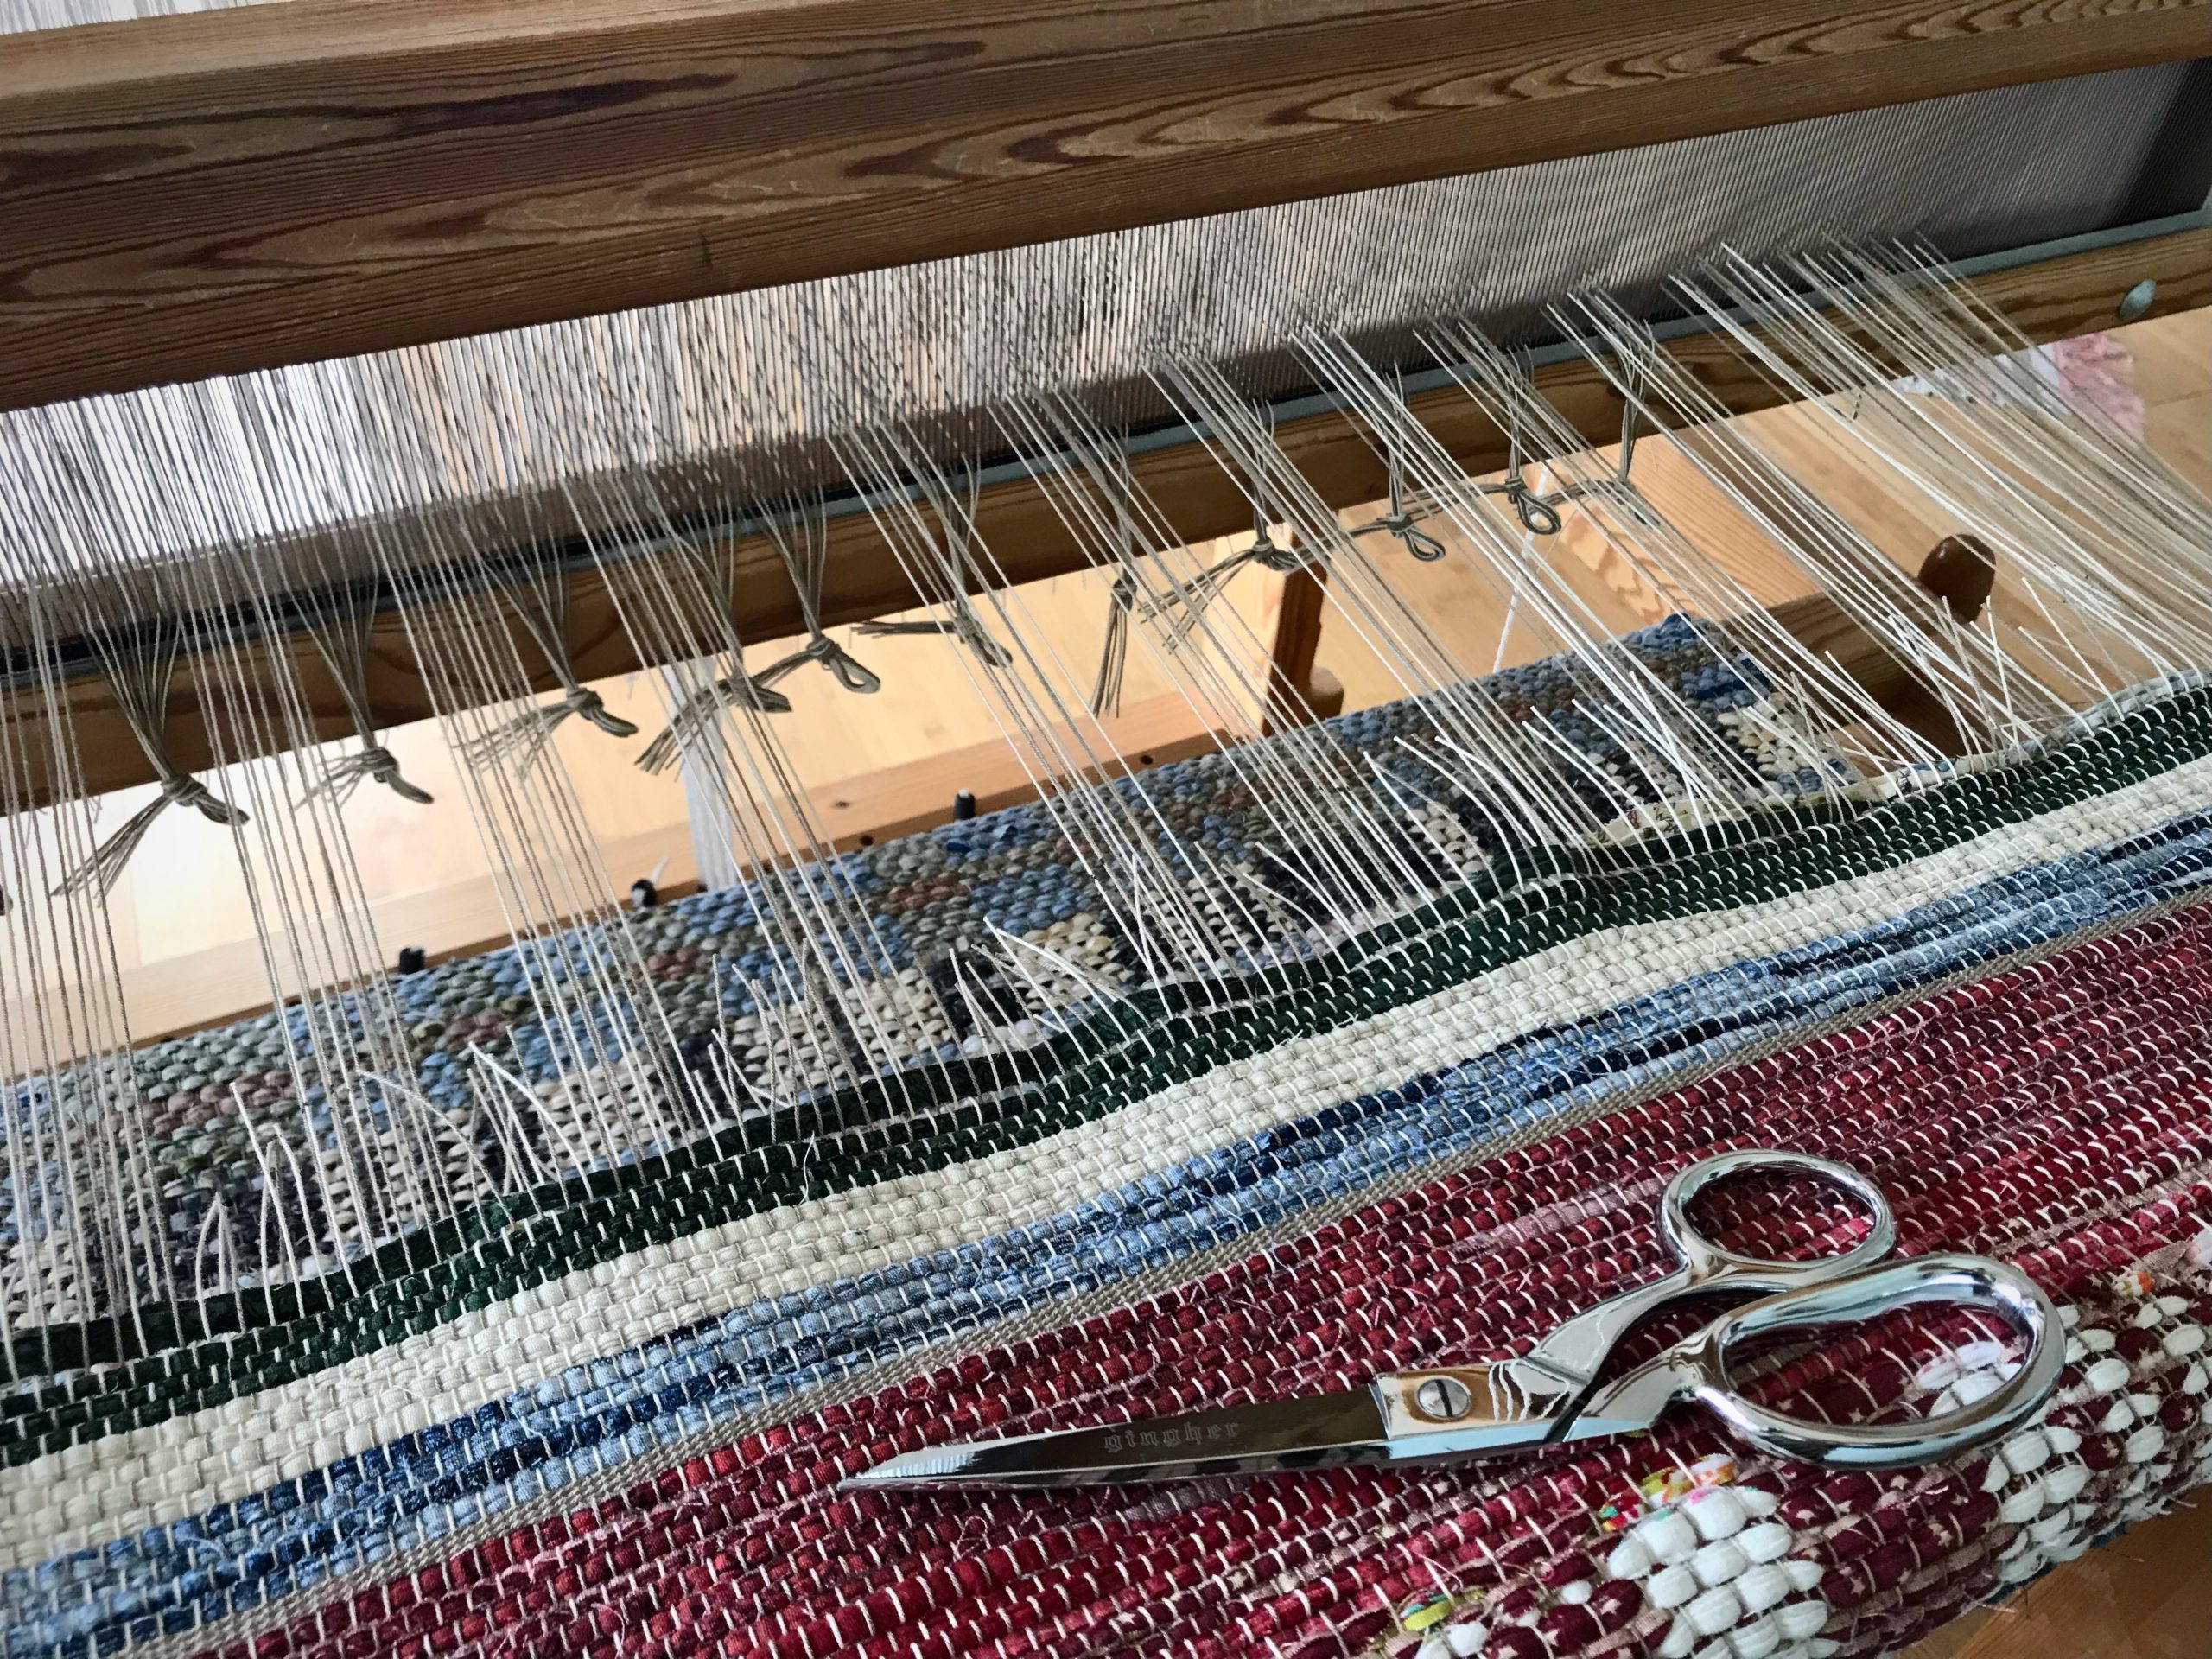
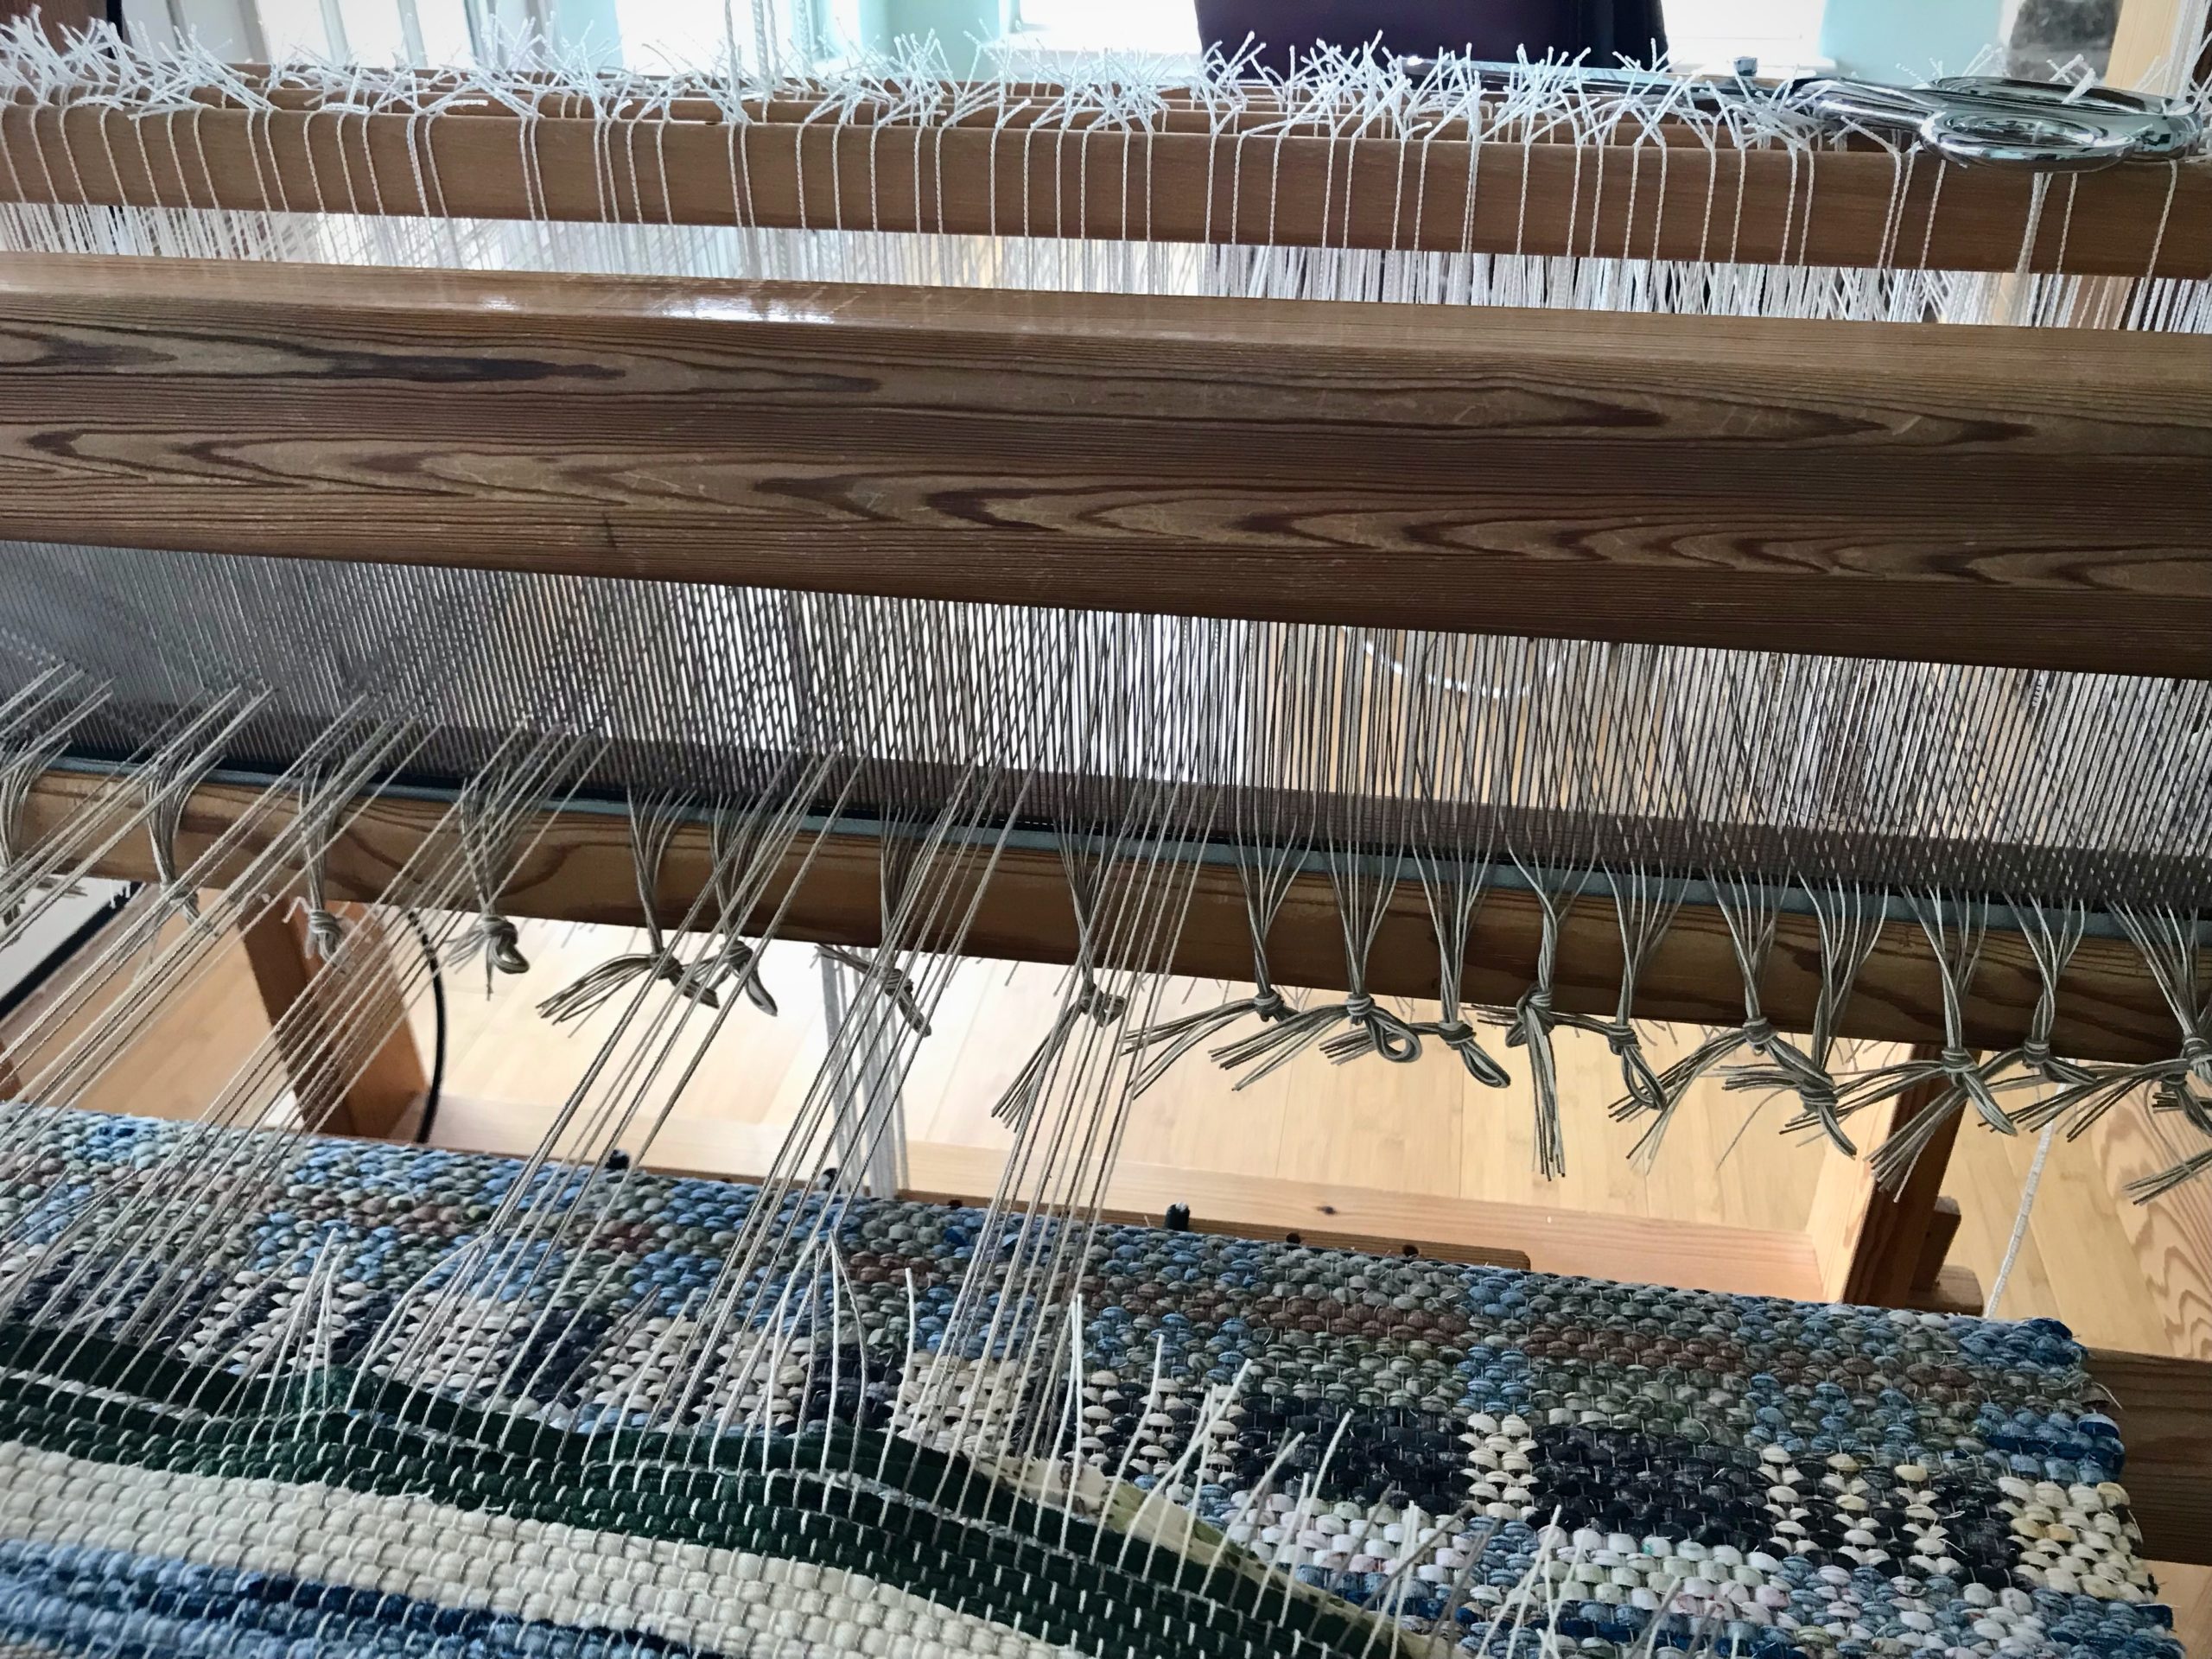
Middle section of rug has red fabric strips for weft.Rows of stripes between sections of the rug.Third section of rug has dark green fabric strips as weft.Gimåkra Standard, 120cm. My favorite.Do you see the flaw in the warp thread (12/6 cotton)? Fortunately, I have already woven the hem and the 6 picks of the warp-thread header. How’s that for a perfect ending? I am cutting off this rug and will tie back on for the next rug. The flaw in the thread will be cut away.Ready to tie back on very soon.
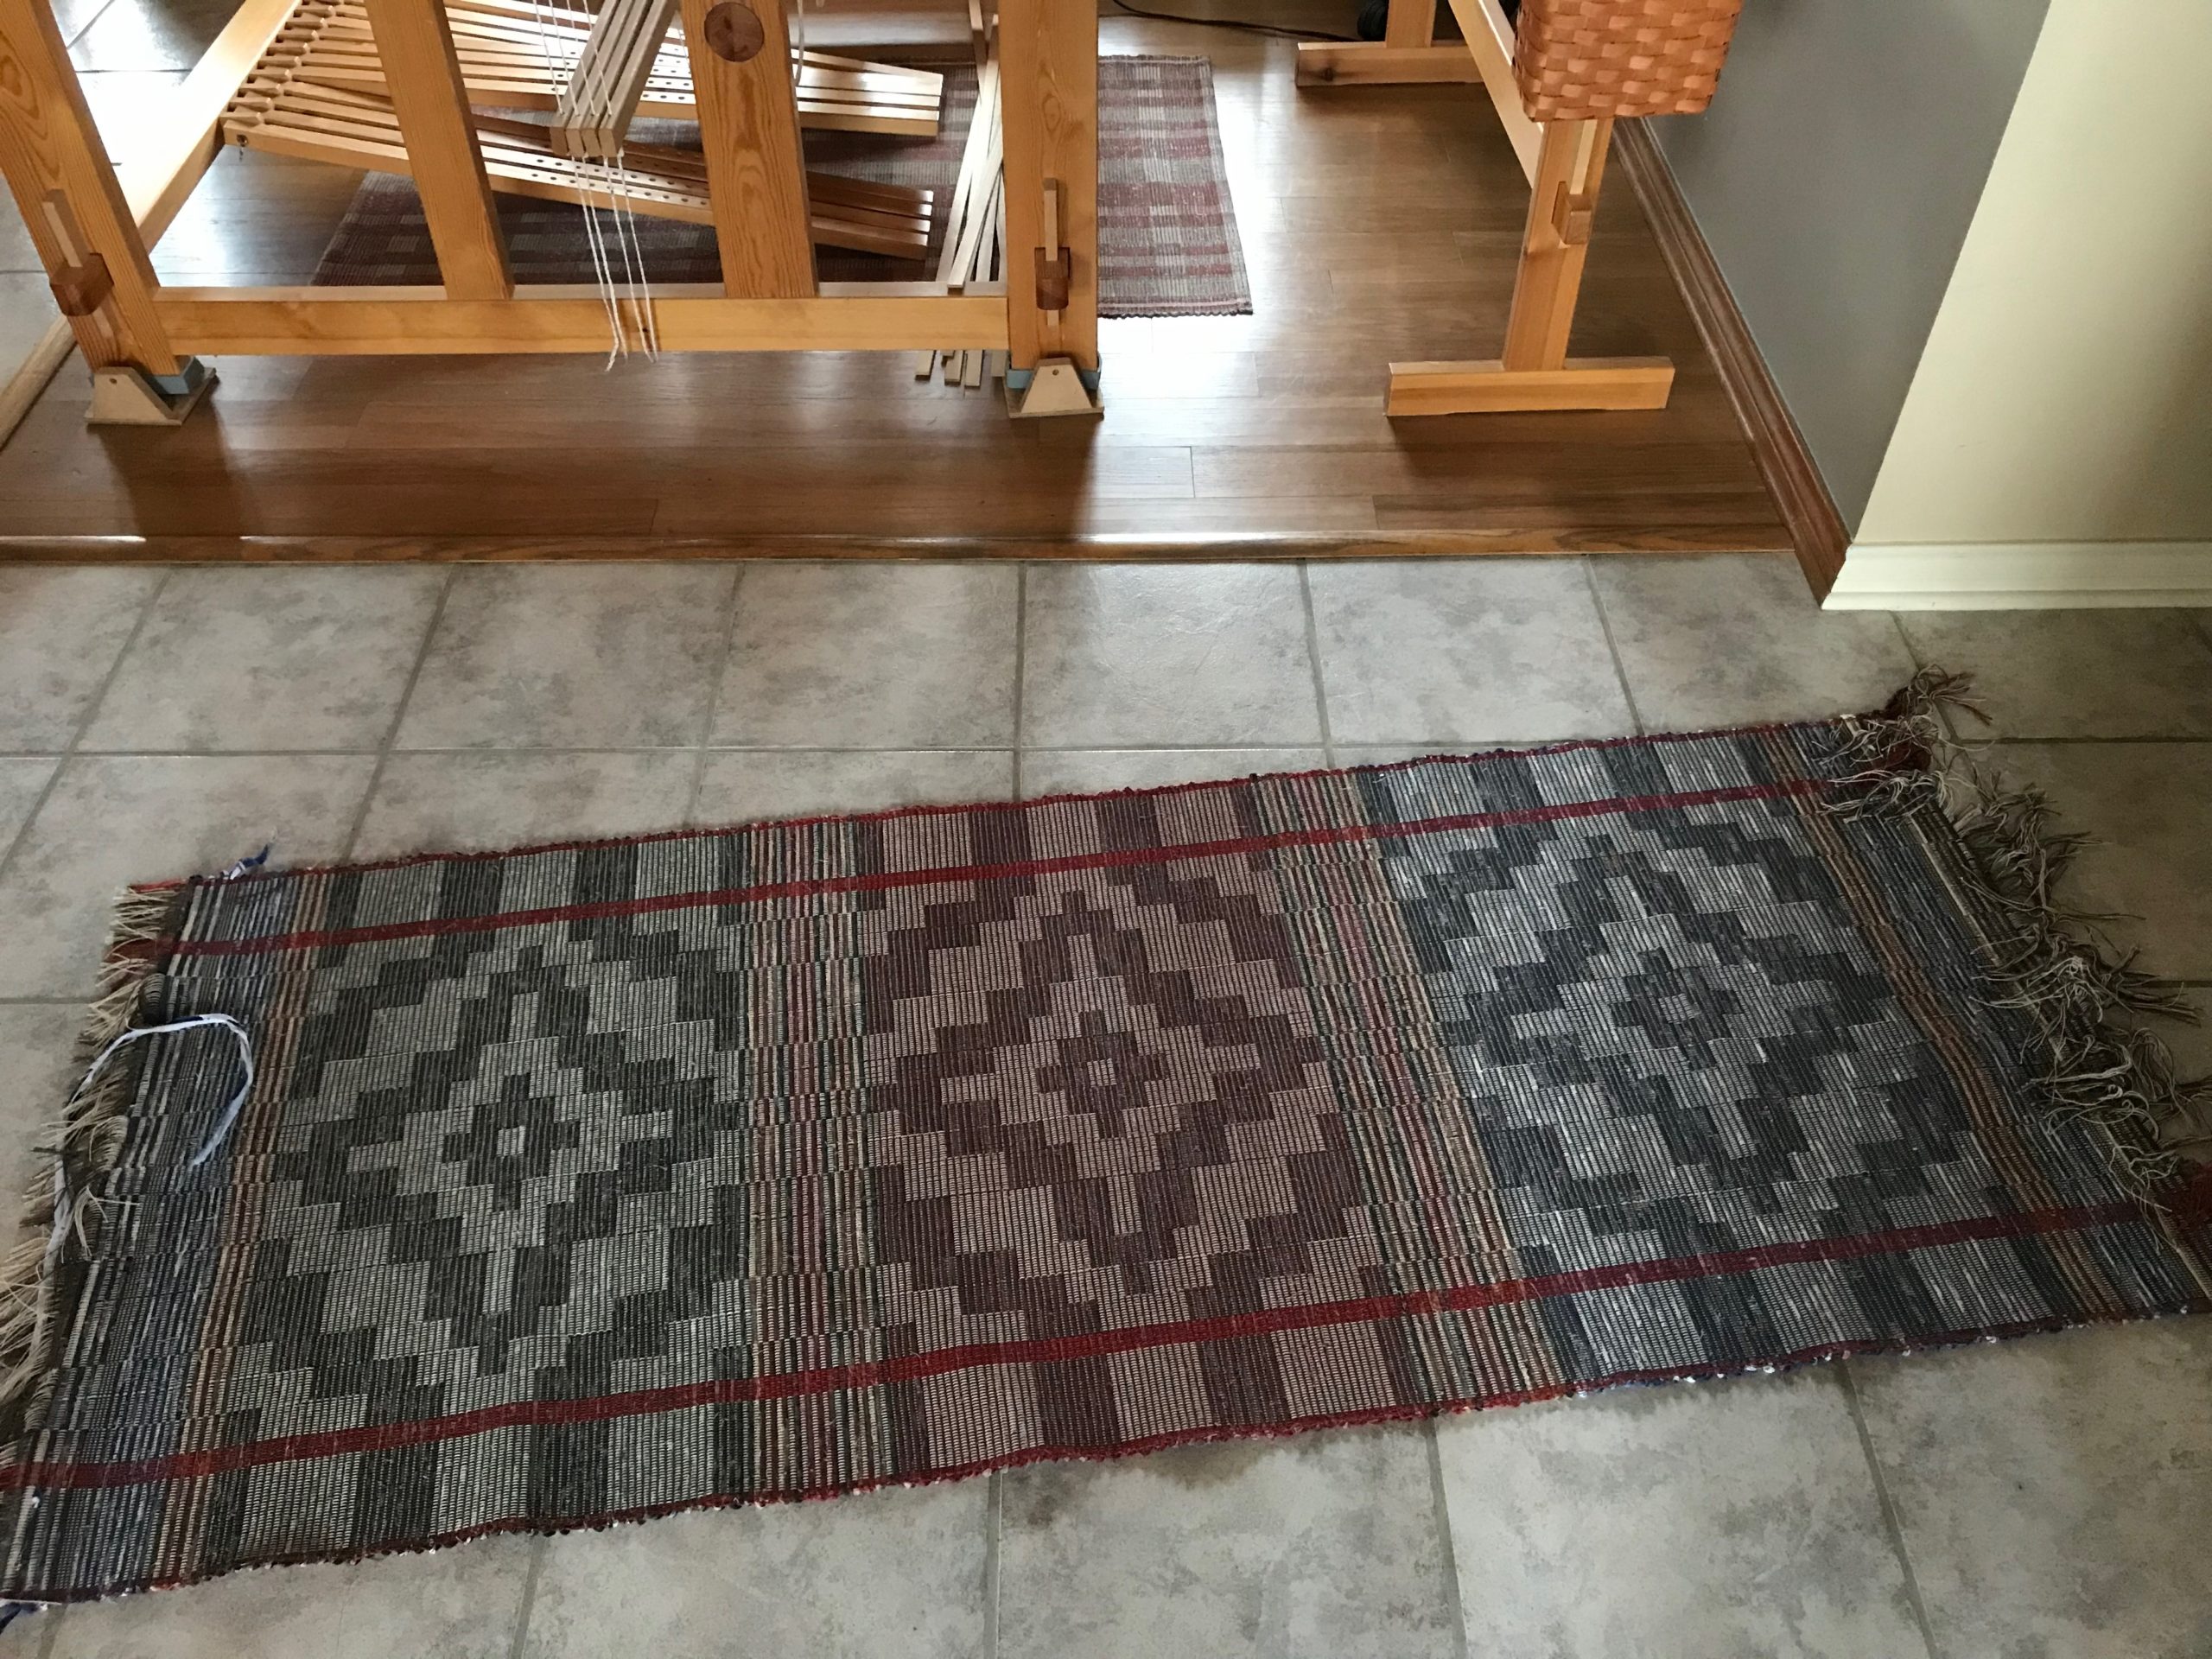
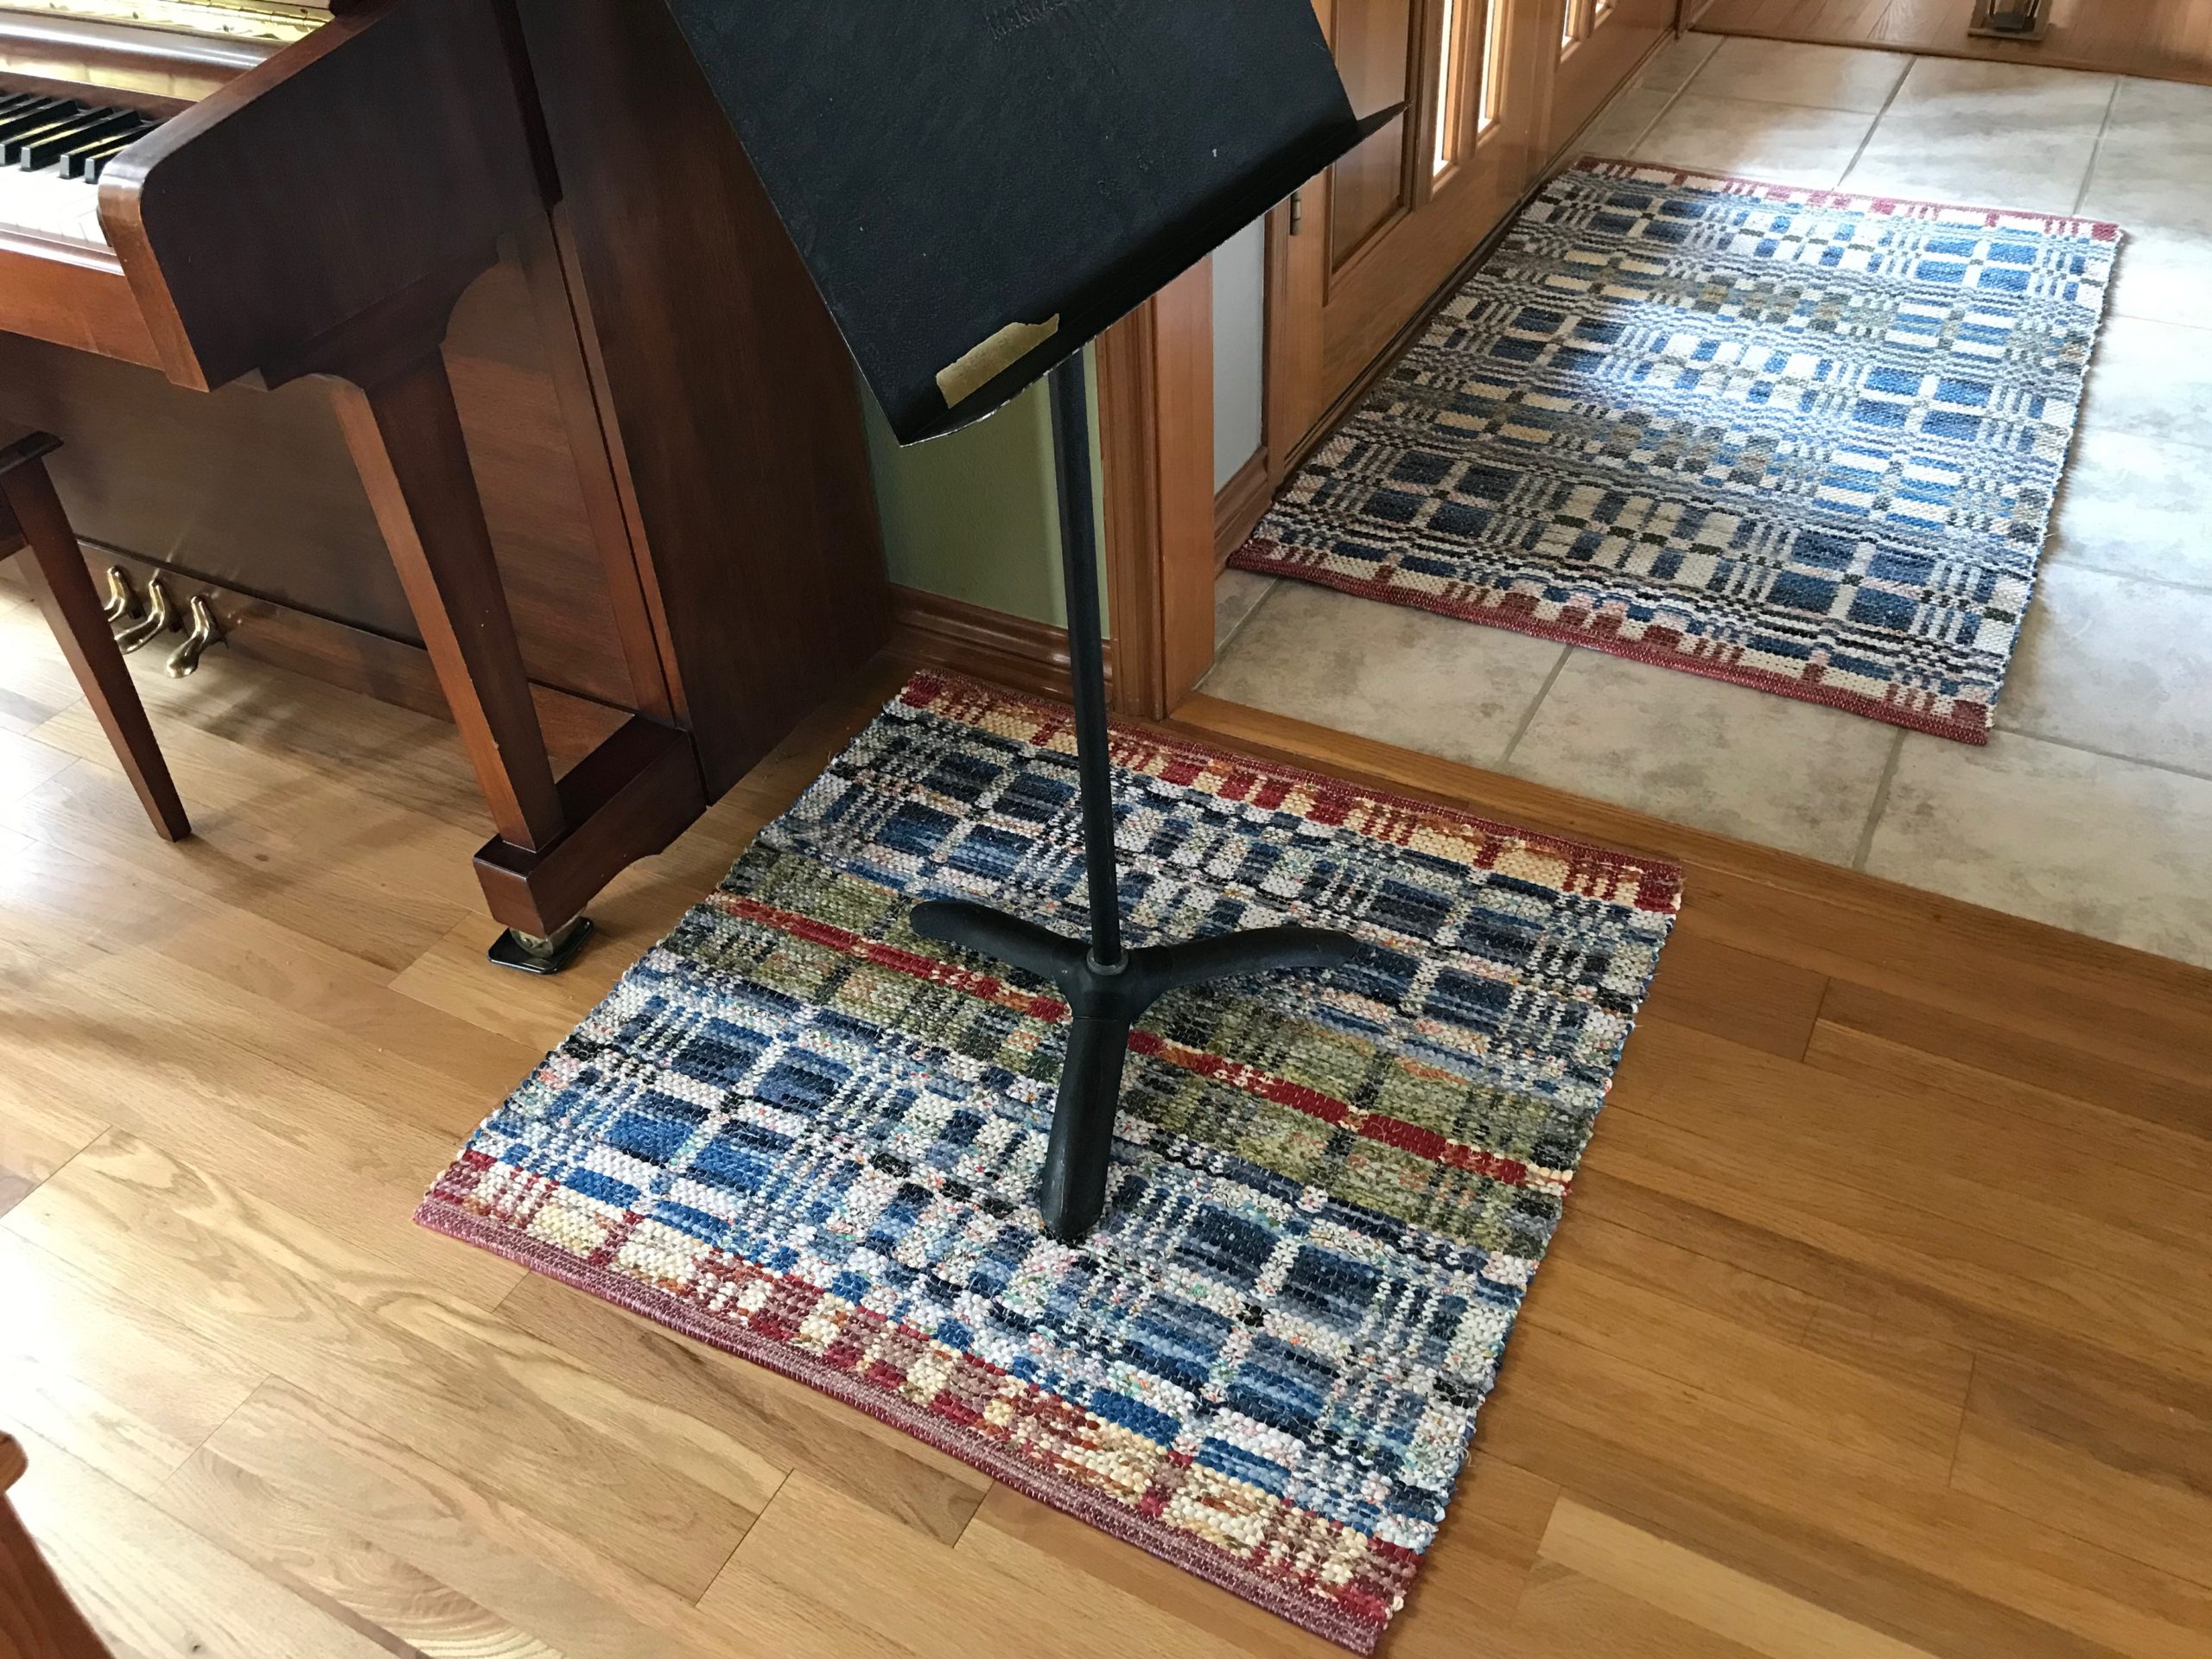
Not until I cut it off and see the whole rug unfurled on the floor do I really grasp the story this rug is telling. The surprise is pleasant. Threads and fabric strips, and a weaver’s hands (mine), have turned written plans into a compelling story to beautify our surroundings.
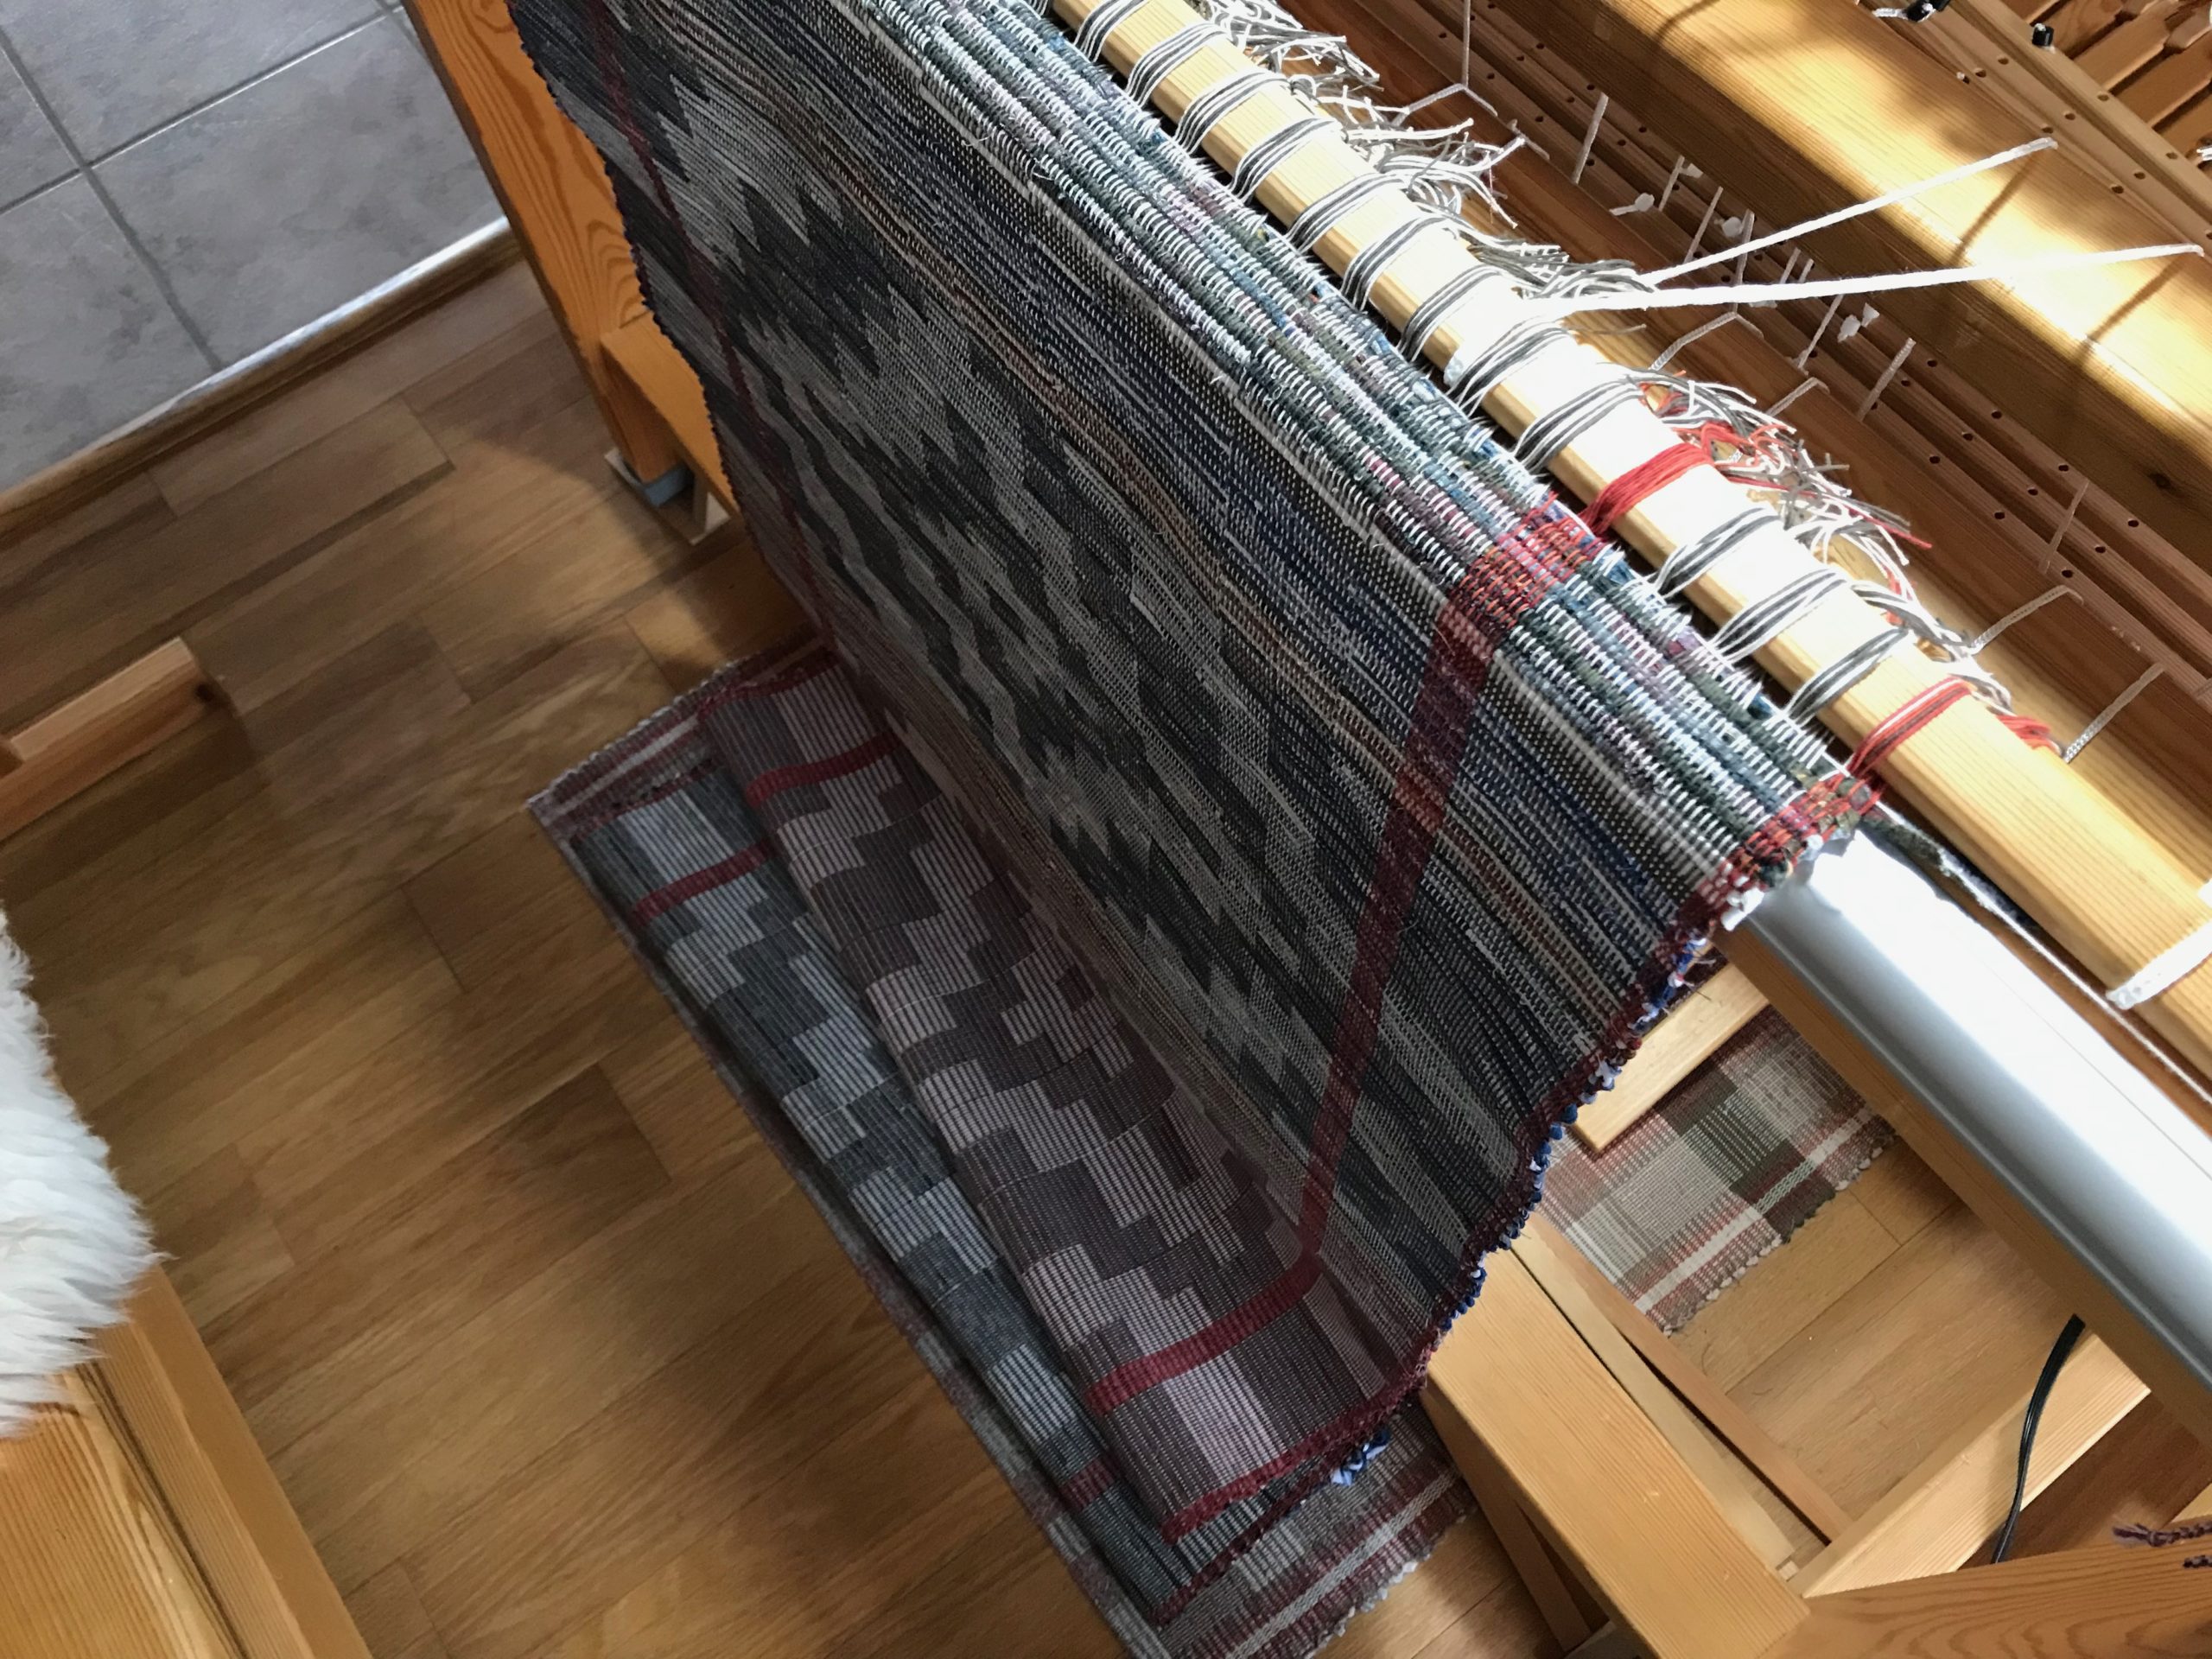
It is easy to untie all the knots on the tie-on bar. That gives me plenty of length for tying warp ends into overhand knots in the finishng process.Unfurled on the floor. First view is a pleasant surprise.
Our Grand Weaver excels at taking simple threads and odd pieces of cloth to create a lasting story. He weaves his plans into our lives to draw us nearer to himself. We see only short segments at a time. From beginning to end, though, our Lord’s skilled and scarred hands demonstrate his love to us. The finished work is more than we imagine.
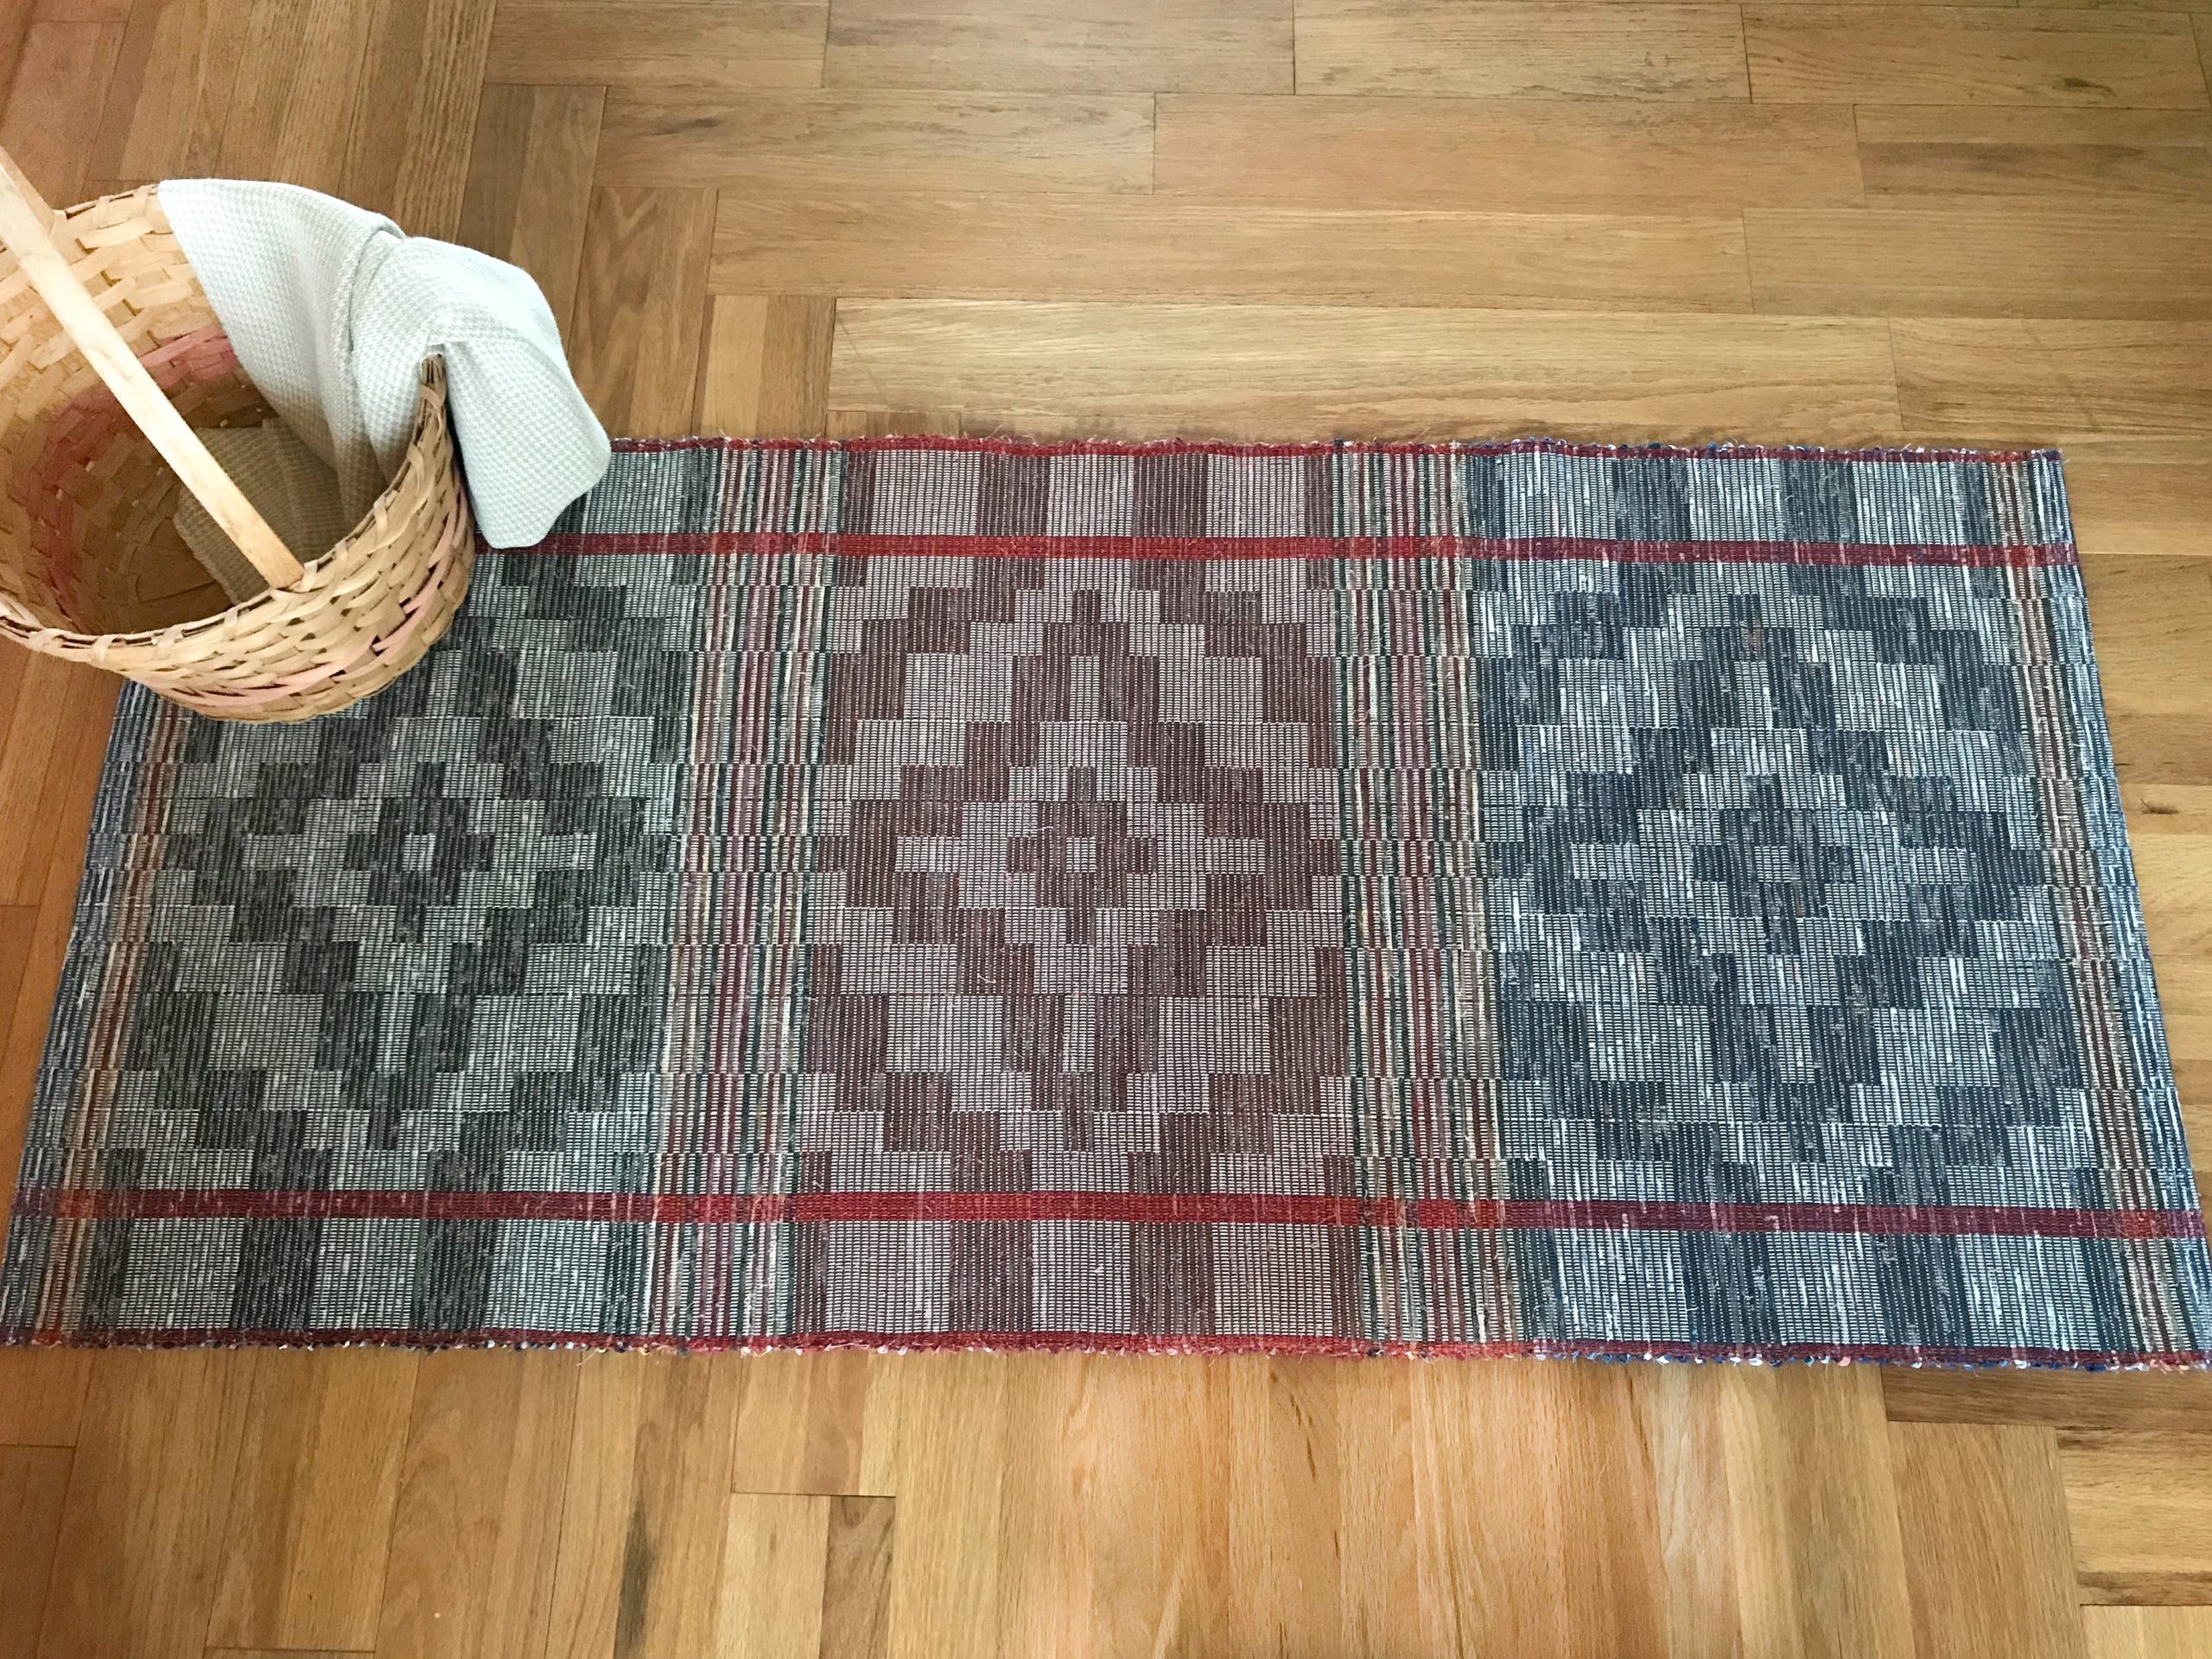
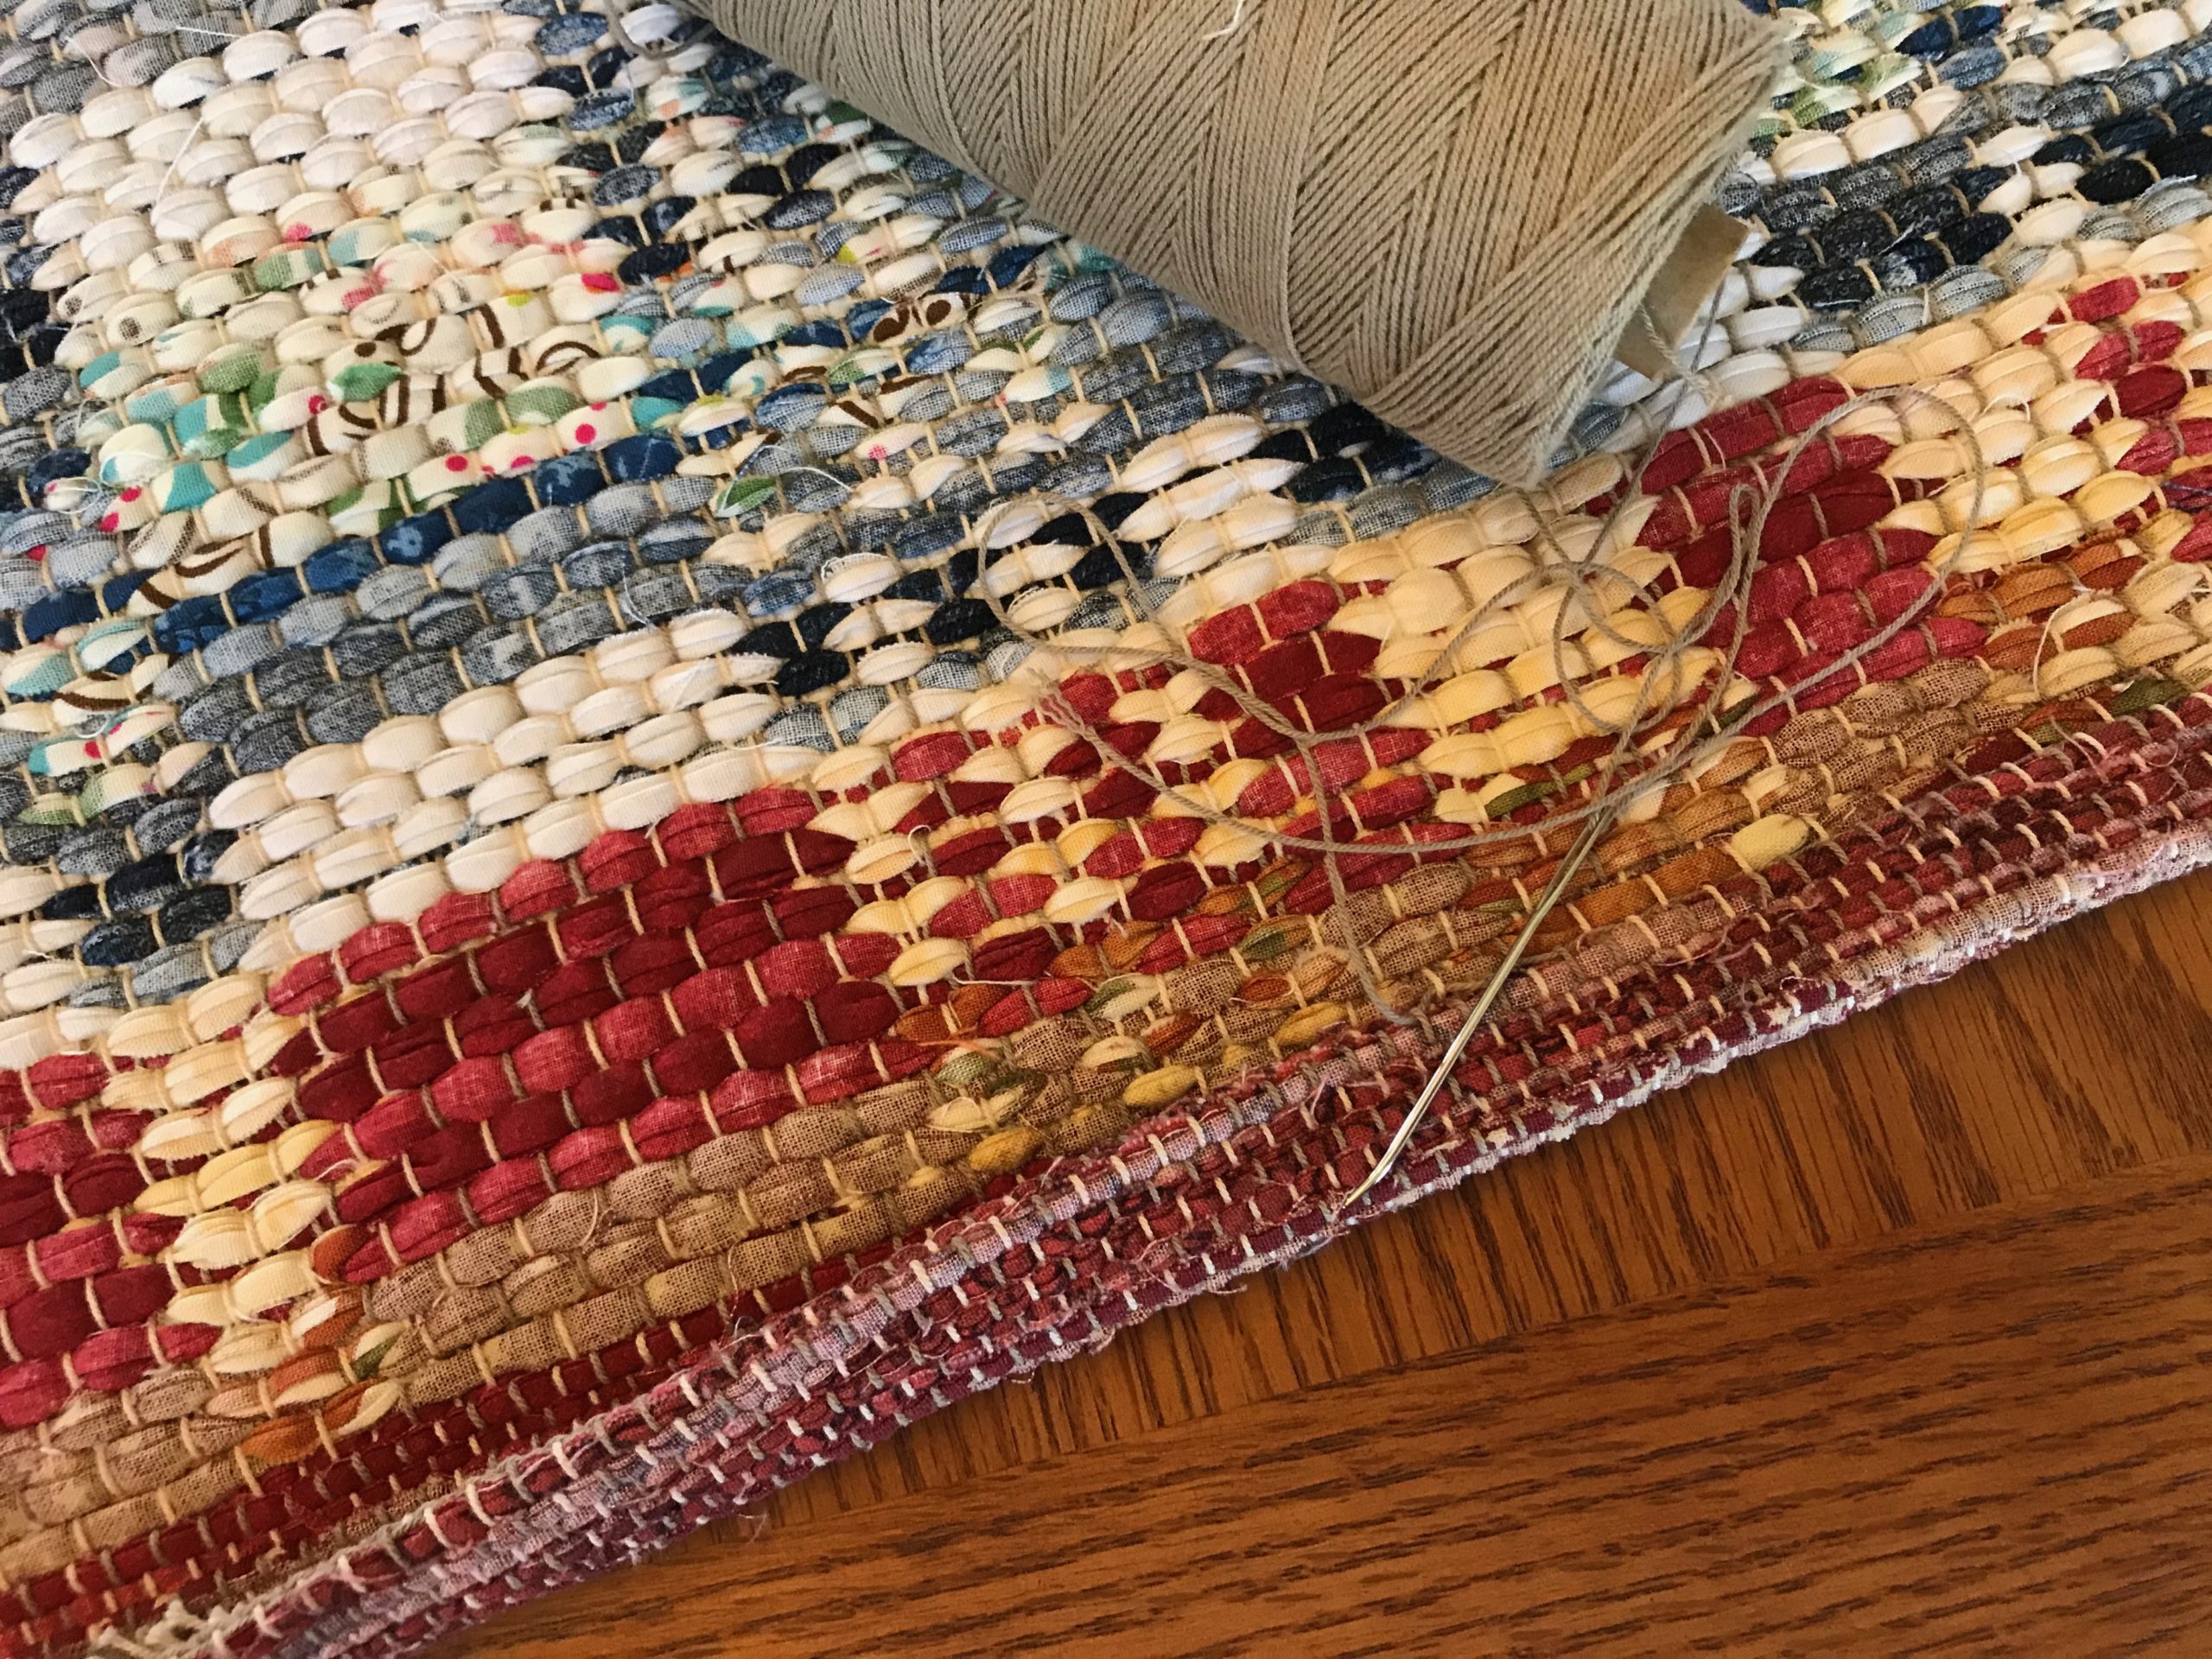
Warp ends have been knotted, and hem turned under and hand stitched. This rug is ready to beautify the room.
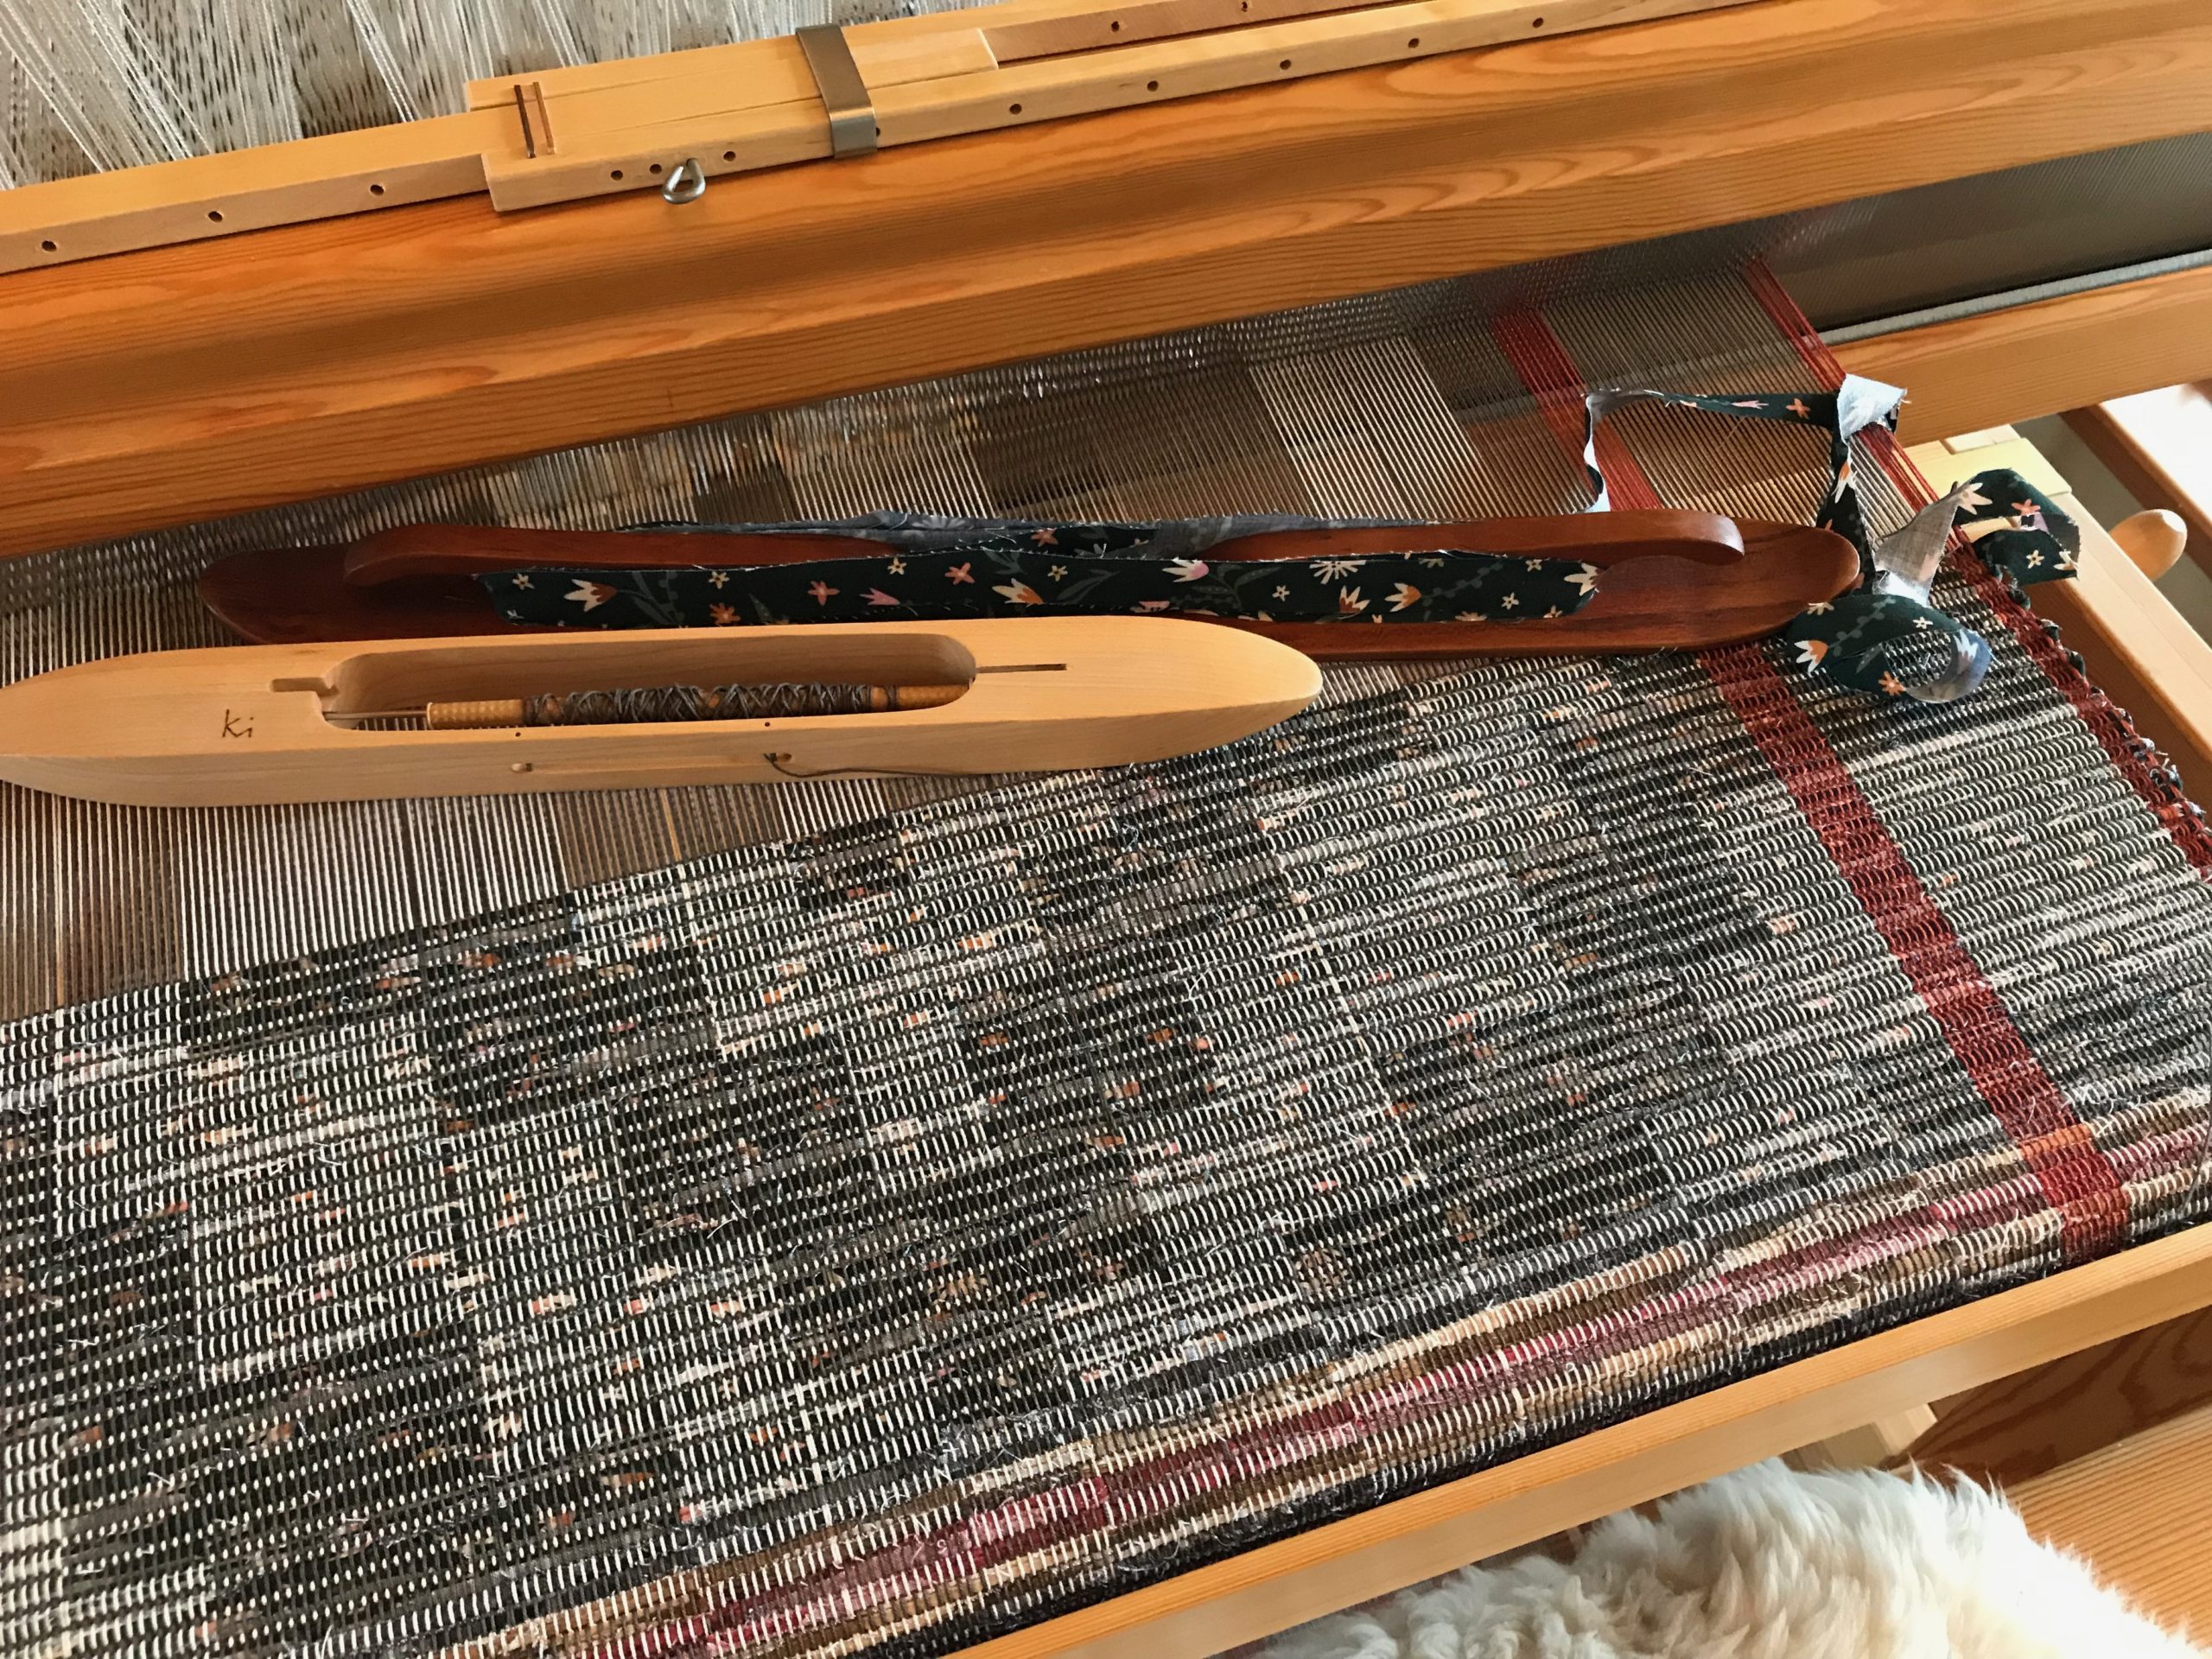
I’m at fresh starting place. After finishing another double binding rag rug, I have tied the rug warp back on. I’m ready for a new variation in this rag rug series of block designs. Rug warp lets me stop and start. Cut off and tie back on. It’s as simple as that.
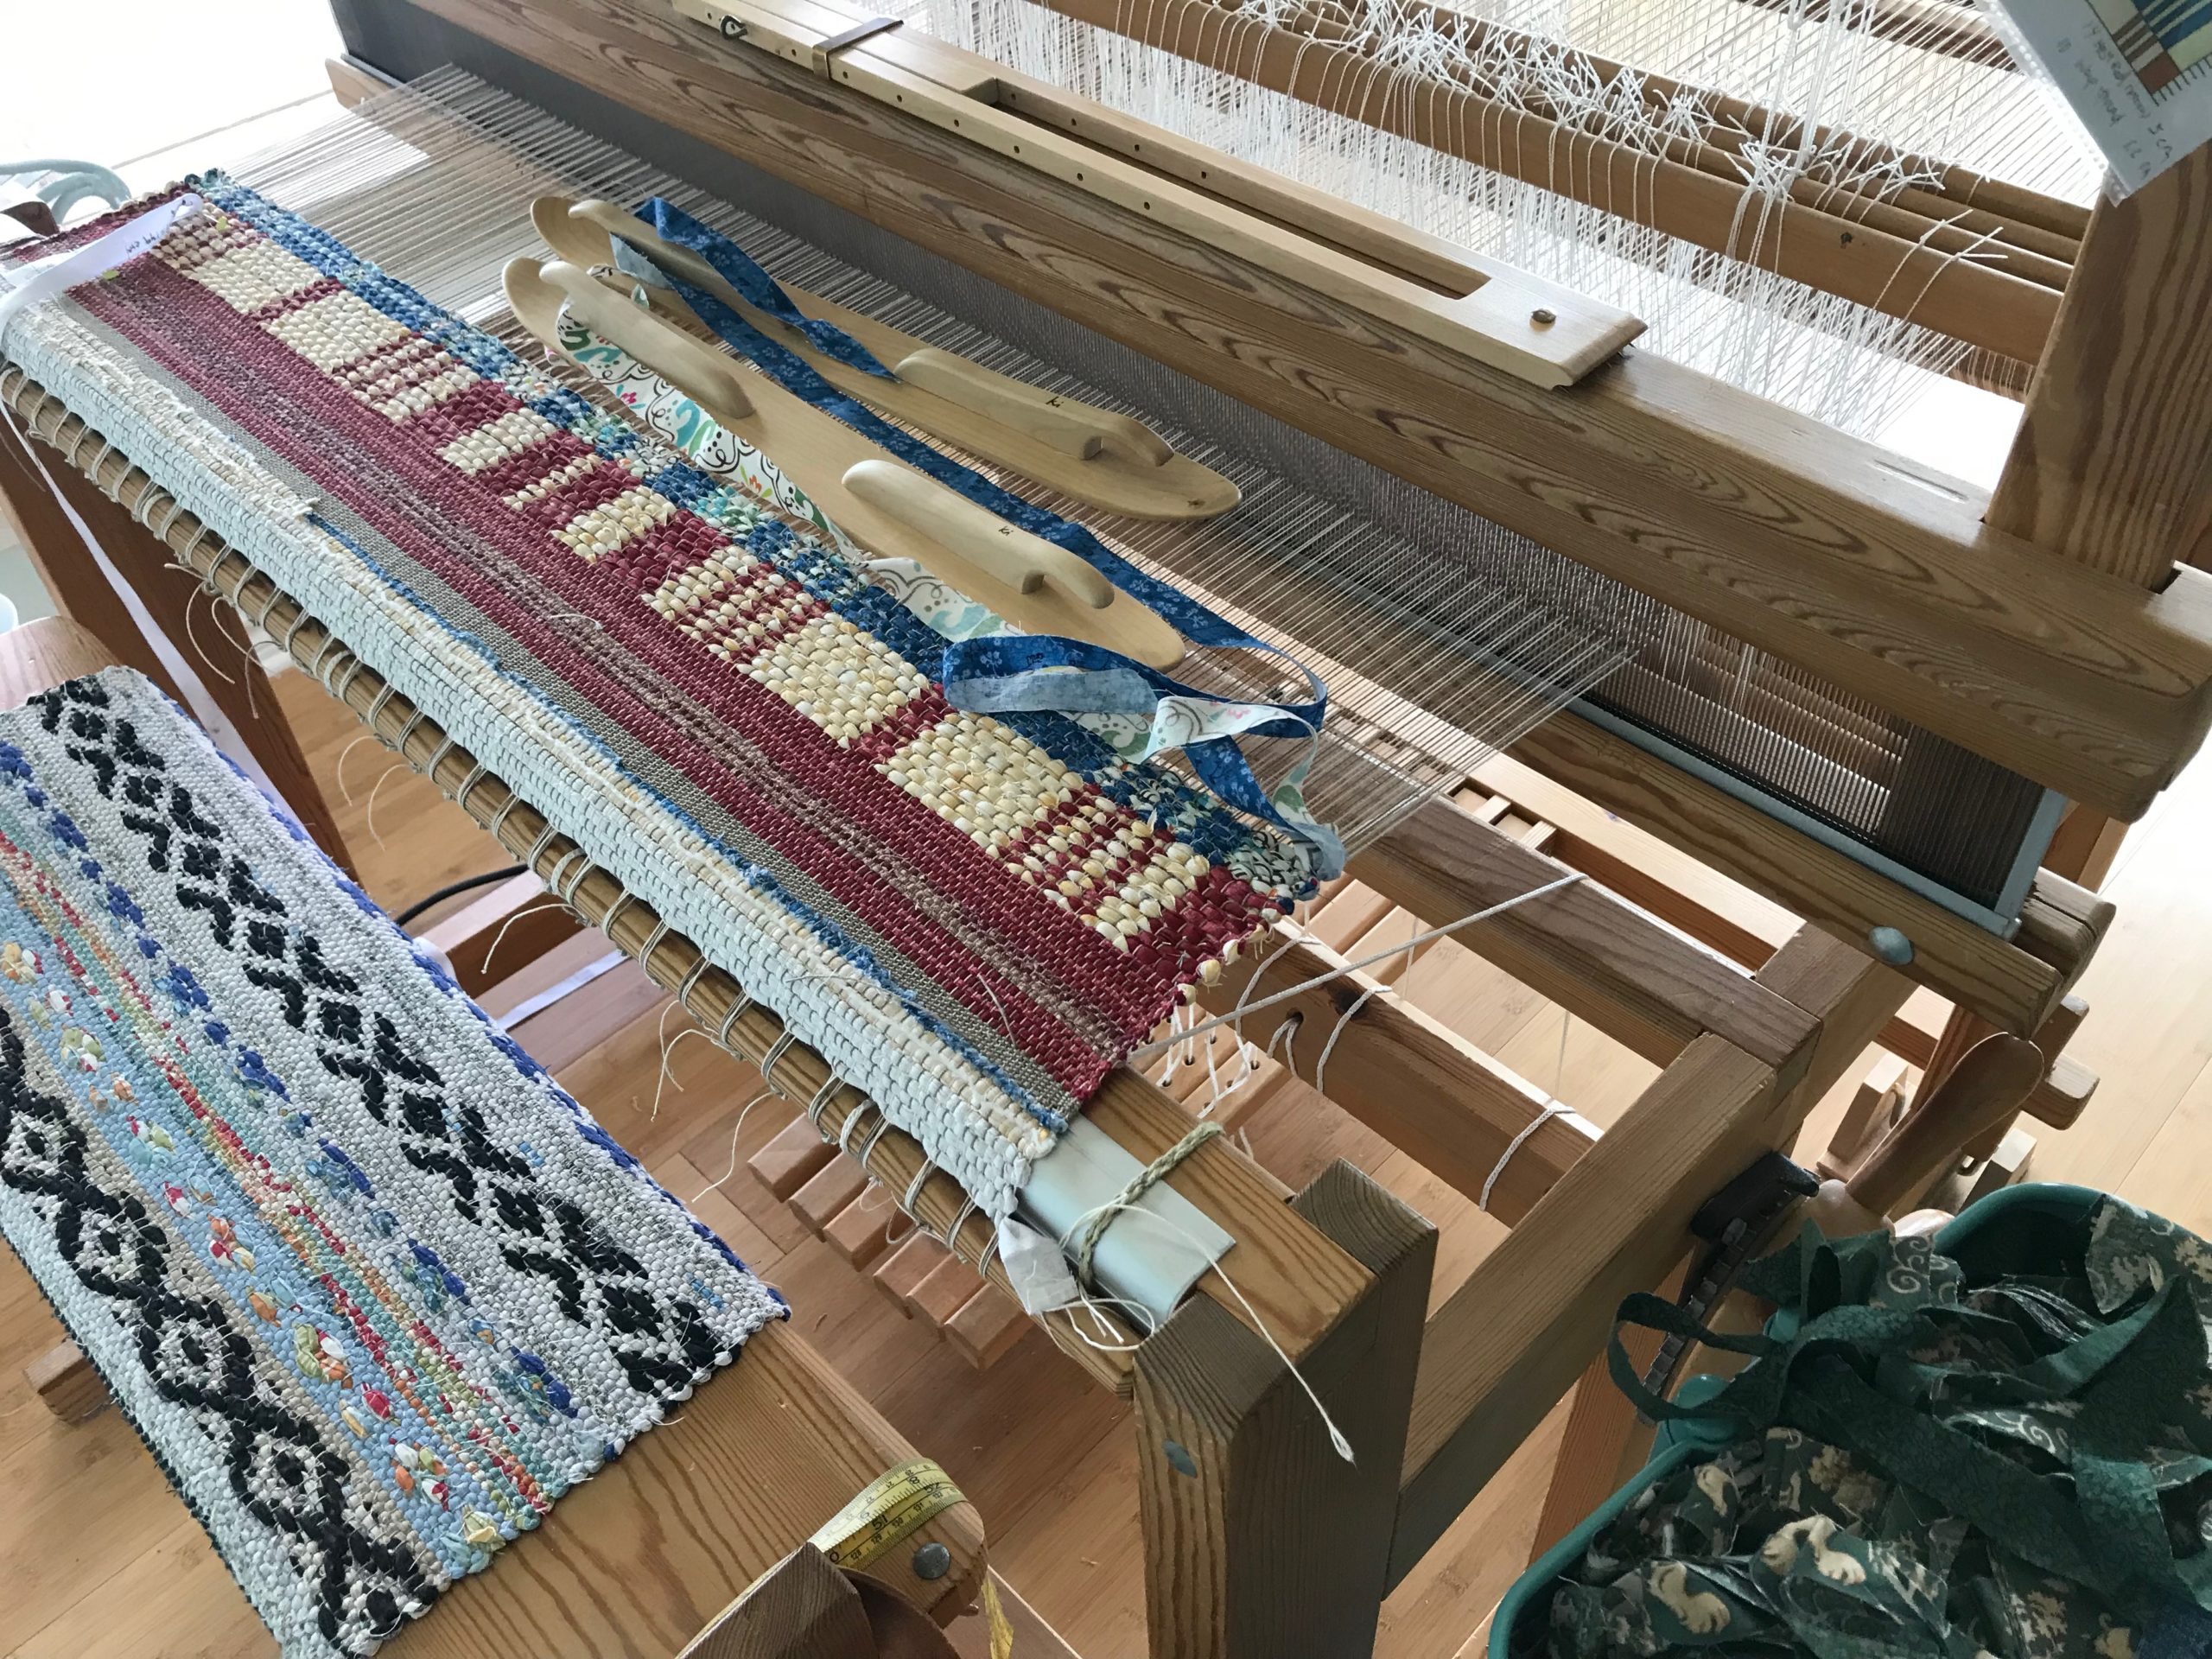
Hem at the end of the second rug is woven in plain weave with narrow fabric strips for weft.Off the loom for a first glance.Warp ends have been tied in knots and trimmed. Hand hemming fini\shes the rug.Second rug of the series.After tying the warp back on, I start the third rug in the series.
May your progress be observable over a span of time.
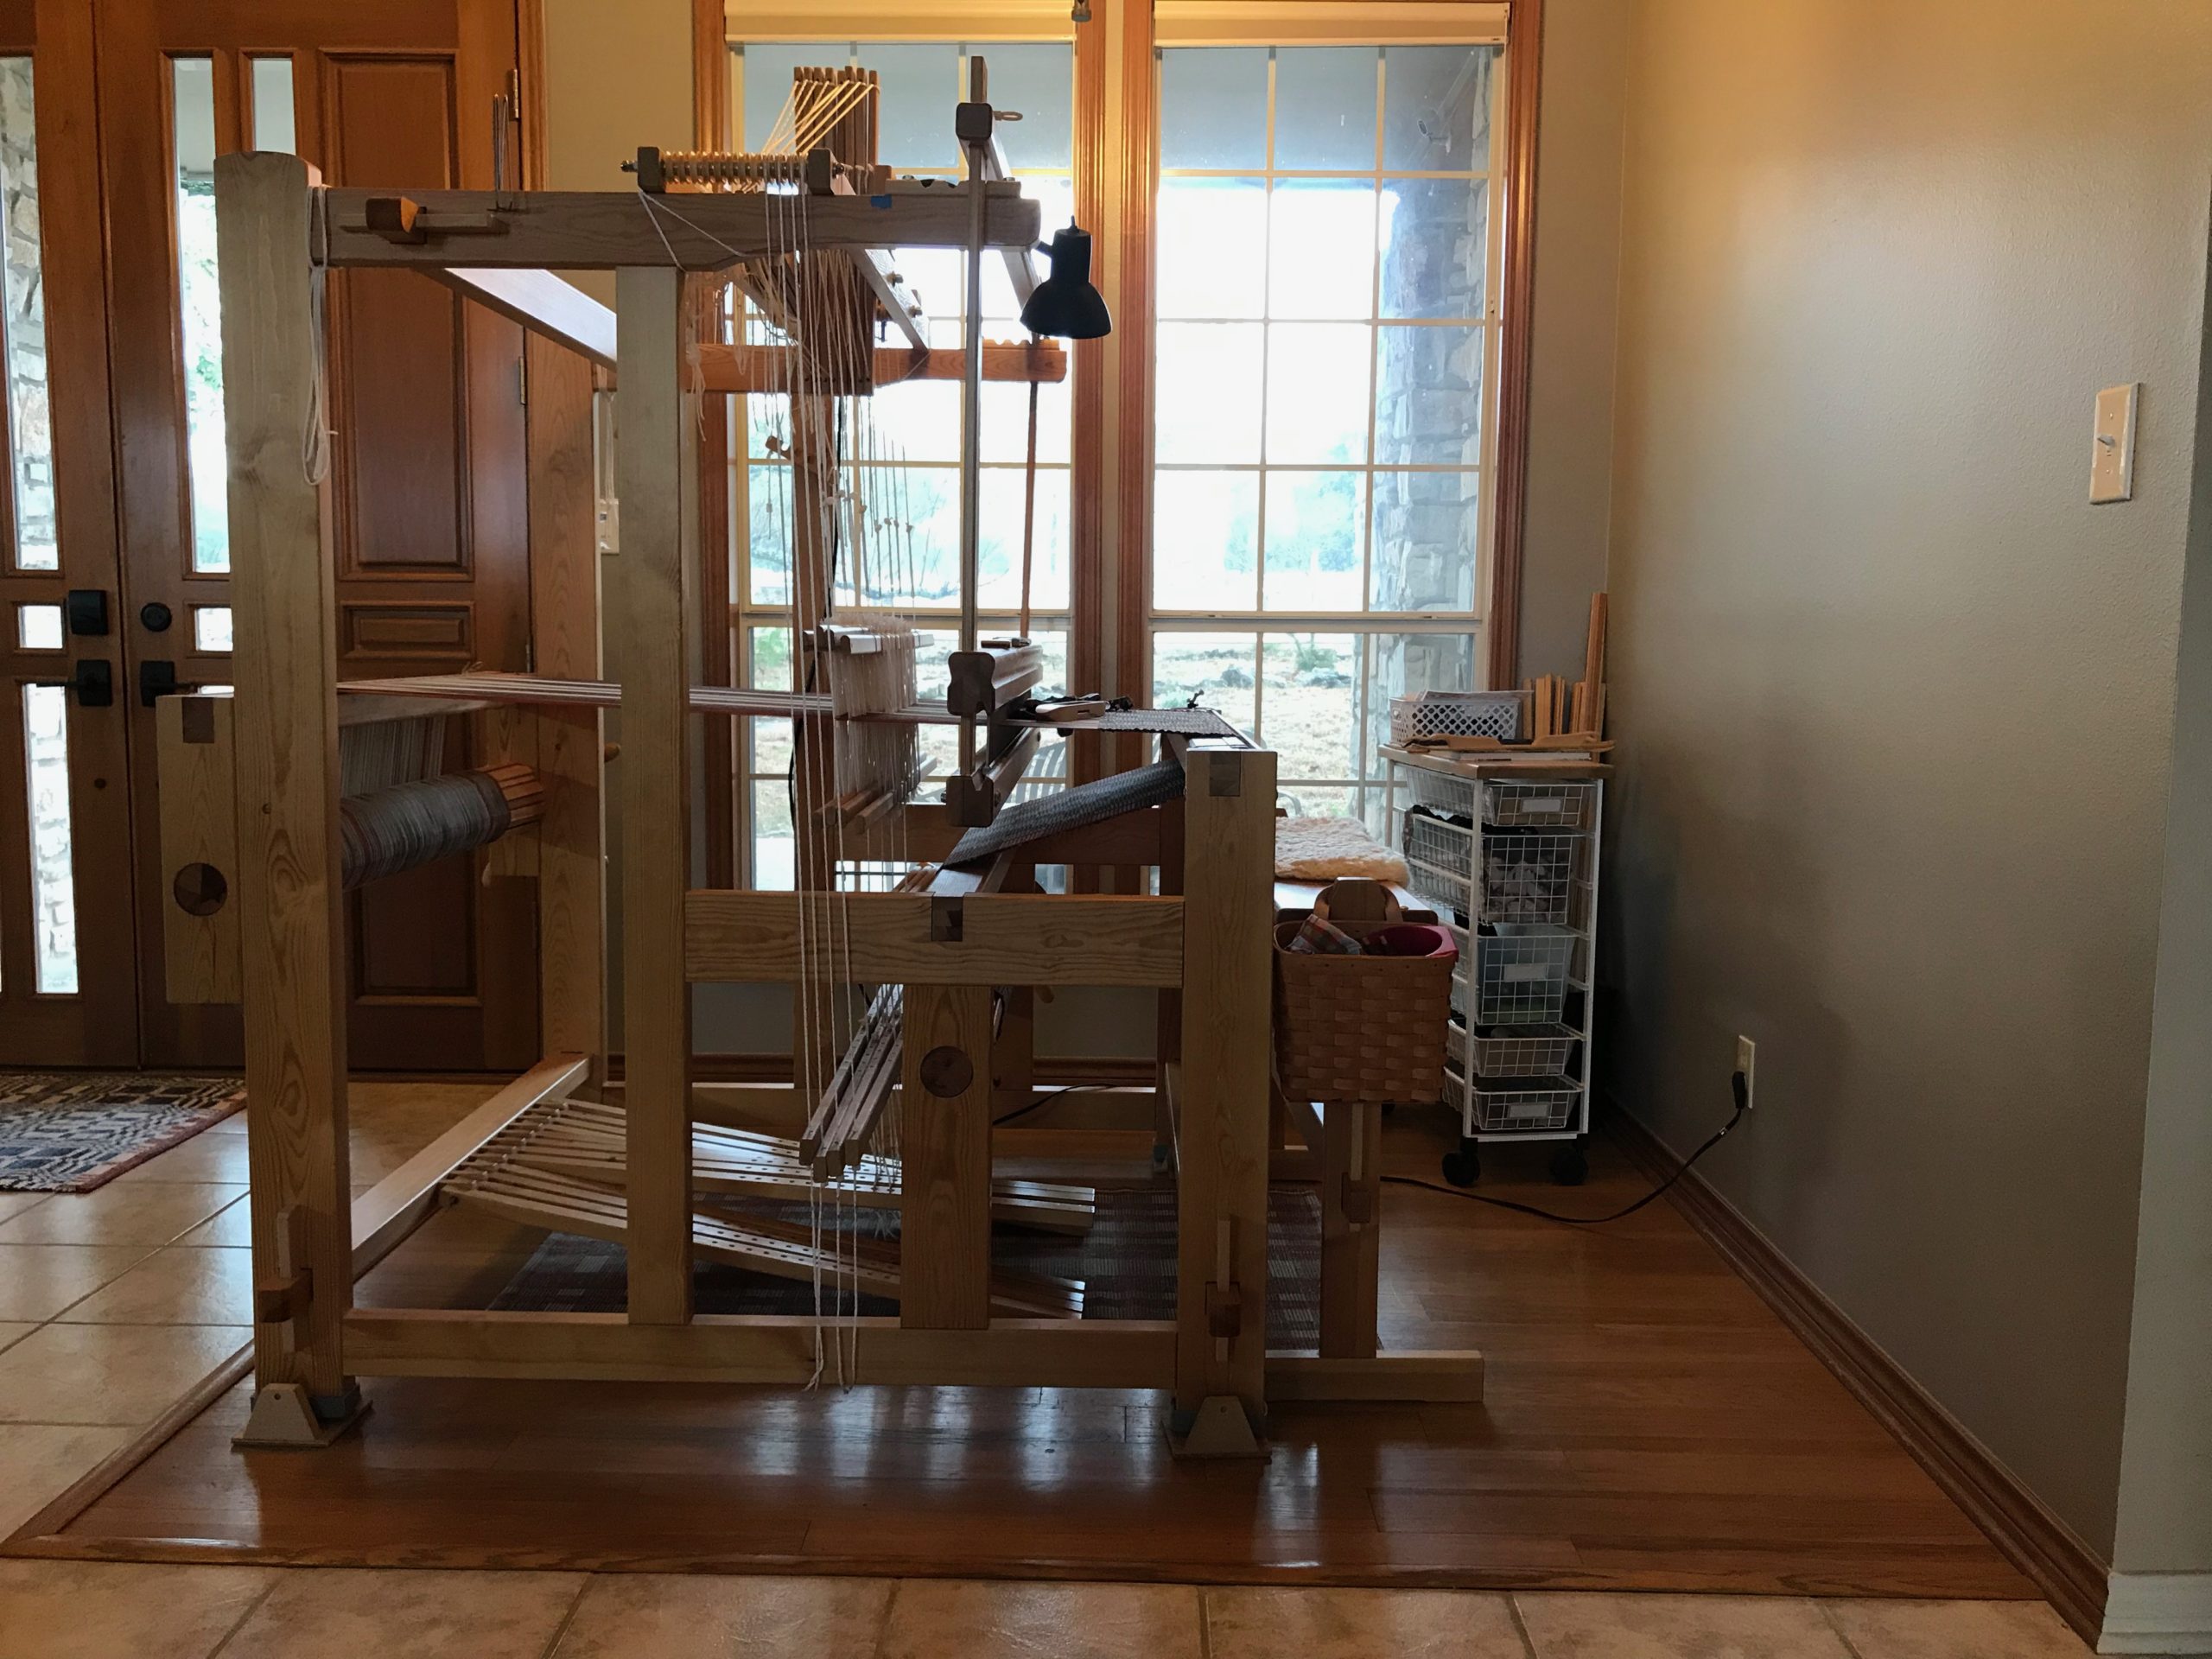
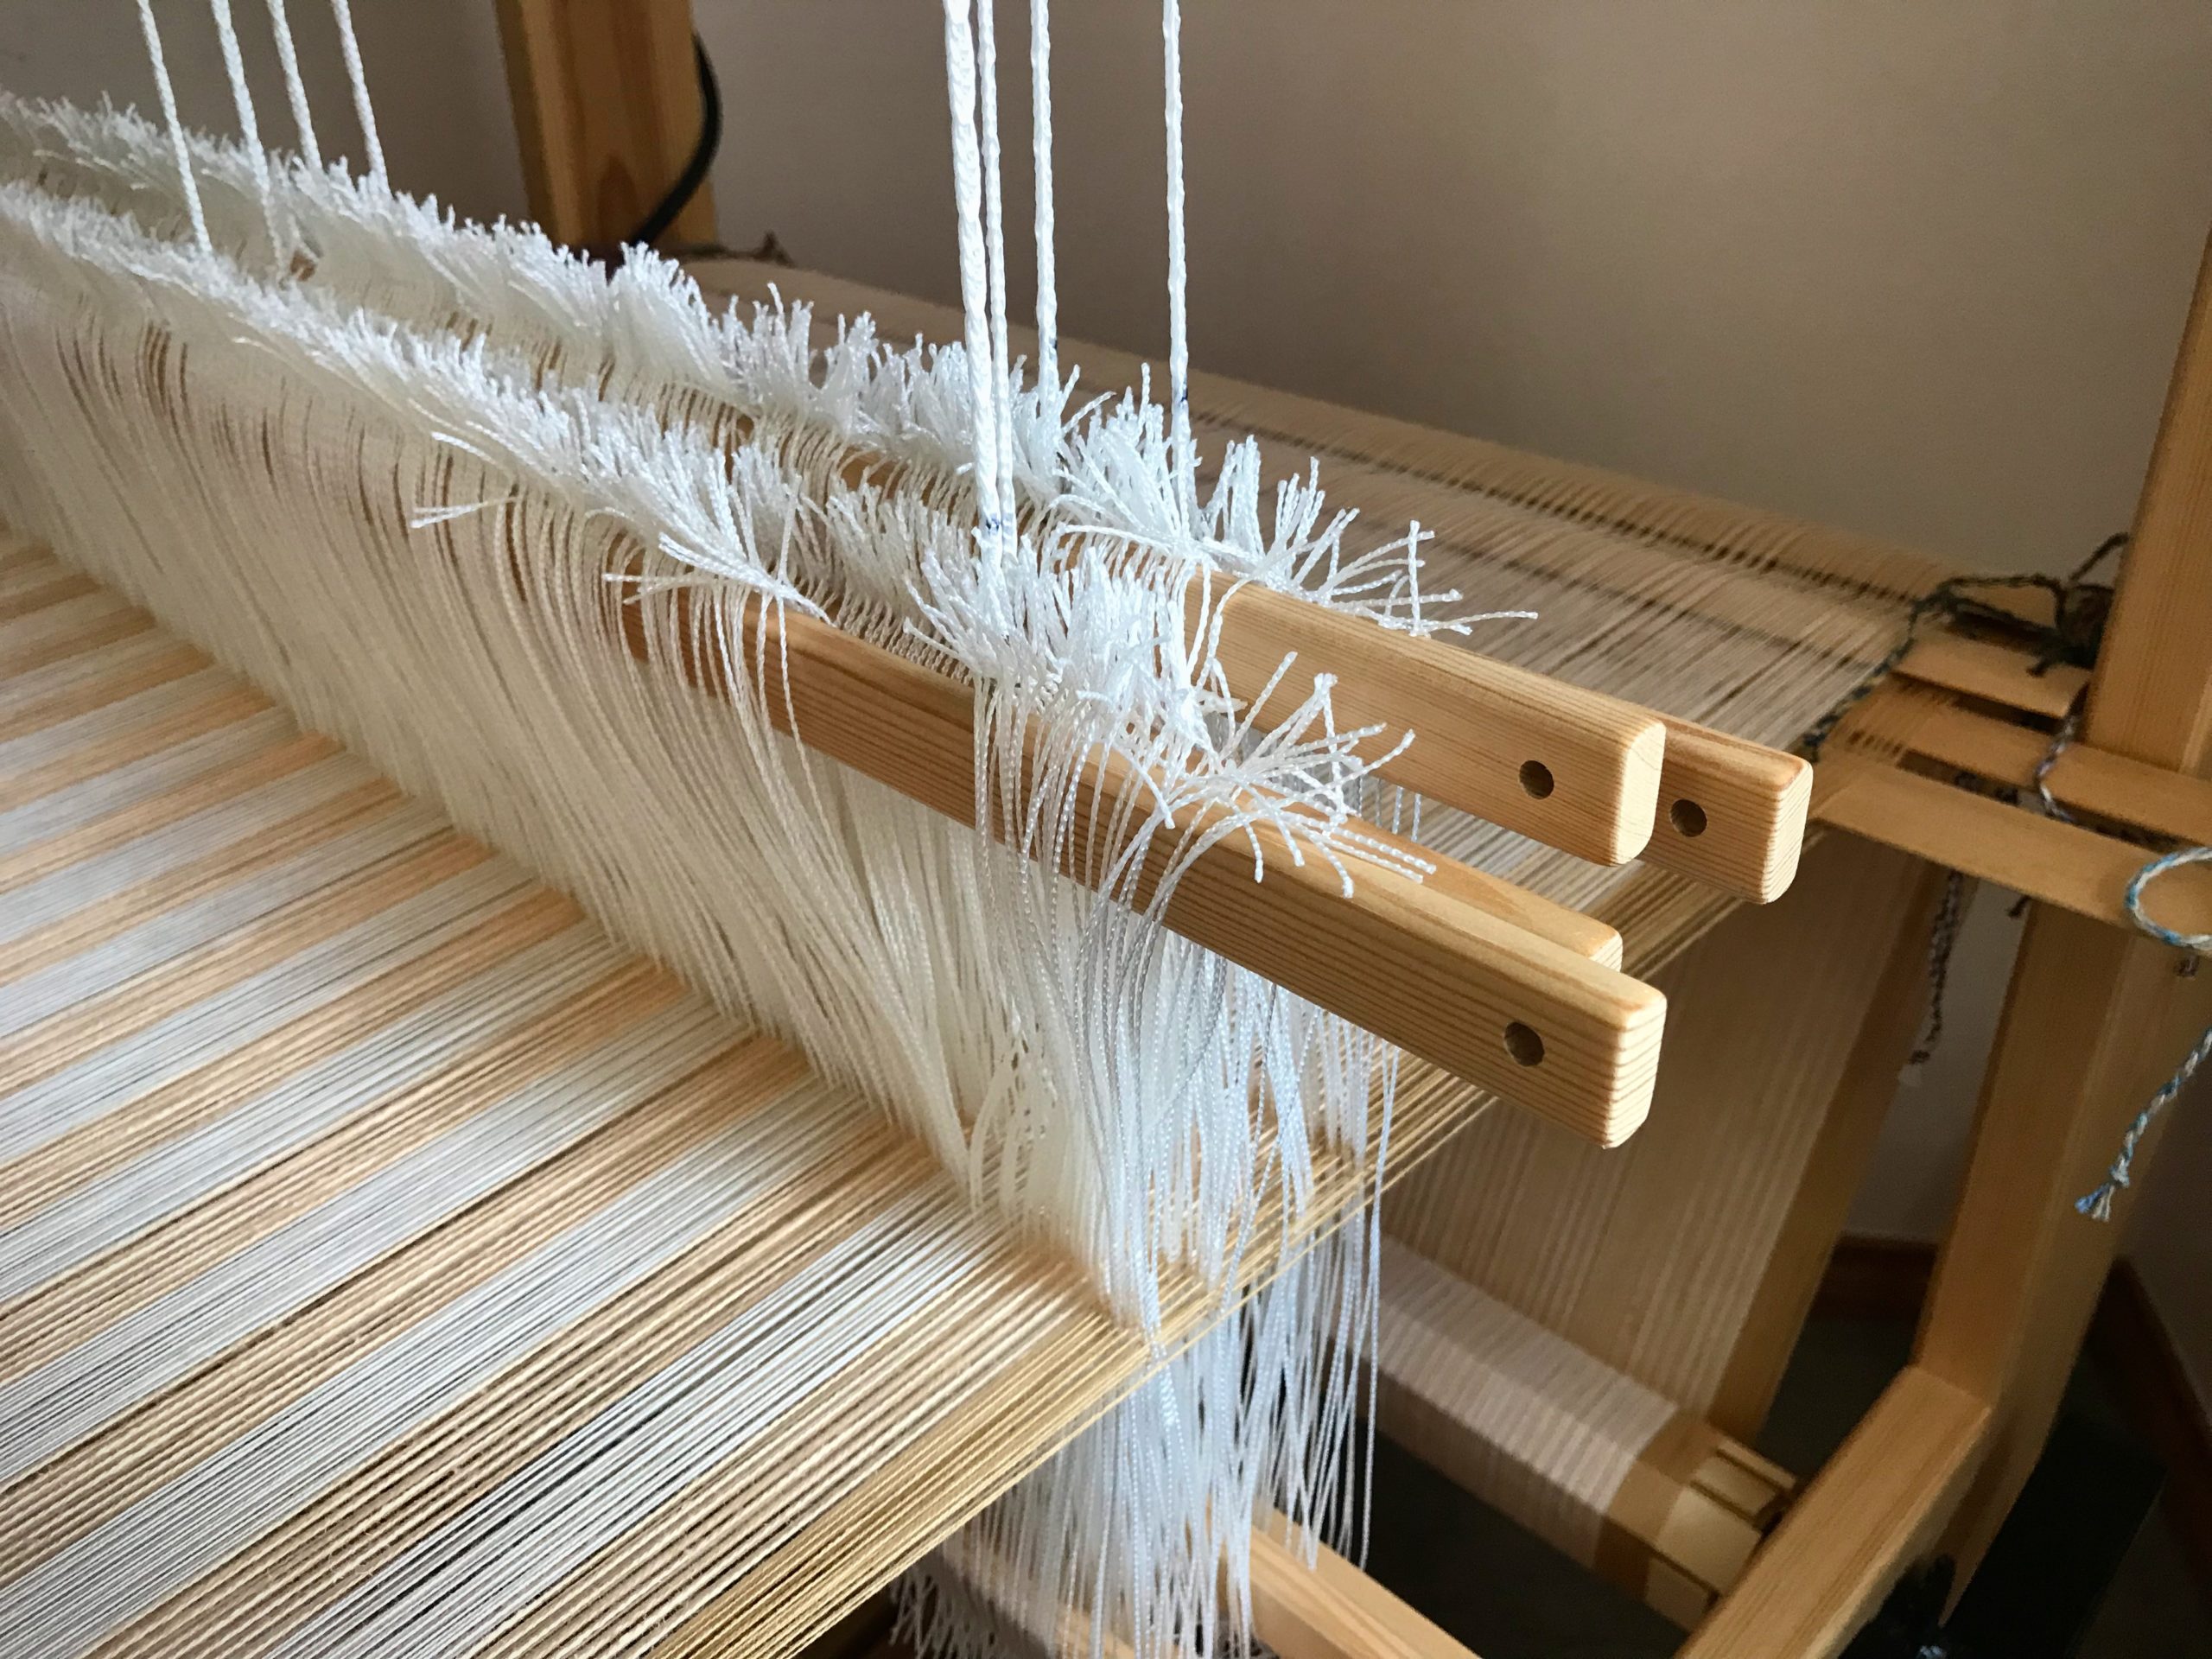
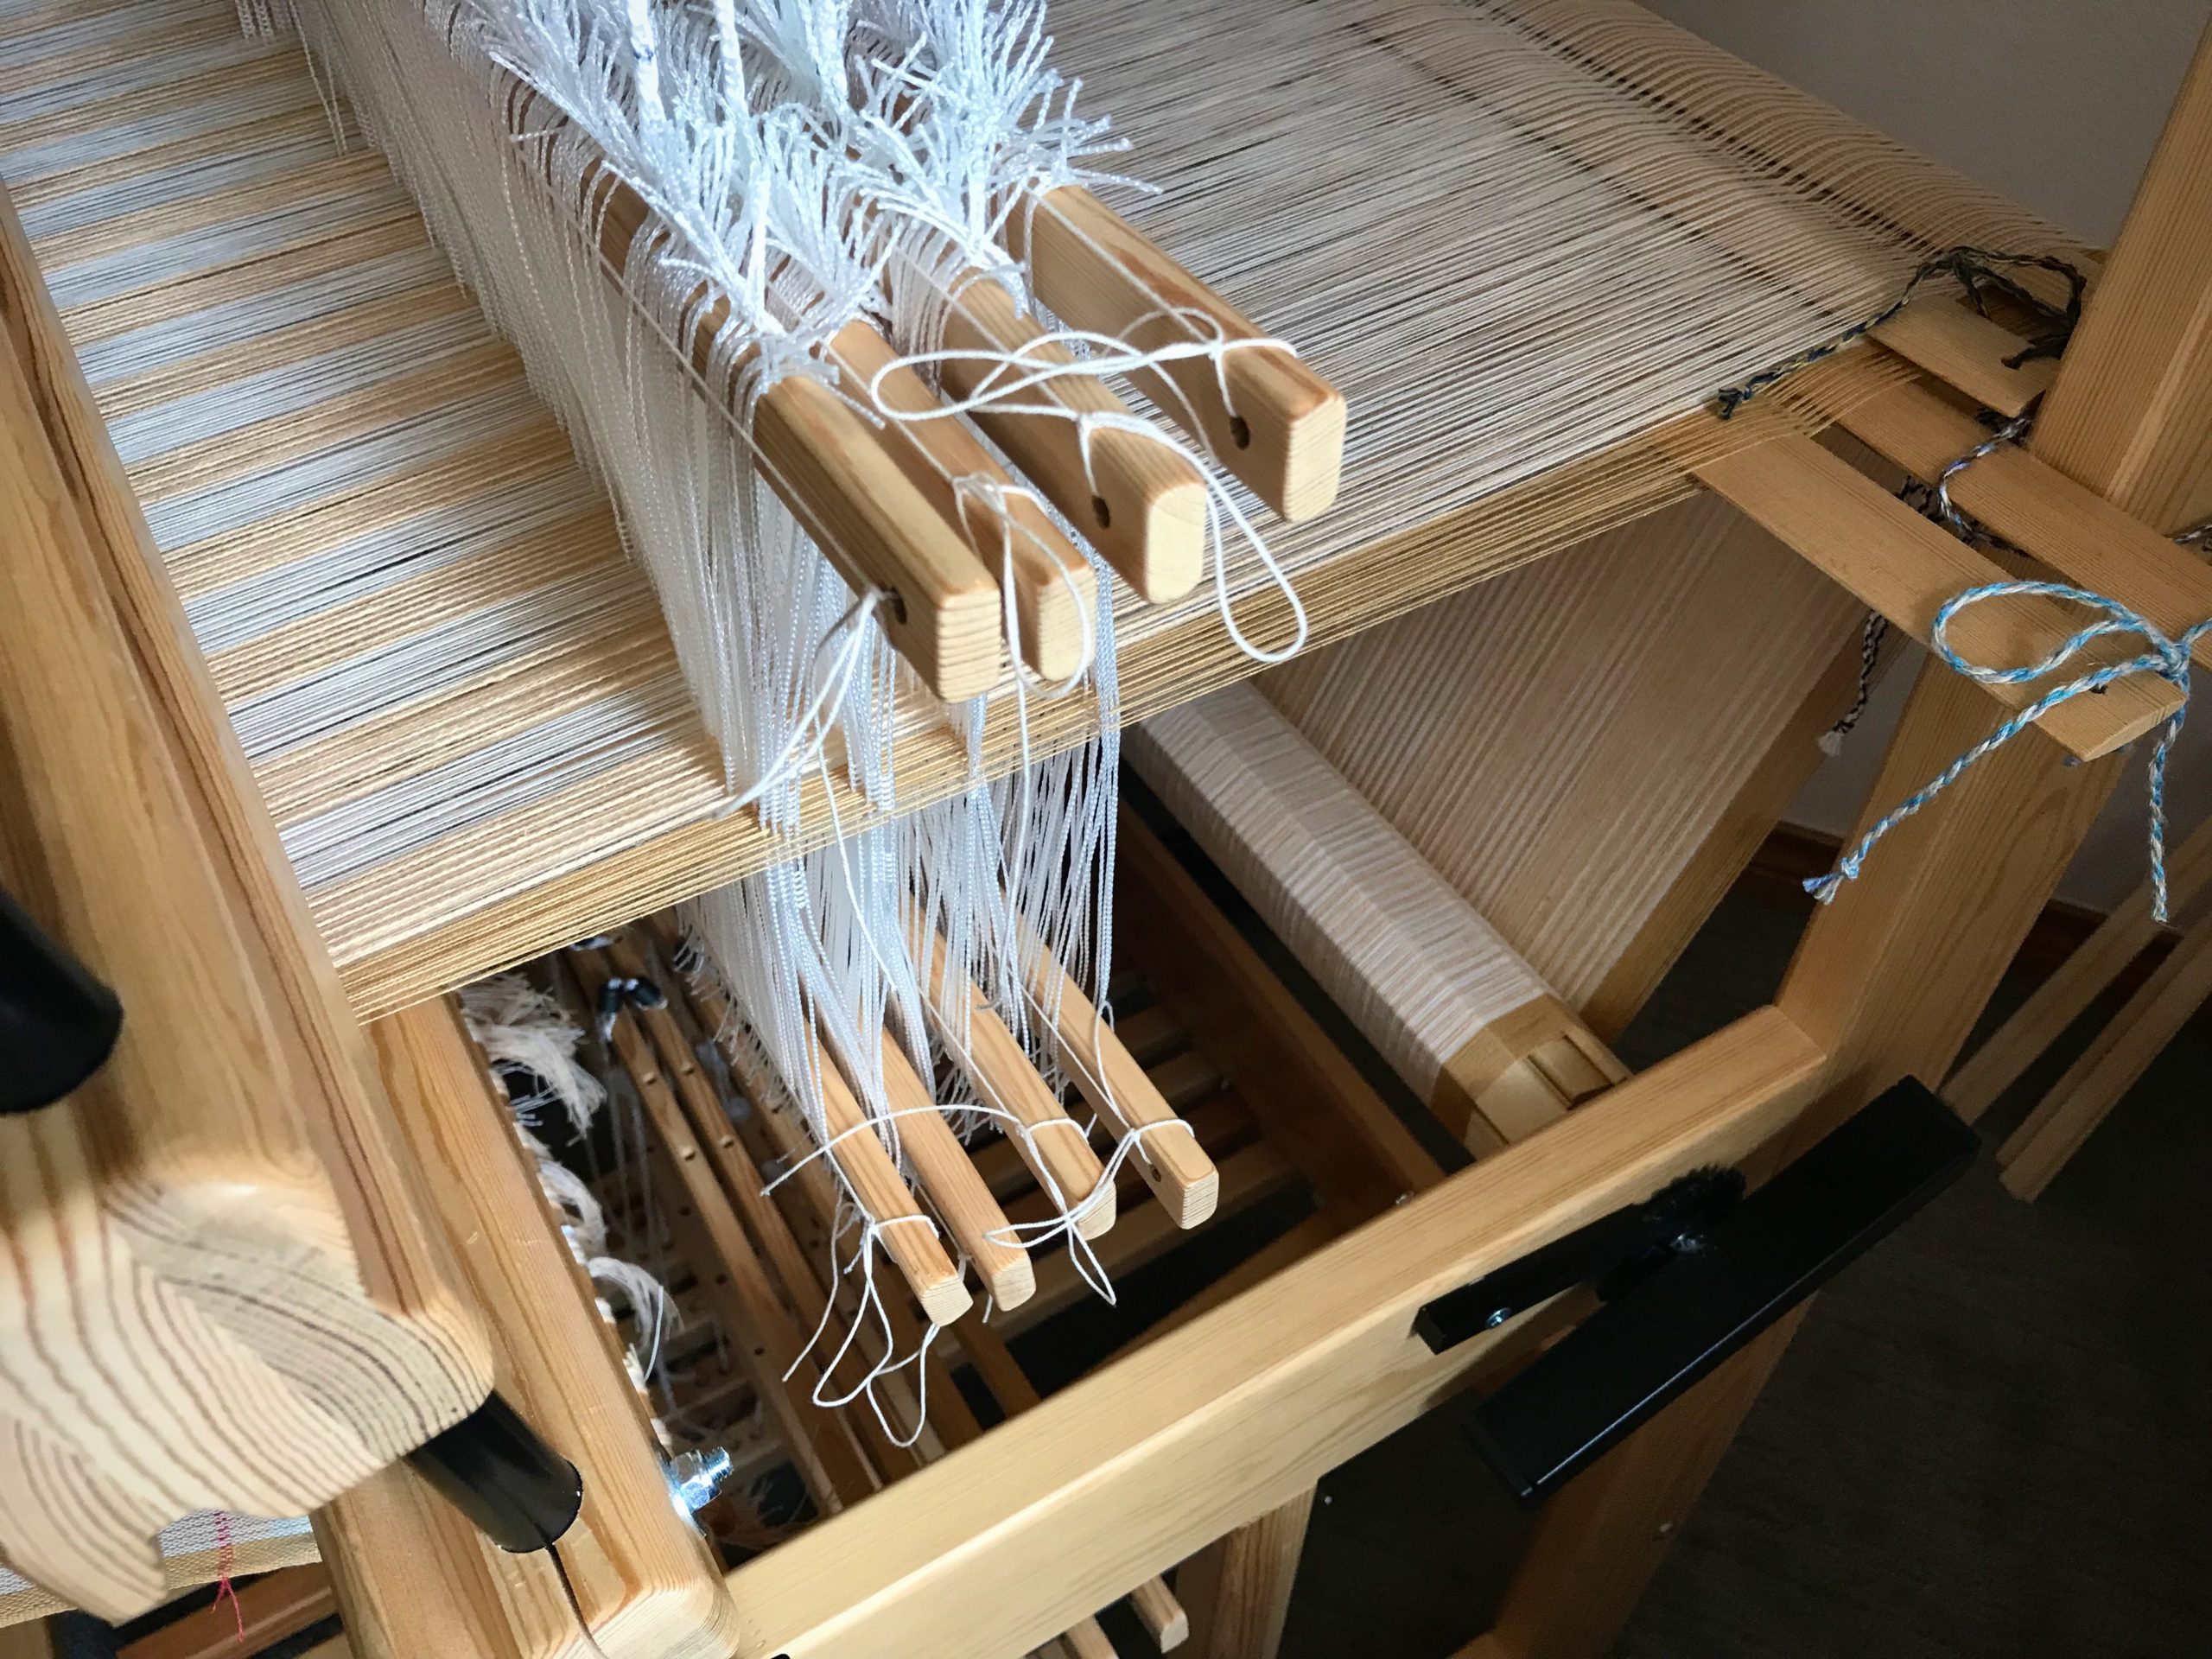
Some things are easier done than said. I said to myself that it’s too much trouble to tie retaining cords on the shafts. I am weaving almost full width on the Glimåkra Julia. I know that heddlescan slip off the ends of shafts. Still, I tell myself I can keep an eye on it. It won’t be a problem, right? Wrong.
Juila’s wide warp. So far, so good. I’ll pay attention and everything will be just fine. Famous last words.Oops. I took this picture after I had fixed most of the mess created by dangling heddles. When heddles slip off shafts they must be put back on thread by thread to maintain correct warp order. These were tangled enough that it took me a few tries to get it right.
Tie Retaining Cords on Shafts
Purpose: Keep Texsolv heddles secure on their shaft bars, especially when weaving a wide warp.
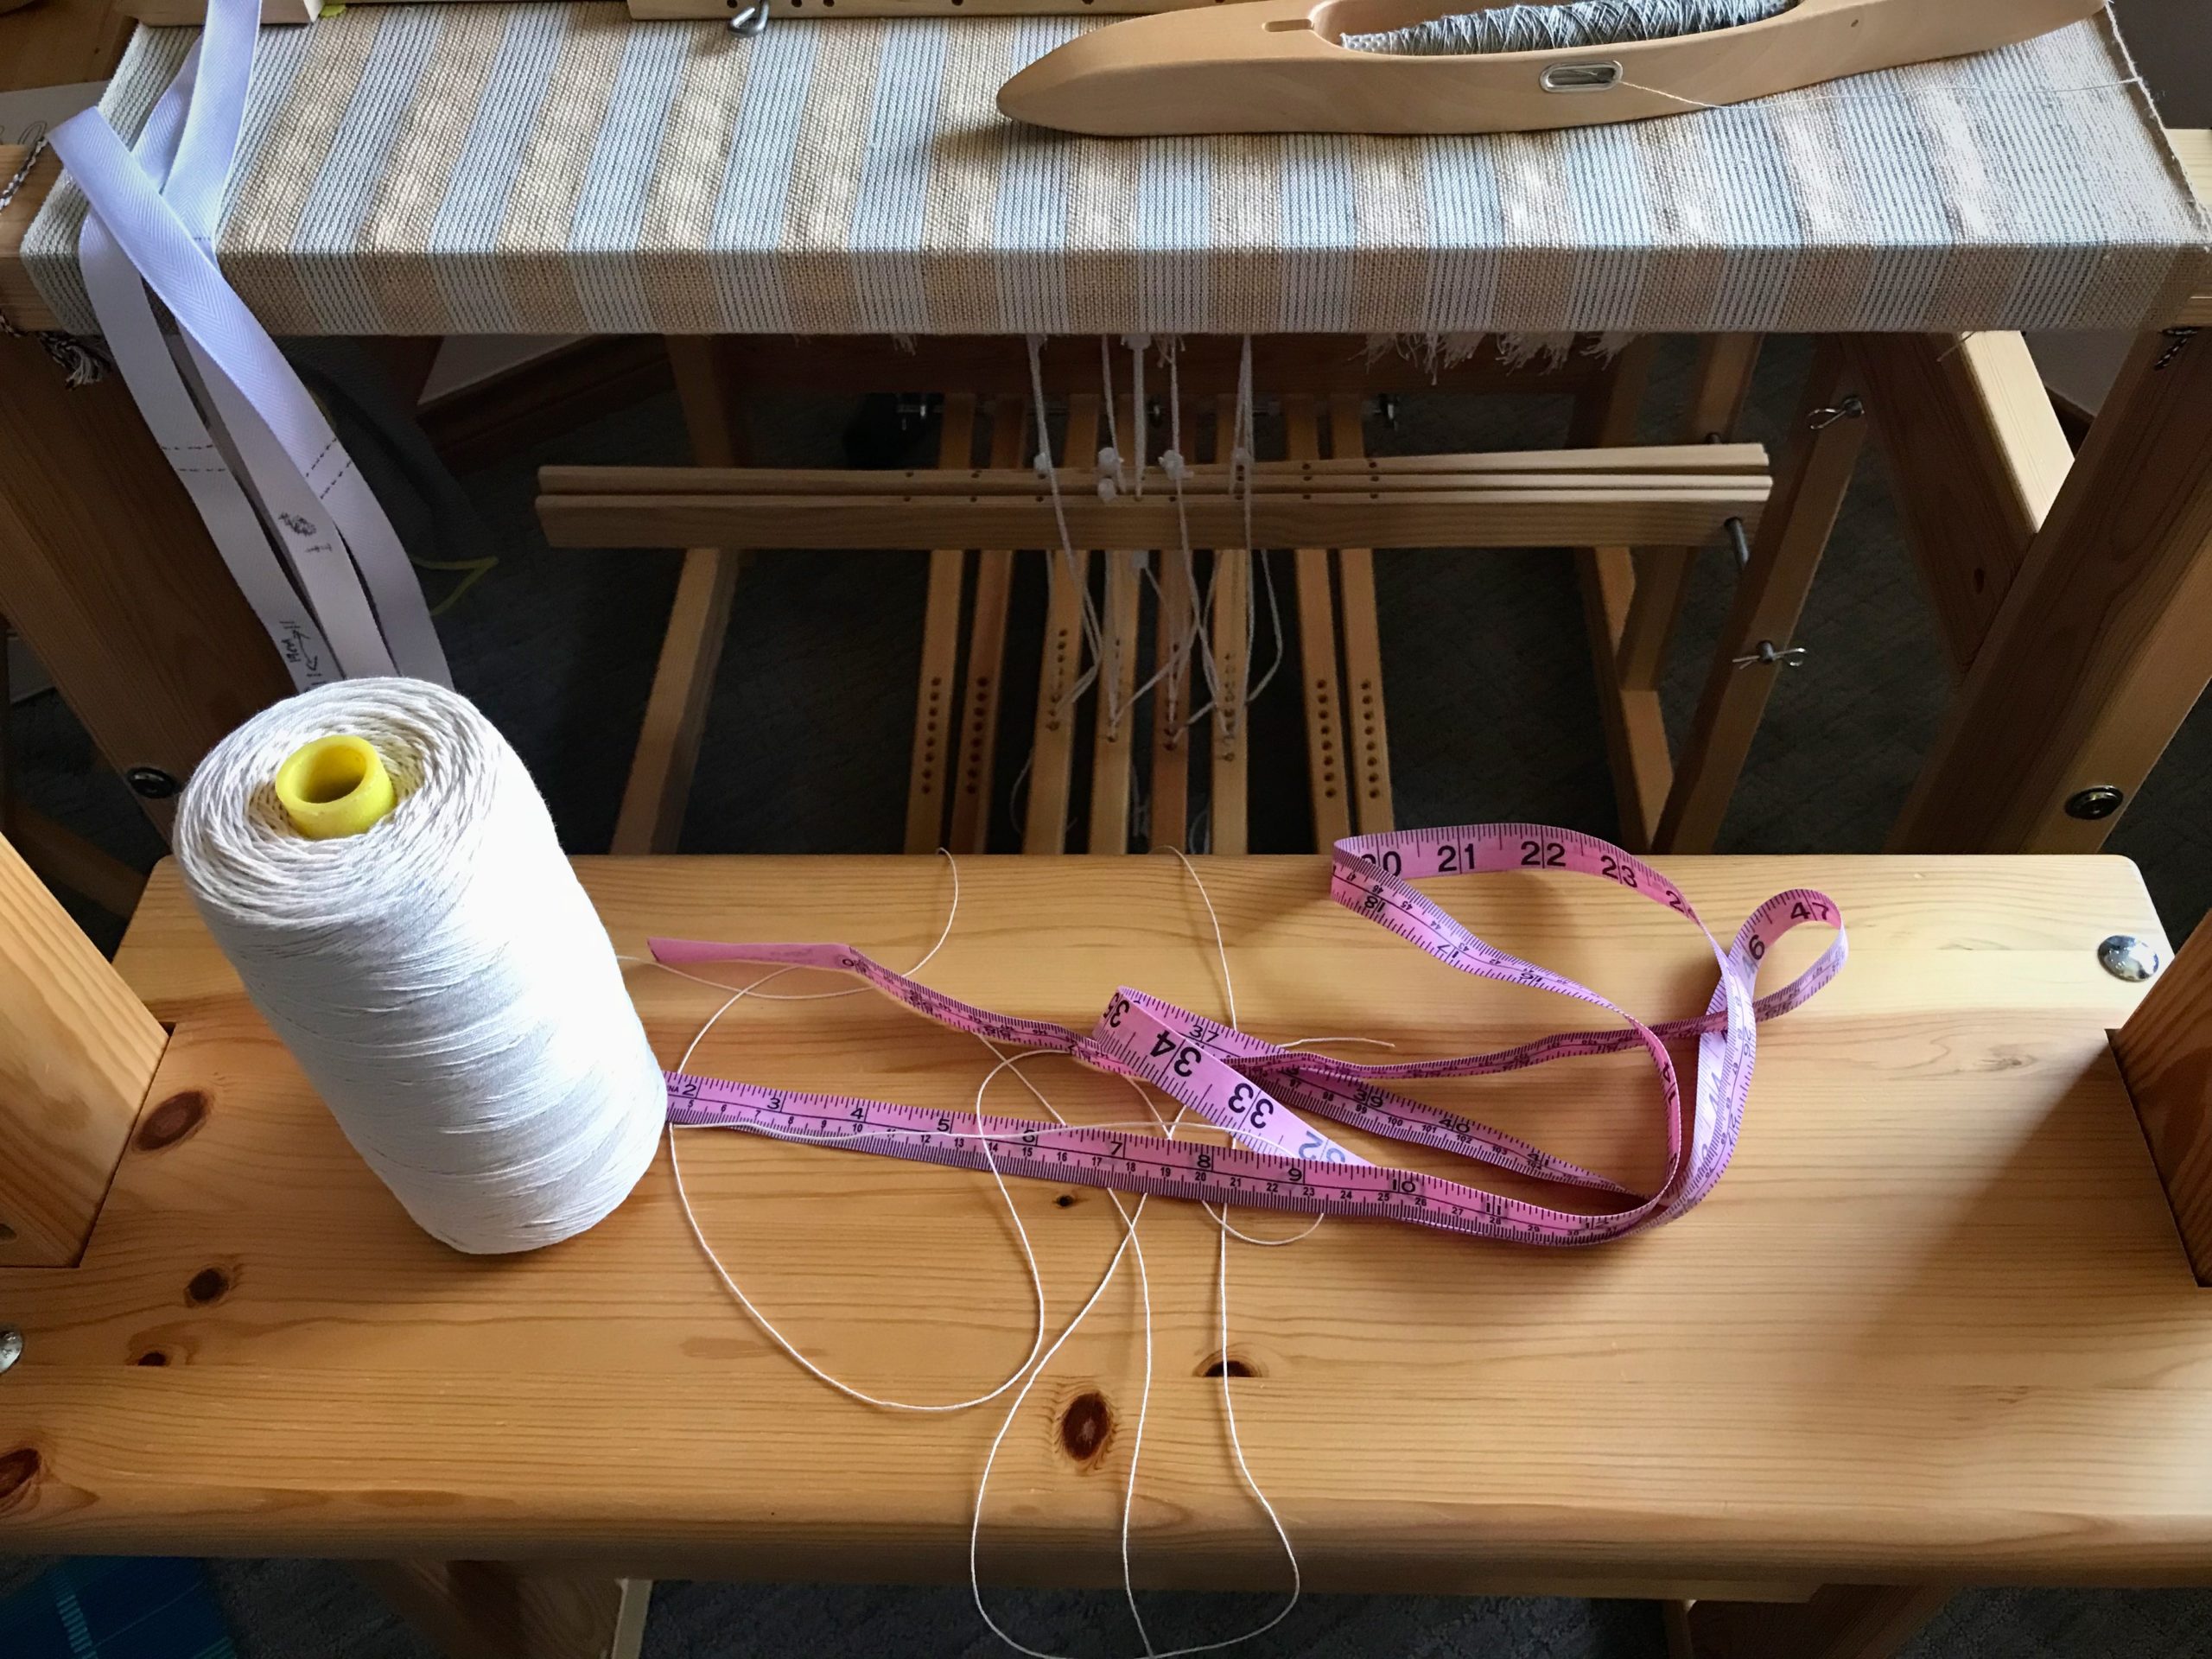
Supplies
Tape measure
12/6 cotton seine twine
Scissors
12/6 cotton seine twine (rug warp) to the rescue!
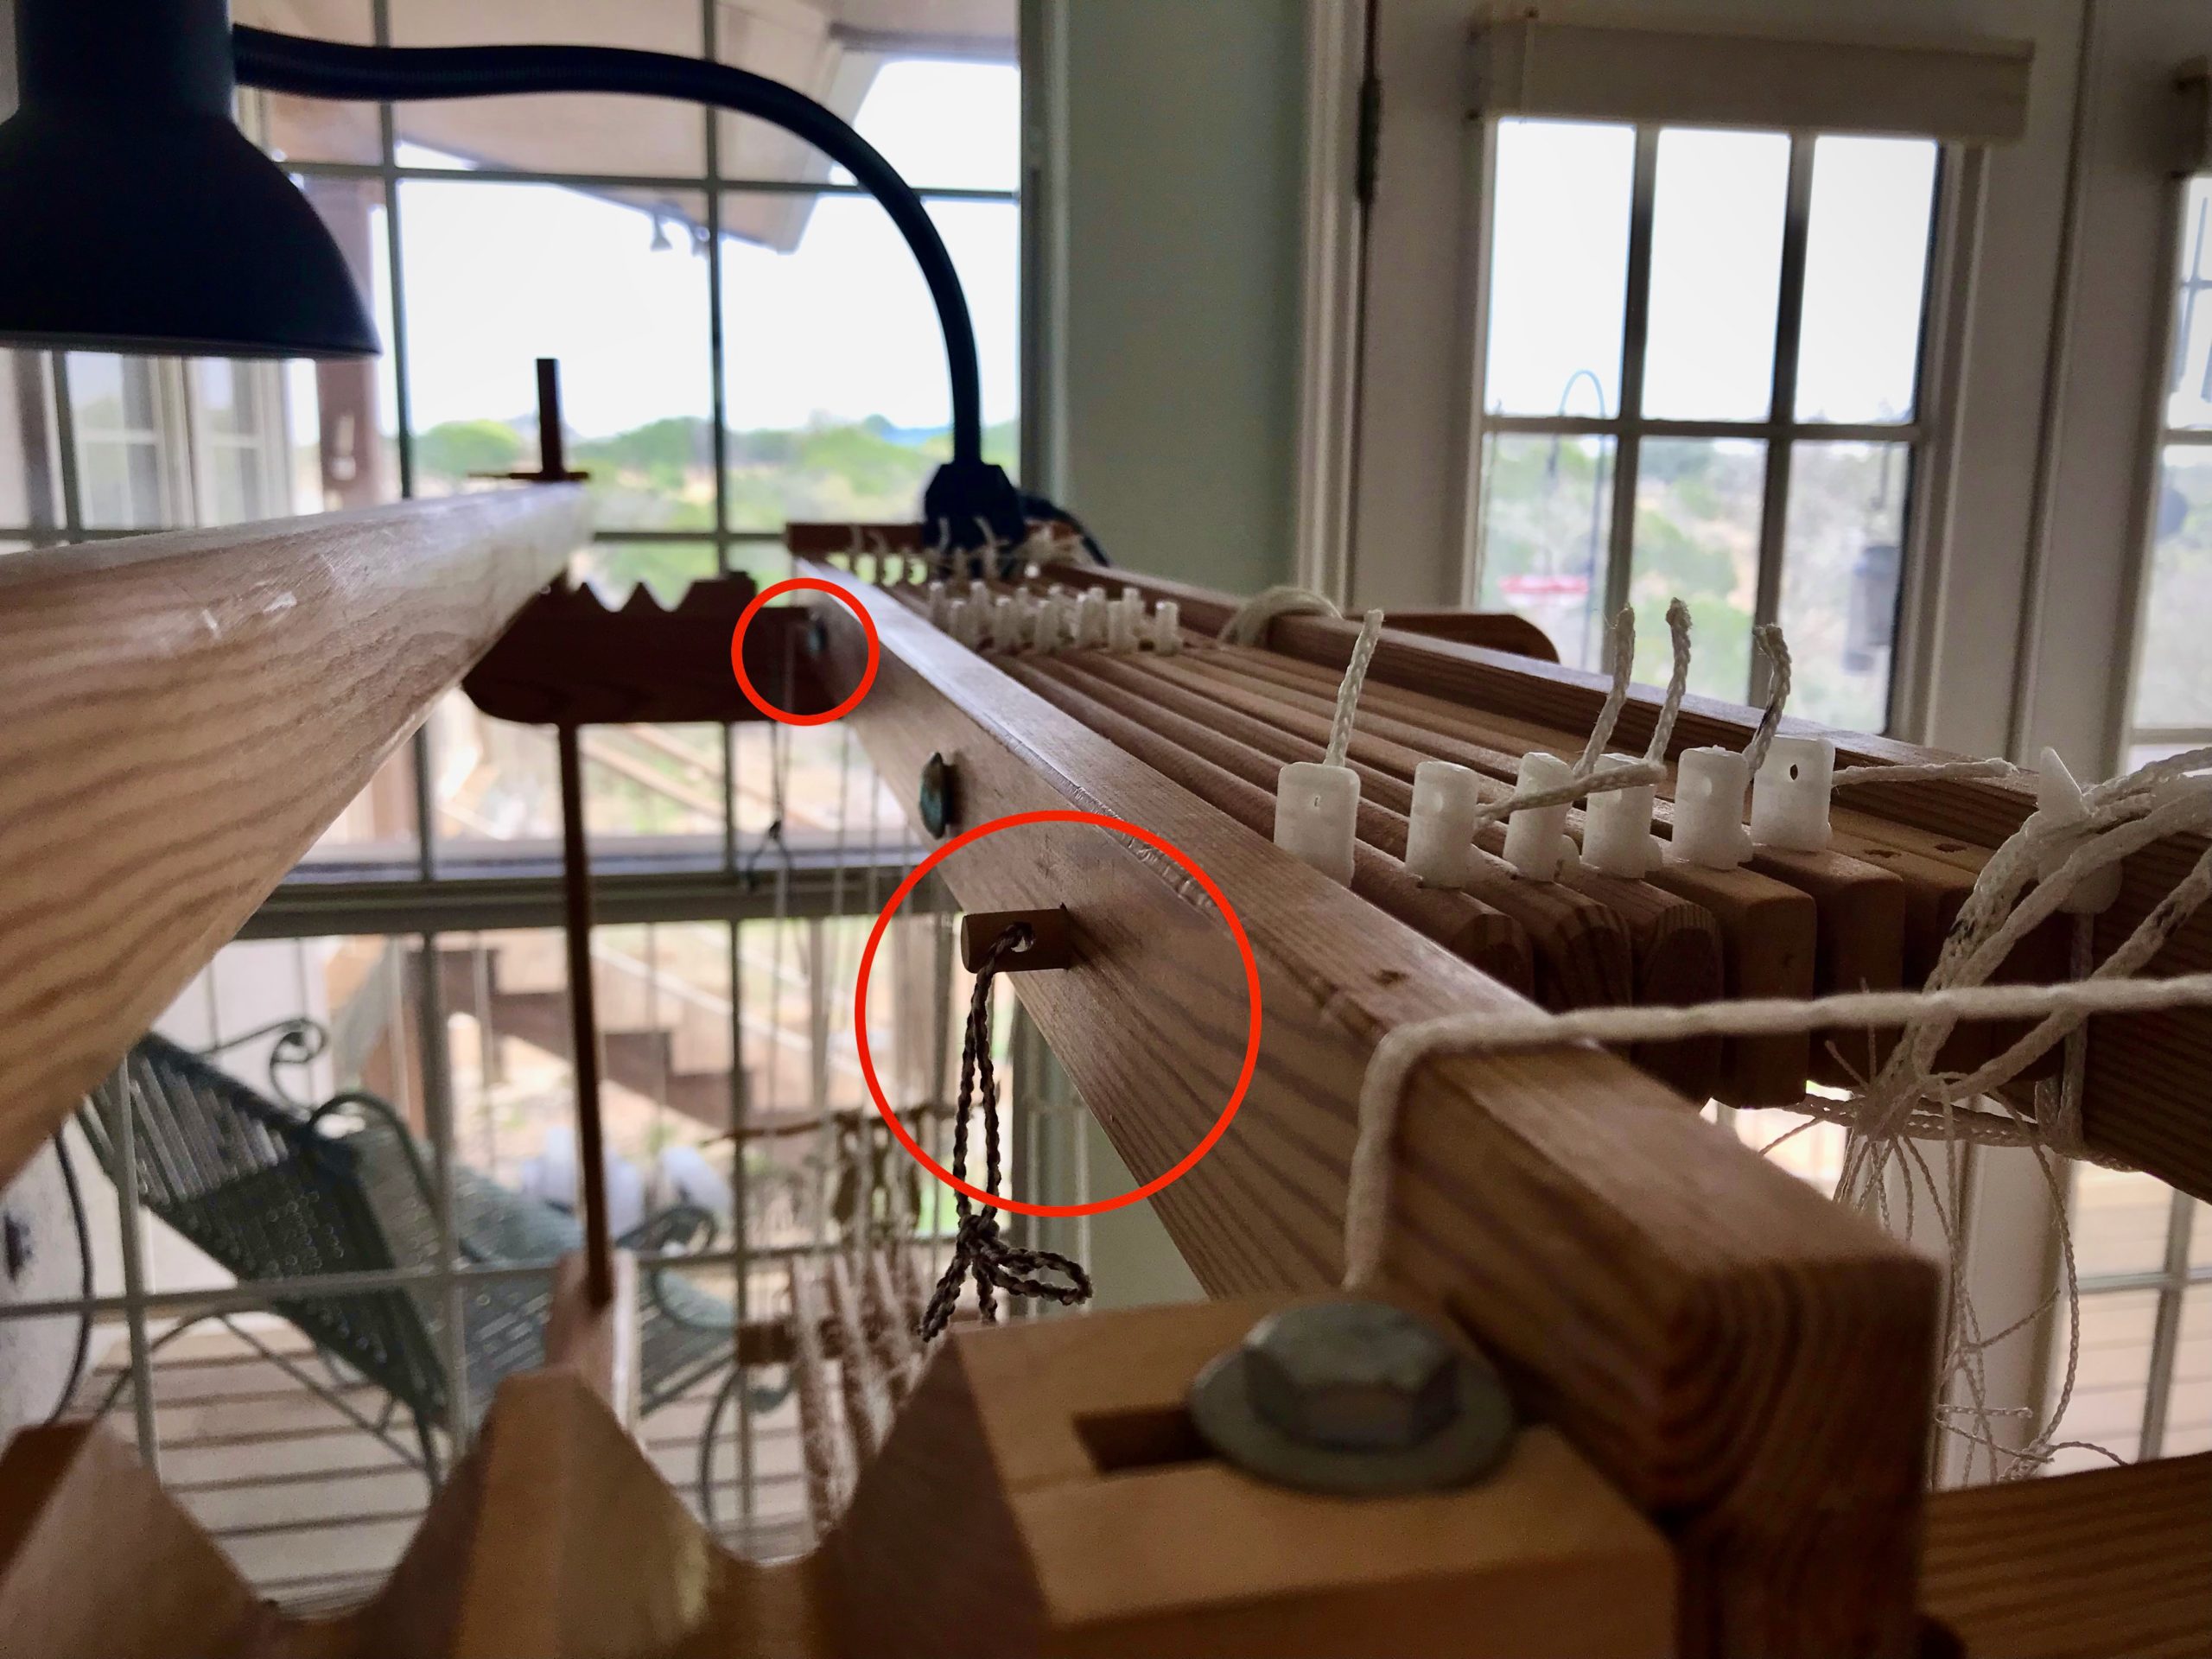
1 Measure shaft bar from hole to hole. (Julia shaft bar is 70 cm) 2 Figure additional length (about 40 cm) for tying two knots. (70 + 40 = 110 cm) 3 Cut seine twine to measured length for each upper and lower shaft bar. (Heddles can slip off lower shaft bars, too.)
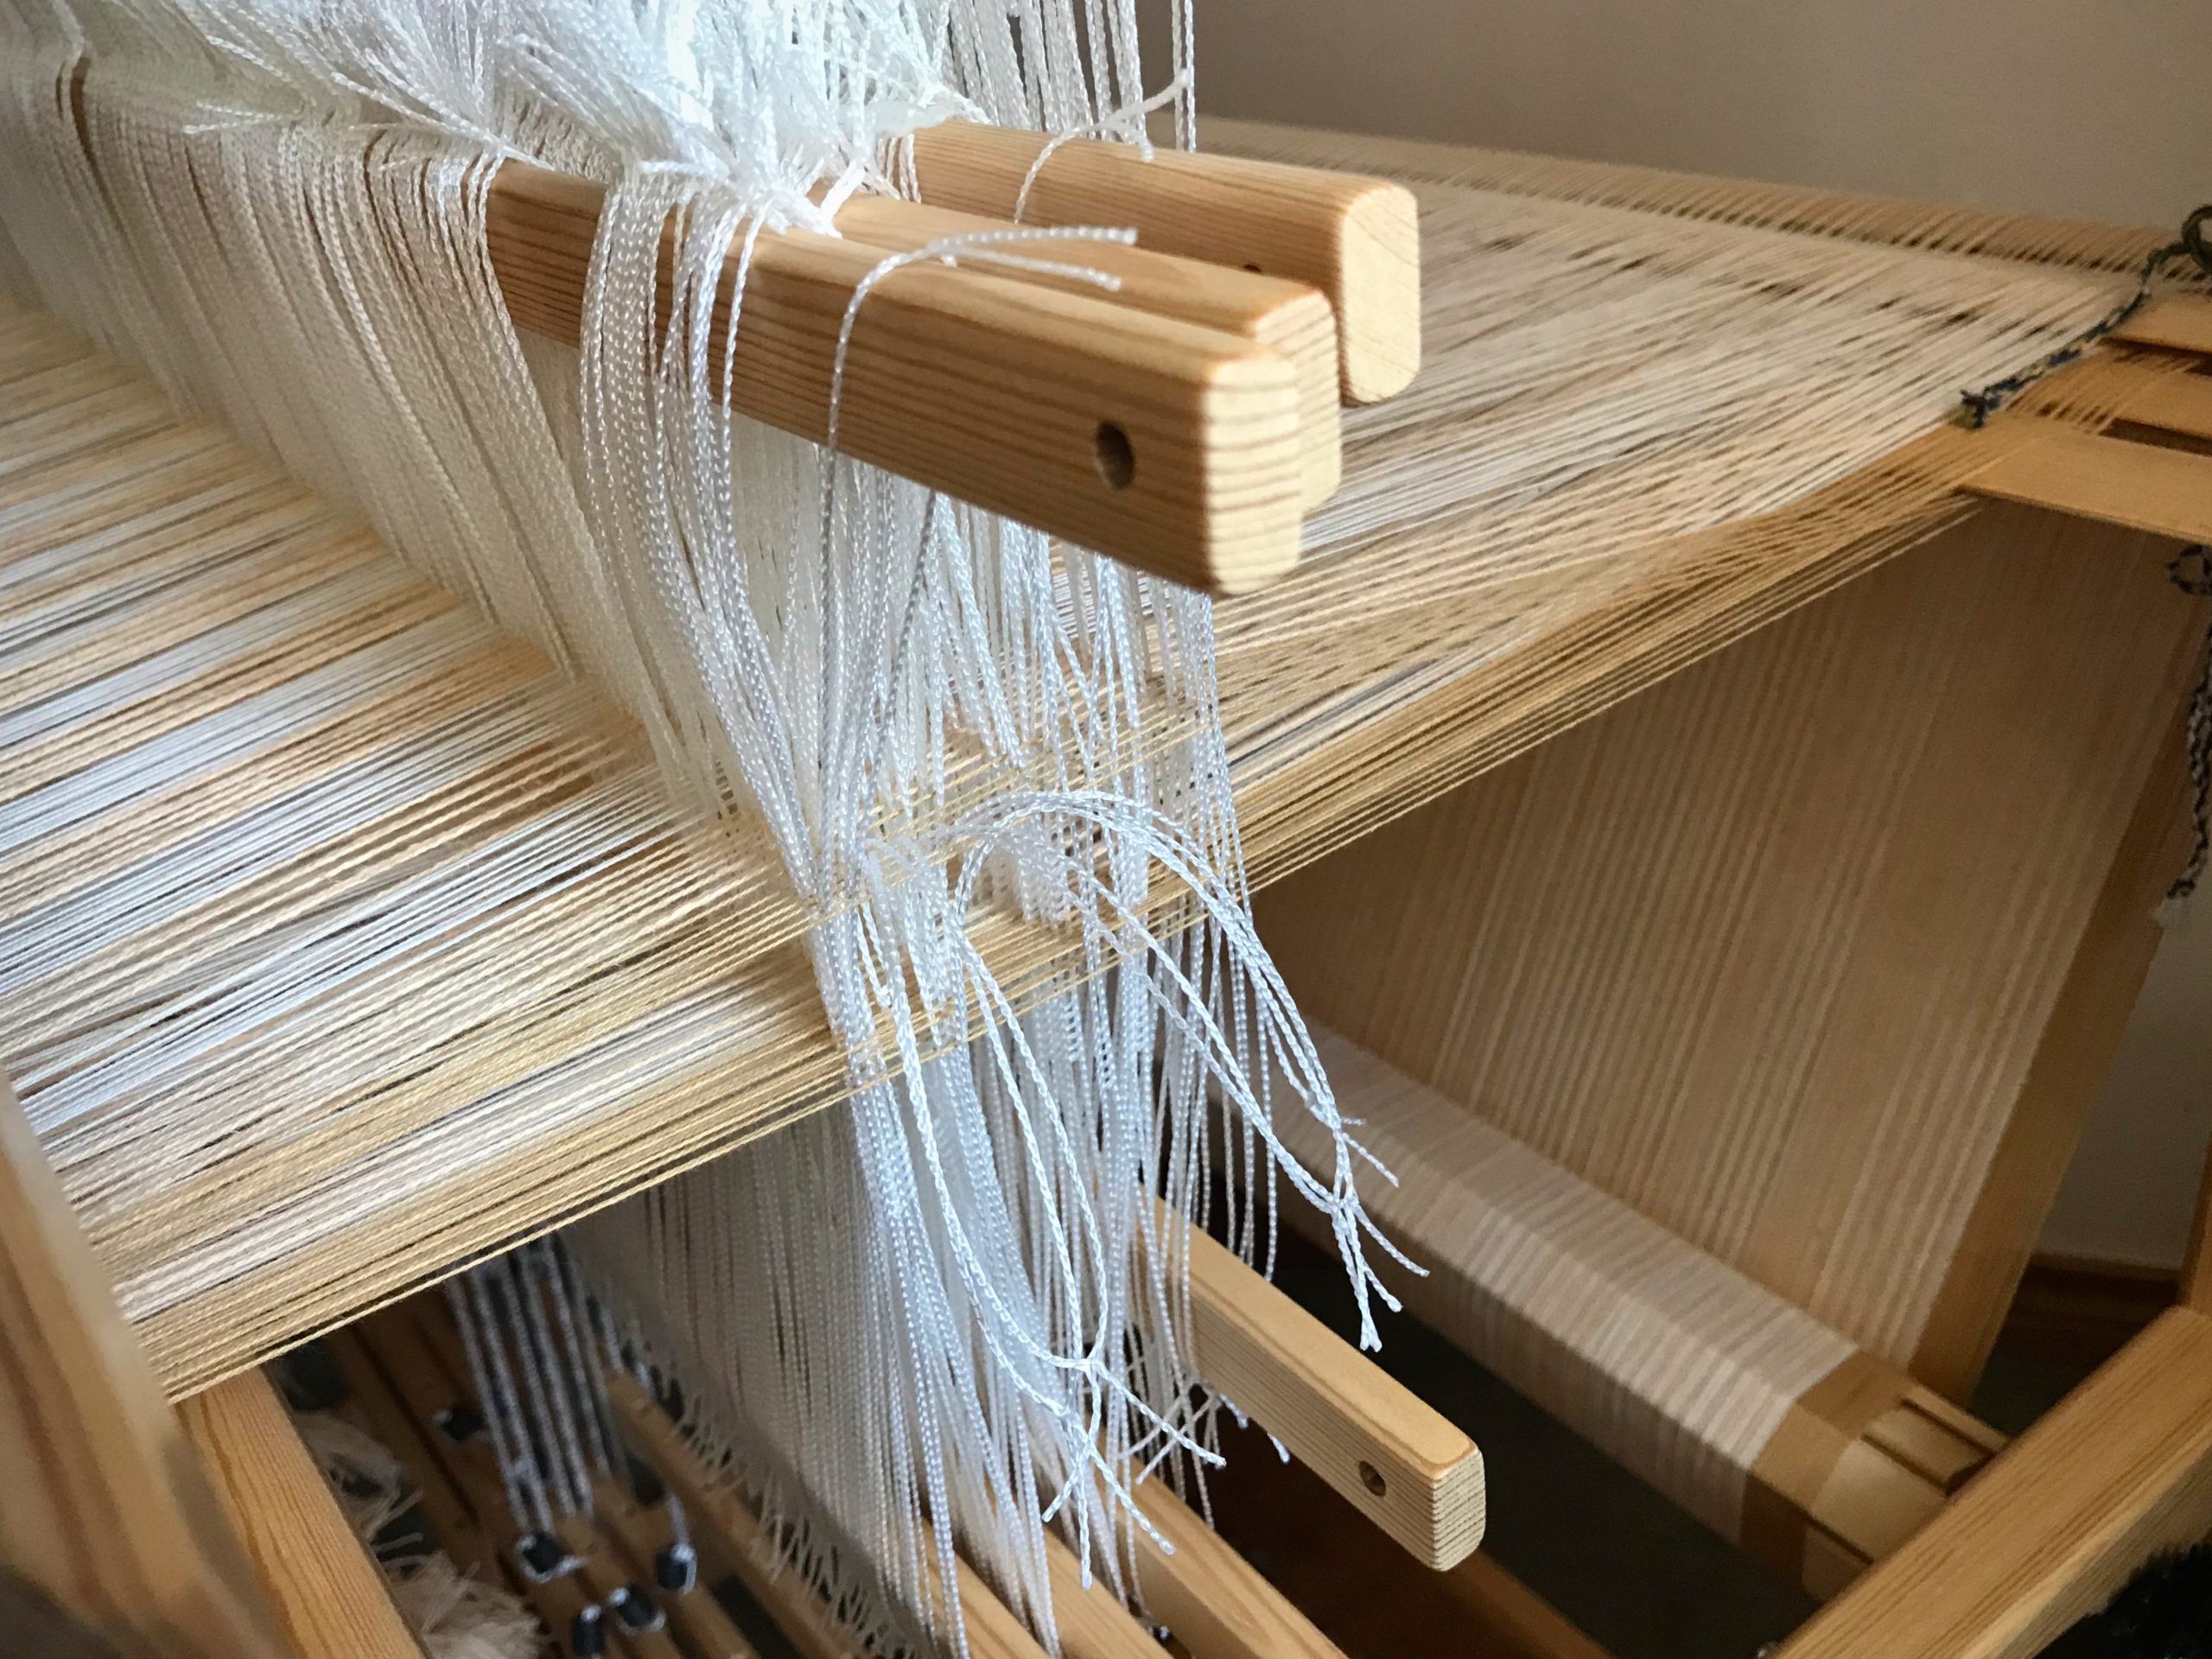
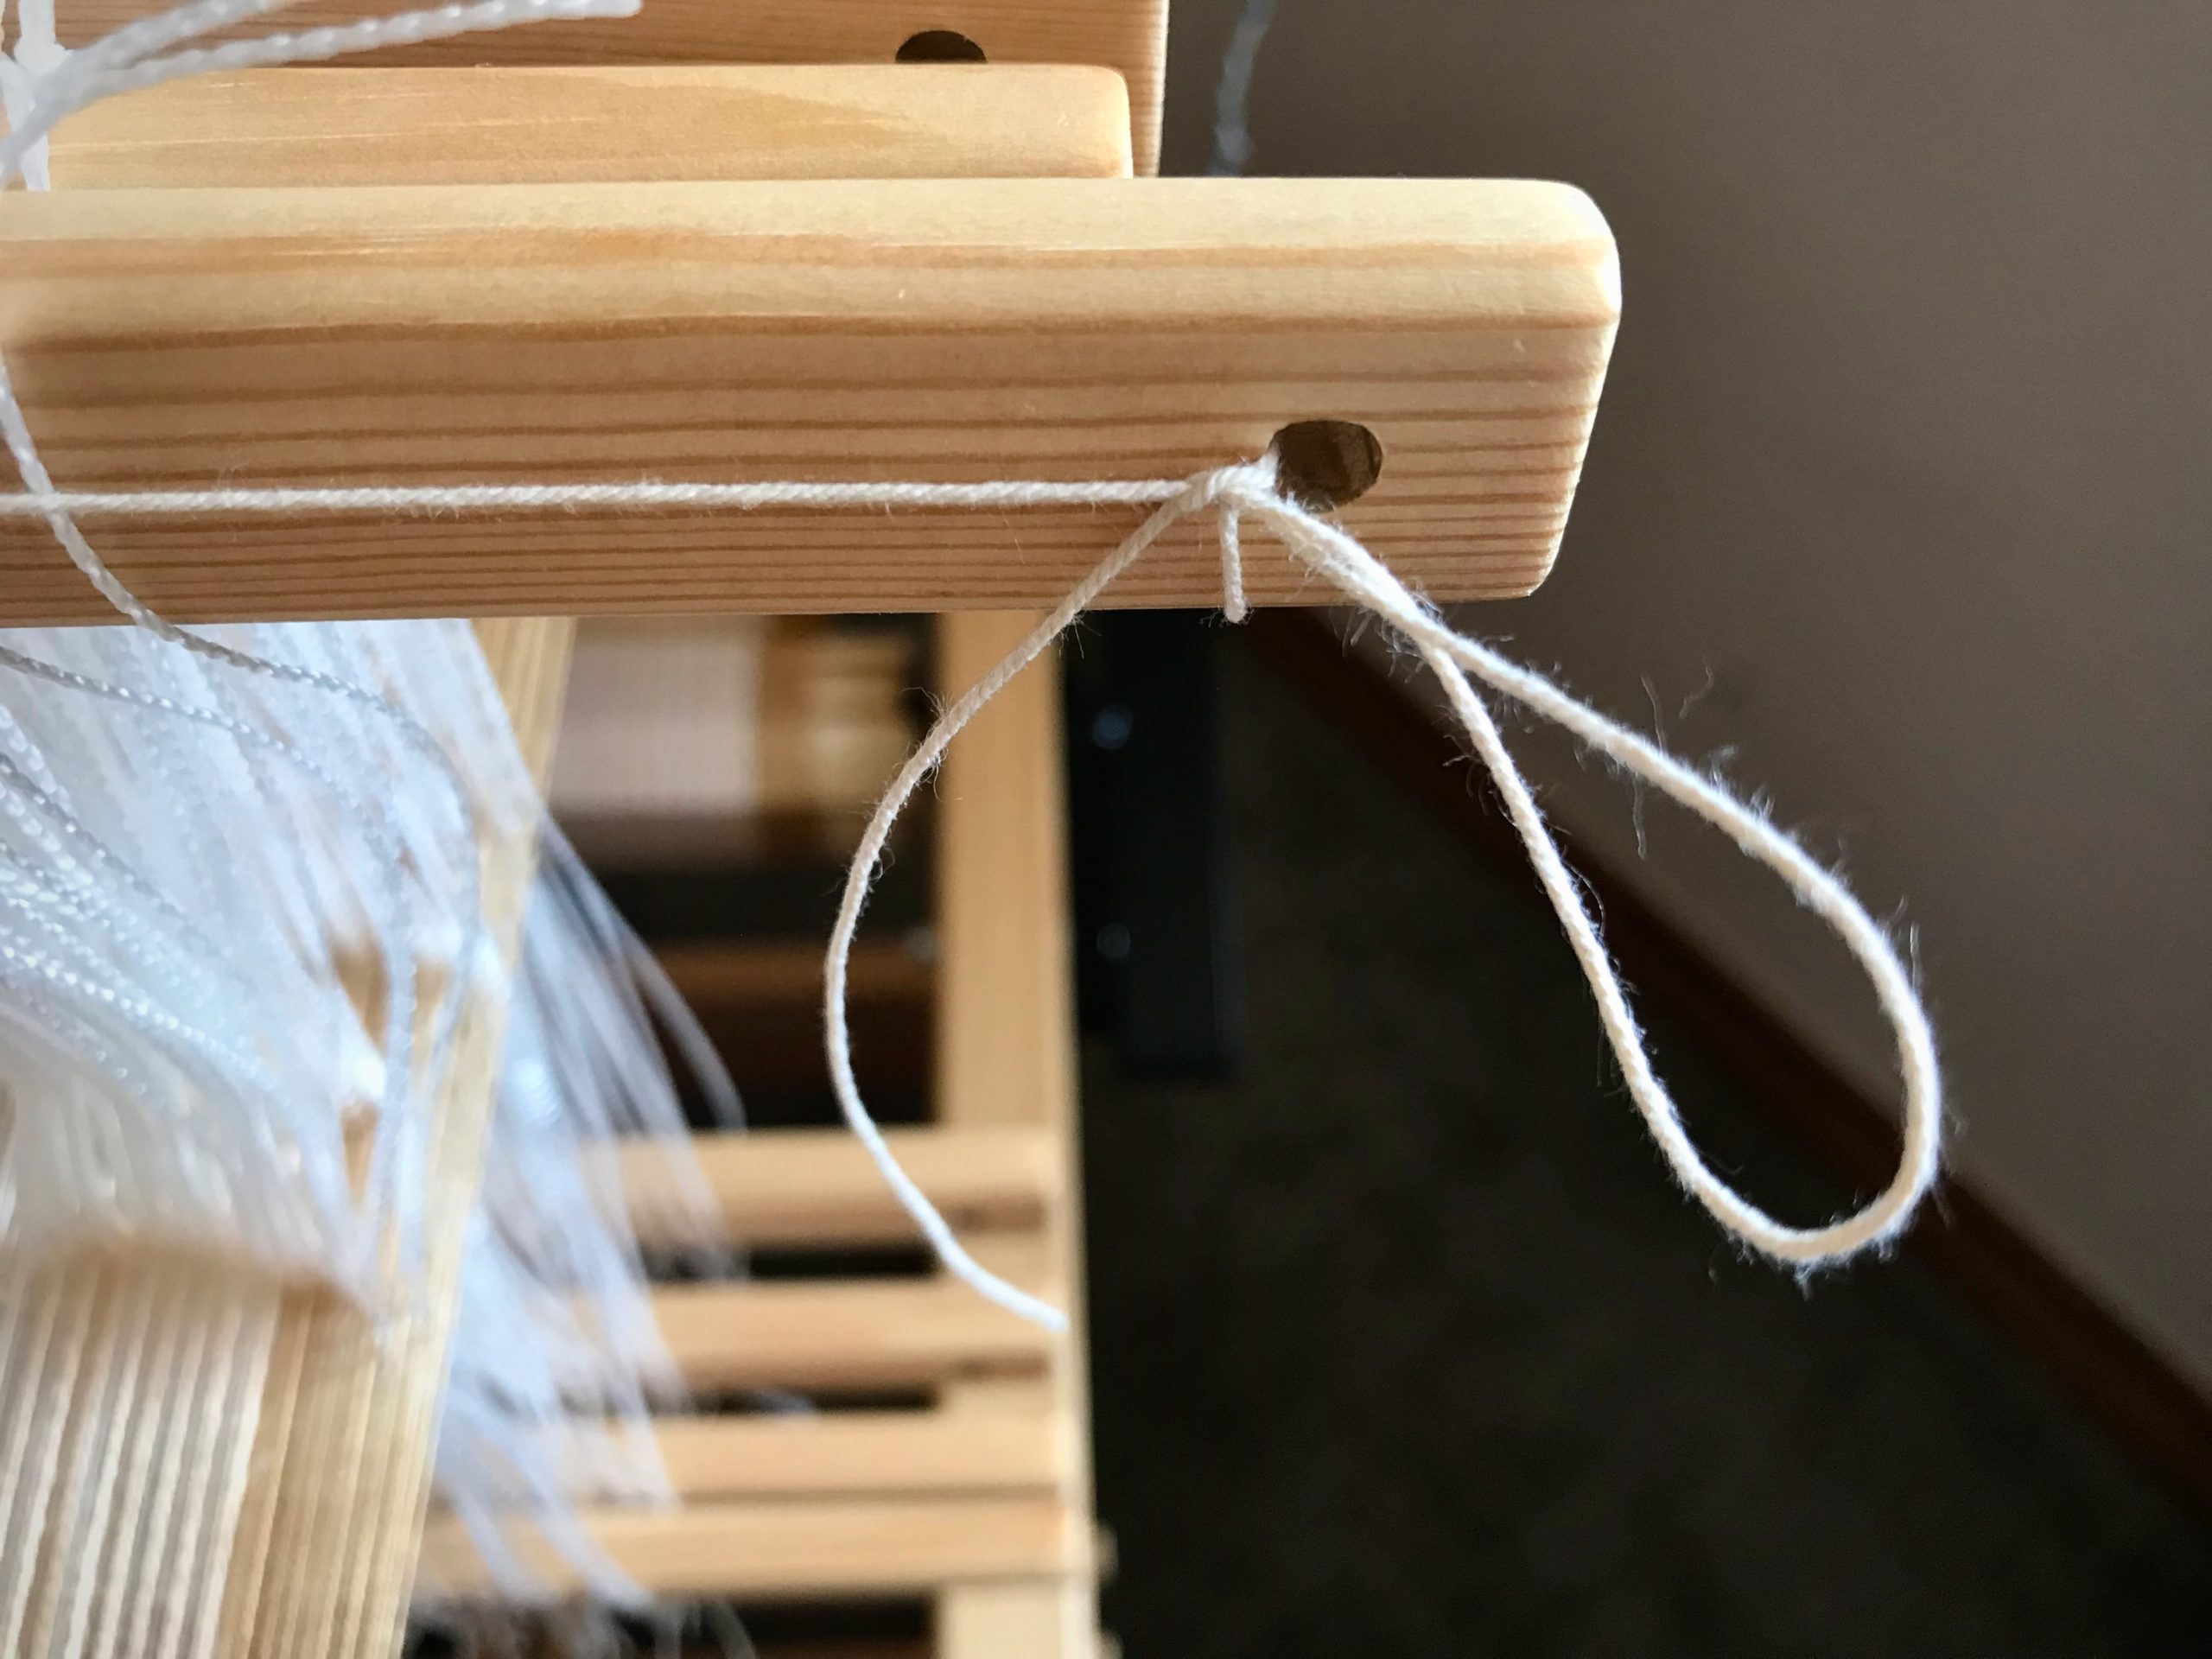
4 Insert one of the seine twine cords through the hole on one end of a shaft bar. Tie. (I use the half-bow slip knot as described in Learning to Warp Your Loom, by Joanne Hall, p.38.)
Tie retaining cord to one end of the shaft bar. Any knot will do, but I like this half-bow slip knot because I can untie it simply by pulling the end of the cord.
5 Insert the other end of the cord through the hole at other end of the shaft bar. Tie.
Thread the cord through the hole at the end of the bar.Tie a simple knot and tighten it.Tie another simple knot, leaving a fold in the end of the cord.Pull the loop to tighten the knot.
6 Repeat steps 4 and 5 for each remaining upper and lower shaft bar.
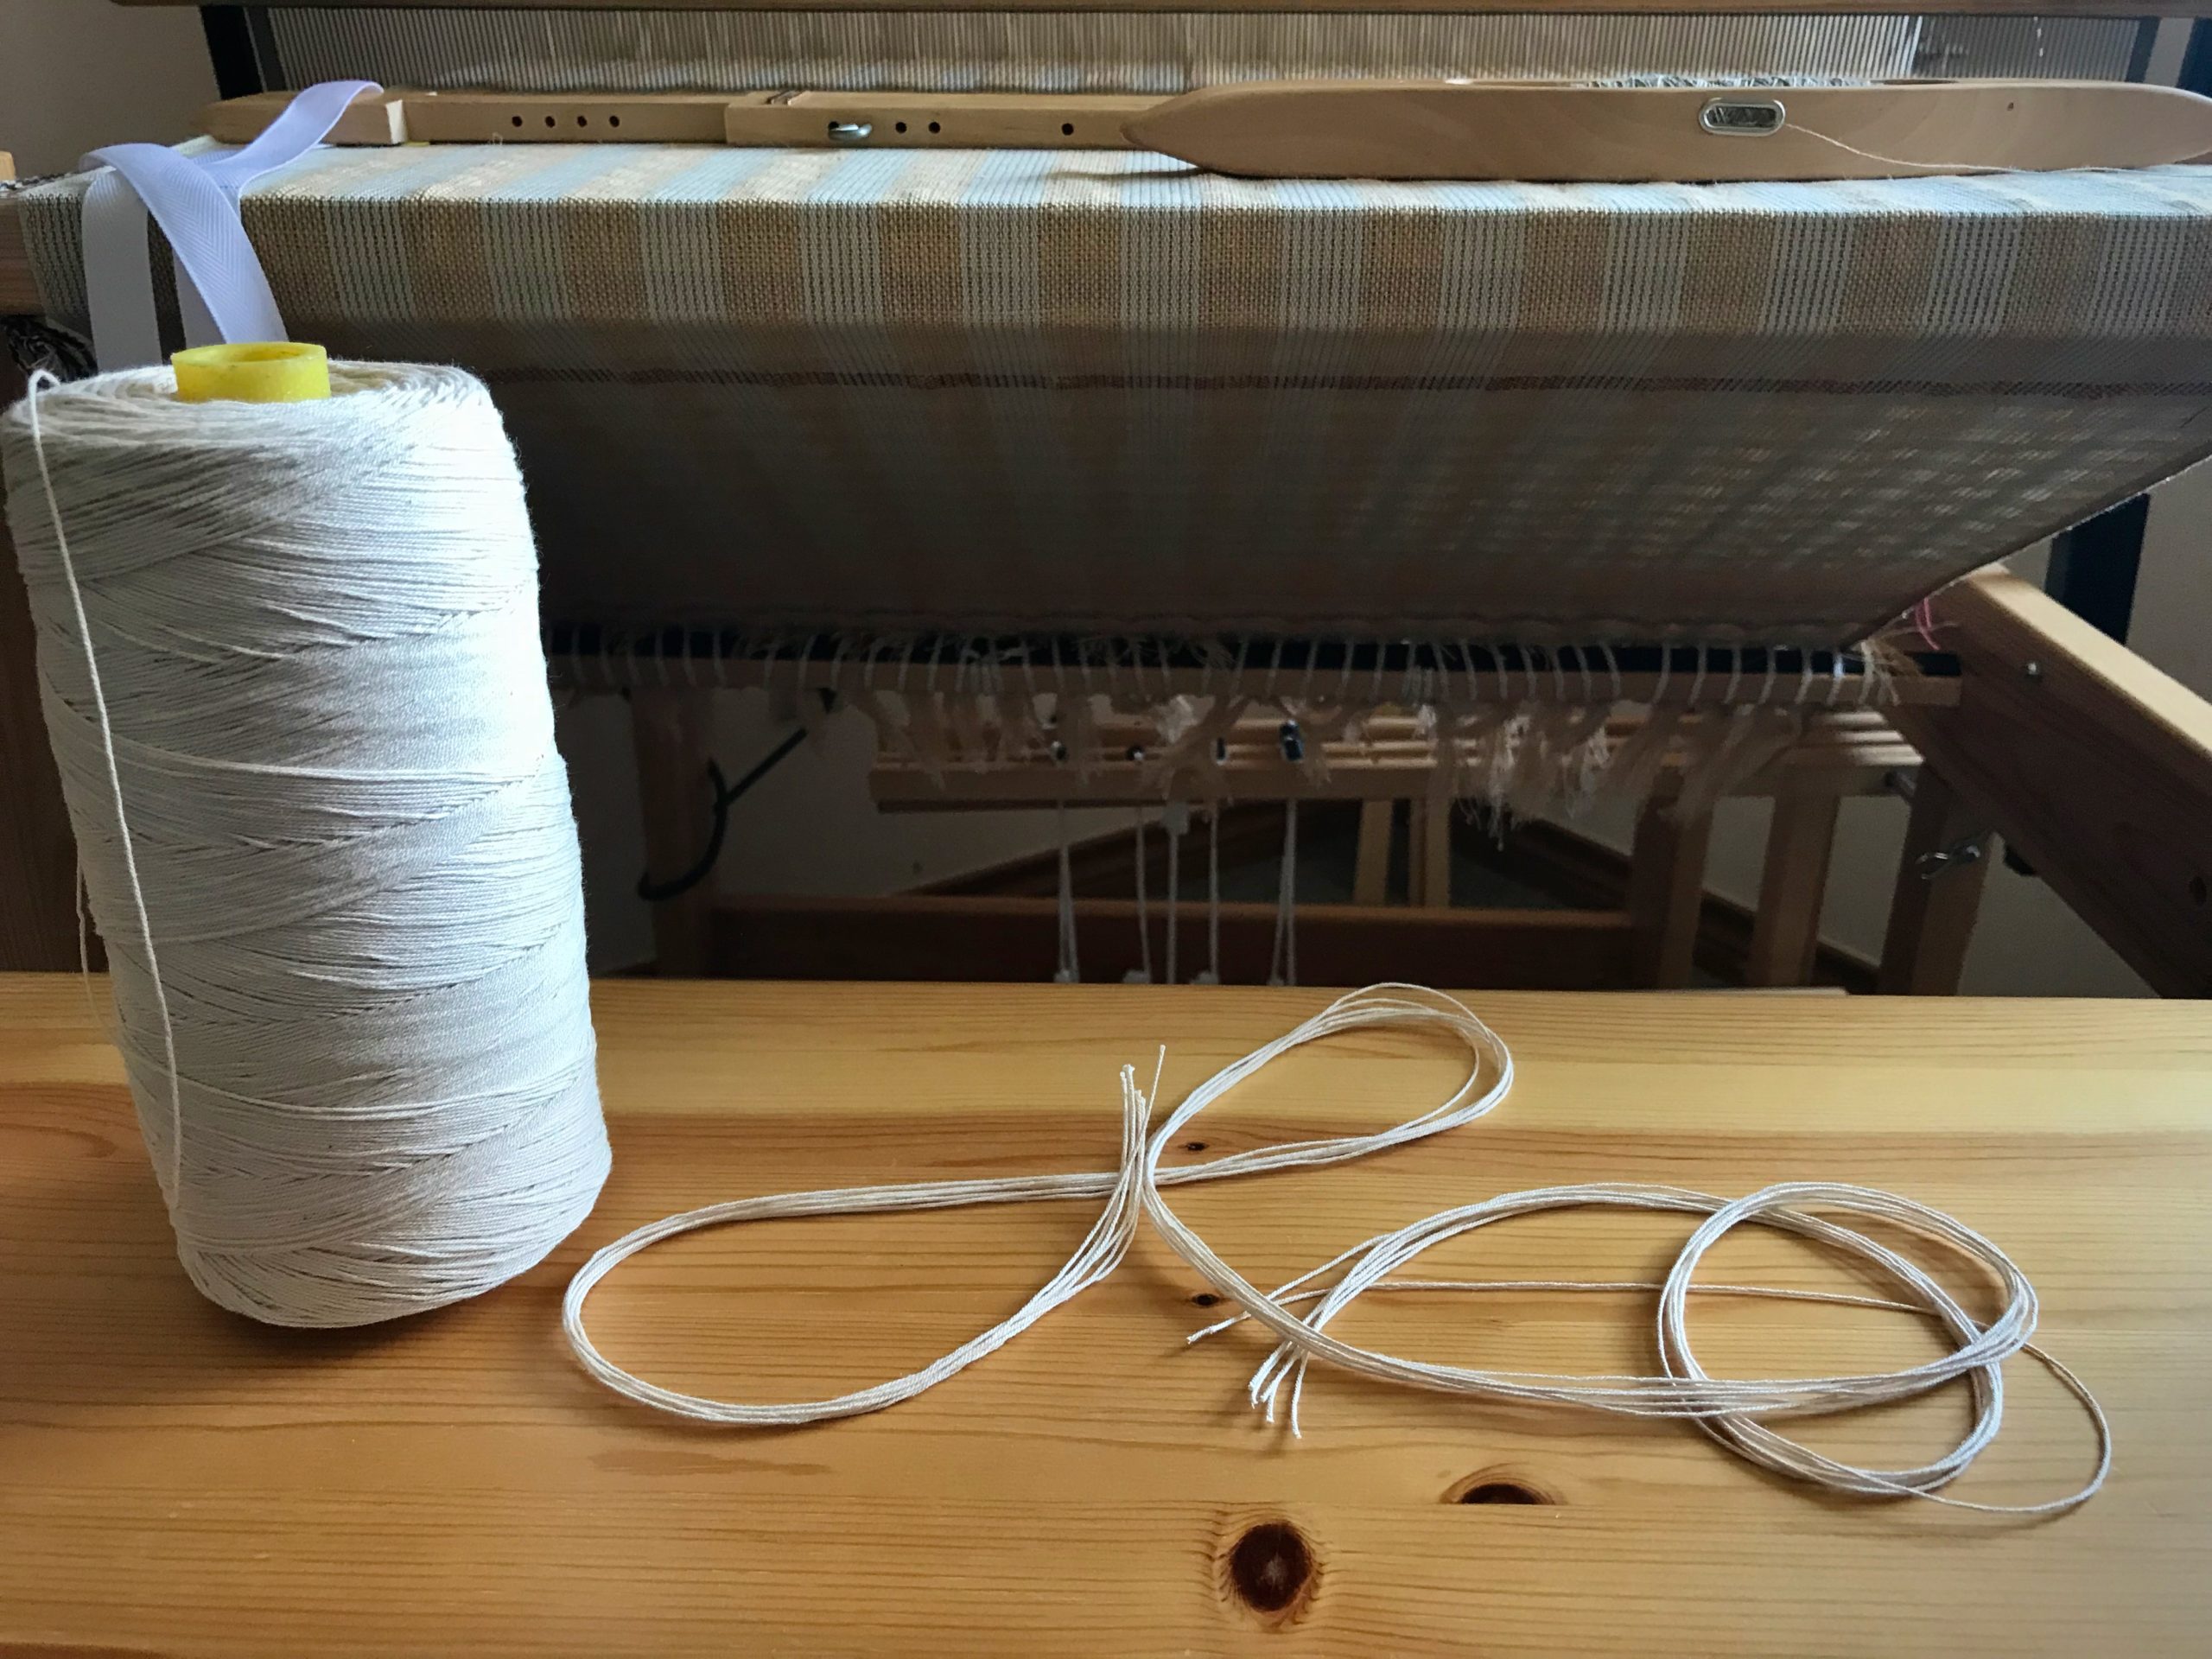
All tied up and ready to go! When this project is finished I will wind up these retaining cords on an empty tube and re-use them for the next wide warp on the Julia.
Continue weaving with one less thing to think about.
45 minutes: Time it took to reposition heddles that had slipped off a few shafts and were in a mess because I didn’t notice it immediately. Less than 10 minutes:Time it took to cut string and tie retaining cords on 4 upper shaft bars and 4 lower shaft bars.
‘Nuff said.
May you take the time to do what needs to be done.
I have good reasons for cutting off this first double-binding rag rug before proceeding with the rest of the warp. This pause and reset ensures happy weaving to the end. Cutting off gives me a fresh start for the next rug.
Reasons for cutting off rag rug before end of warp
Uneven warp tension. I can improve the warp by tying back on.
Large rag rag. I can get a tighter warp tension by removing the rug’s bulk from the cloth beam.
New design. It helps me to see the completed rug before starting the next one, since this is a brand-new design.
Rug comes to an end with a red border/hem. A warp-thread header follows, and then a few rows of scrap header to help secure the weft until finishing knots are tied.
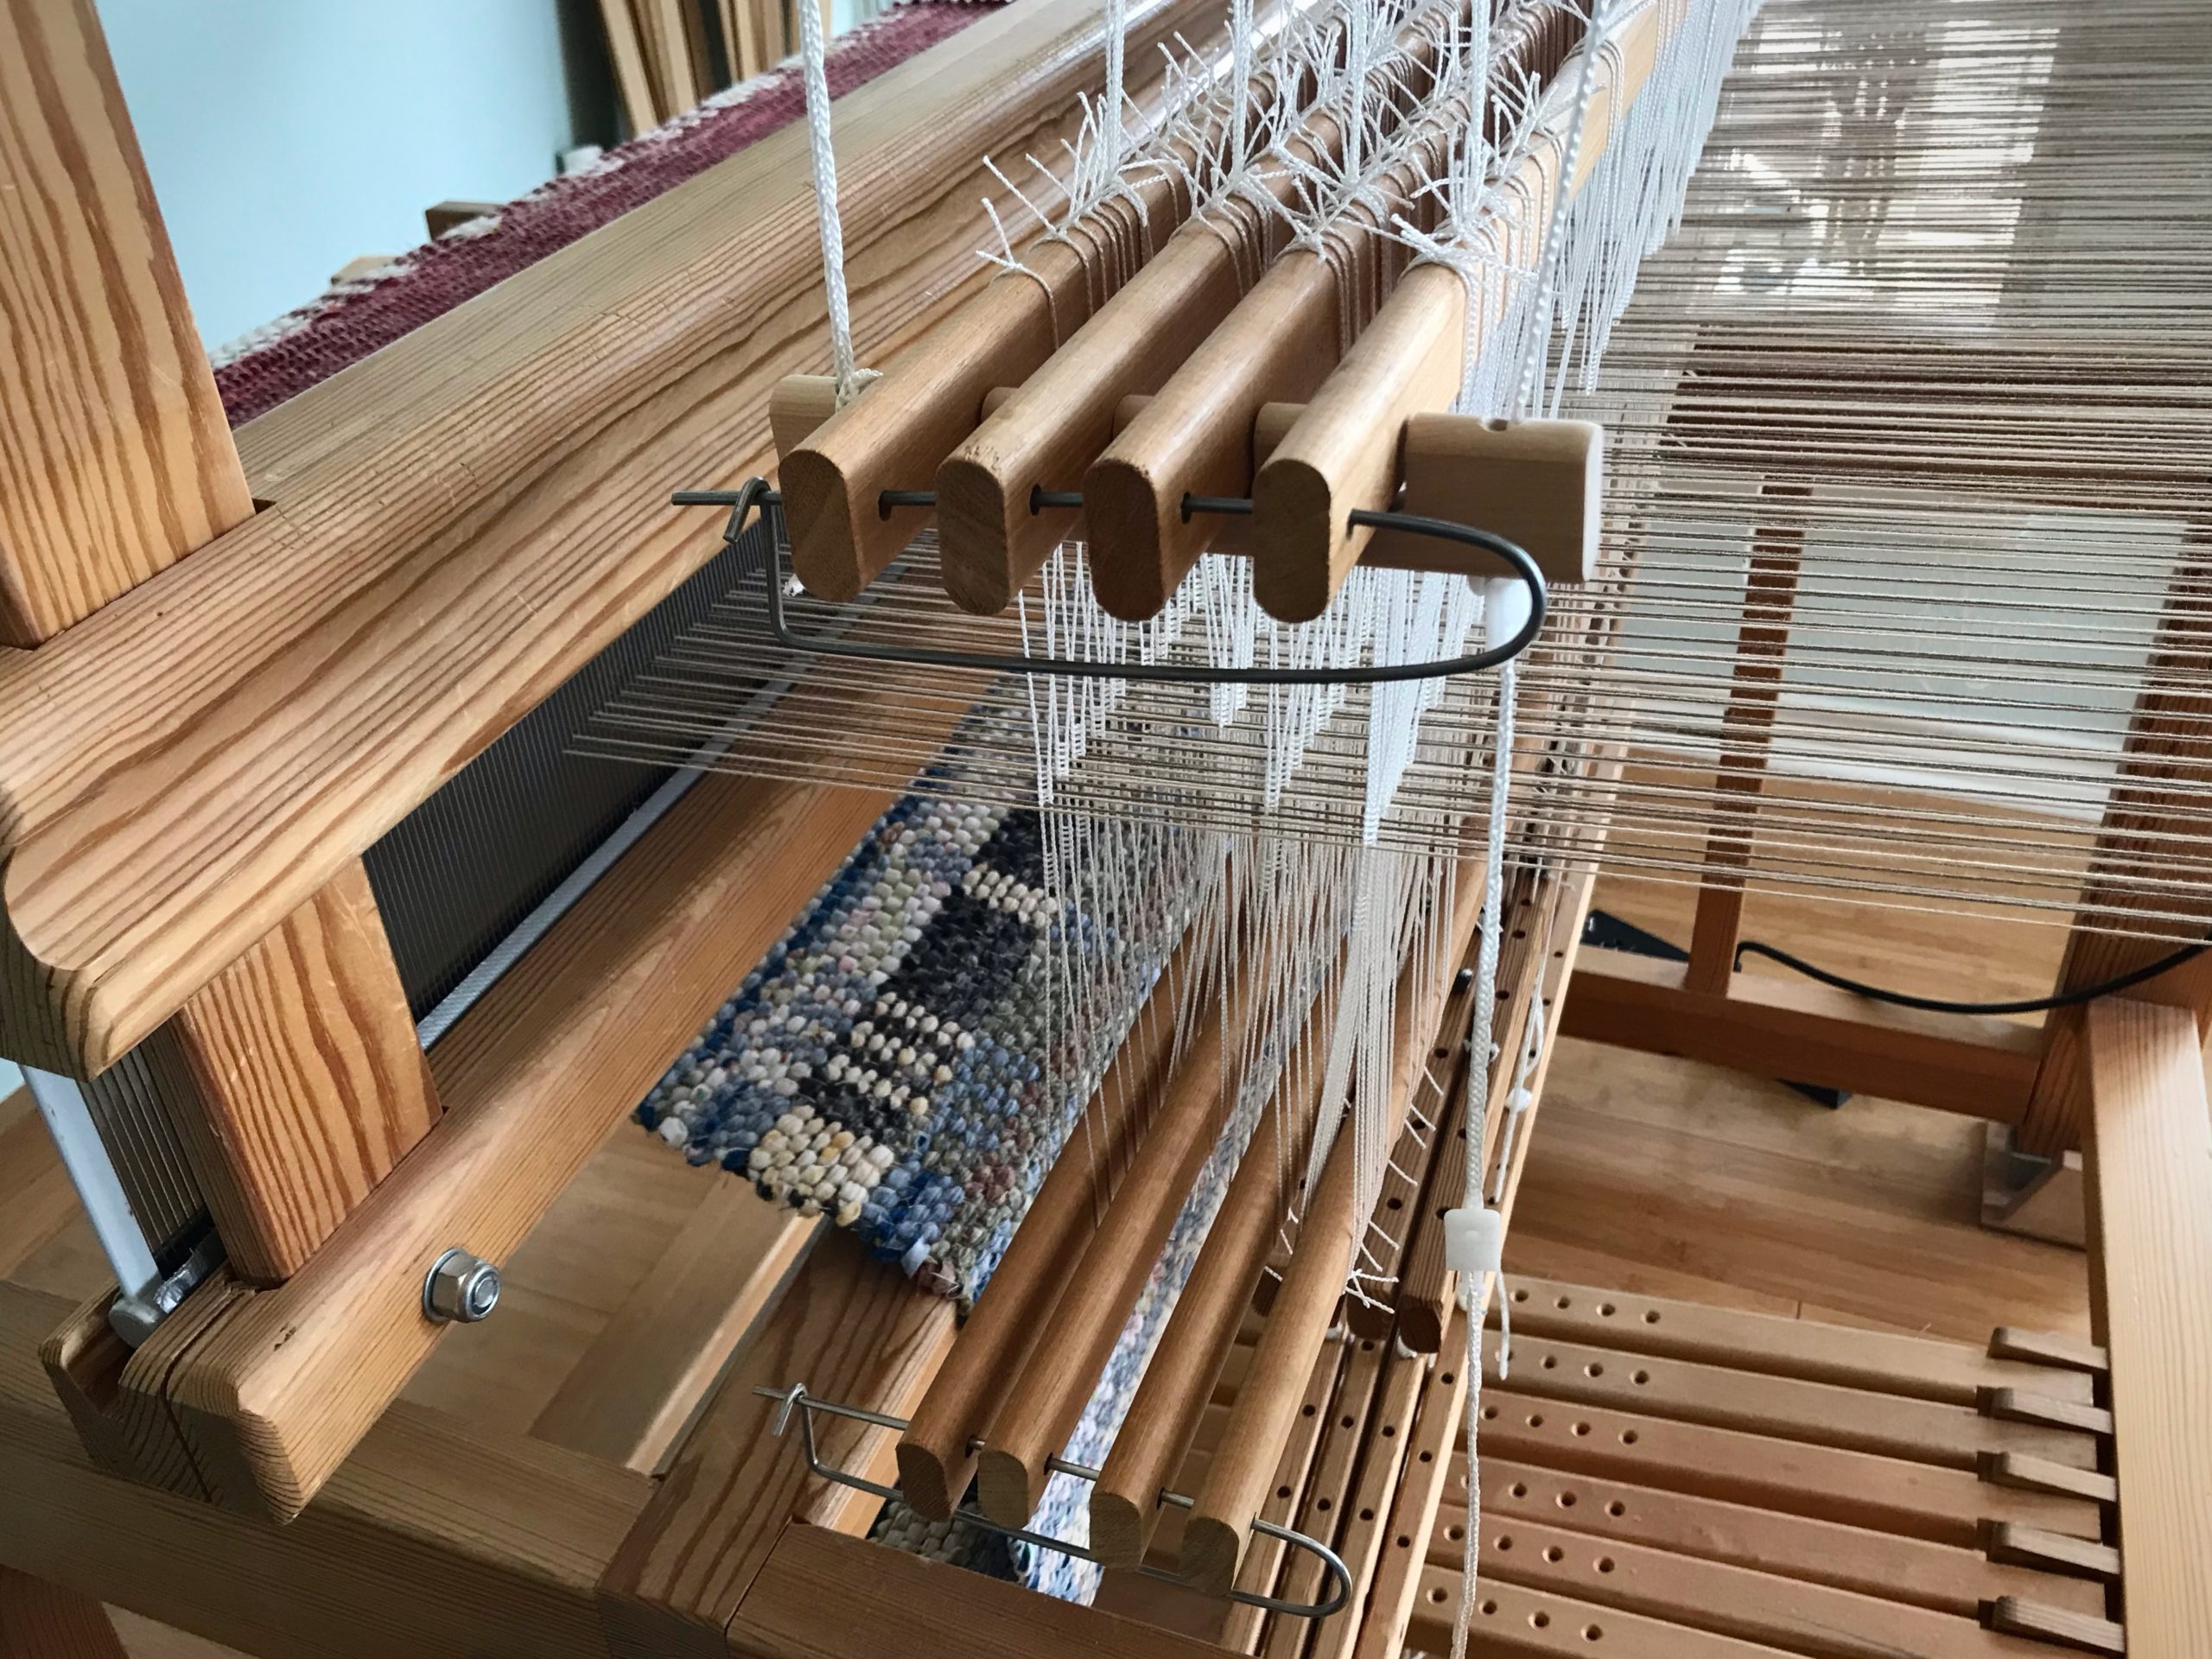
Steps for cutting off rag rug before end of warp (countermarch loom)
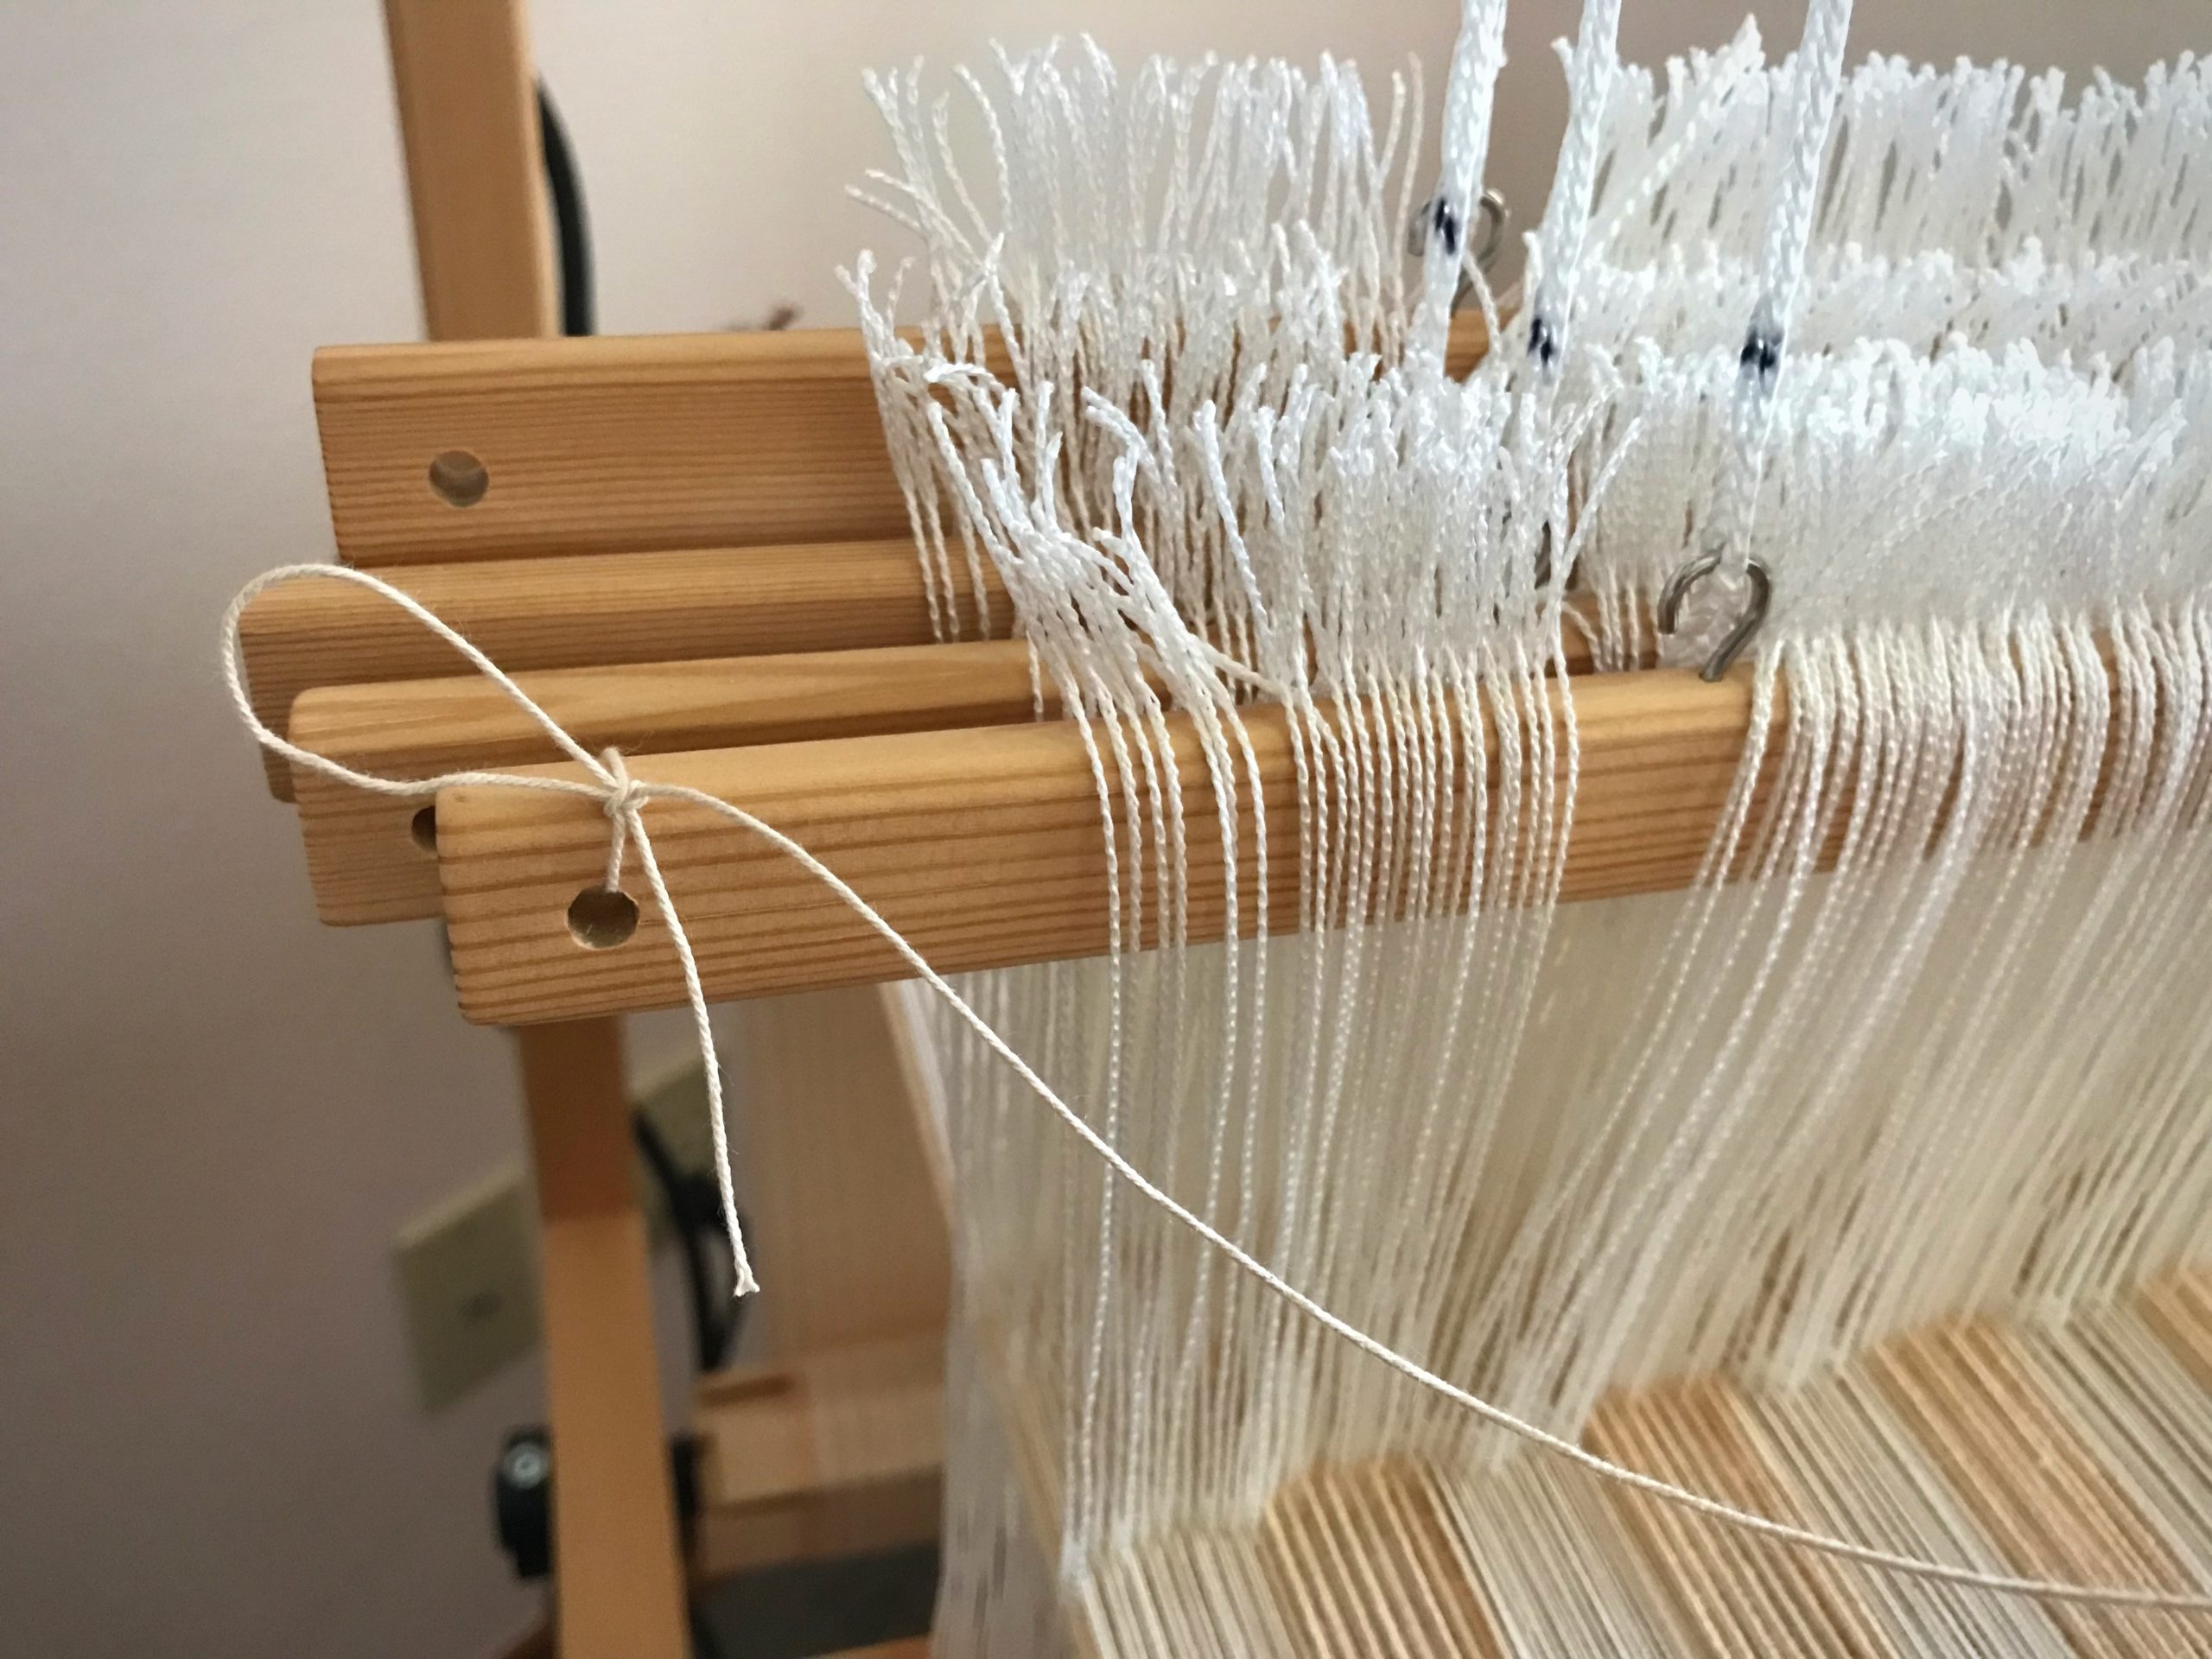
Tension on the warp is released at the back ratchet and front ratchet.
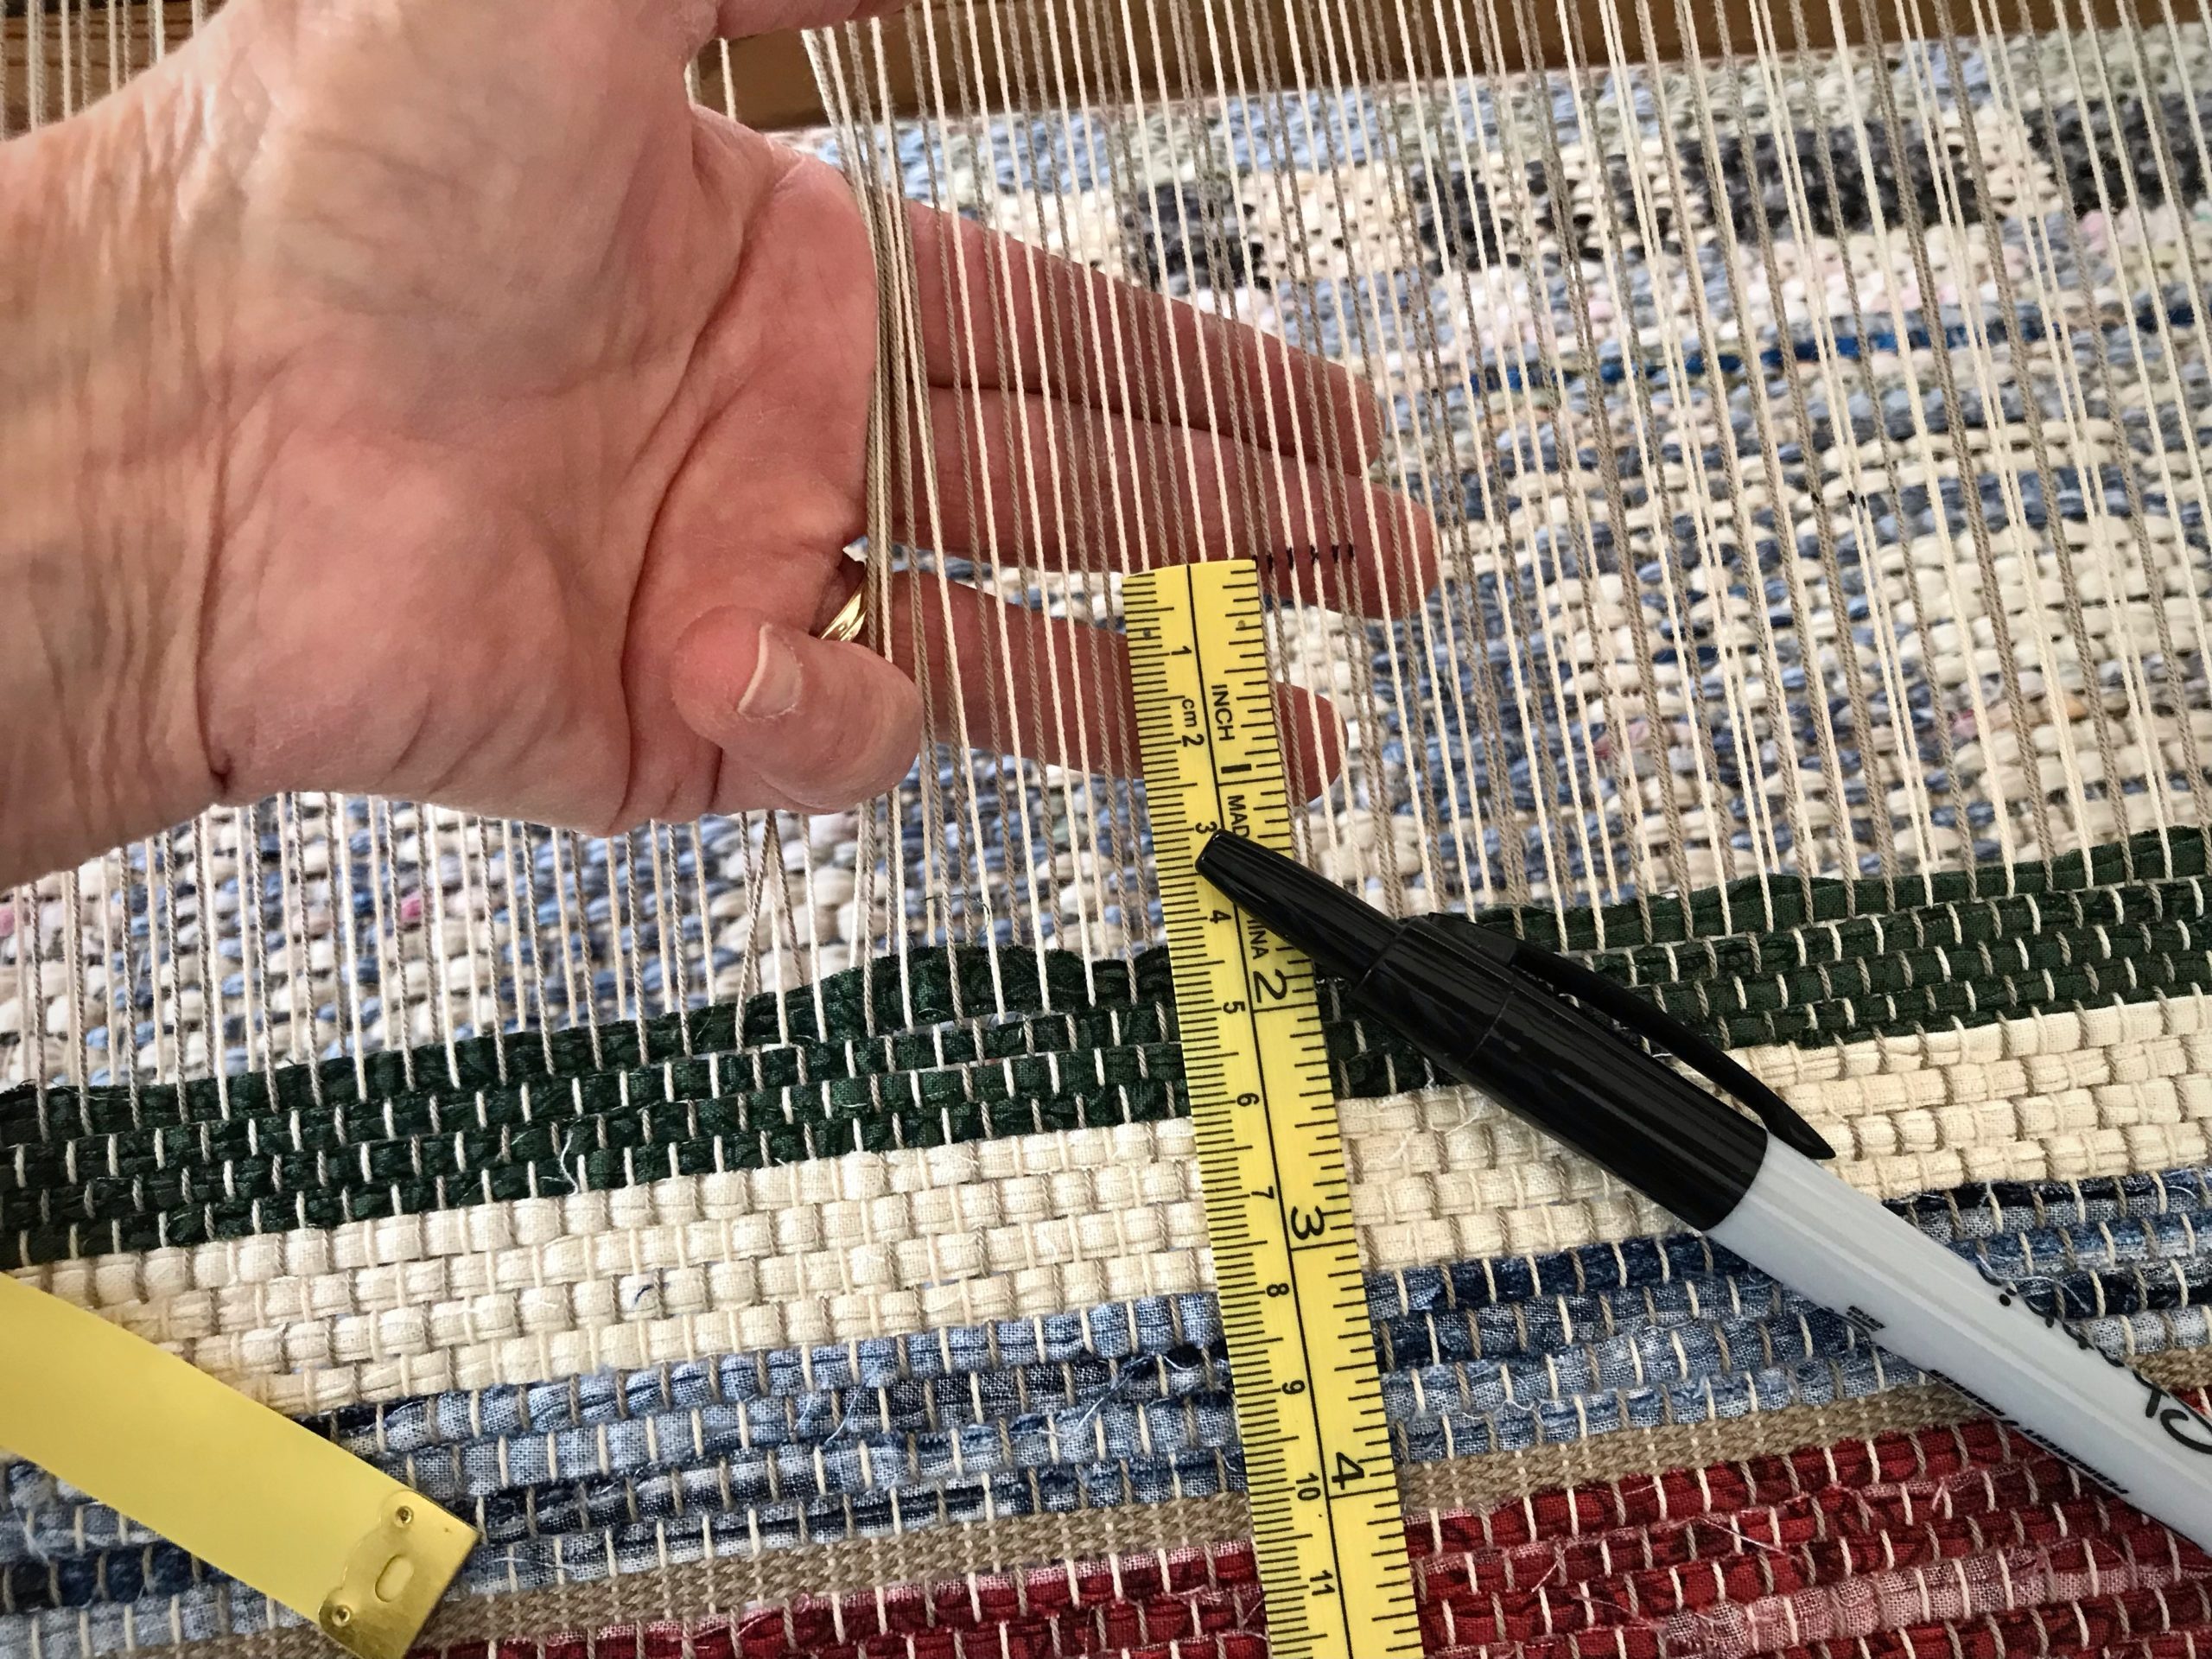
Mark a cutting line across the warp with a black marker. Allow at least 10 centimeters (4 inches) beyond the rug’s warp-thread header for tying knots later that will secure the weft.
Mark a cutting line across the warp. Leave enough warp at the end of the rug to tie overhand knots to secure the weft.
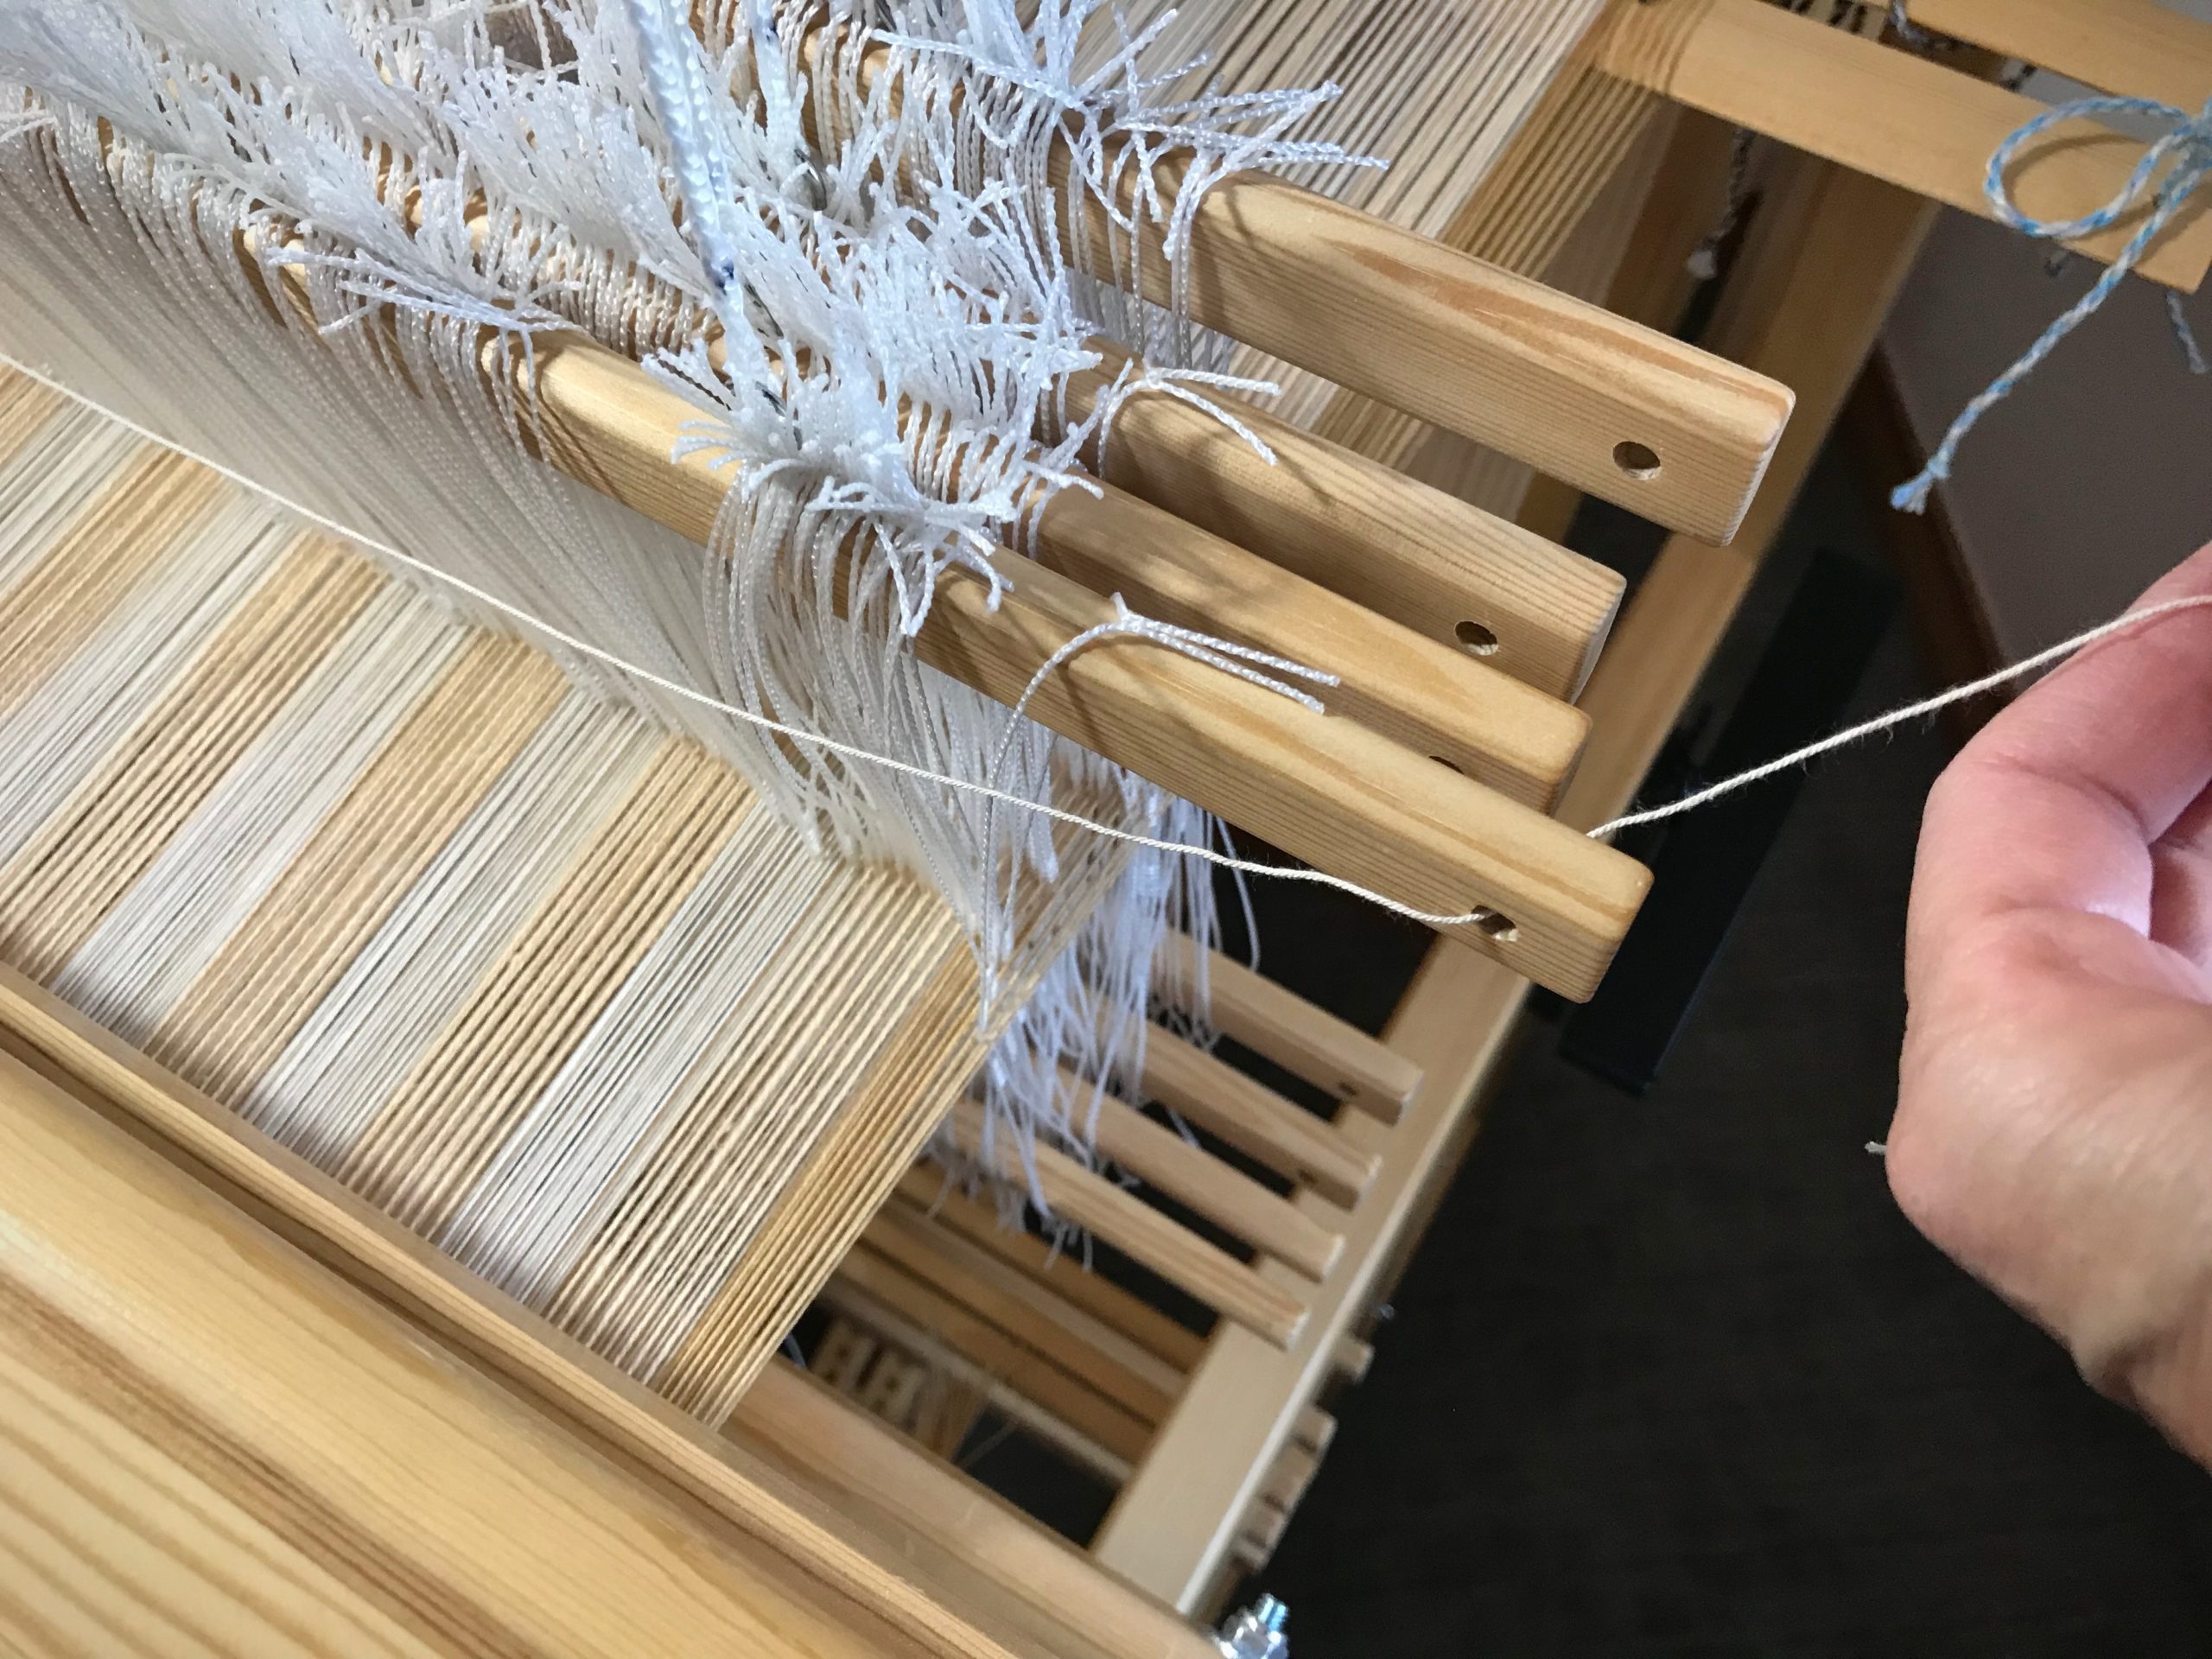
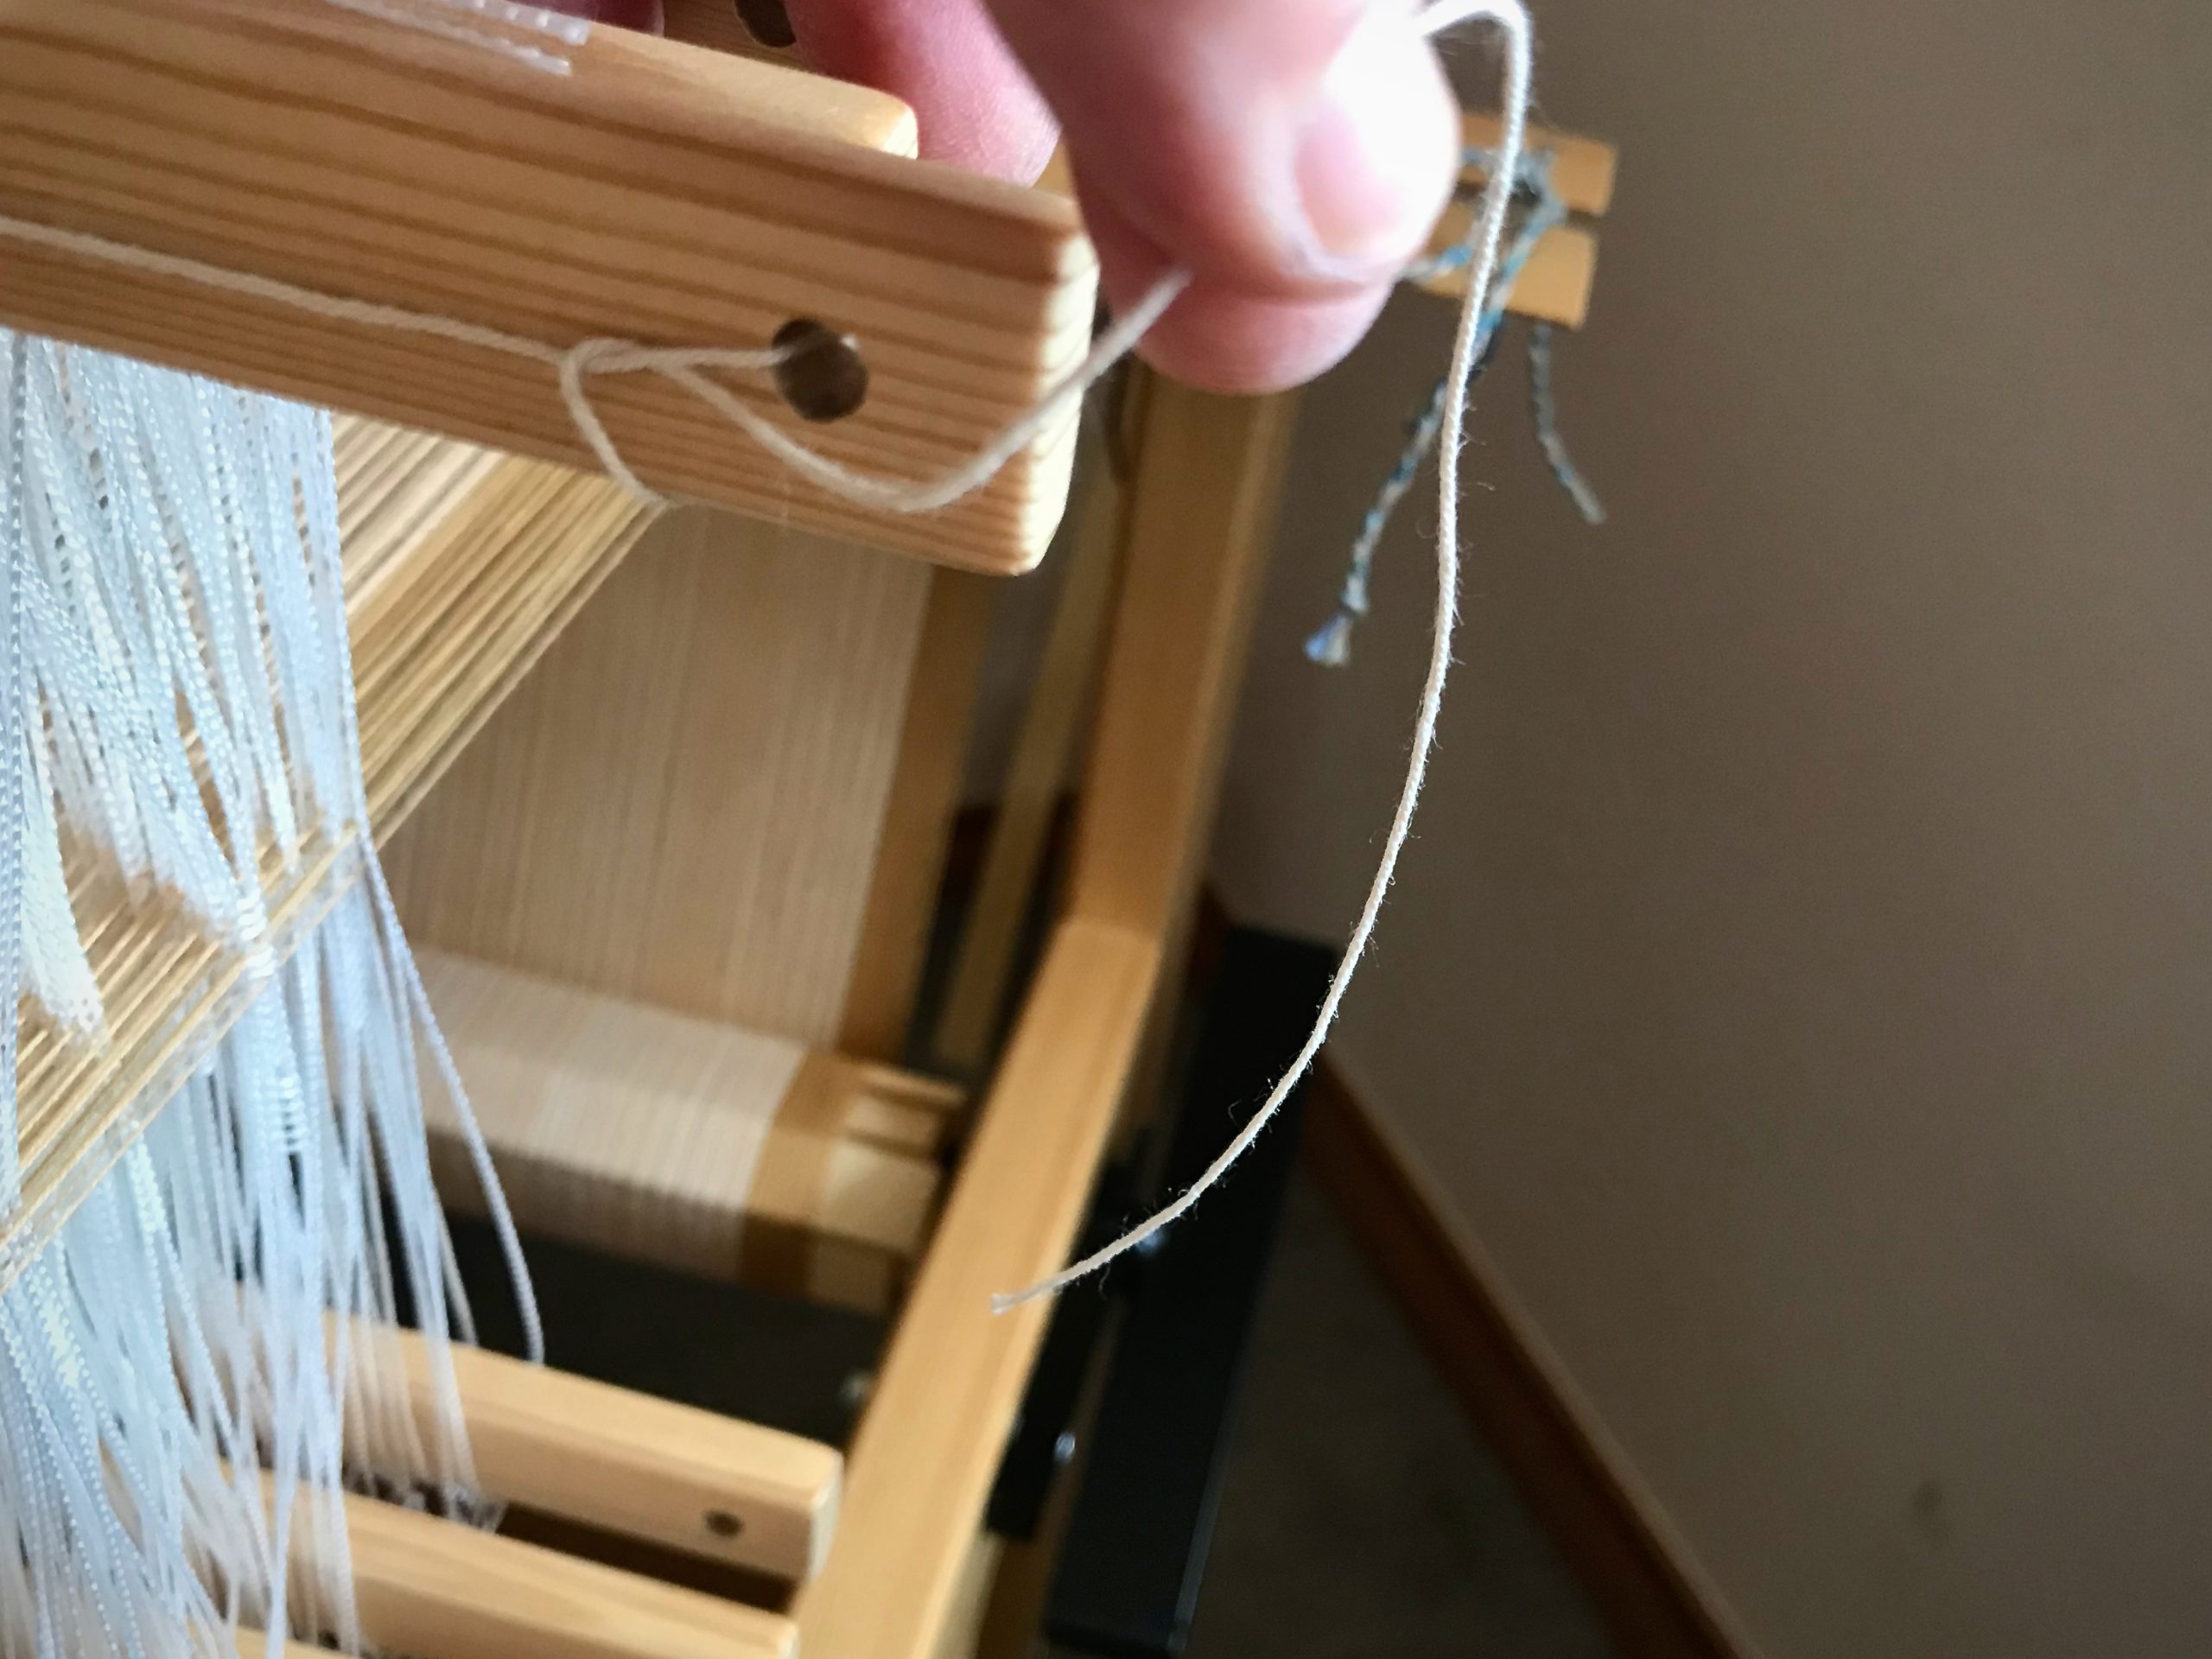
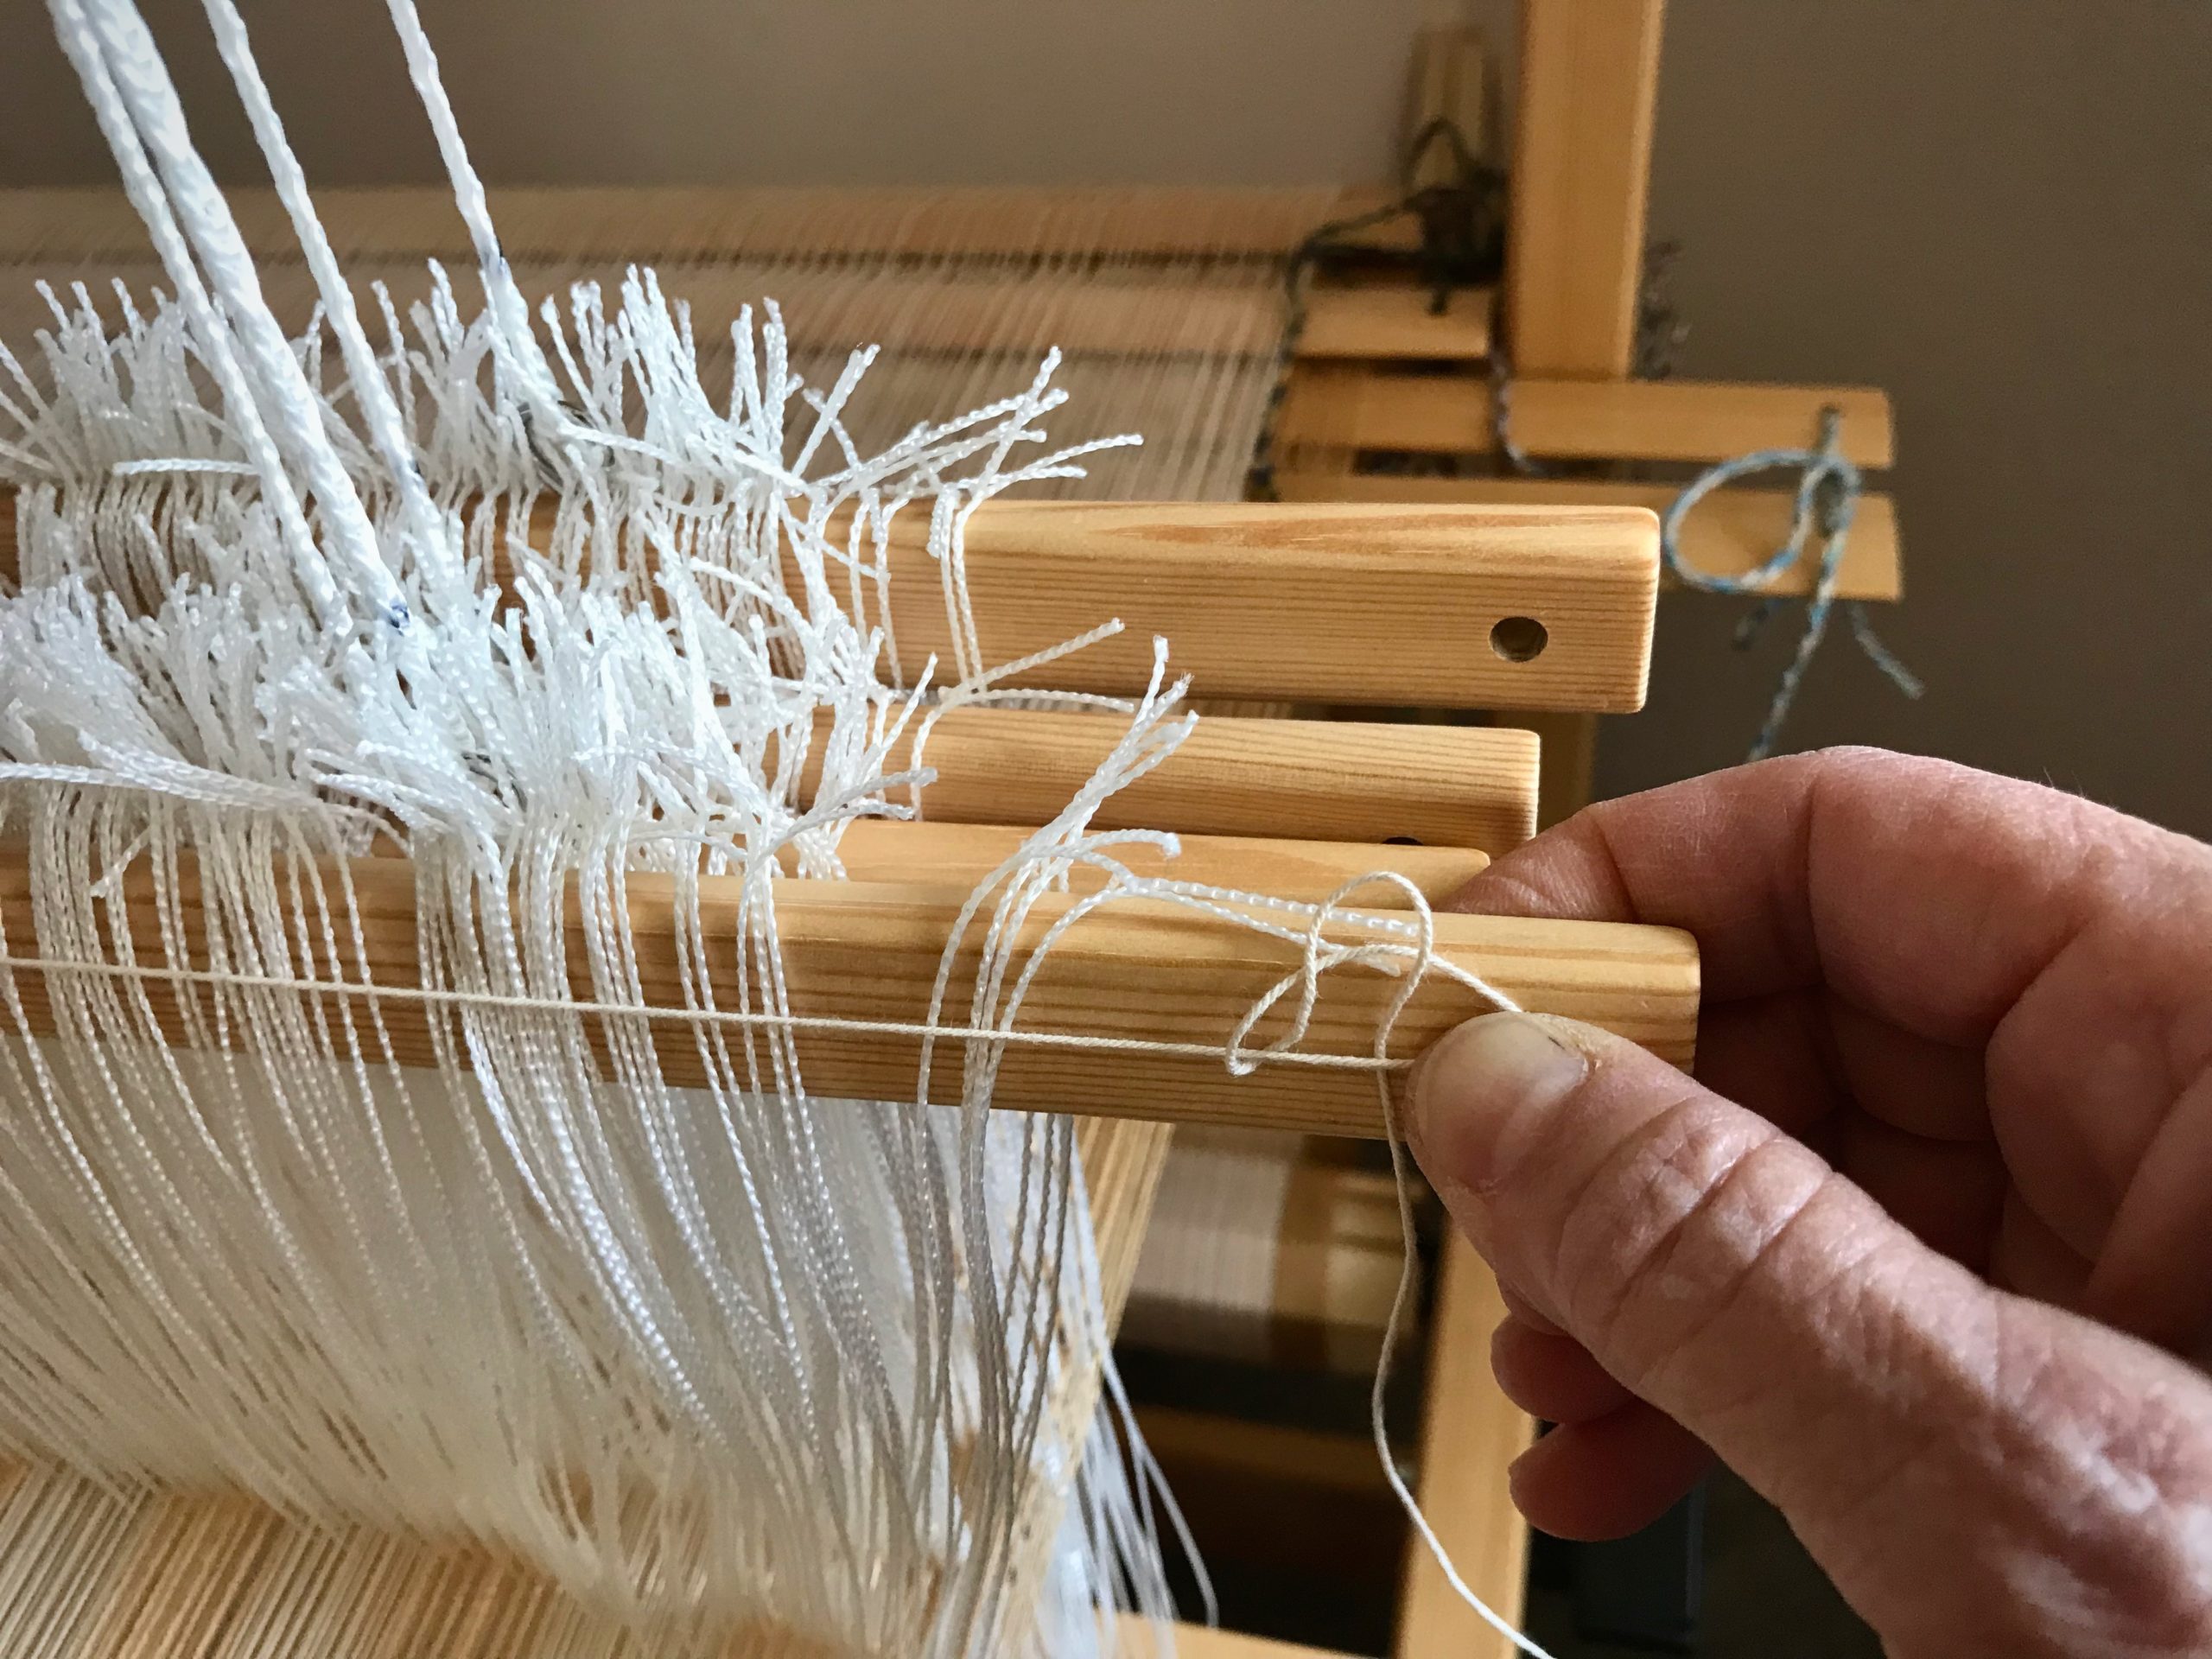
With tying back on in mind, cut one group of ends and skip the next group of ends. Continue across the warp, alternating cut and uncut groups of ends. Tie groups of cut ends in slipknots as you go.
By spacing out the cut ends, the weight of the rug is evenly distributed. There is less pulling and distortion while cutting off. At the same time I am preparing groups of ends for tying back on.
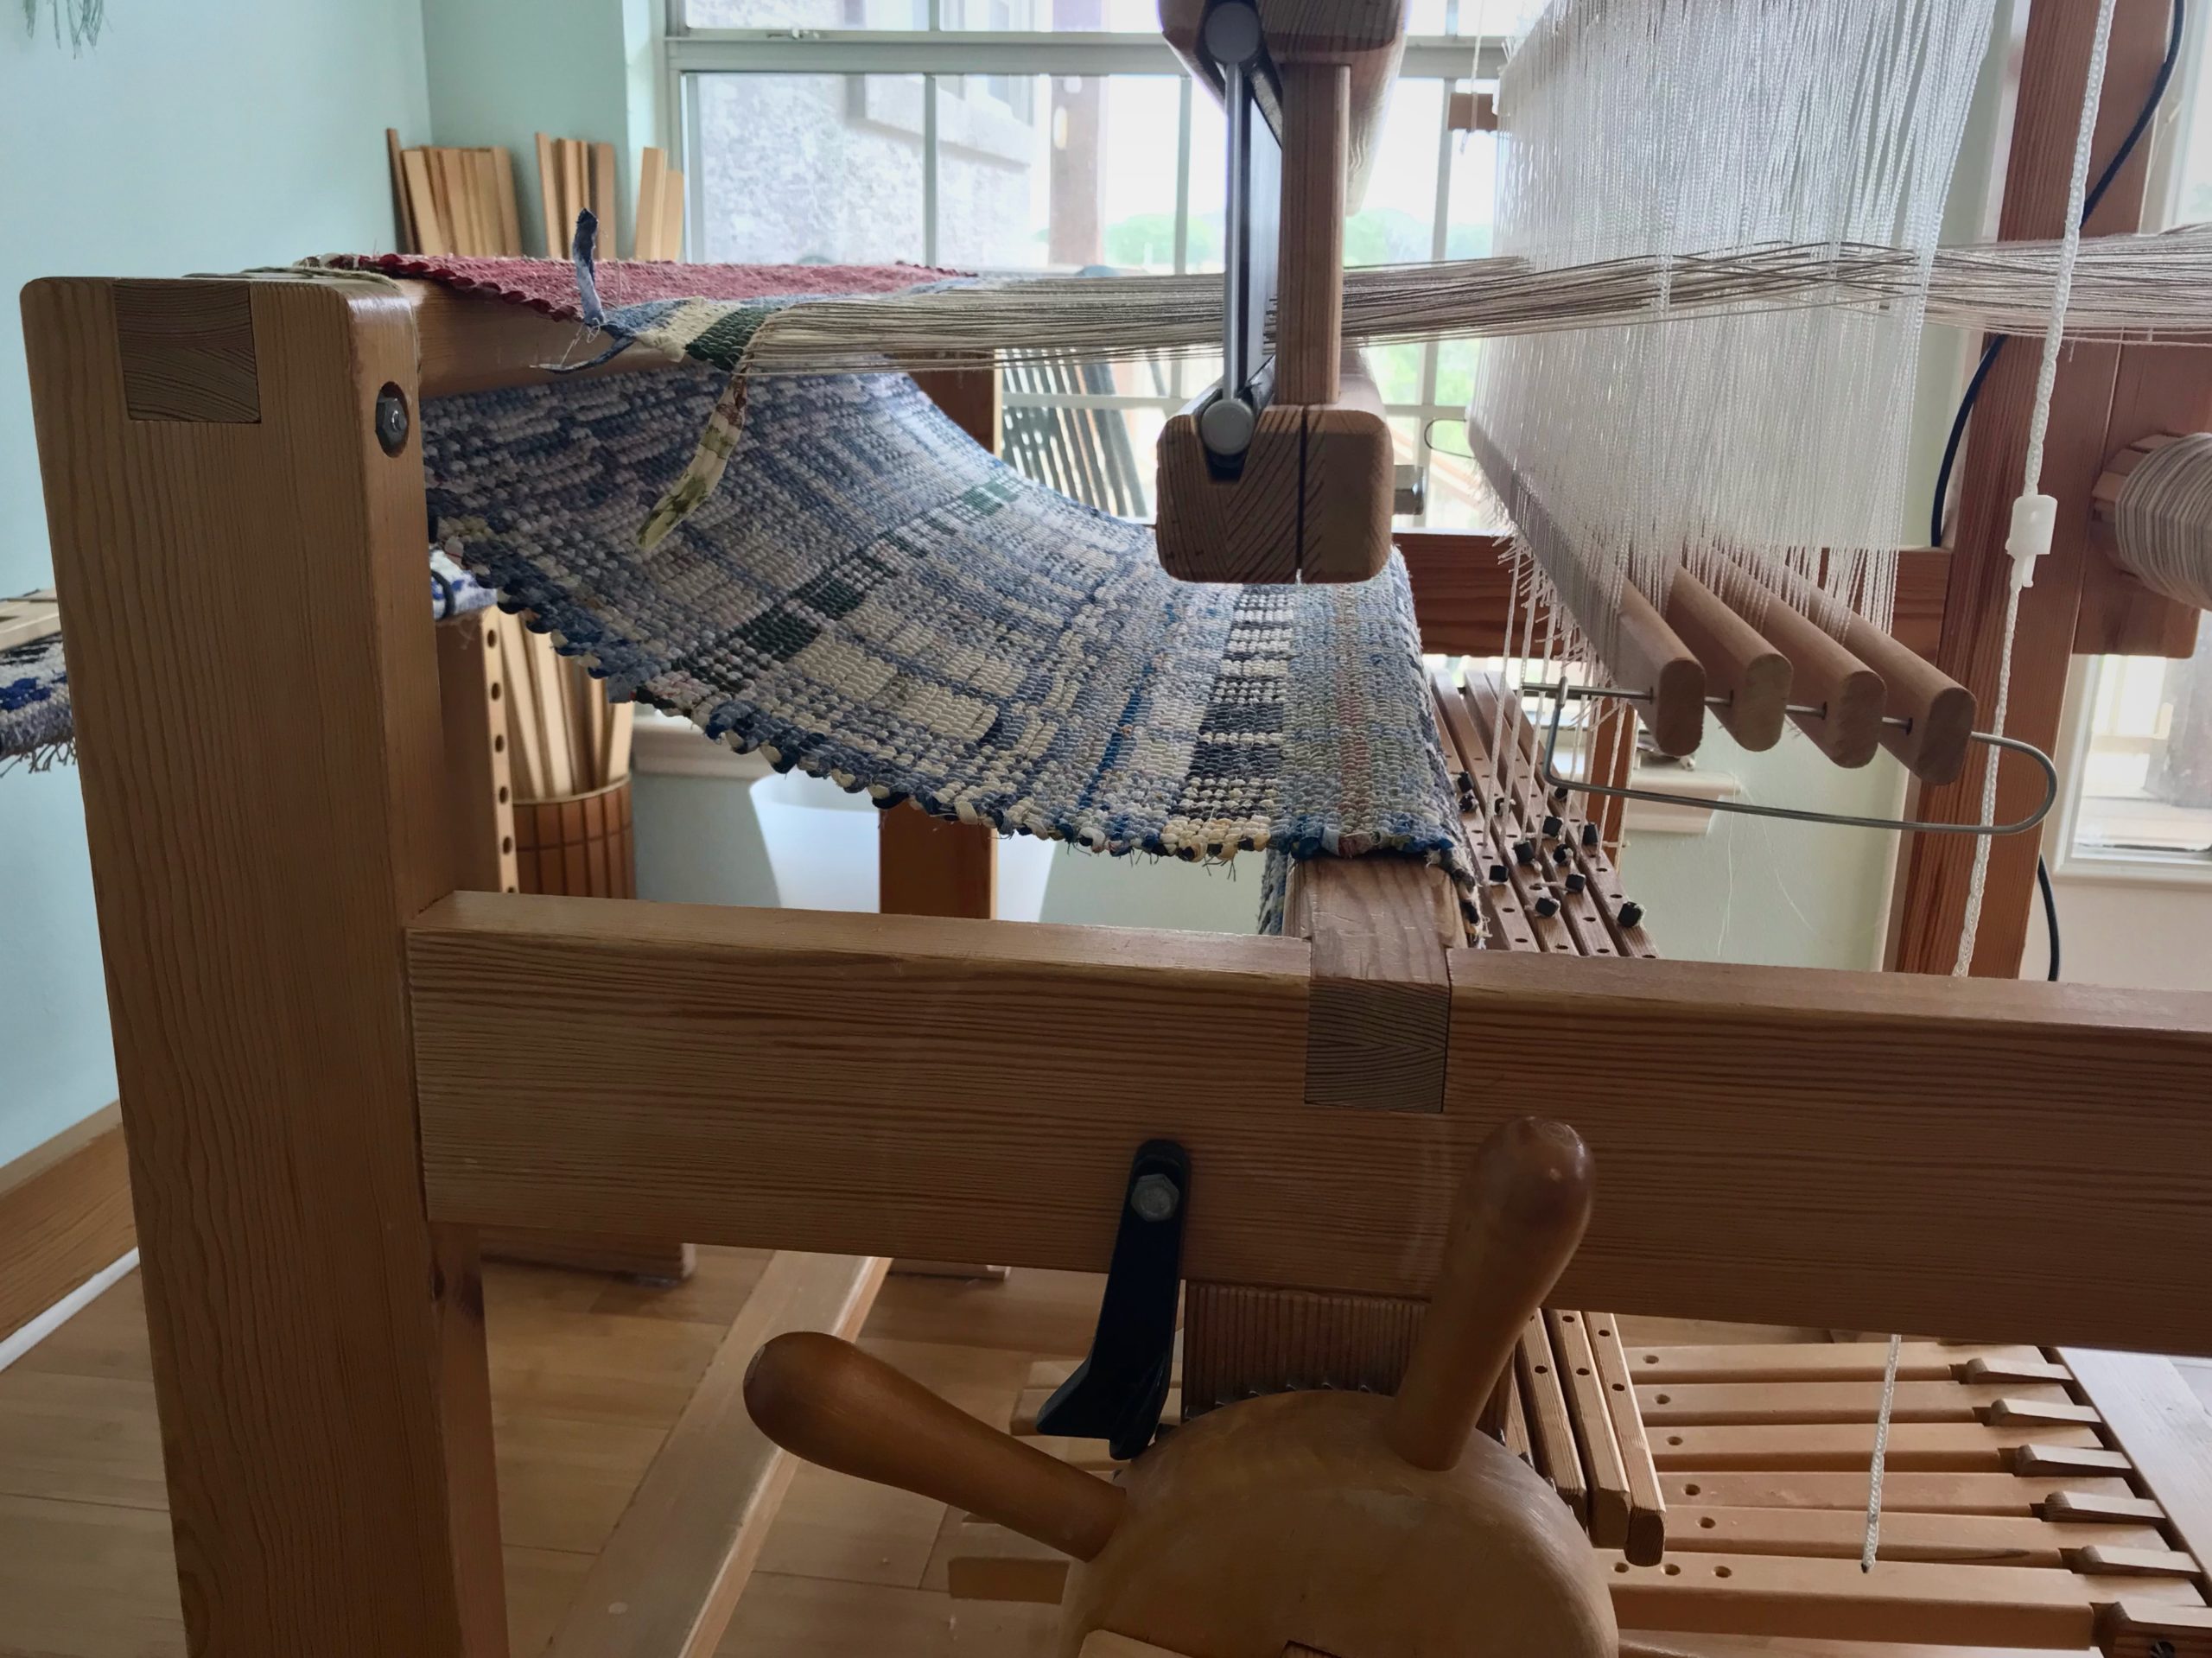
Make a second pass, cutting the remaining groups of ends, and tying them in slipknots.
Continue cutting off groups of ends.
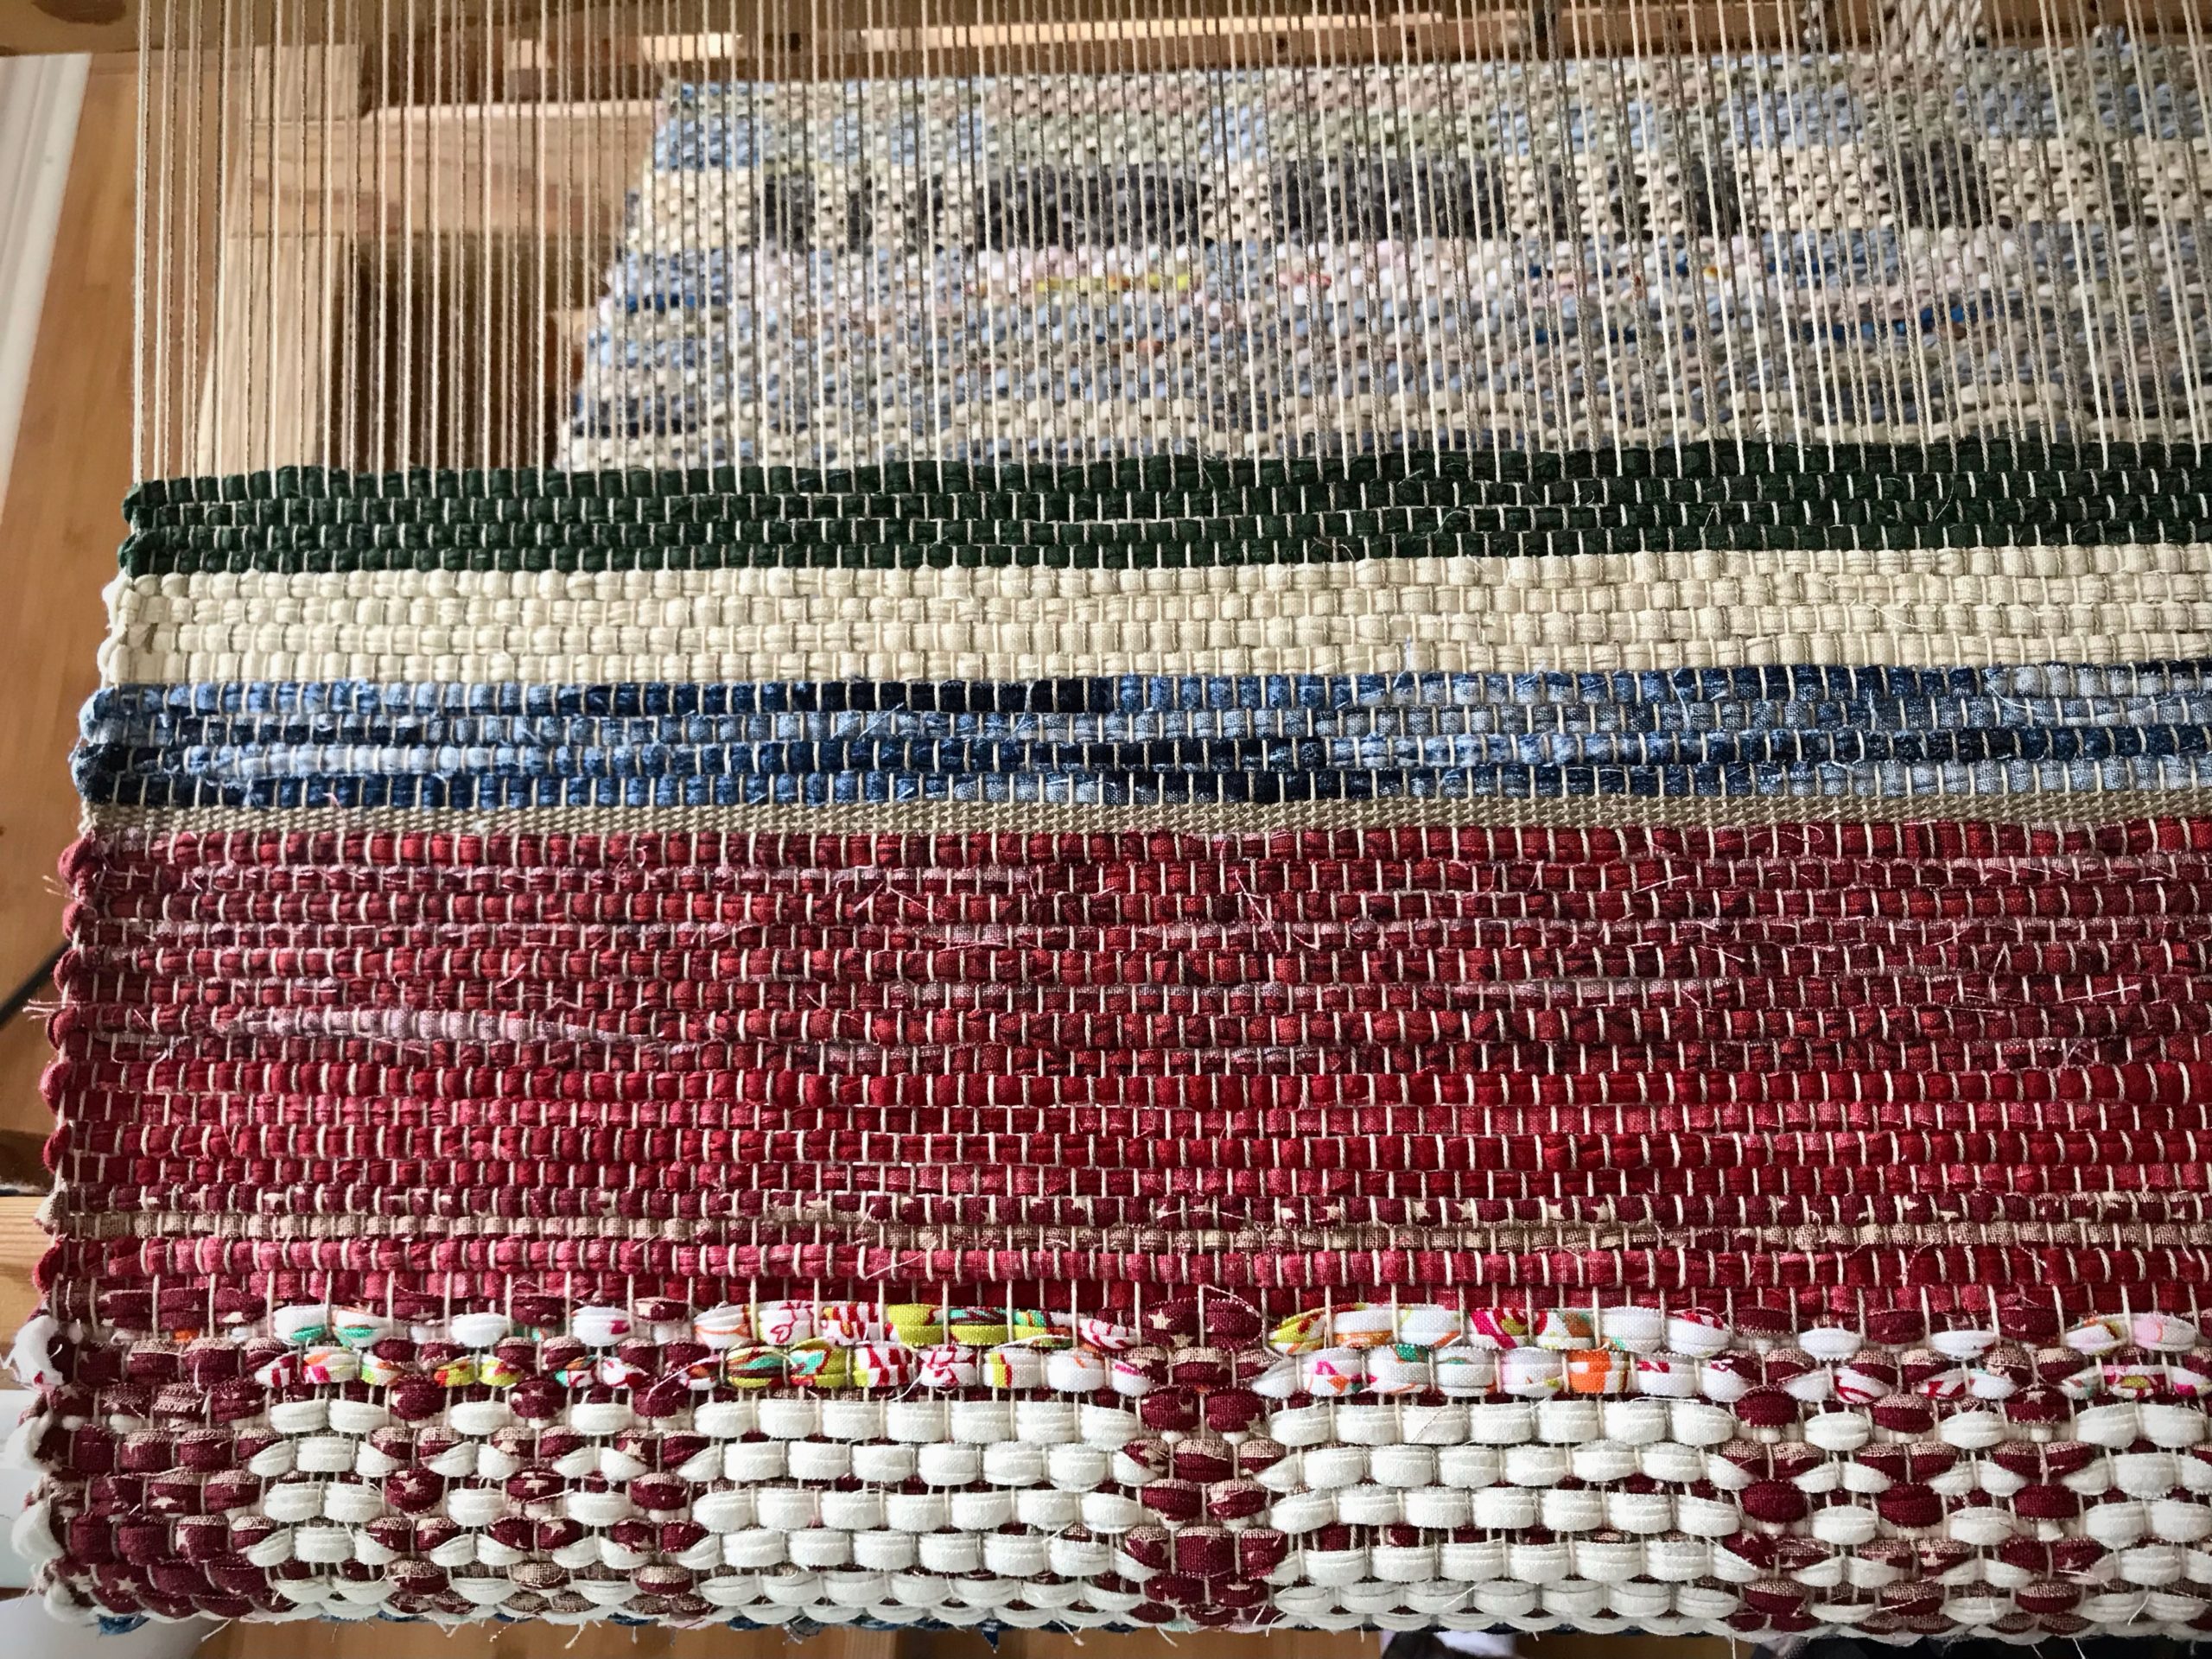
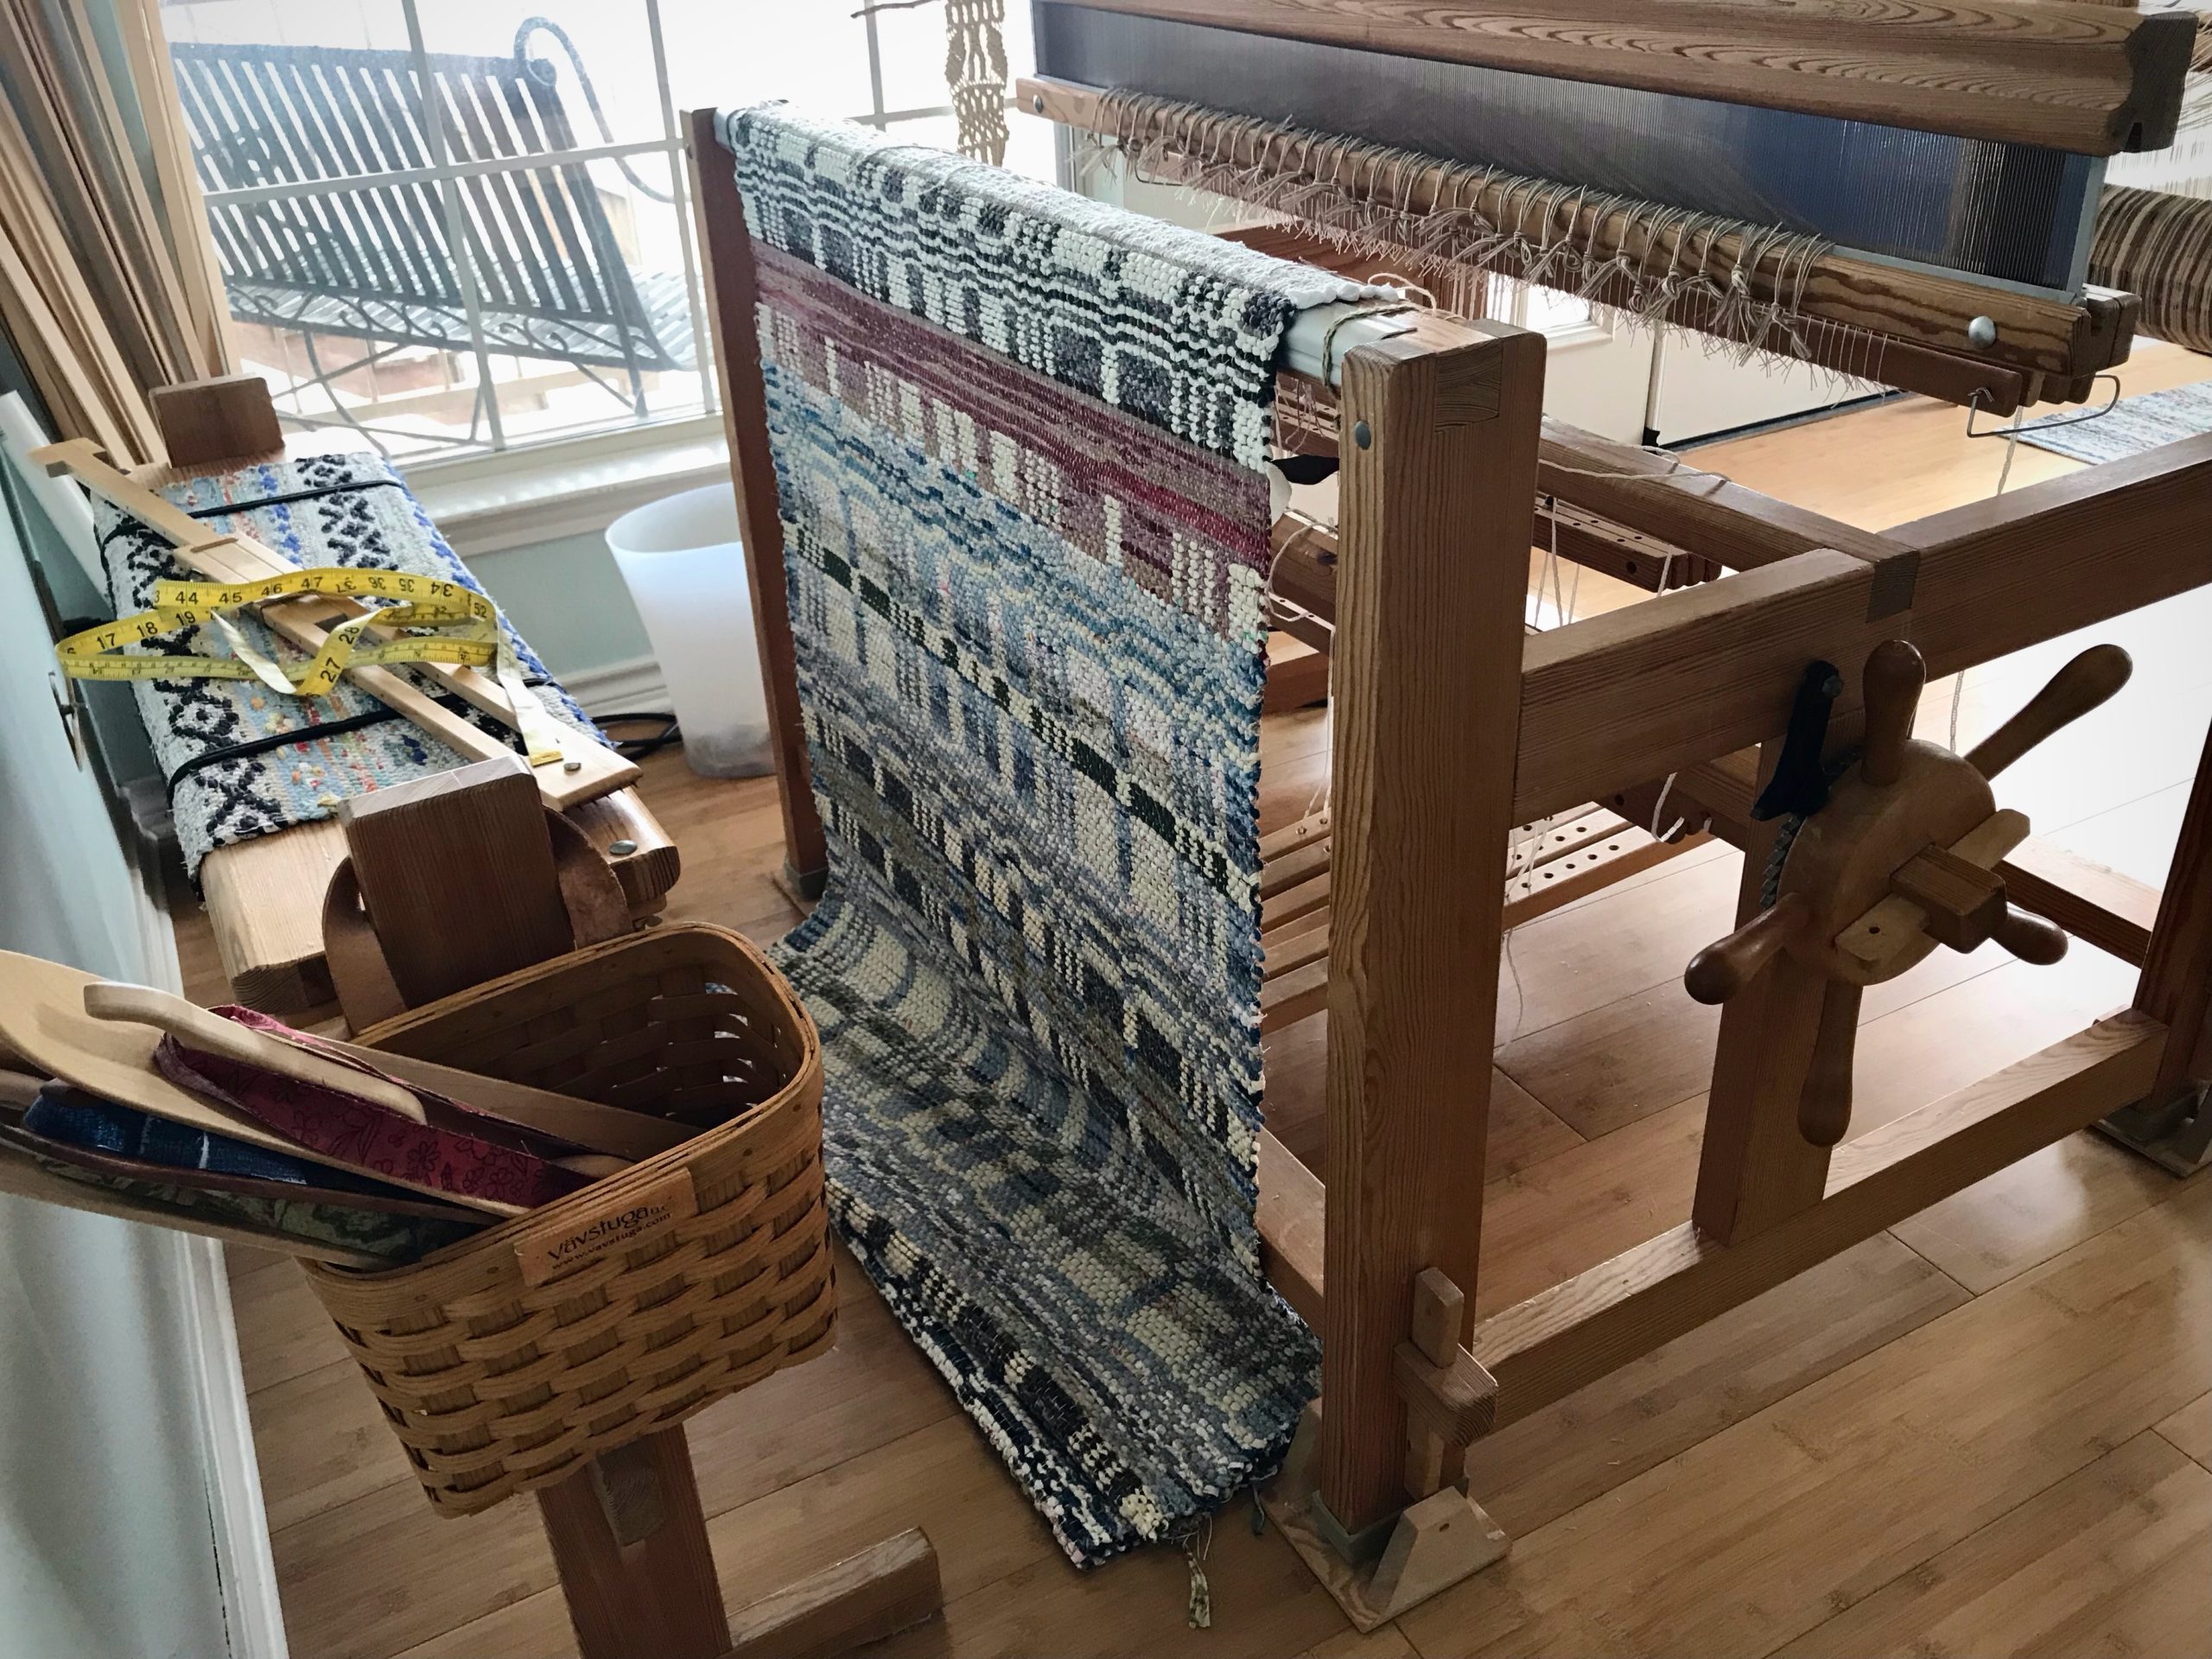
Unroll the rug from the cloth beam. Take a photograph.
First look at the back of the rug.
Lay the rug out on the floor. Ooh and aah.
Double-binding rag rug, ready for finishing and hemming! I let the rug rest on the floor for a couple days to let the warp and weft relax. Next step is to tie ends into overhand knots.
A warp is finished when the woven cloth has been taken to completion. At that point, the loom is free for a new warp. That is the rule I’ve given myself. If I ignore the rule and put on a new warp before its time, the unfinished cloth has a way of staying unfinished for too long.
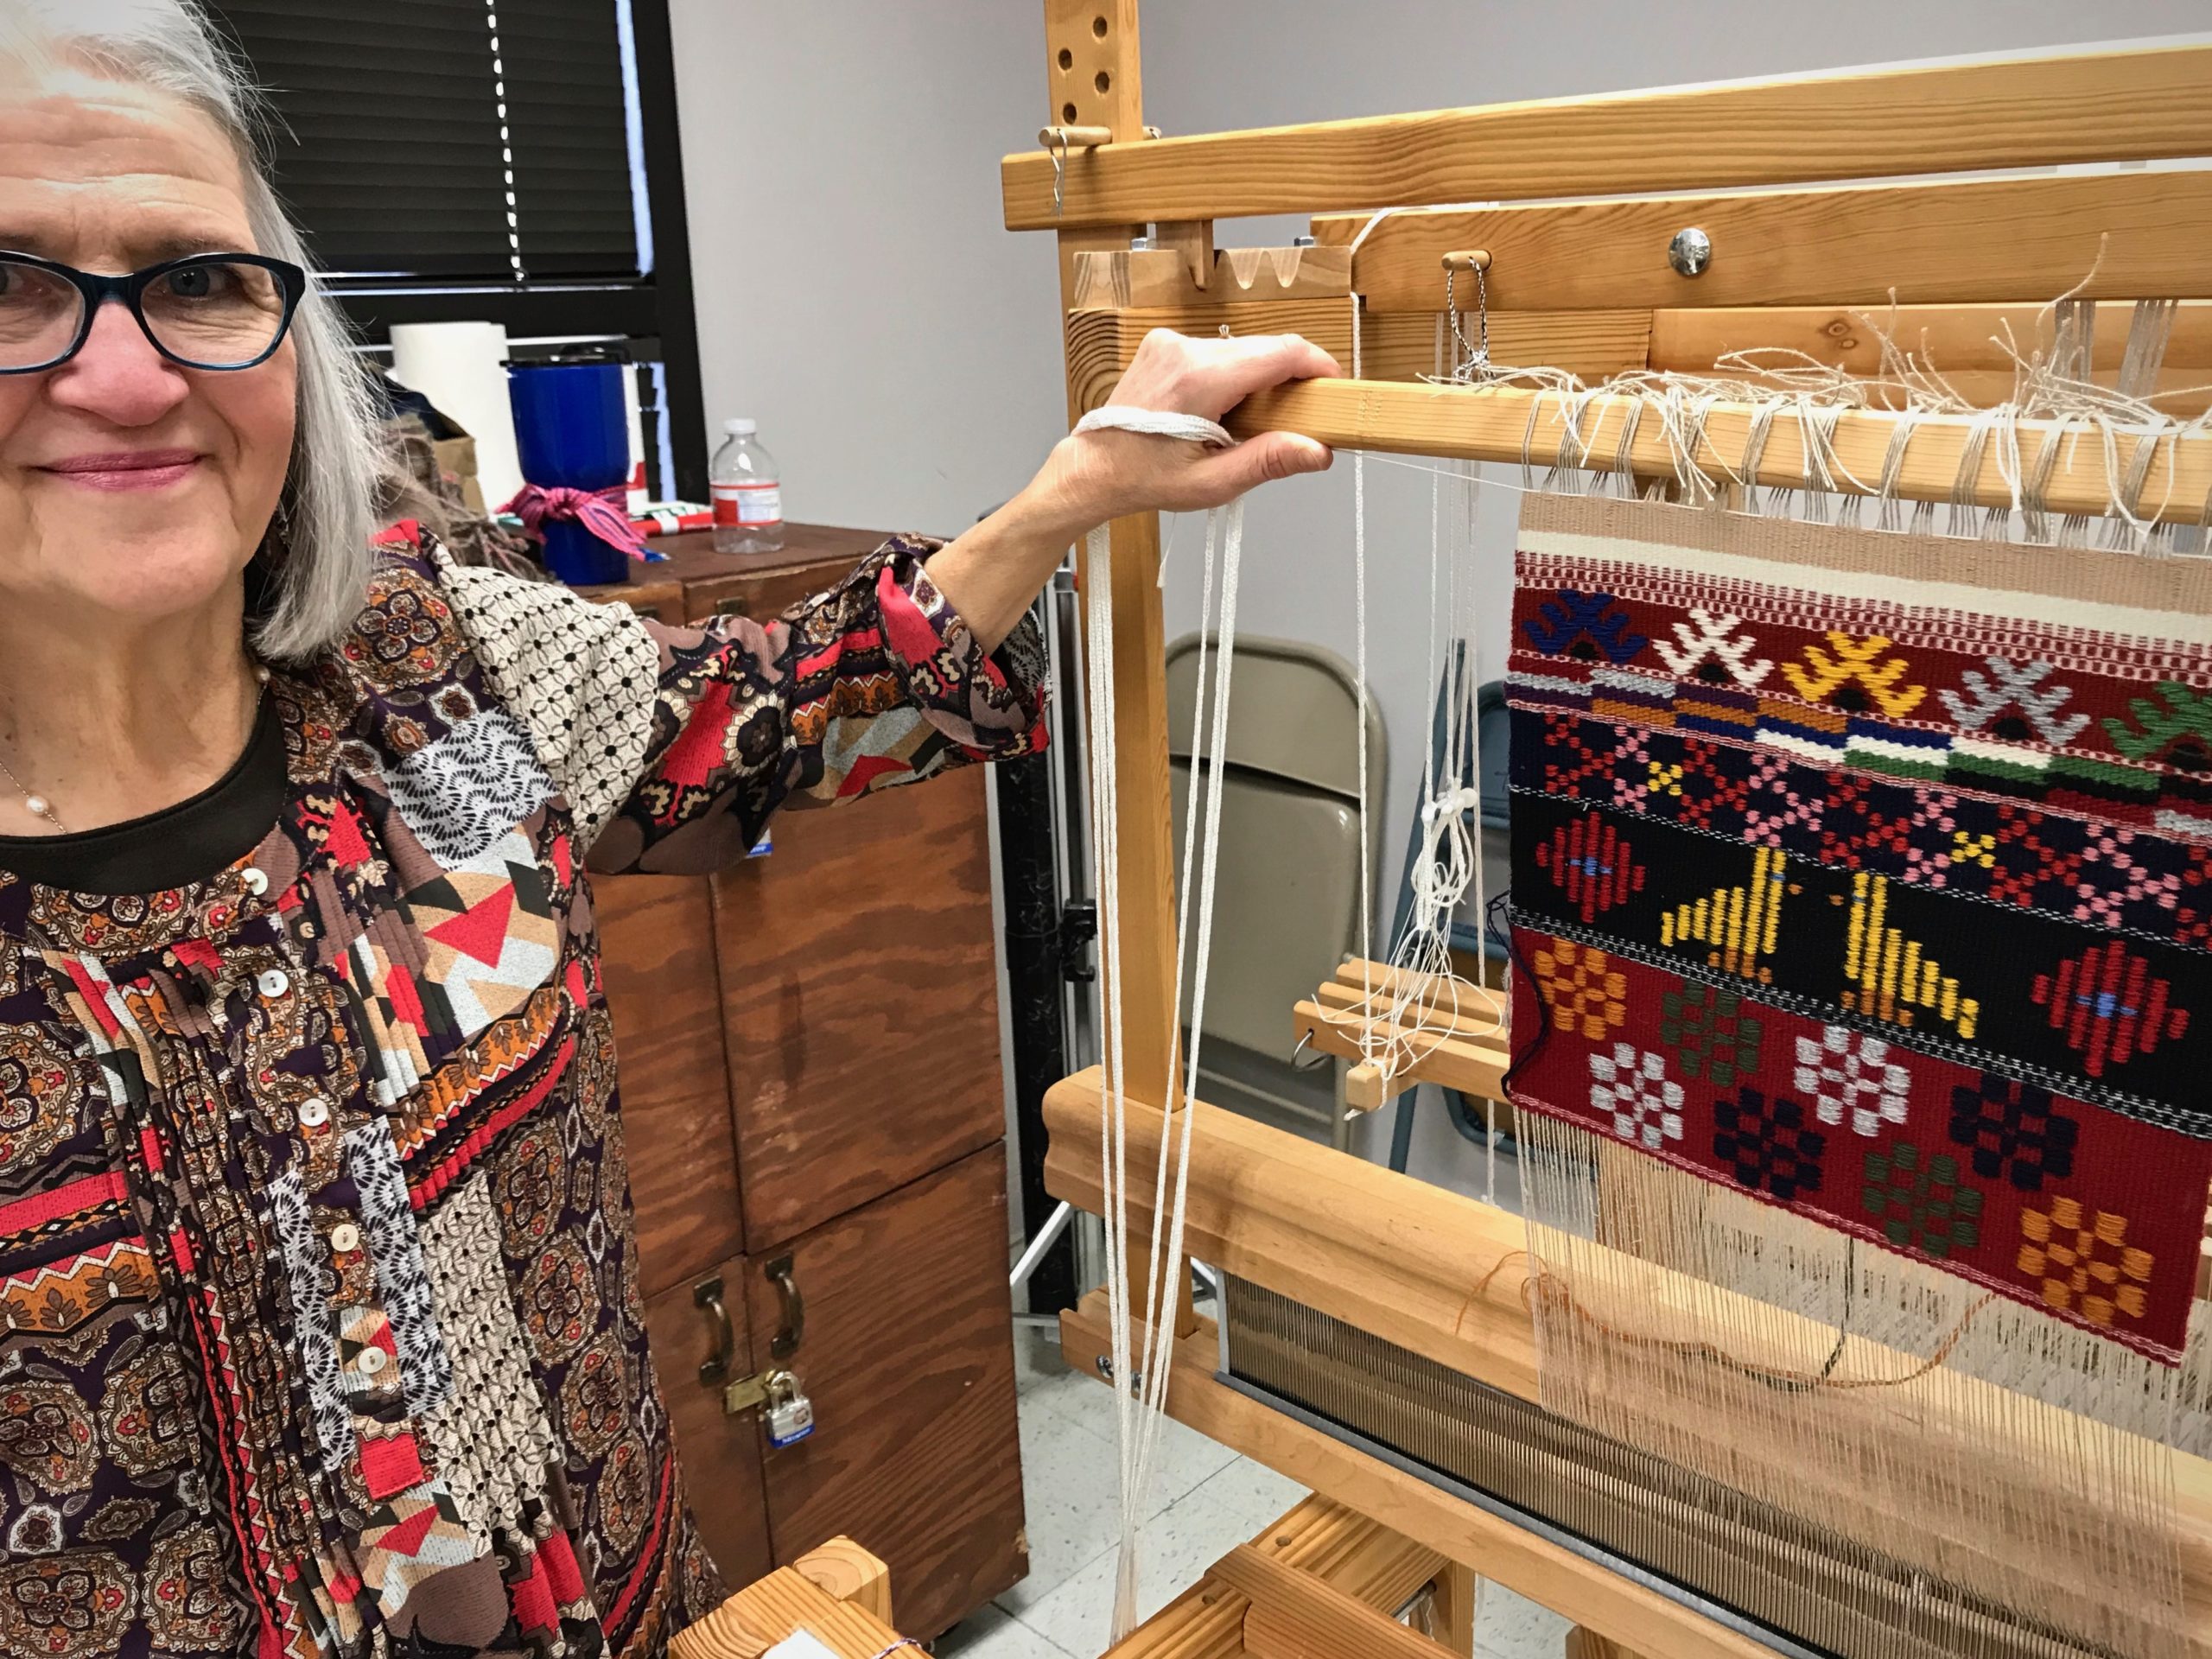
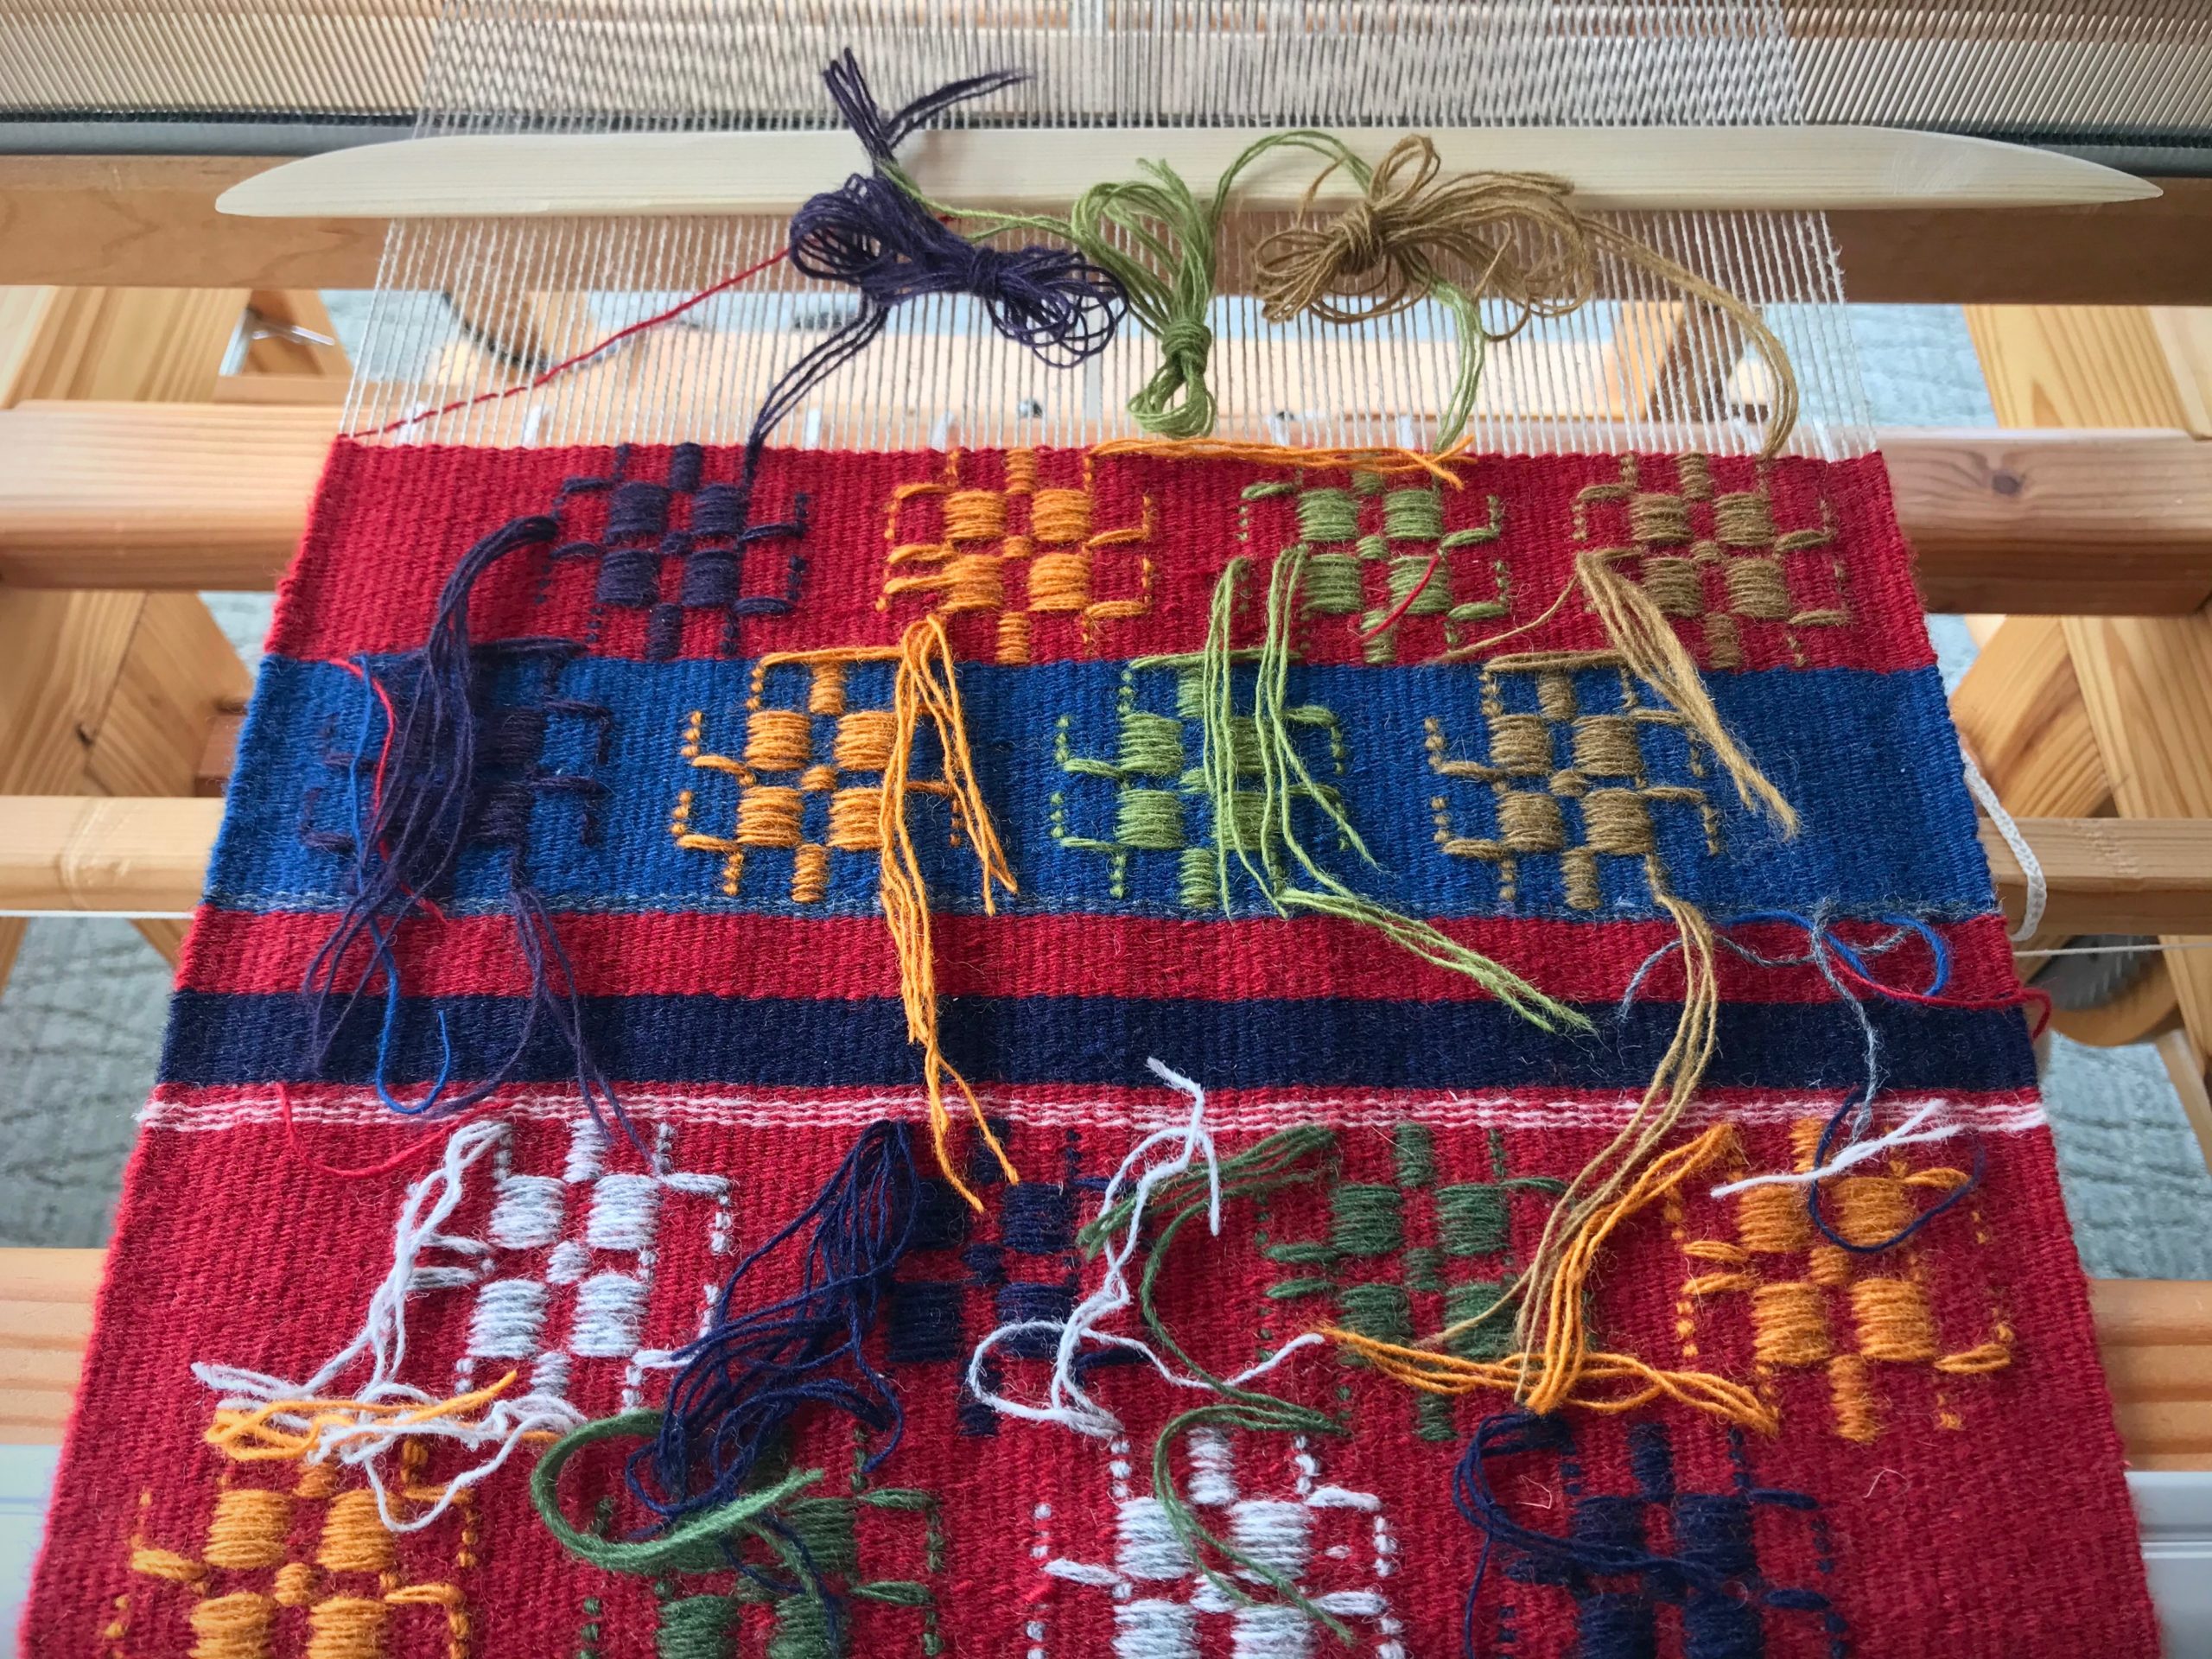
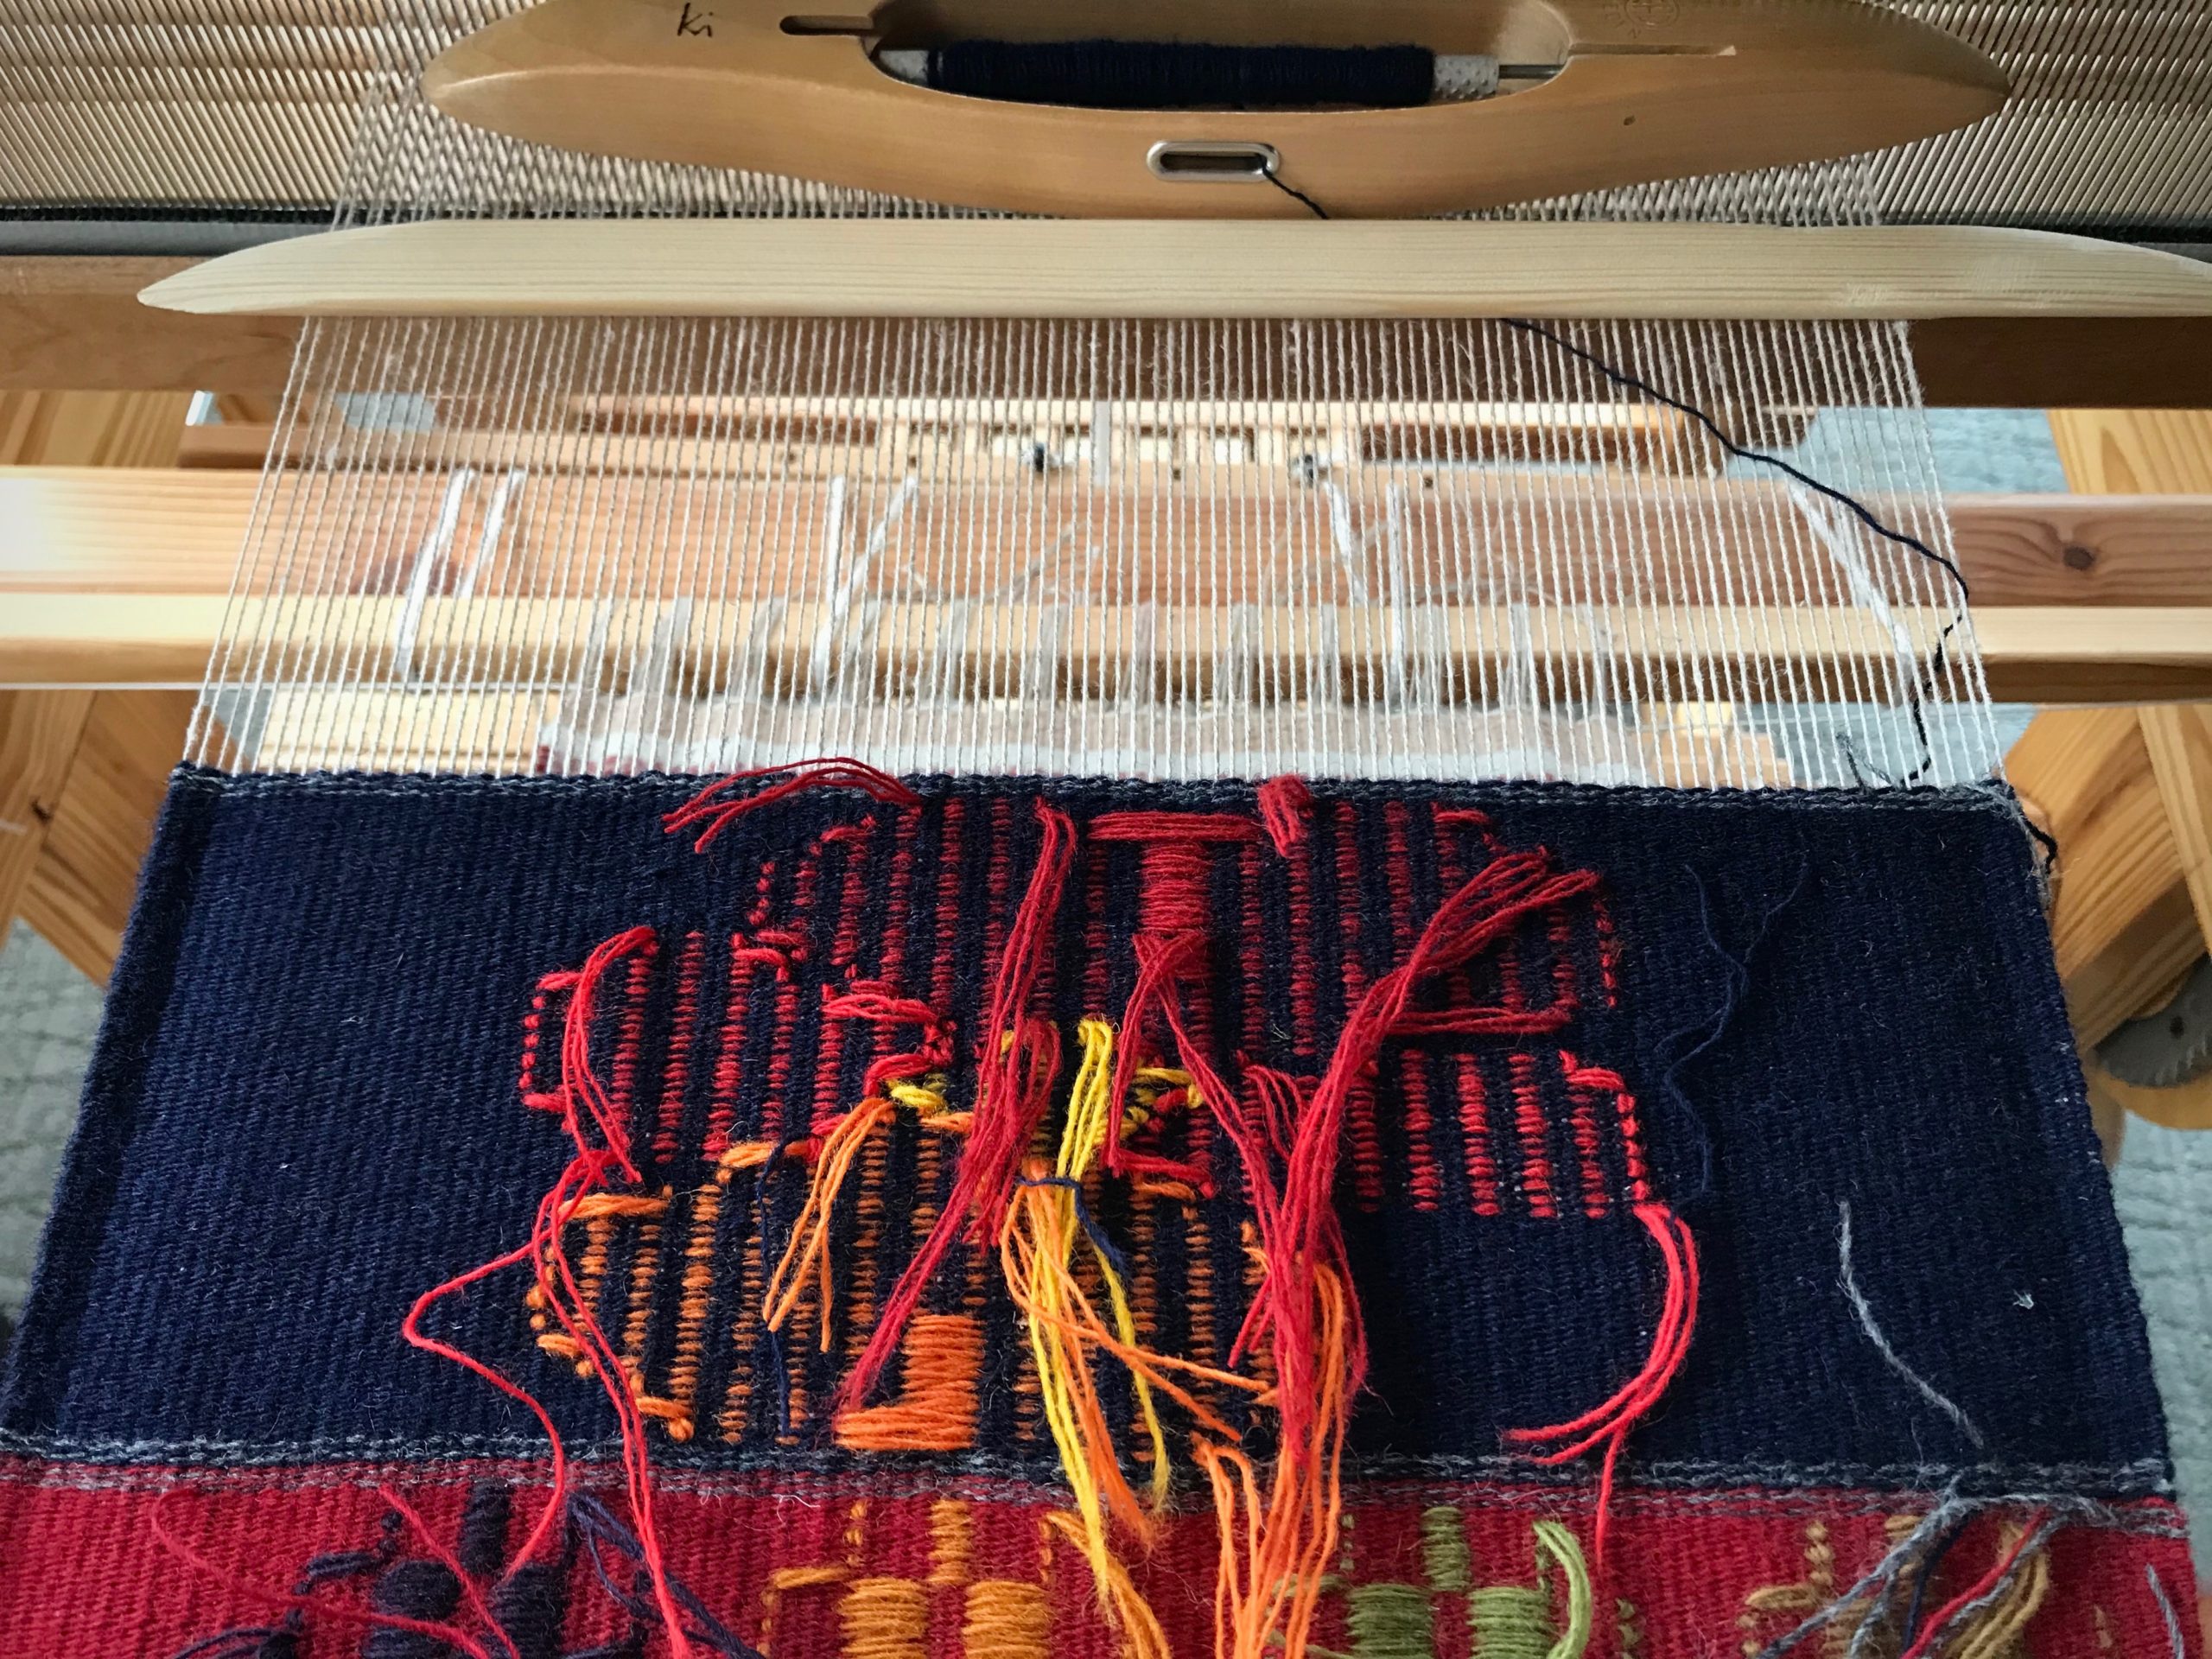
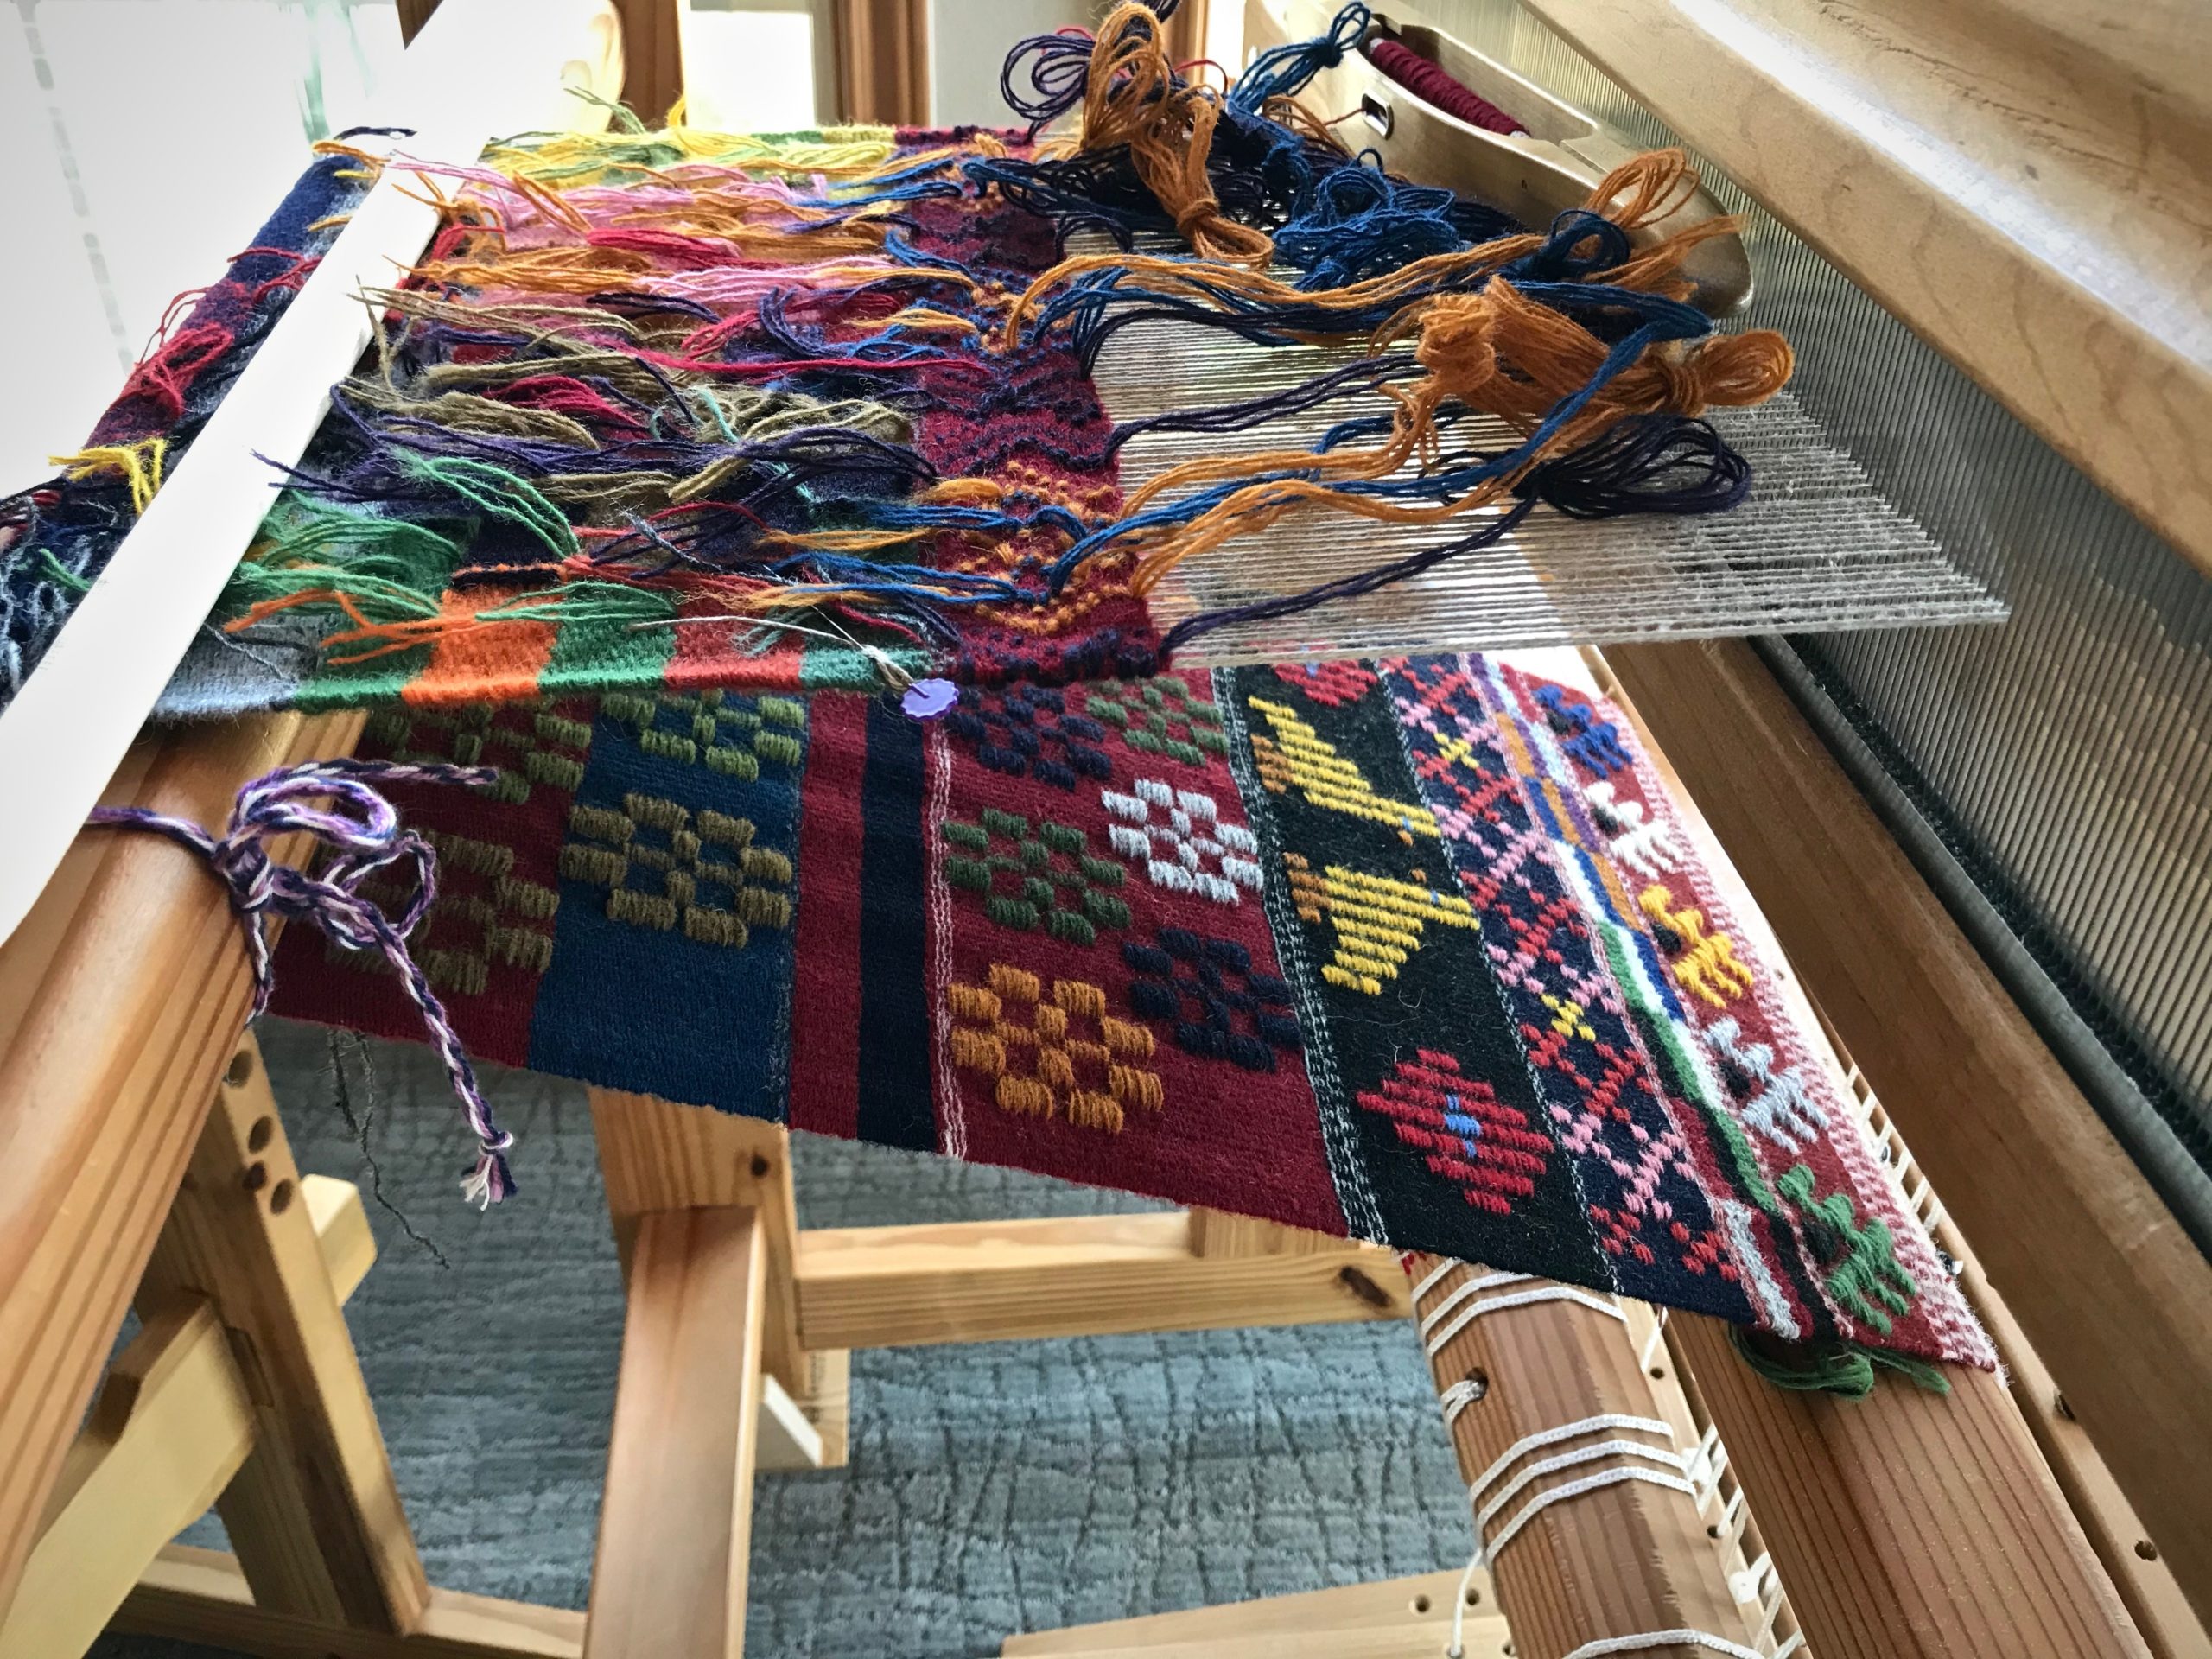
Ready to pack up after the Swedish Art Weaves workshop and take my loom back home. The Joanne Hall workshop was sponsored by the enthusiastic San Antonio Handweavers Guild a few months ago.Monksbelt pattern continued at home.Woven from the back, this dukagång pattern came from a Swedish publication I borrowed from the San Antonio Handweavers Guild library.Krabbasnår, just behind the fell line, is from a pattern in Heirlooms of Skåne, Weaving Techniques, by Gunvor Johansson.
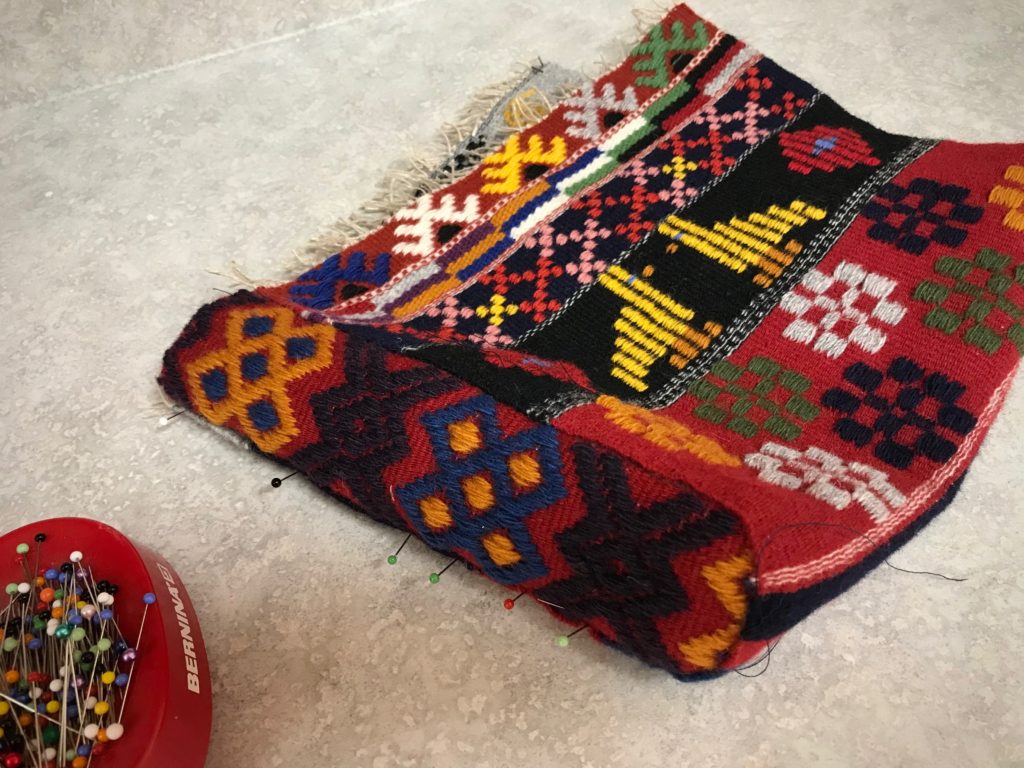
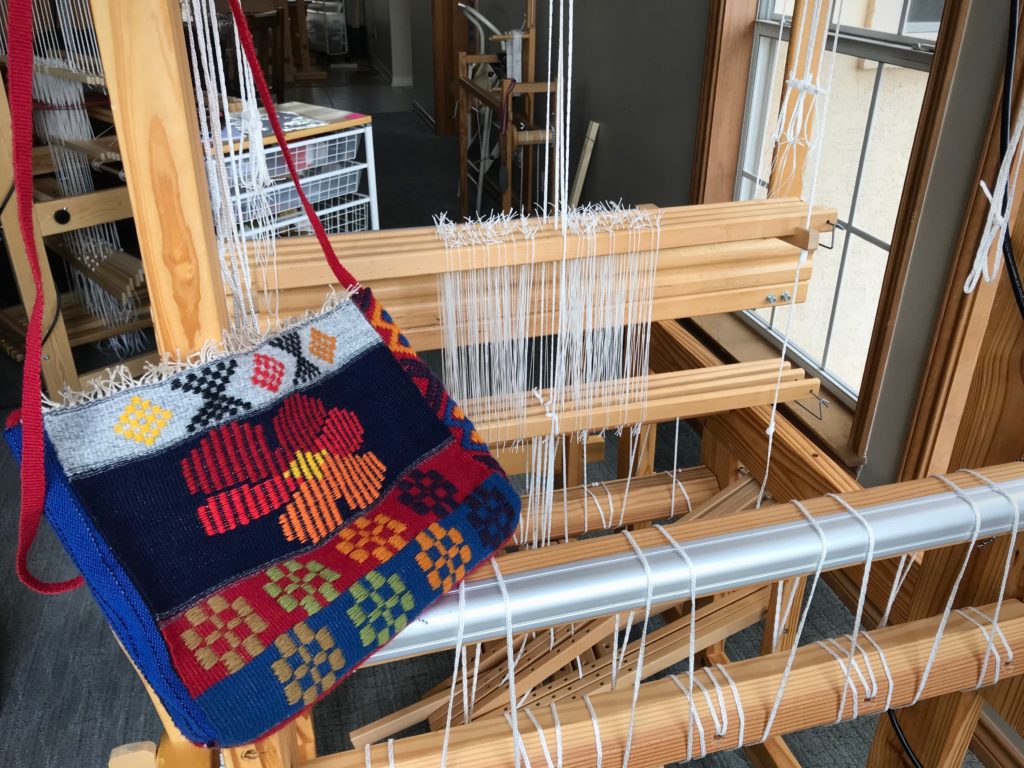
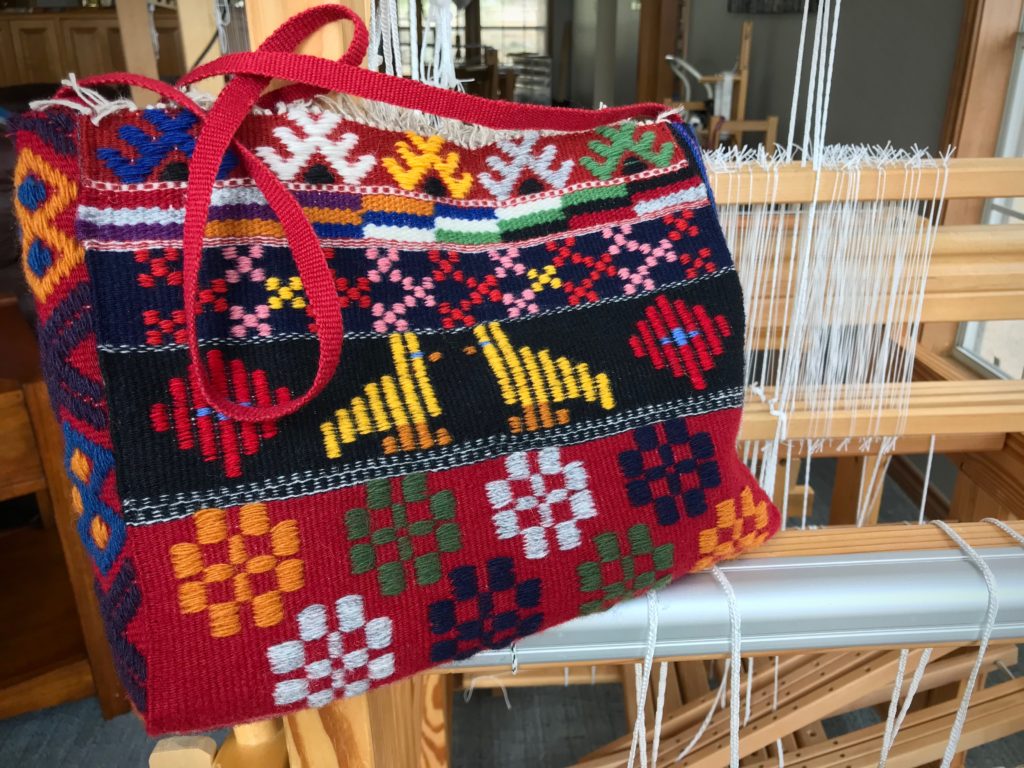
Thanks to that completion rule, I have a new bag. This fabric includes the various patterns that I wove in Joanne Hall’s workshop on Swedish Art Weaves several months ago. You will also see that I explored some patterns on my own at home. I gained two excellent outcomes from this finishing pursuit—a new bag to use, and a loom that is free for the next warp! (See the first bag here: Monksbelt Flowers on a Shoulder Bag)
Side piece, krabbasnår, is hand-stitched in place. From the top of the bag to the bottom – krabbasnår (krabba), rölakan, halvkrabba, dukagång, munkabälte (monksbelt), each section separated by plain weave stripe variations.On this side of the finished bag, from top to bottom – halvkrabba, dukagång, munkabälte. I made the hard decision to take out a section of rölakan I had woven in order to be able to put the knots from the linen warp at the top of the bag.Bag is lined and has pockets, and has a magnetic snap closure. The 6/2 Tuna wool shoulder strap was woven on my Glimåkra band loom.Now, on to the next warp!
Left to myself, I’d rather do what I want. I’d rather start a new project than bring an “old” one to completion. I’m glad my Lord is faithful with me. He completes the work that he began. The Good Shepherd tends his sheep. He leads us to the still waters of peaceful perseverance, saving us from the regret of going our own way. And we have his perfect outcome to look forward to.