Home in Texas on the Drawloom

The sky is the limit! That is my conclusion after weaving a few designs using the Myrehed combination drawloom. The shaft draw and the single unit draw systems are combined on this ingenious apparatus that is attached to an otherwise ordinary loom. The shaft draw system enables me to weave repeated patterns. The single unit system enables non-repeat patterns. This narrow warp is my playground to do both.
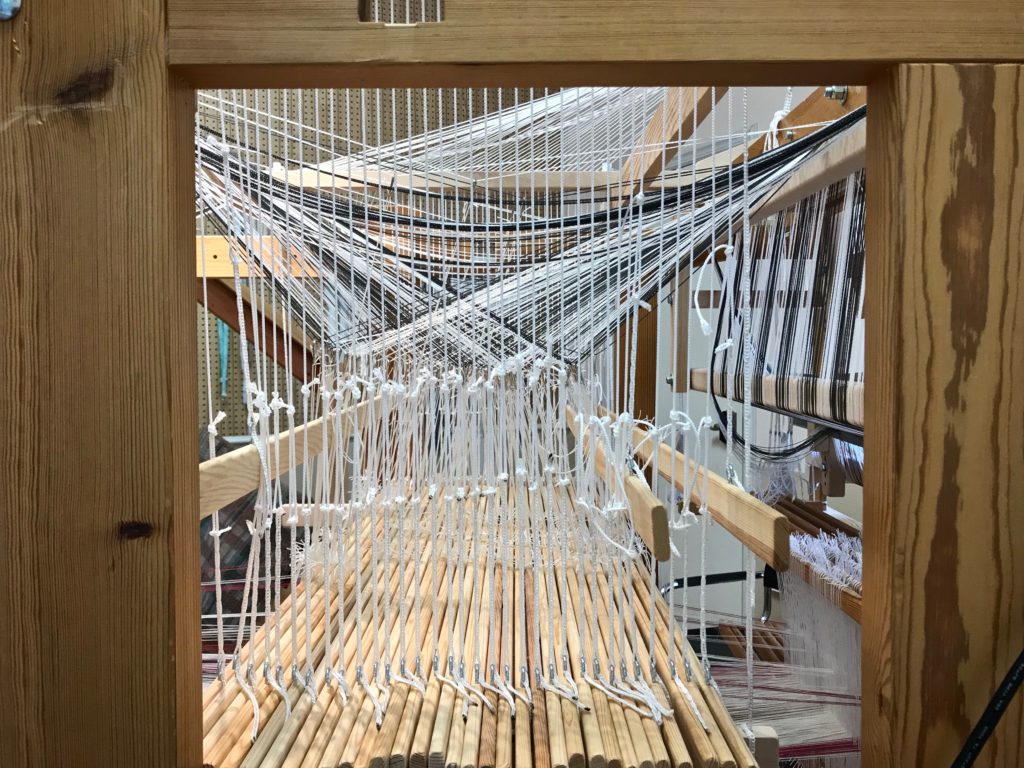
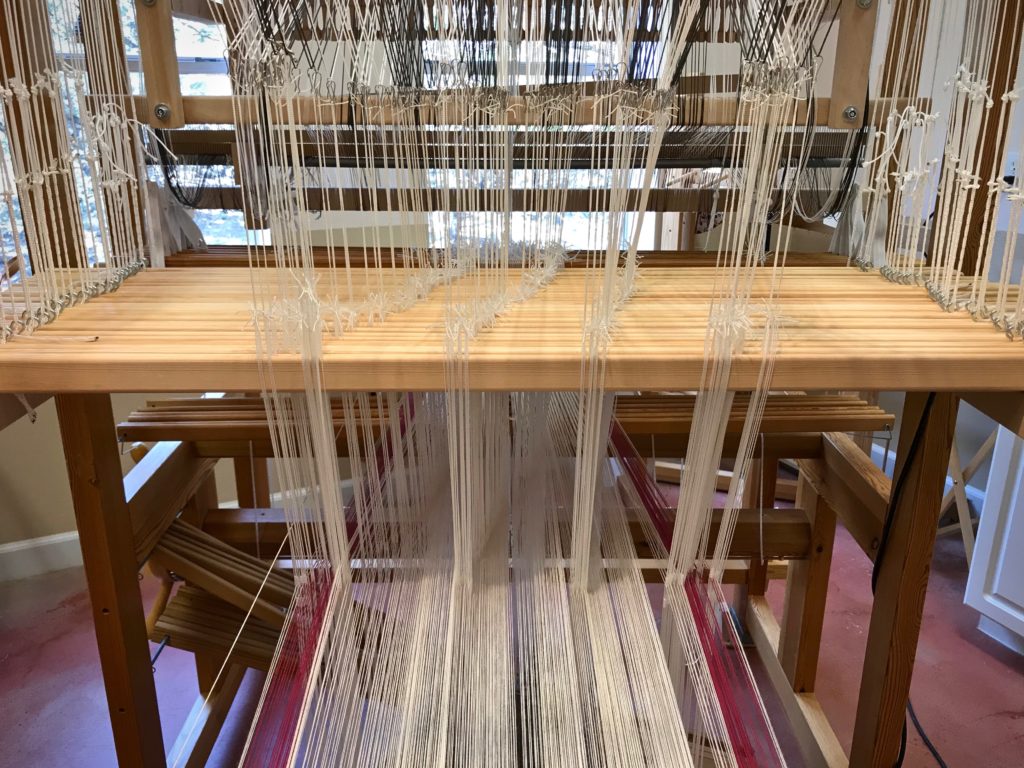
Myrehed Combination drawloom - learning its potential.
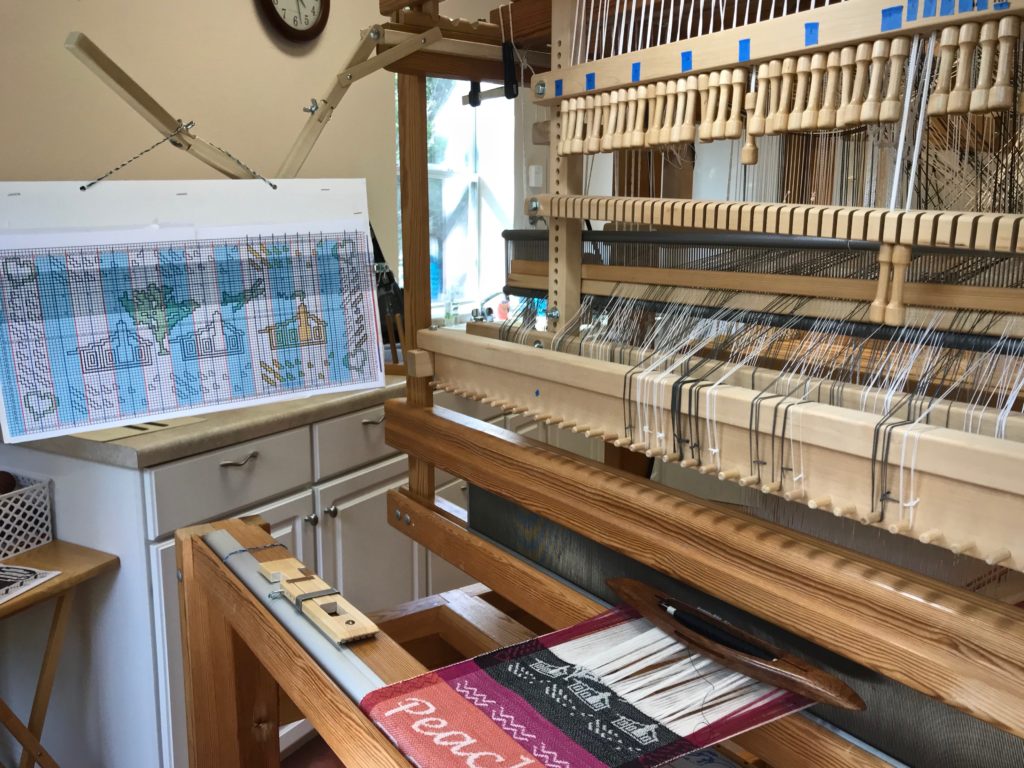
Pattern shafts (the wood bars) and single units (with black and white draw cords) are combined for this warp. 36 pattern shafts, including the X shaft. 132 single units.
Setting up the Myrehed combination drawloom.
Central design area uses a repeat of 30 pattern shafts threaded in a straight draw. Side borders use a repeat of 5 pattern shafts. Lift heddles and lanyard clips on the single unit draw cords attach the draw cords to the all the individual units (single units) on the pattern shafts.

I use the computer to create designs. ”Home in Texas” shows the back of our house, with its massive stone chimney. The tree in the scene is a tracing of the oak tree that I pass as I walk up the hill to my drawloom studio. The airplane is a copy of the Mooney that our pilot friend took us in to fly over Enchanted Rock. I am delighted to discover that I can use a drawloom to bring features of personal meaning such as these to life.
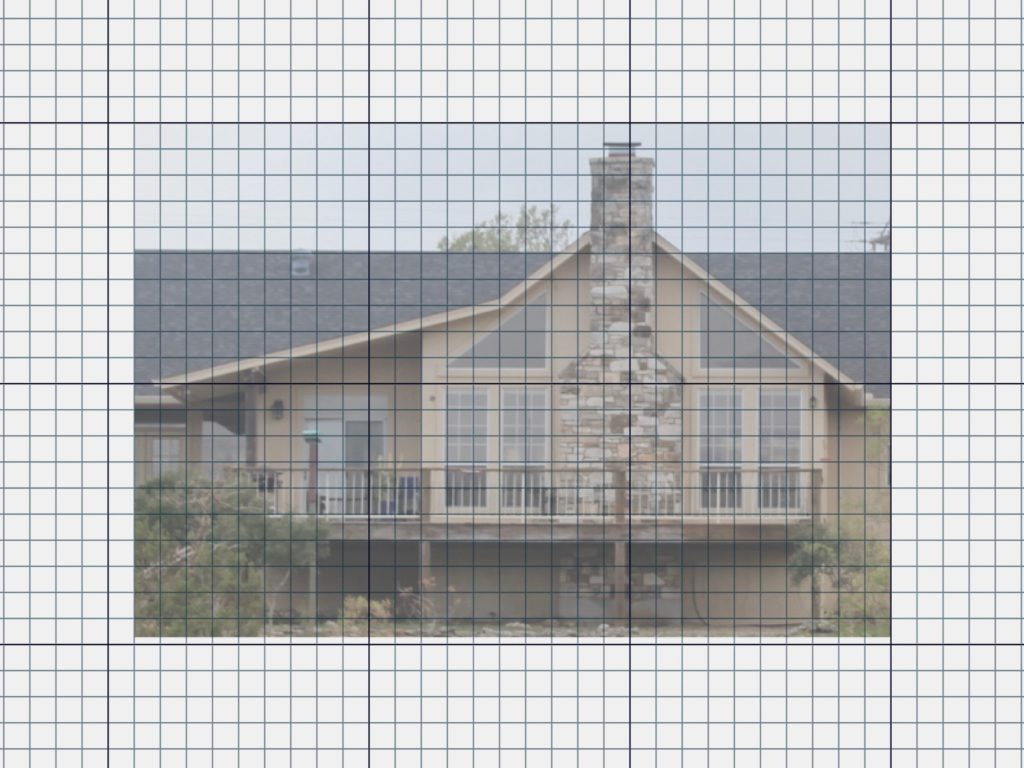
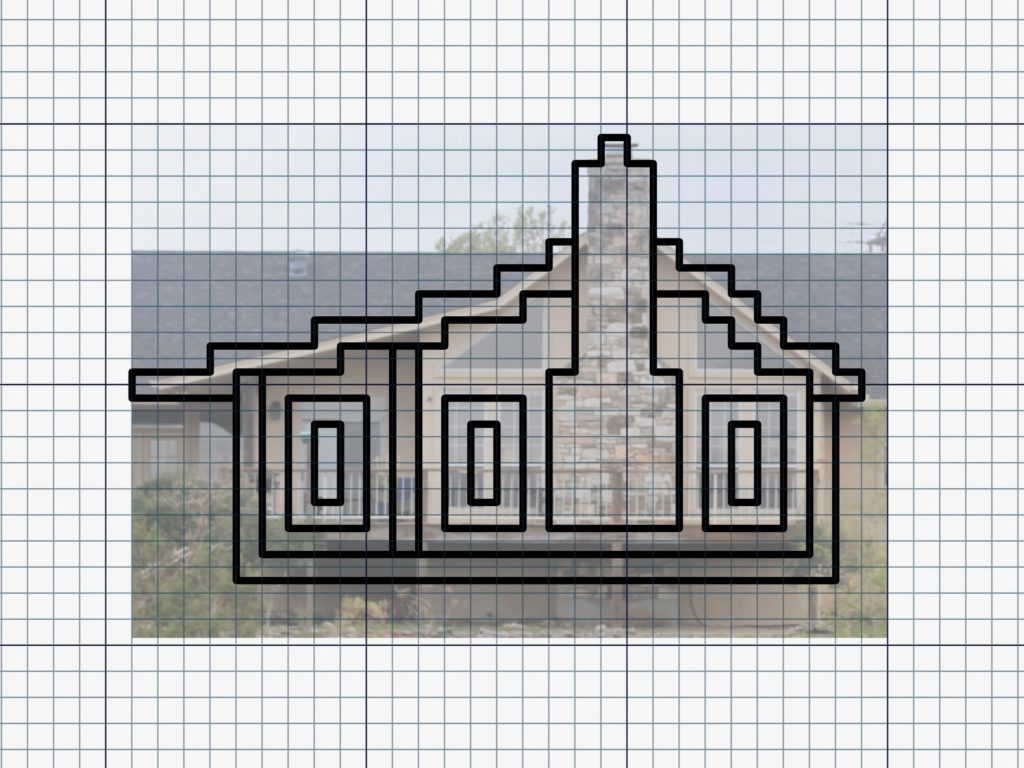
Making a gridded pattern for weaving on the drawloom.
Photo of our back deck. Using Affinity Photo, I set up a grid on the page to represent 30 pattern shafts. I then import my photo onto the gridded page.
Creating a simple gridded pattern on the computer.
Simple outline is created and saved as a separate image. The filled-in outline becomes my drawloom pattern.
Creating gridded designs in Affinity Photo.
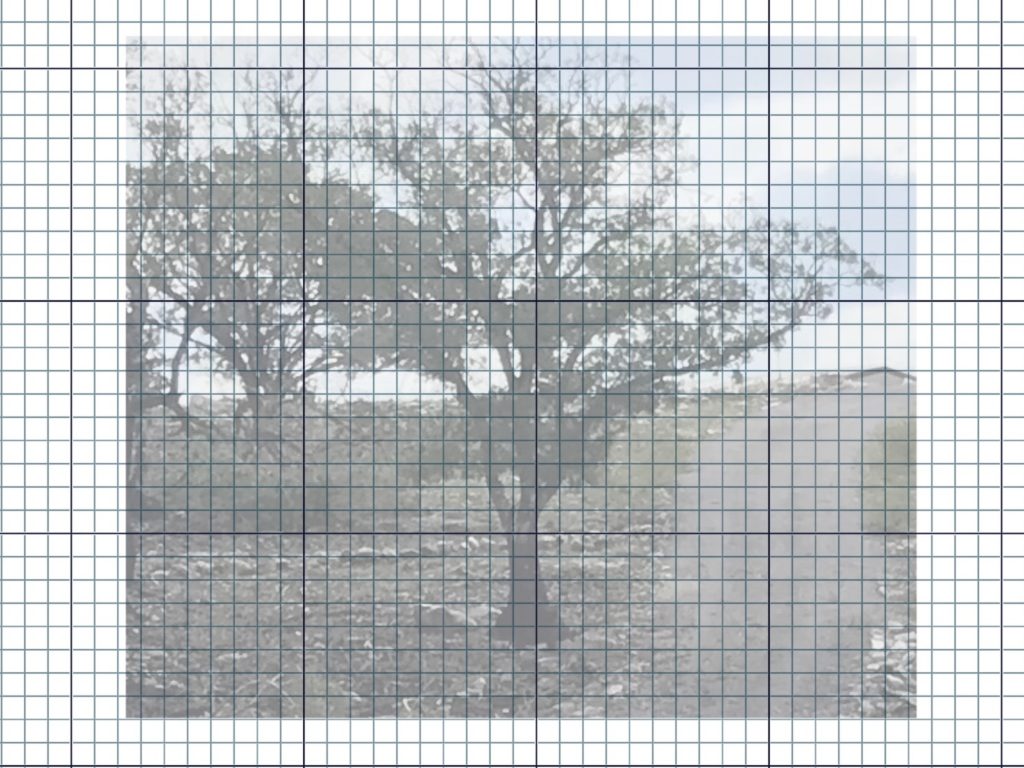
Oak tree that I pass on the hill up to my drawloom studio. After importing the photo, I adjust the opacity to fade the picture, which makes tracing easier.
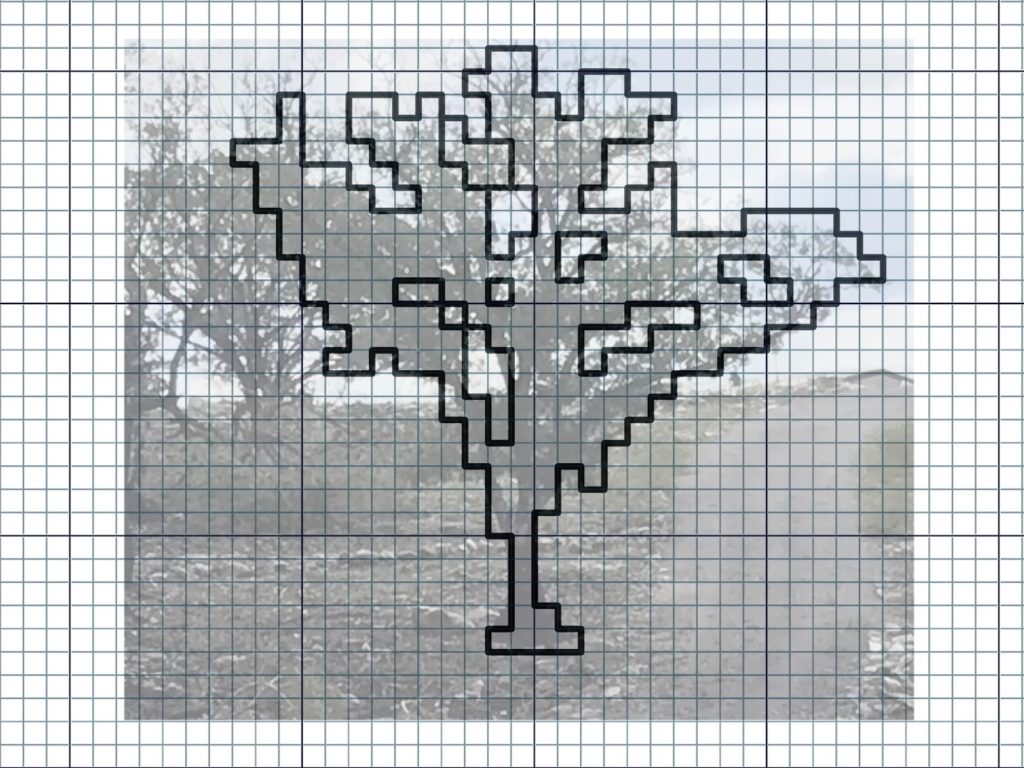
Tracing a tree in Affinity Photo to make a drawloom pattern.
I use a pen tool in Affinity Photo set at 3 pt to do the tracing. Now I can fill in the outline and copy and paste the image onto my chart that I will print and then use at the loom.
Drawloom weaving, using the Myrehed Combination.
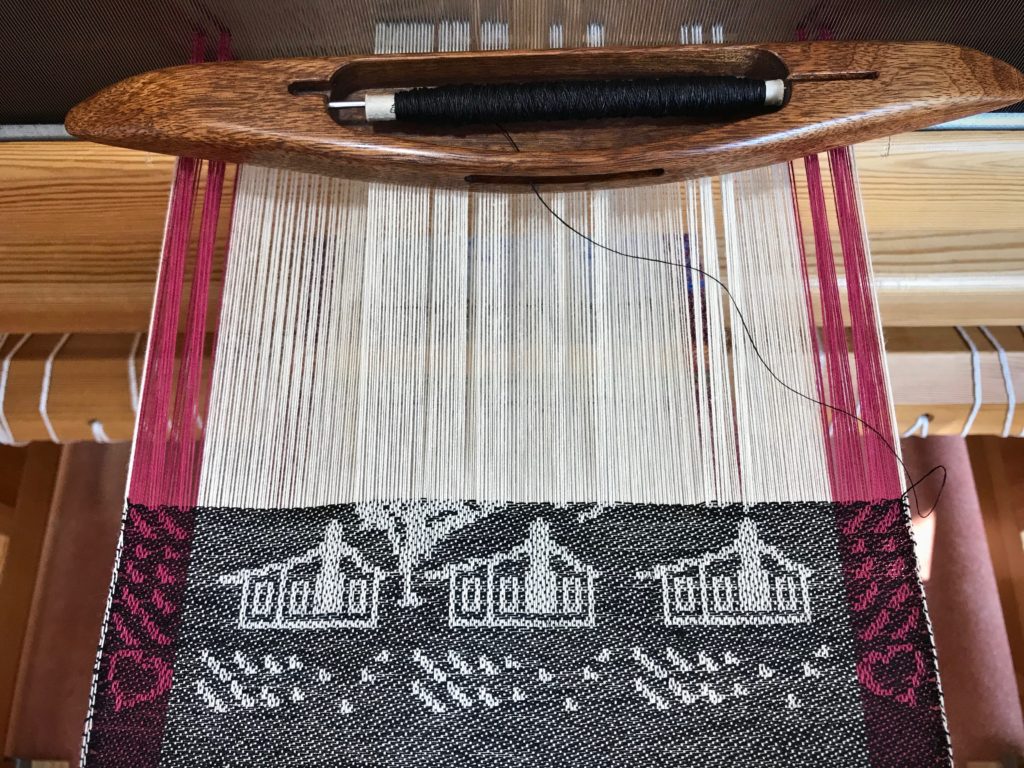
Houses are woven with 30 pattern shafts. The hearts in the corners and the added details above the houses use the single unit draw cords. The tree is beginning to appear between the two houses on the left.
Myrehed Combination drawloom.
Two draw handles are pulled for the pattern on the side borders. Single unit draw cords are pulled and held in place on the hook bar above the beater.
Our Texas Home - woven on the drawloom.
Our Texas Home

The words of the Creator have life in them. It’s as if he puts his thoughts on the loom and weaves them into being. Let there be light! He speaks; and it is so. Listen closely. Hear the Grand Weaver say, Peace to you. And it is woven so. You are his workmanship, bringing his design to life.

Experimental warp on the drawloom.
More ideas are forming, even as this fabric begins to hug the cloth beam.

May your life reveal the Creator’s design.

Happy Weaving,
Karen

Single-Unit Boldness

Doing something bold is a dramatic way to end the year. I have added 200 single-unit draw cords to the drawloom. The bold thing is that I am using lanyard clips. This changes the usual process of setting up the draw cords, so I’m making some of it up as I go.

First, I sleyed the cords through the single-unit reed (used for spacing the draw cords). Next, I put a one-inch lanyard clip on every lift heddle. Now, one at a time, in order, I attach a lift heddle to a pattern unit, and then clip the lift heddle to the draw cord. Repeat 200 times. (I picked up the clever tip about lanyard clips online from Su Butler, who has, admittedly, a different type of drawloom setup than what I have.)

When this drawloom rag rug project is finished, I should be able to unclip the draw cords from the pattern units, leave the draw cords in place on the loom, and start fresh for the next project. Progress through the new year will reveal whether this bold action is a good idea…or not.

Journey in Pictures:

Setting up single-unit draw cords.
Setting up single-unit draw cords on the drawloom.
Getting set up for the drawloom.
Lift heddles and lanyard clips.
Lift heddles for the single-unit drawloom.
Attaching lift heddles to single-unit draw cords.
Single-unit reed is sleyed.
Lanyard clips on the drawloom. Process pics.
Placing the single-unit reed on the drawloom.
Pattern heddles in position. Drawloom process pics.
Setting up single-unit draw cords.
Drawloom almost ready for weaving! Process pics.

May you take a bold step into the new year.

In with the new,
Karen