Tried and True: Sheepskin Loom Bench Cover

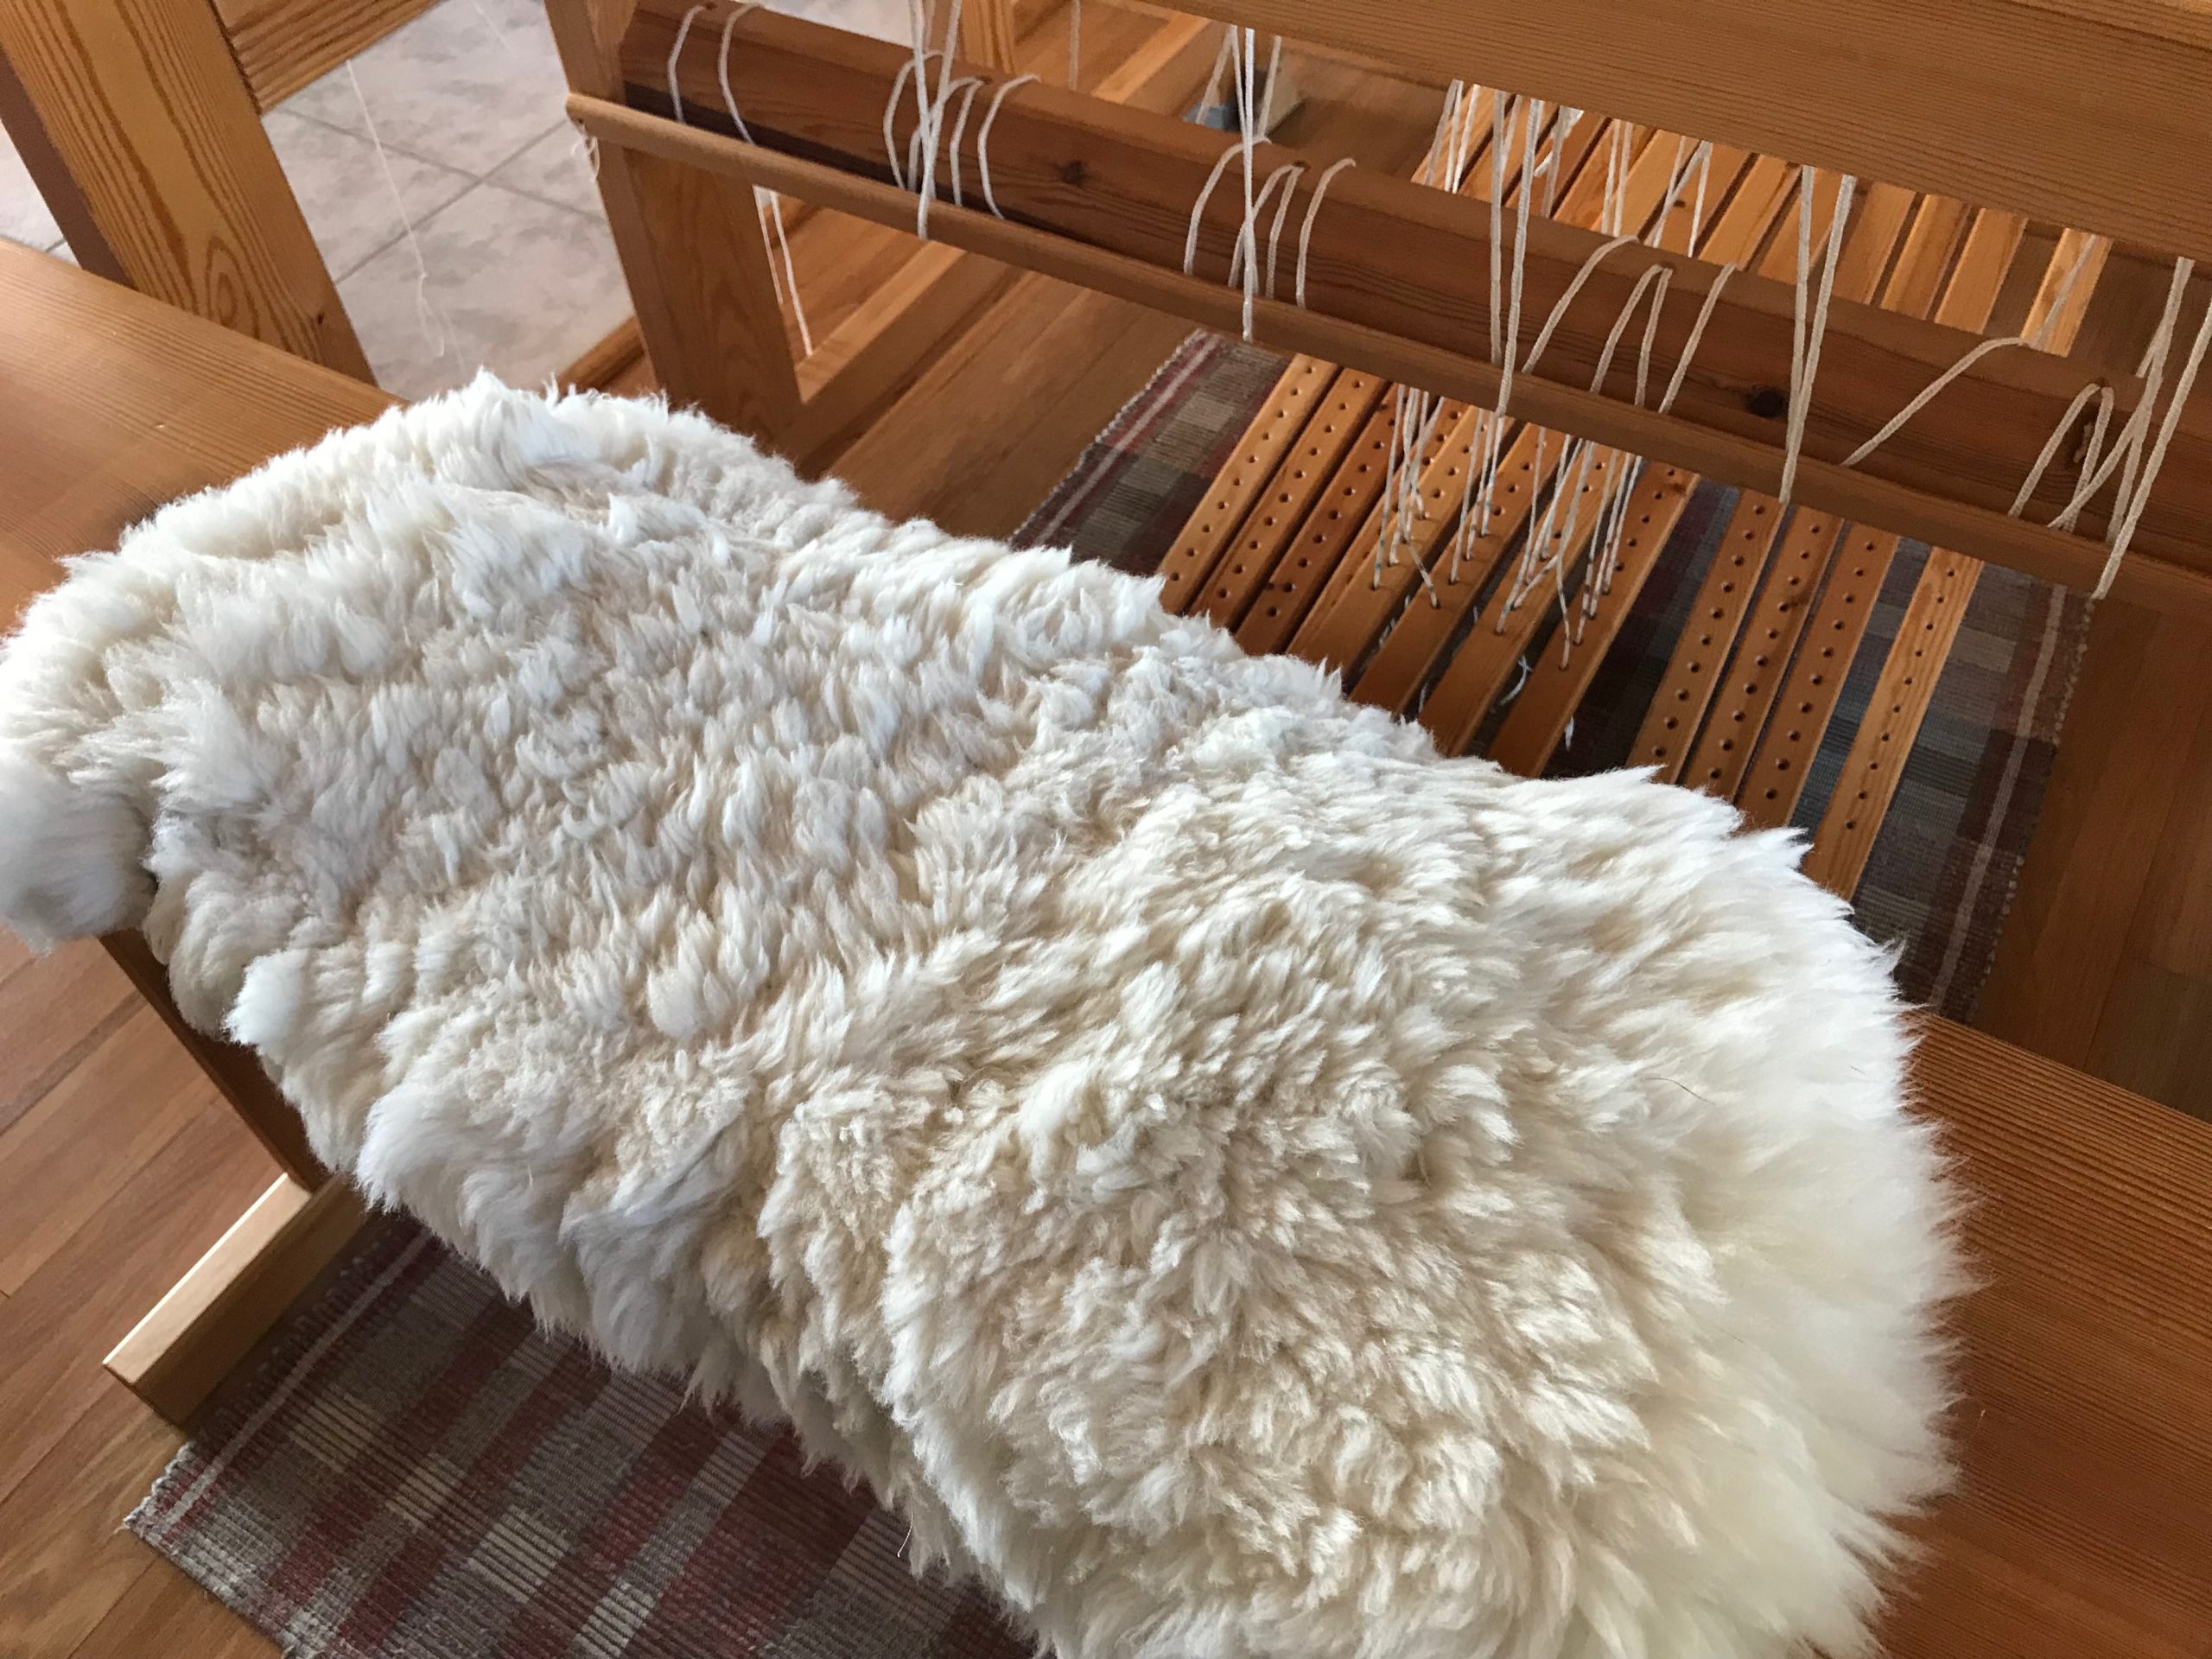
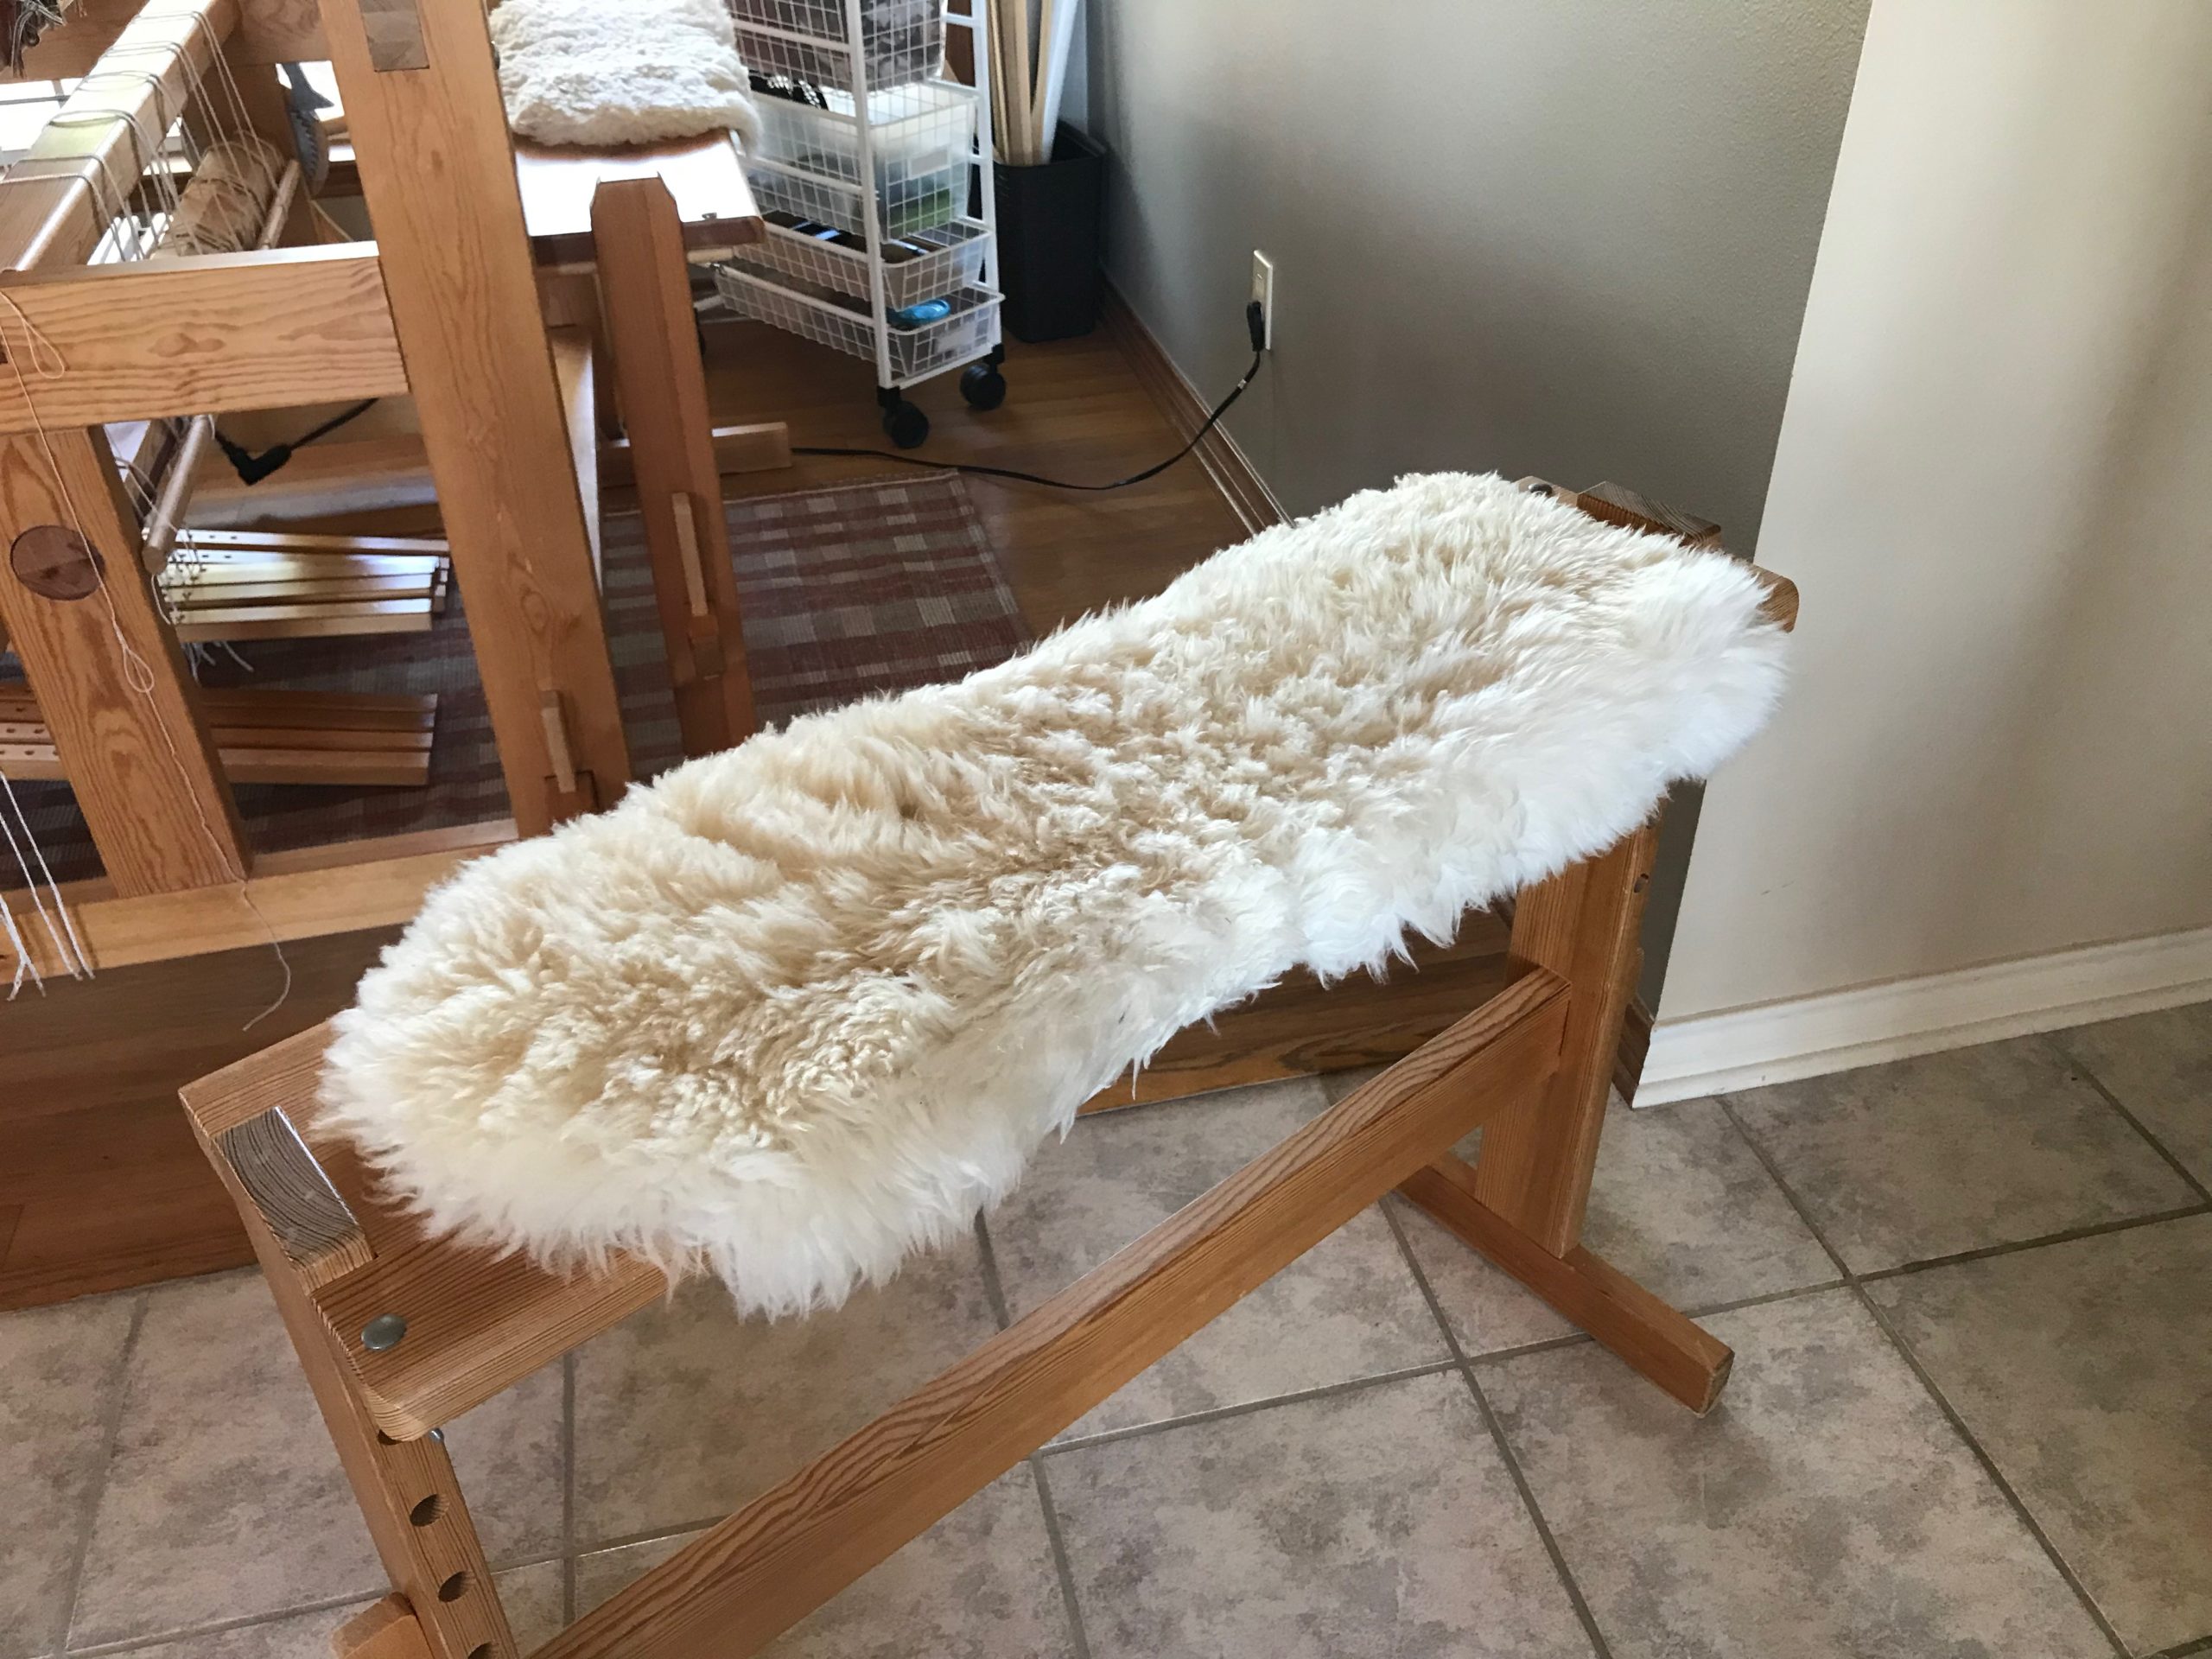
A fluffy sheepskin stays between me and the hard wooden bench at my Glimåkra Standard loom. Softening your loom bench makes weaving that much more pleasant. Last week Jane asked a great question: How do you secure the sheepskin on the bench? To answer that, I invite you to follow along as I secure the sheepskin on my drawloom bench.

Fluffy sheepskin on my Glimåkra Standard bench.
Bench for the drawloom has sheepskin tied on with some twisted cords. Securing this sheepskin is long overdue. Thank you to Jane for prompting this project.

Make a Sheepskin Loom-Bench Cover

Supplies

  • Sheepskin
  • 6 3/8” grommets
  • Pencil
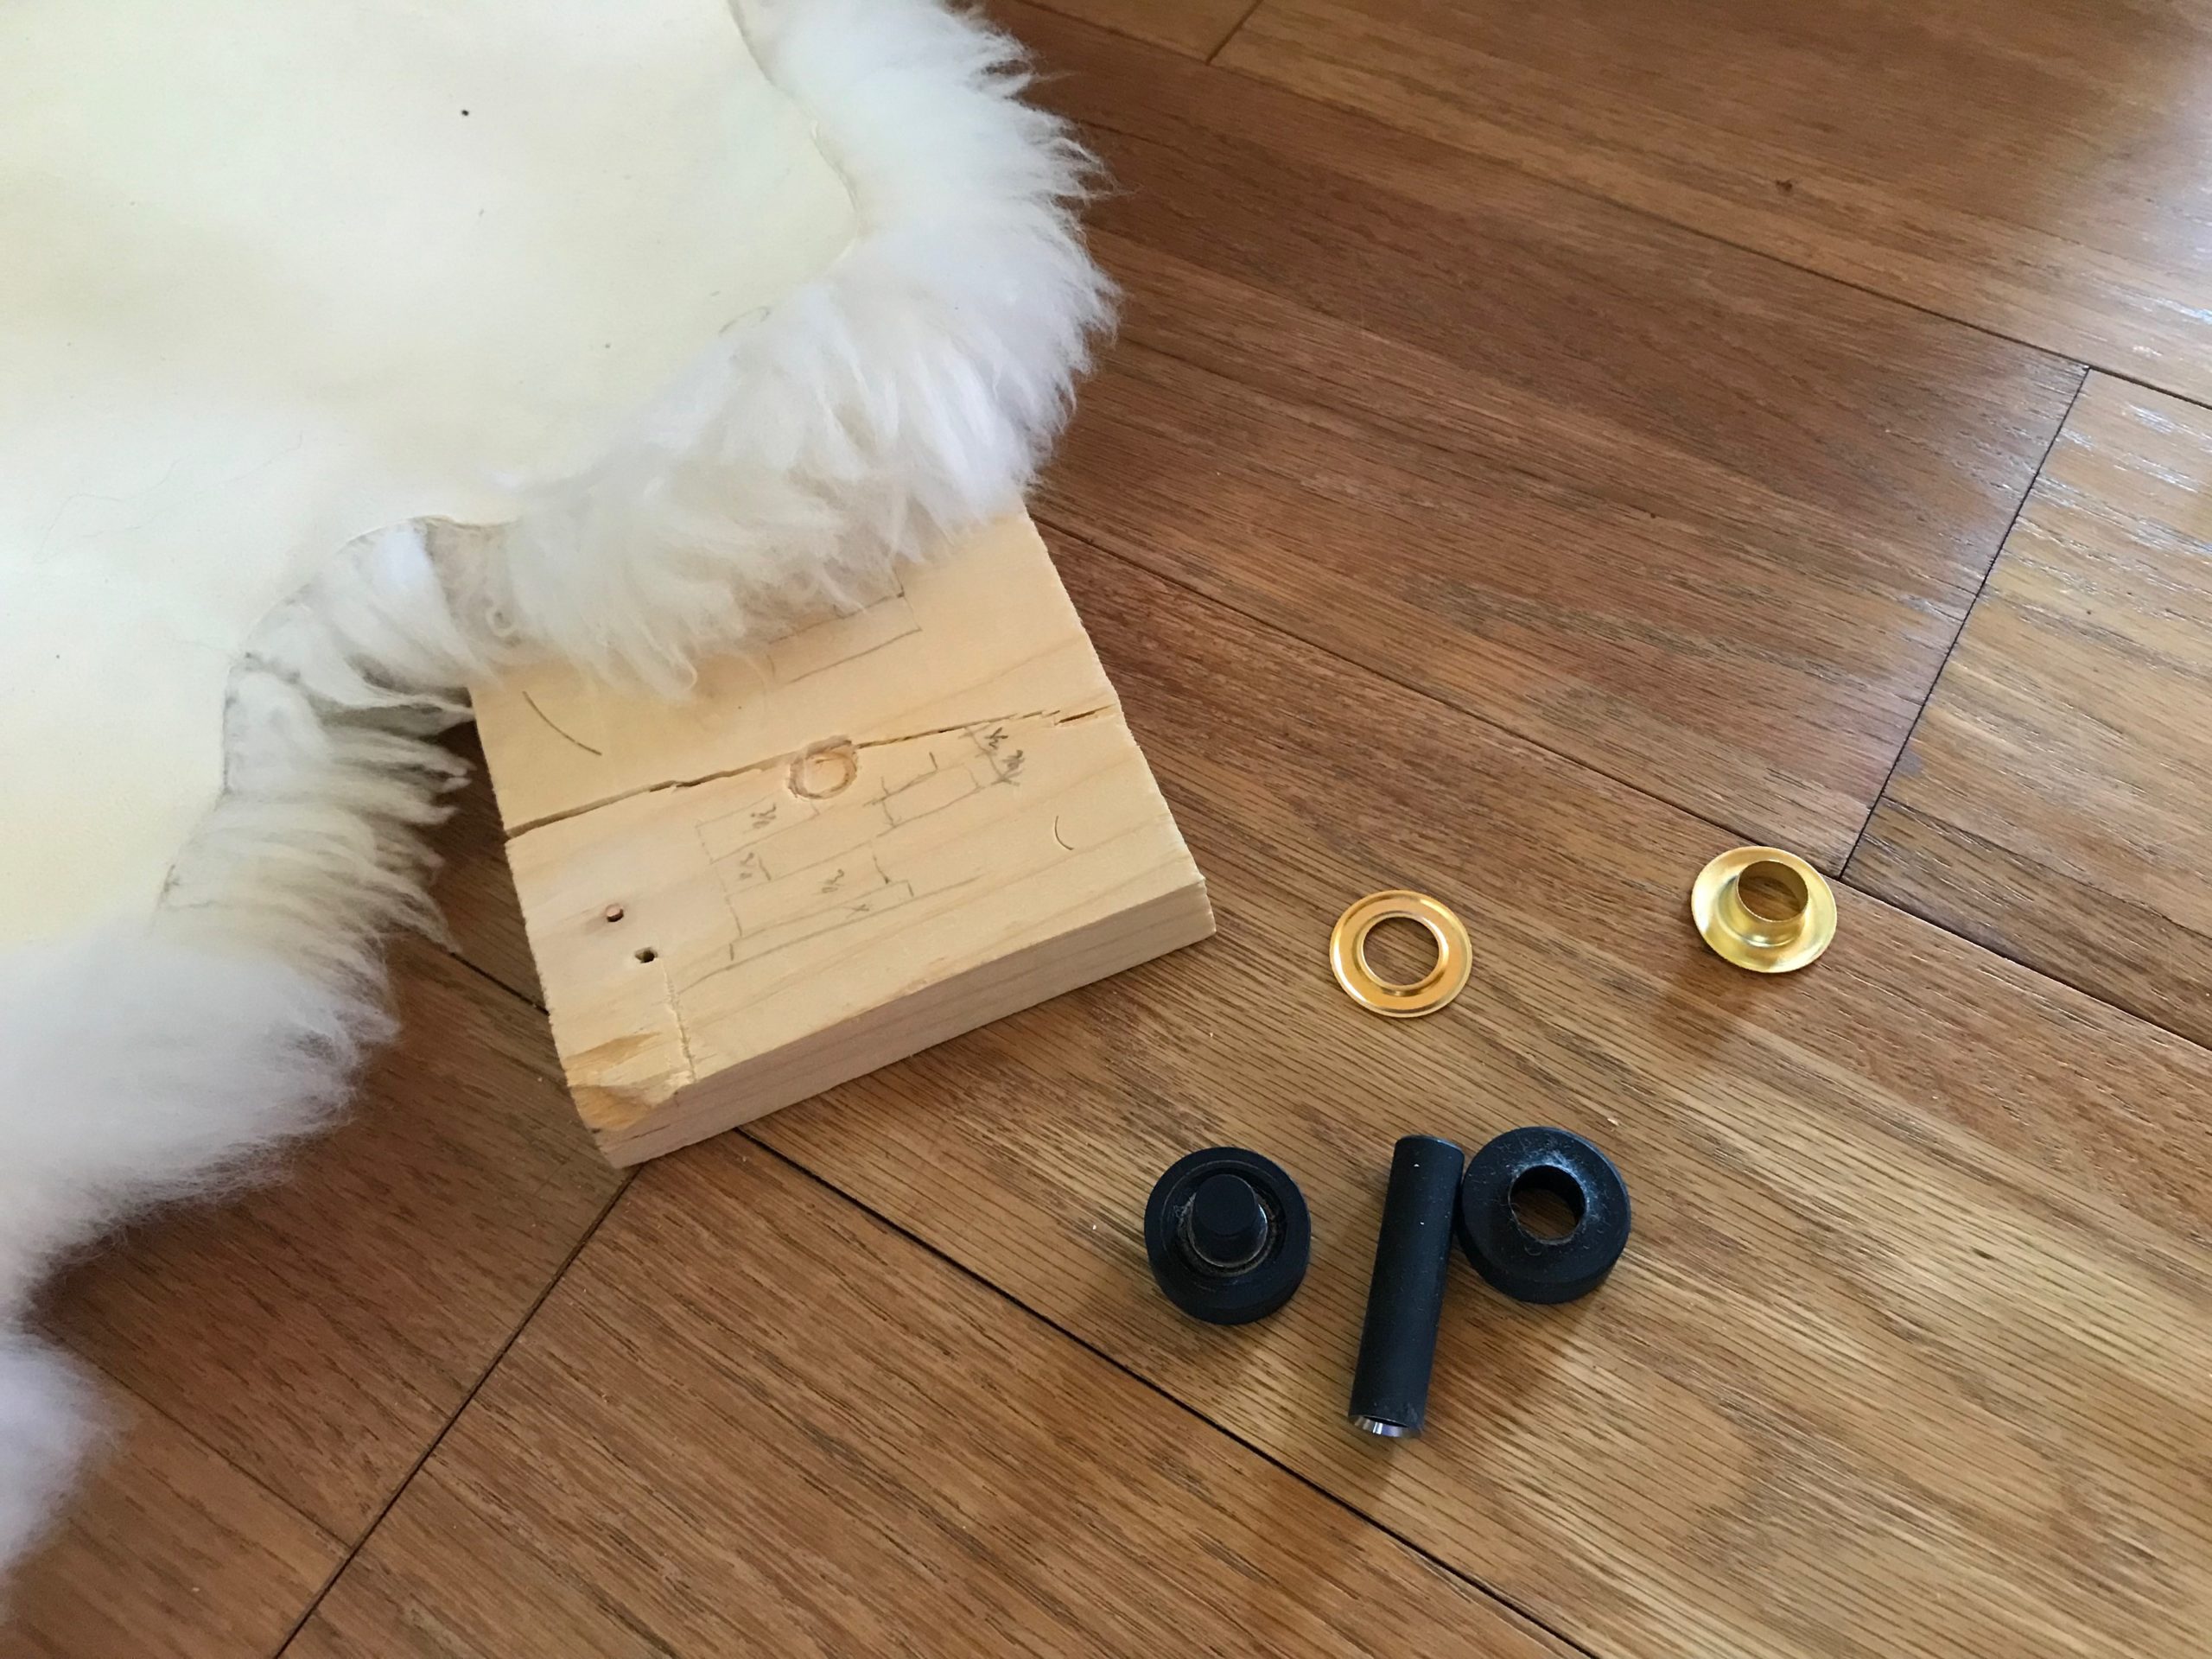
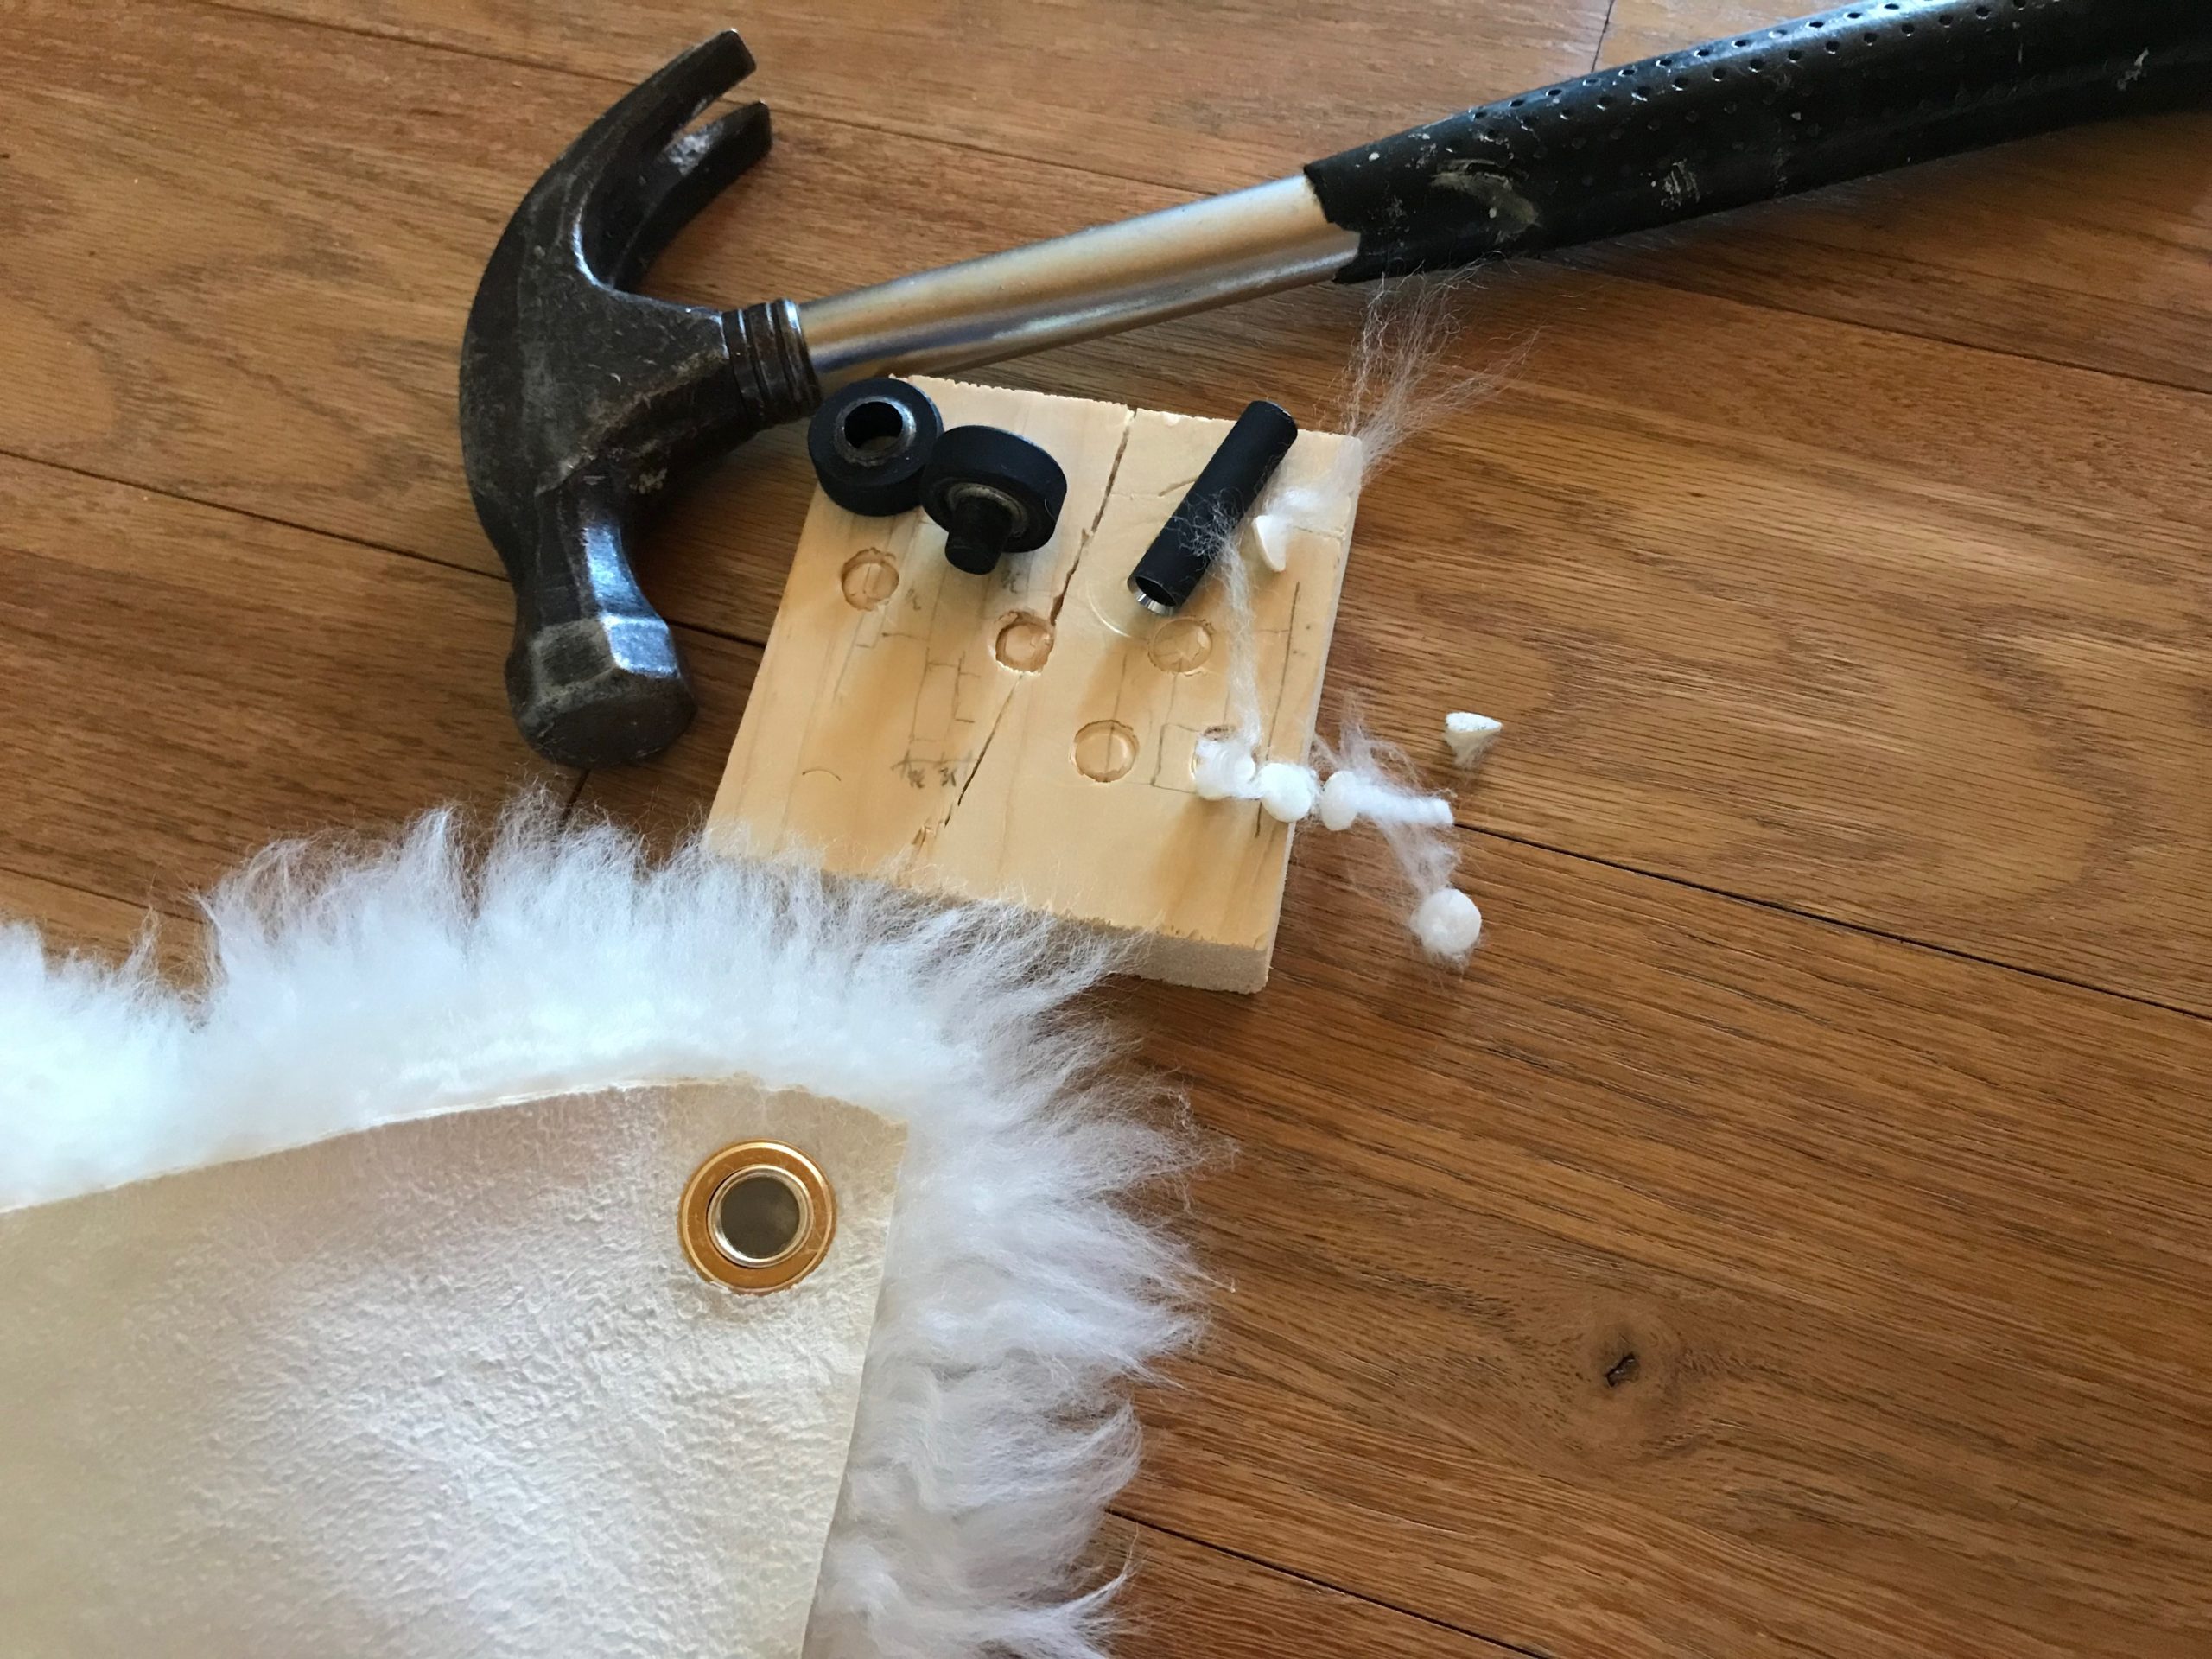
  • Grommet kit (hole punch, base, and flaring tool)
  • Small block of wood
  • Hammer
  • Tape measure
  • Texsolv cord (scissors, and small flame to sear ends)
  • 6 Arrow pegs

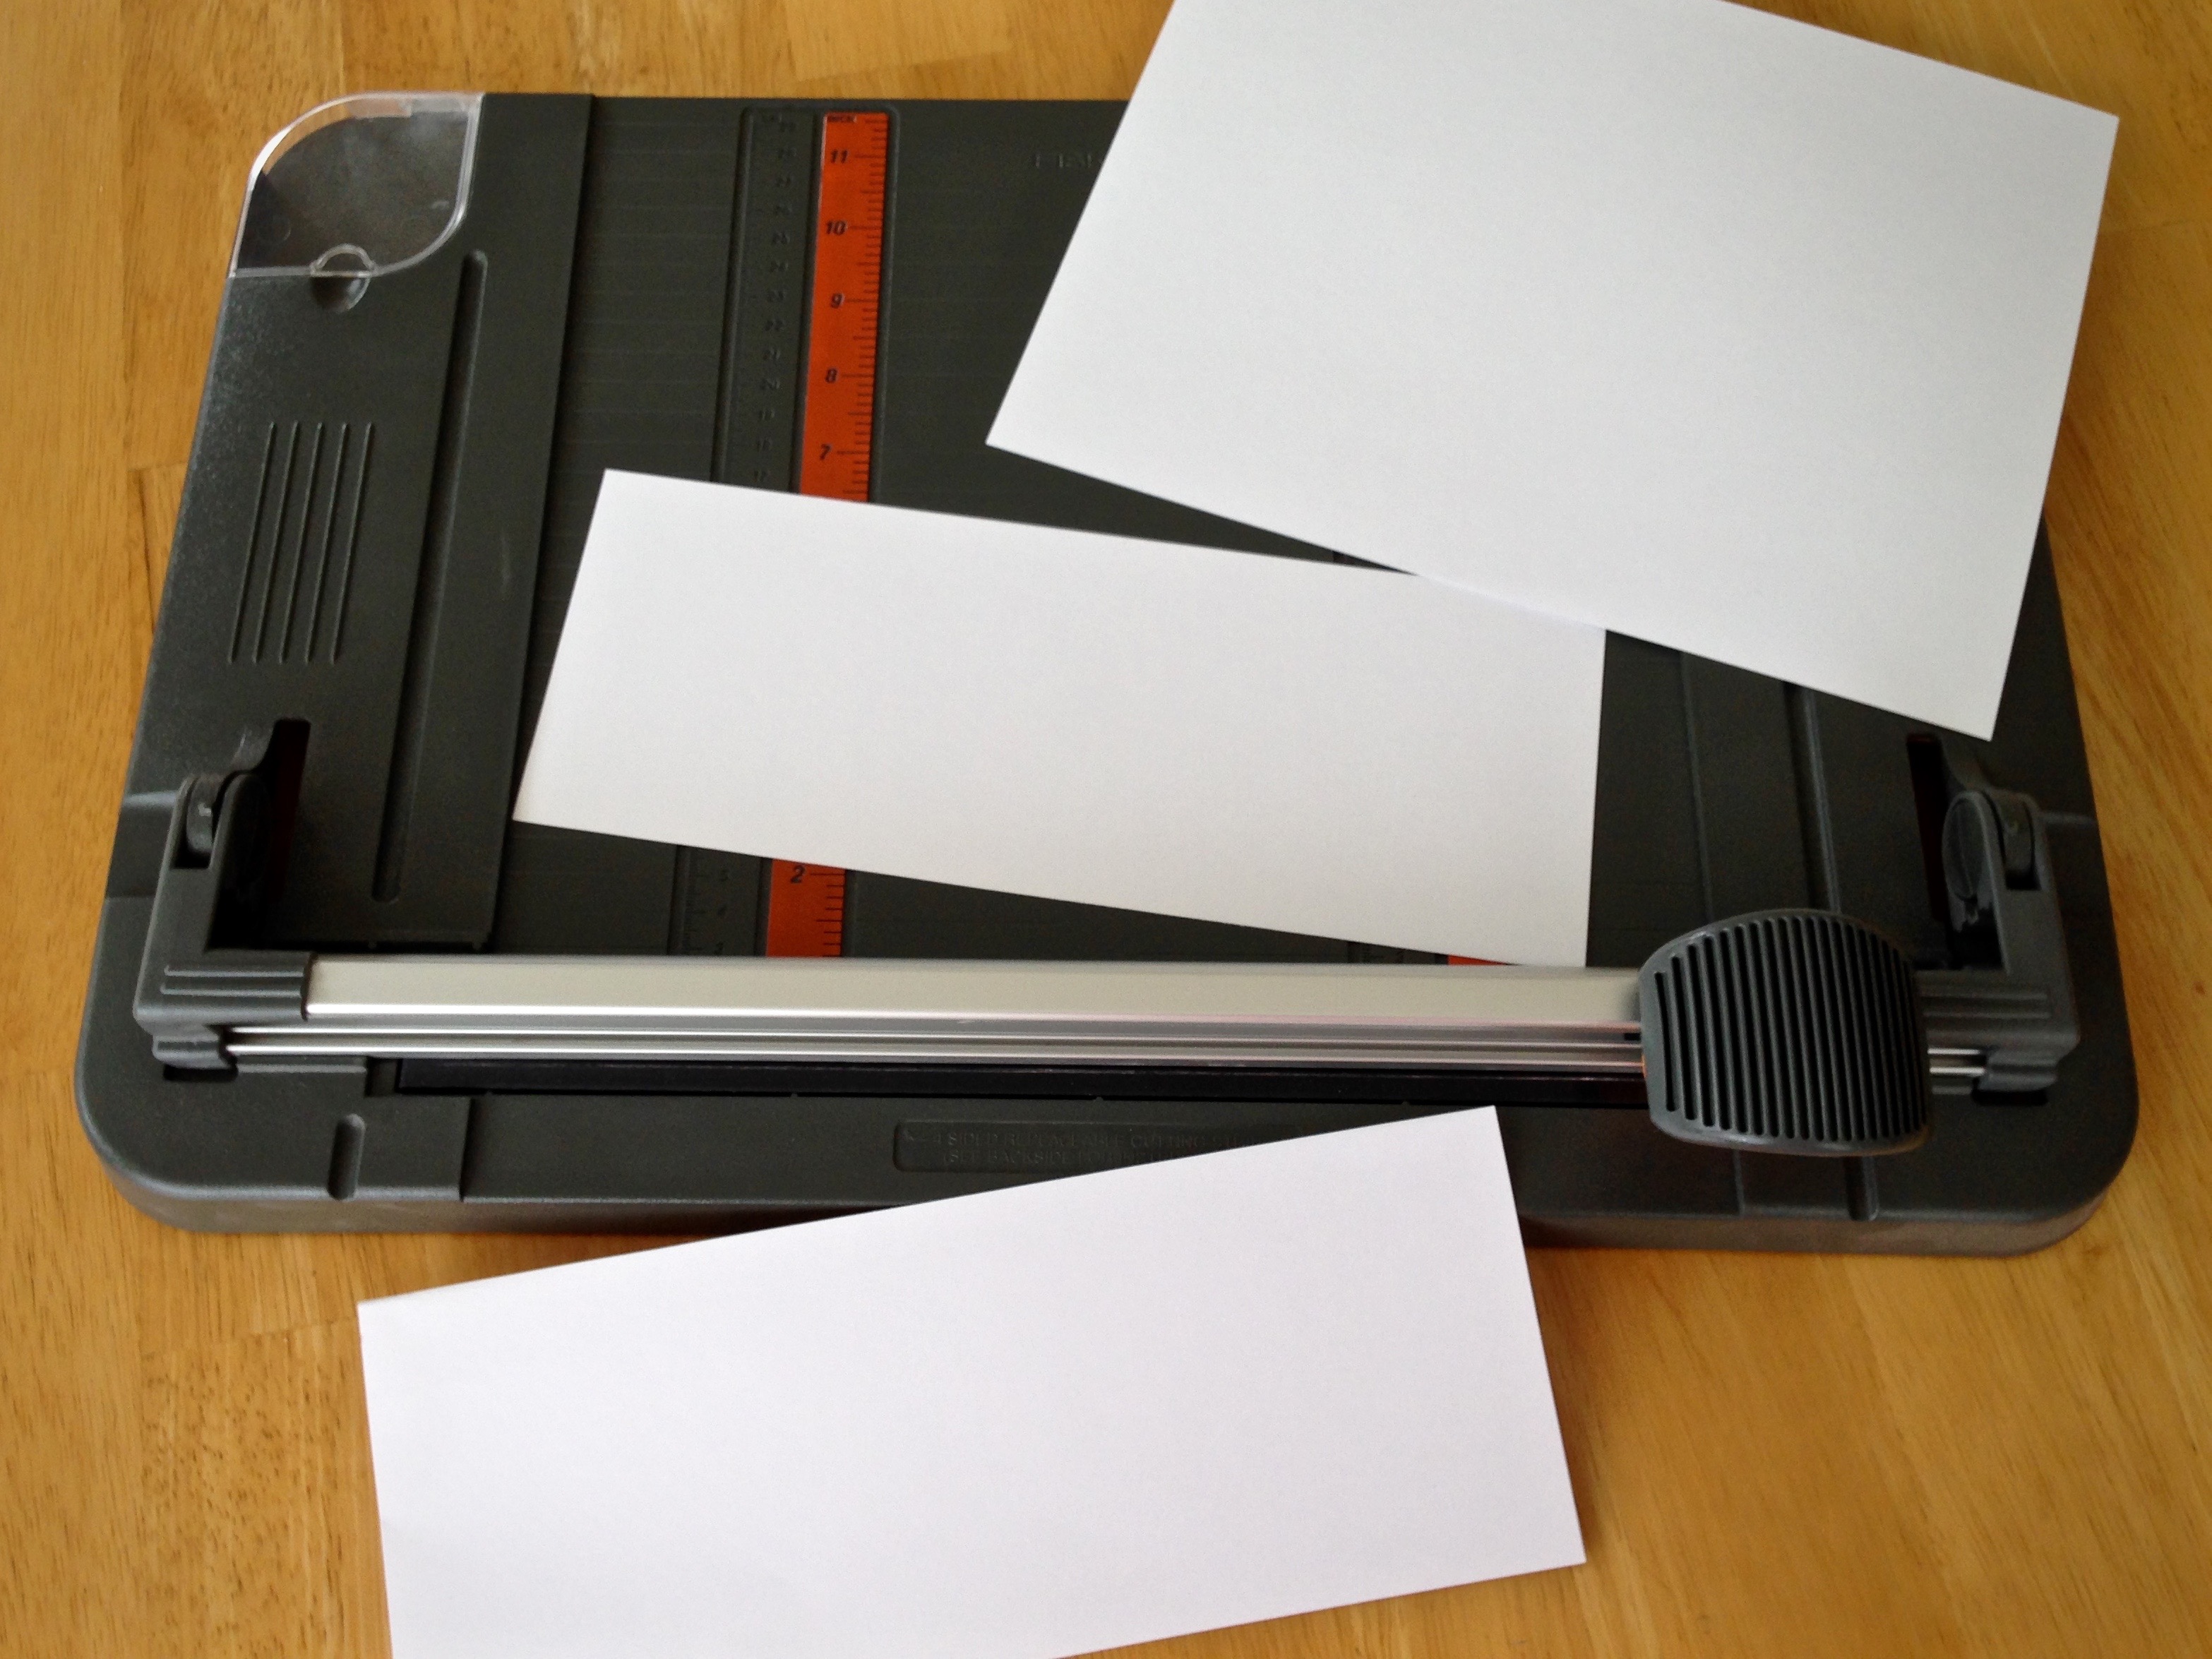
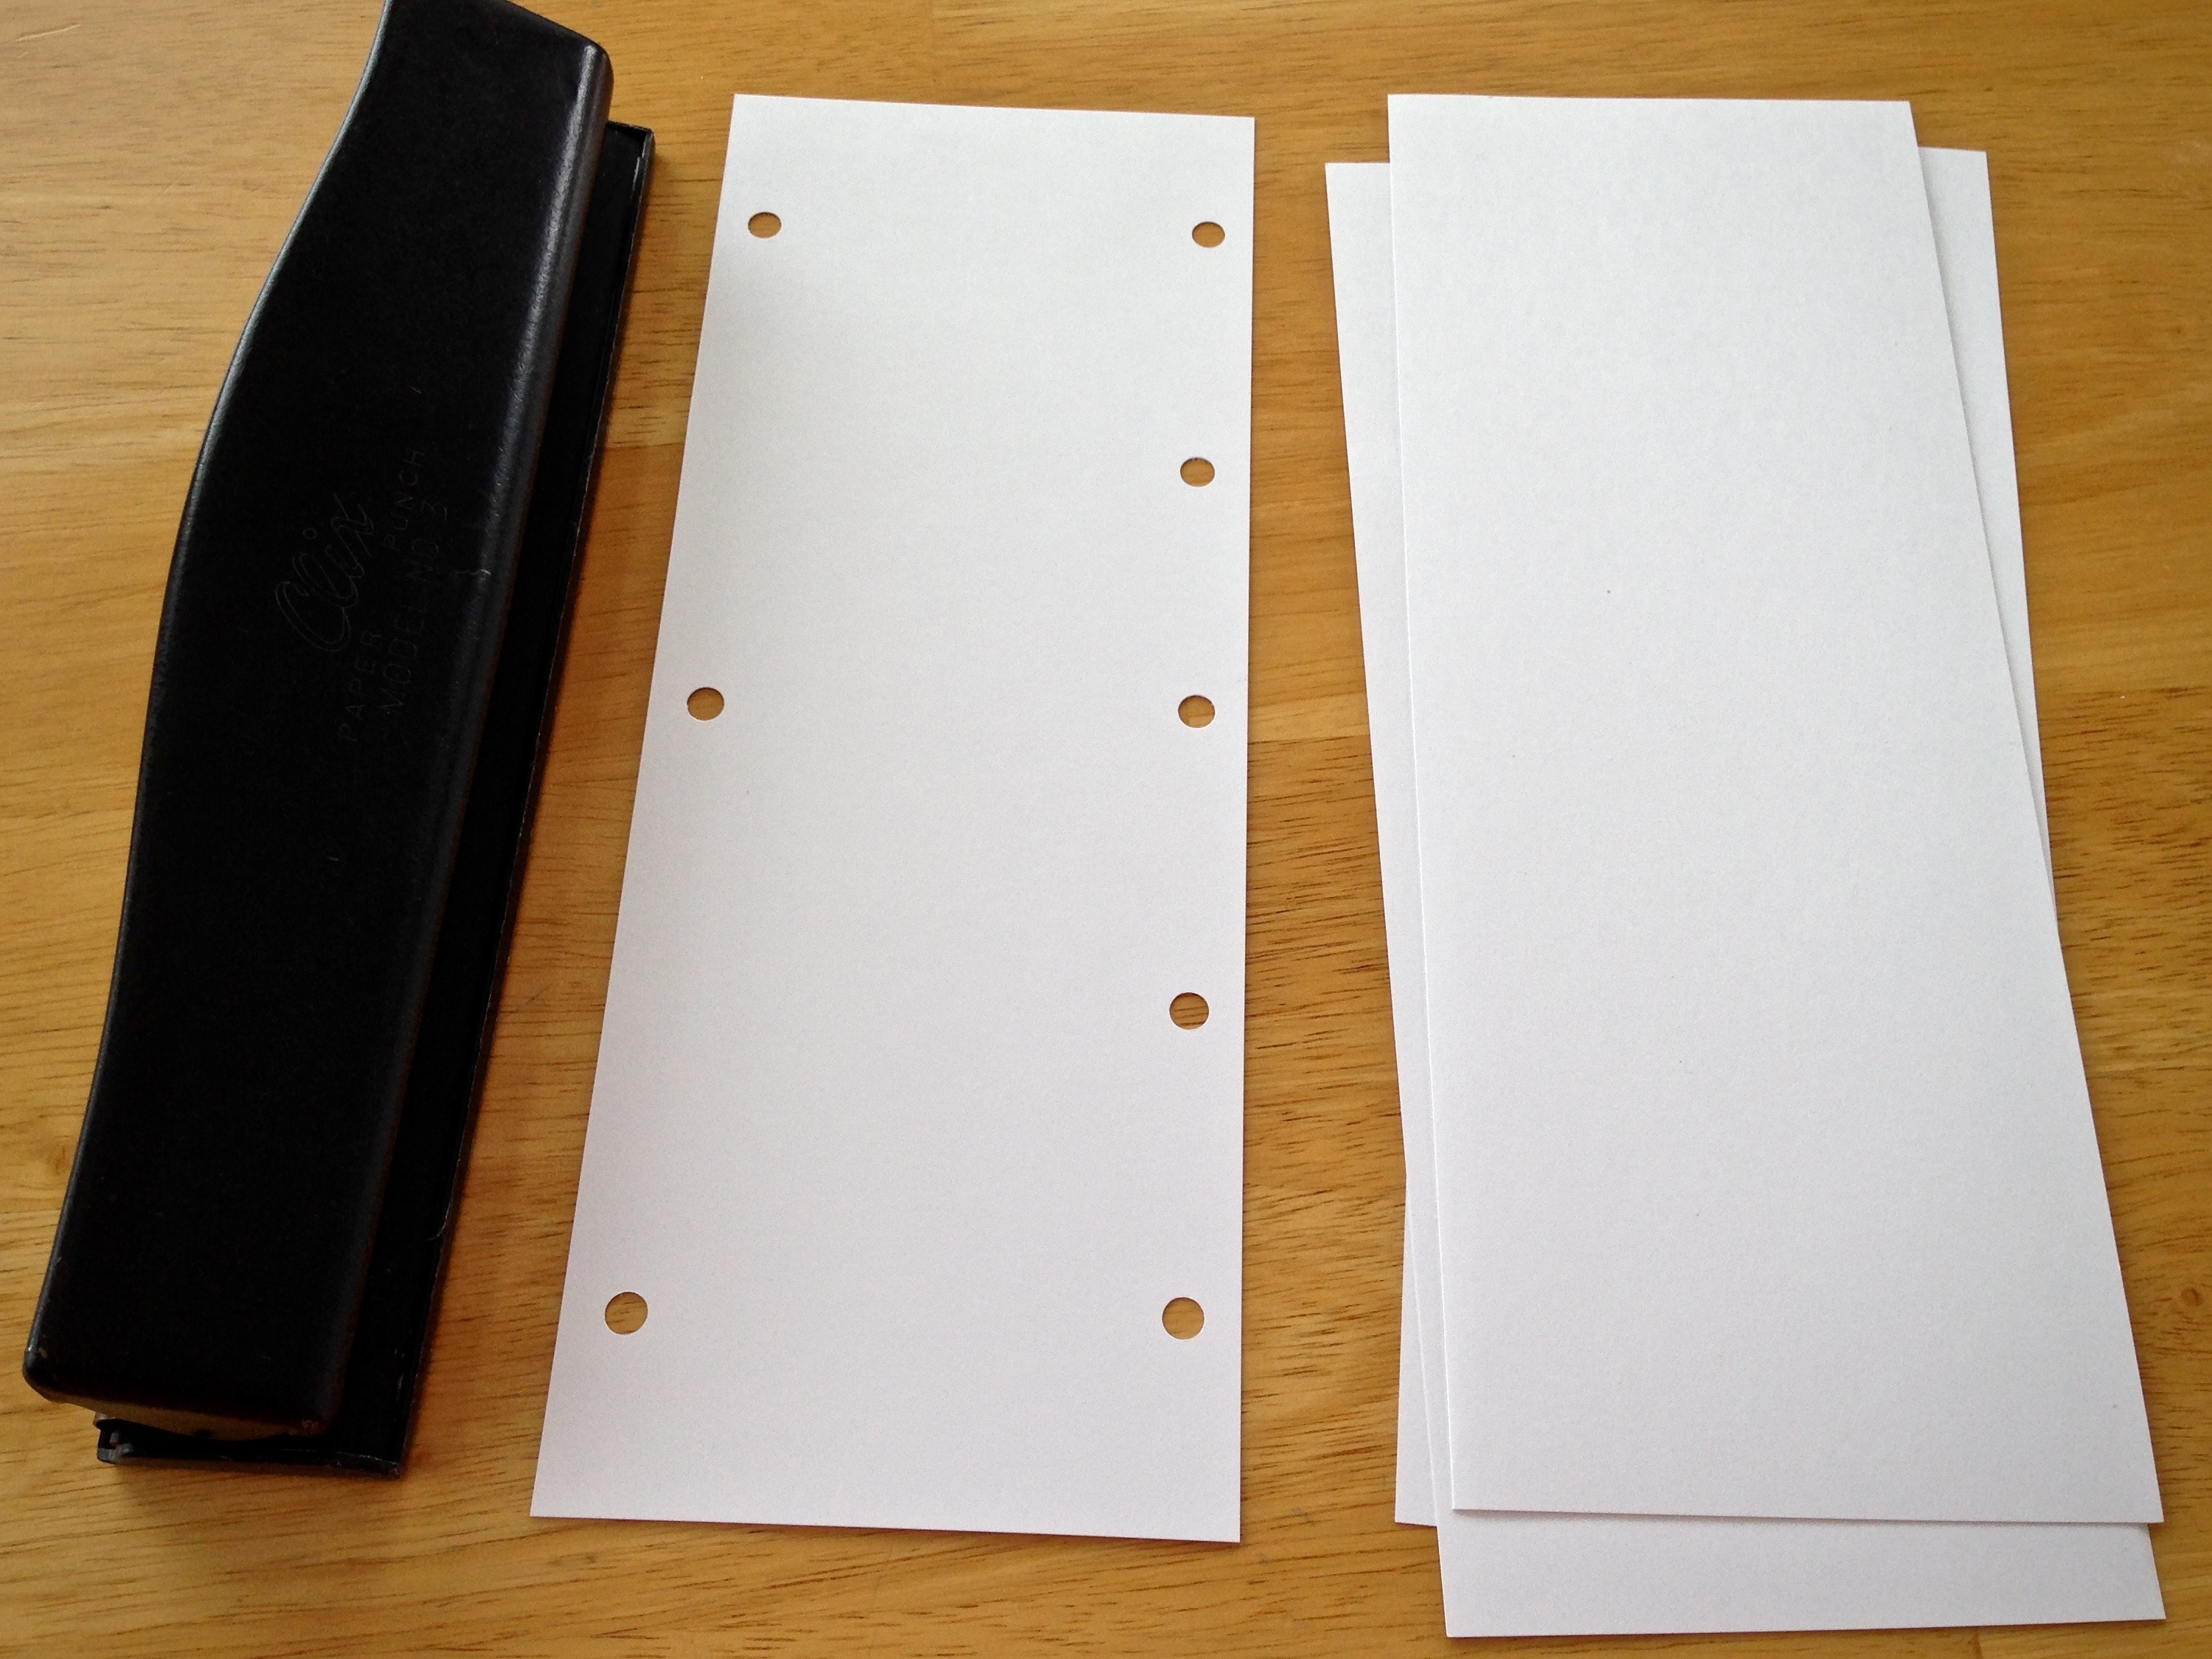
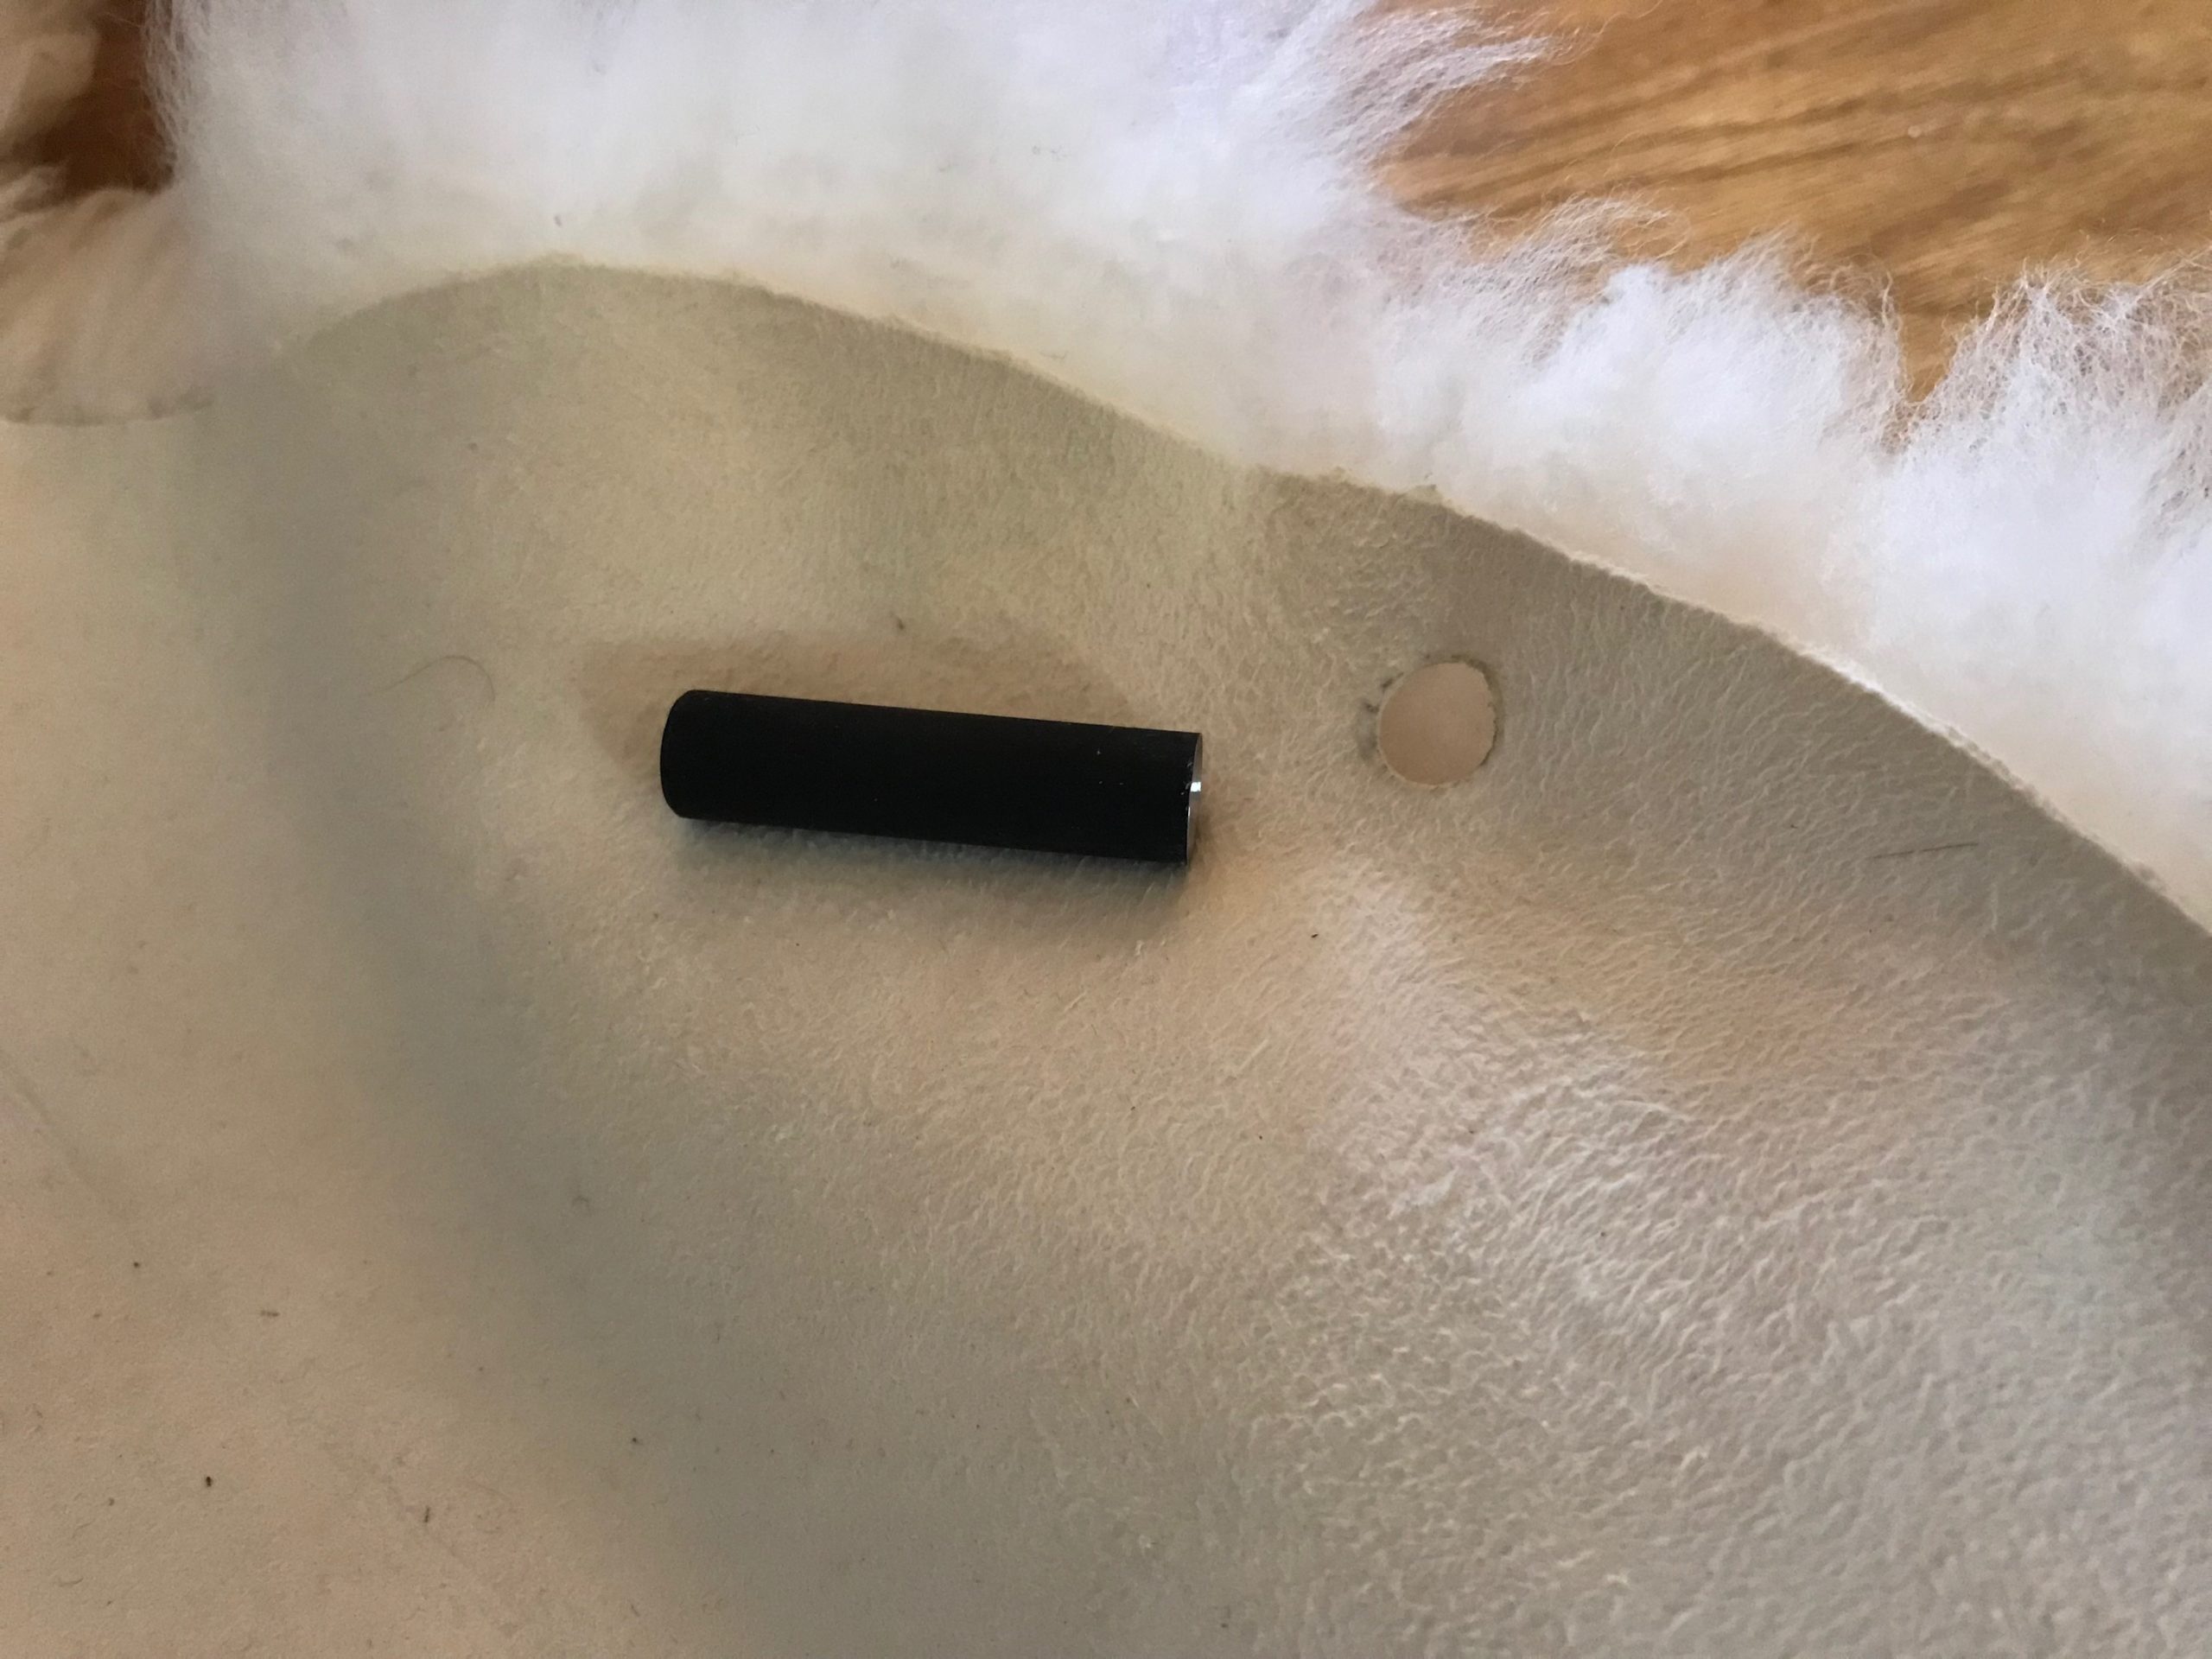
1 Mark placement for 6 grommets on the underside of the sheepskin.

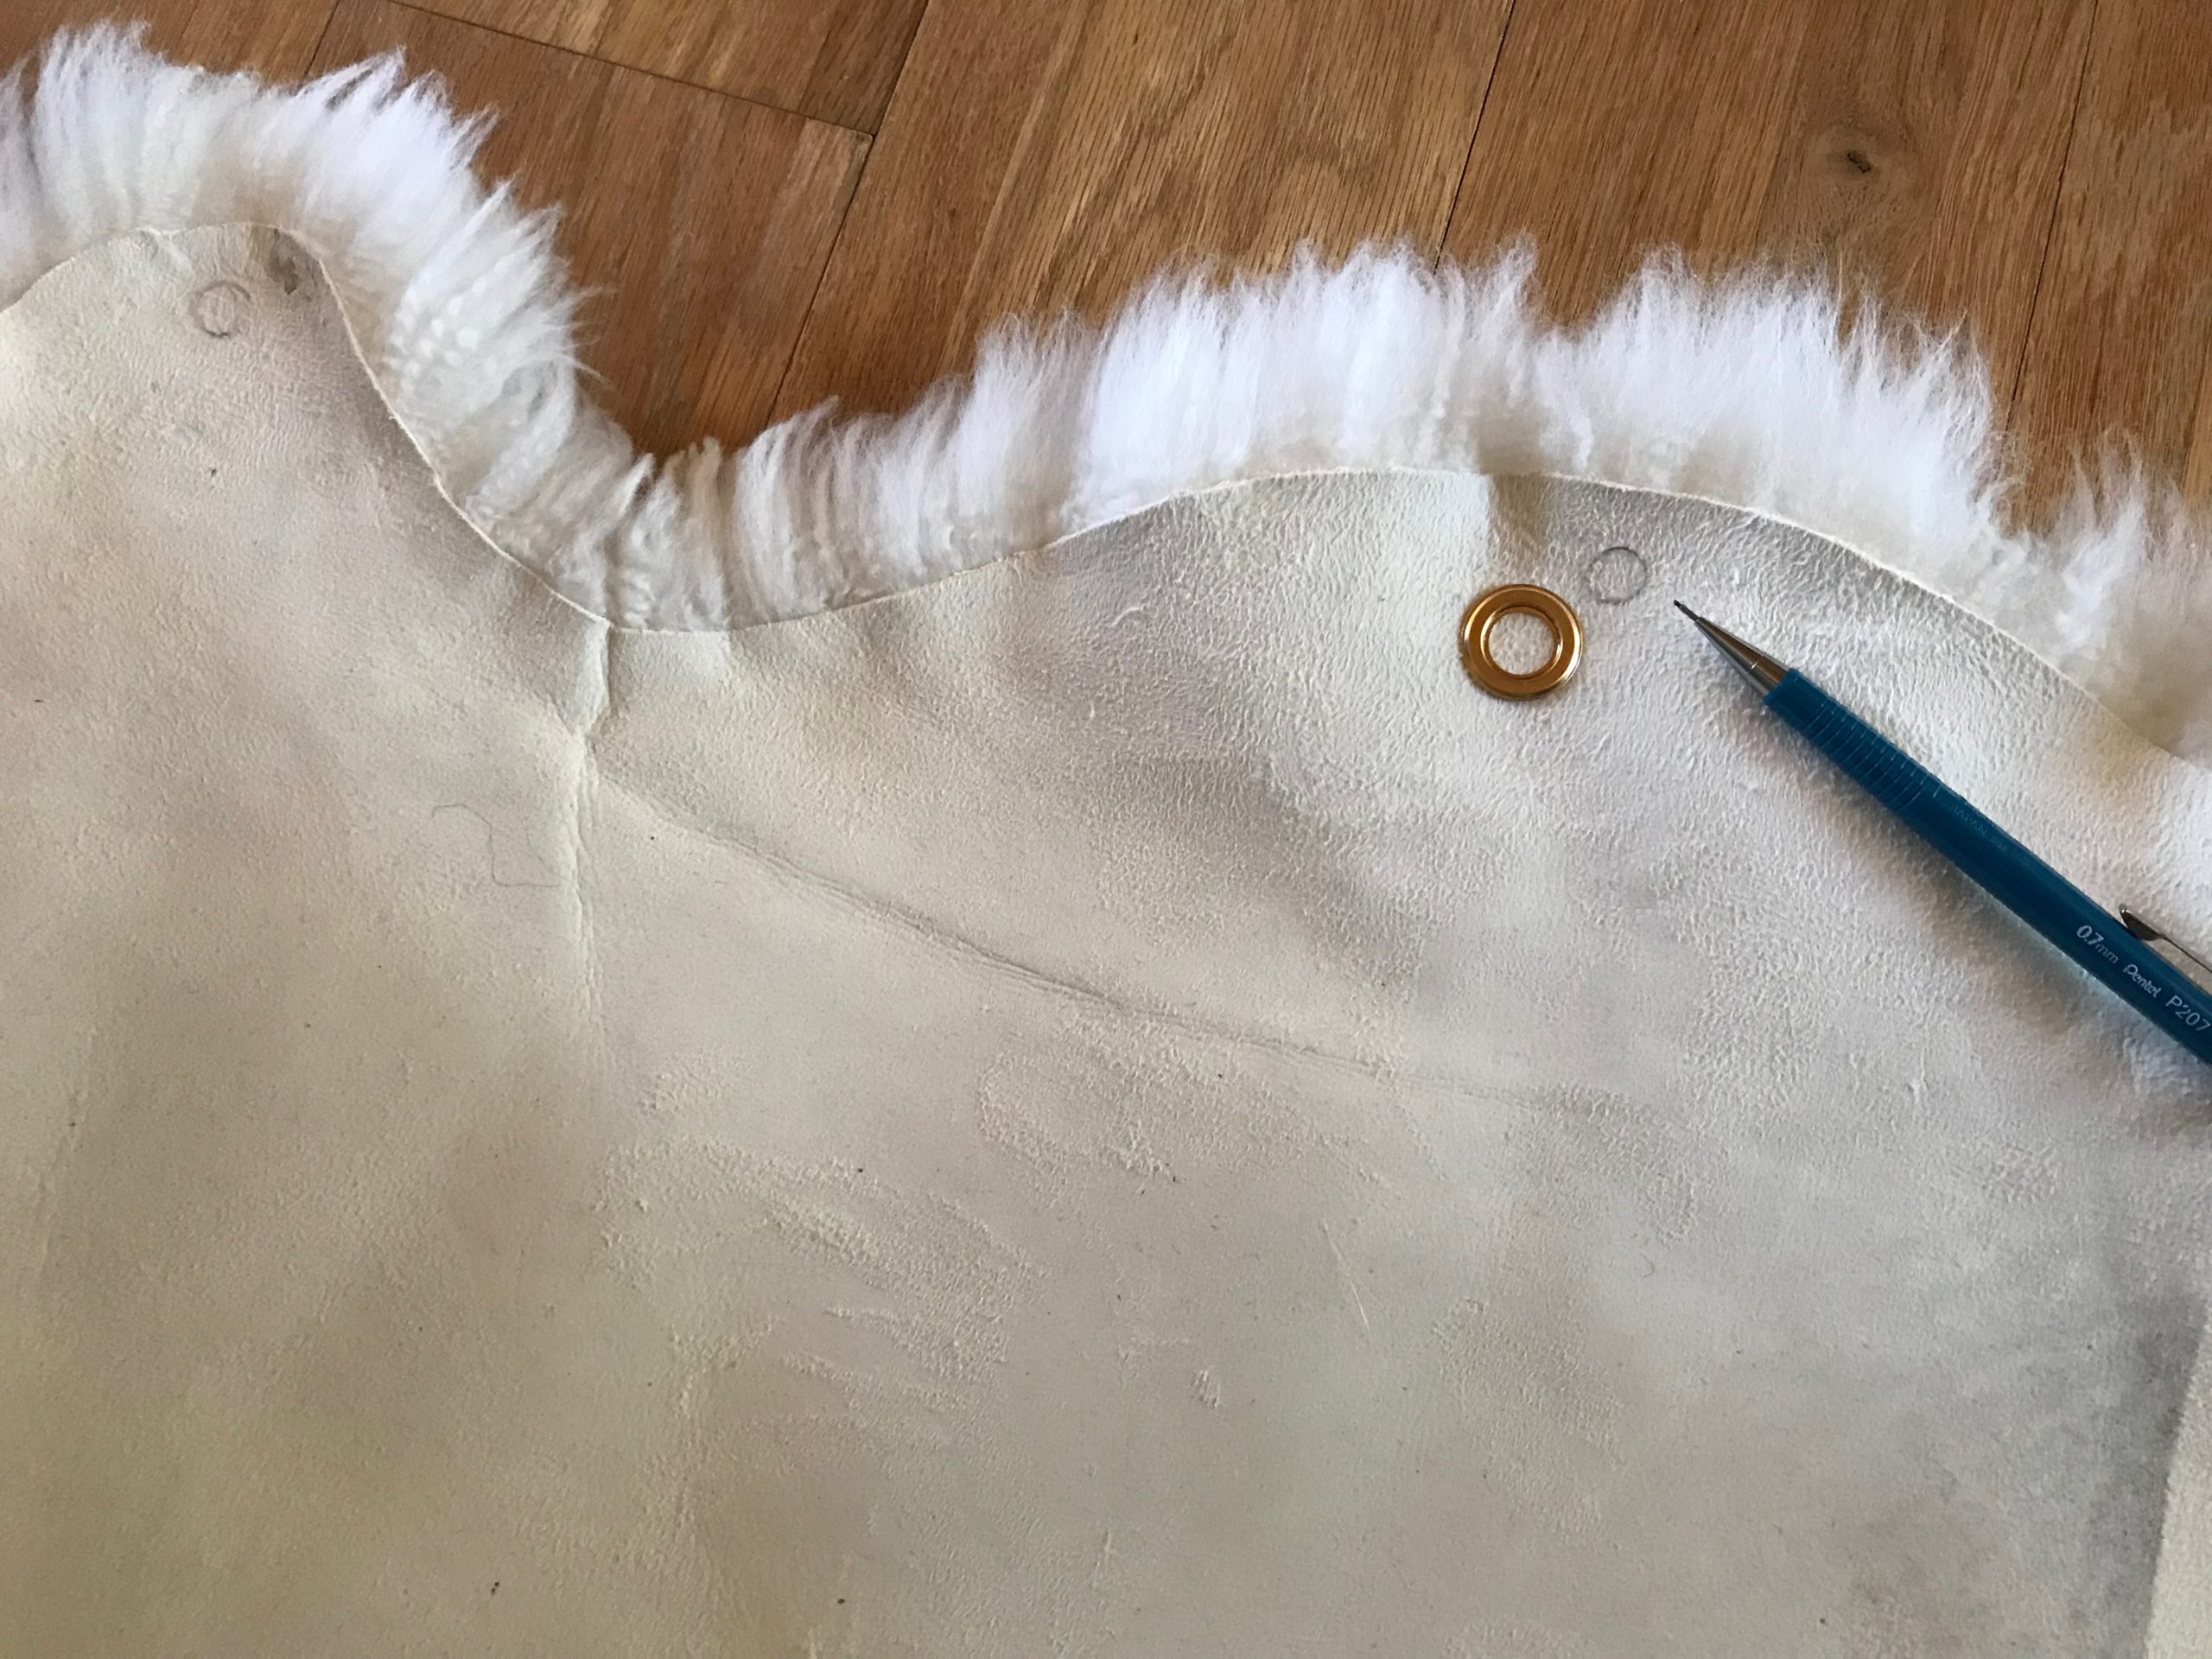
2 With block of wood underneath, hold grommet hole punch over one of the marked positions. Tap tool with the hammer to cut a small hole.

3 Insert the protruding ring of the top grommet piece (grommet) into the fur side of the hole.

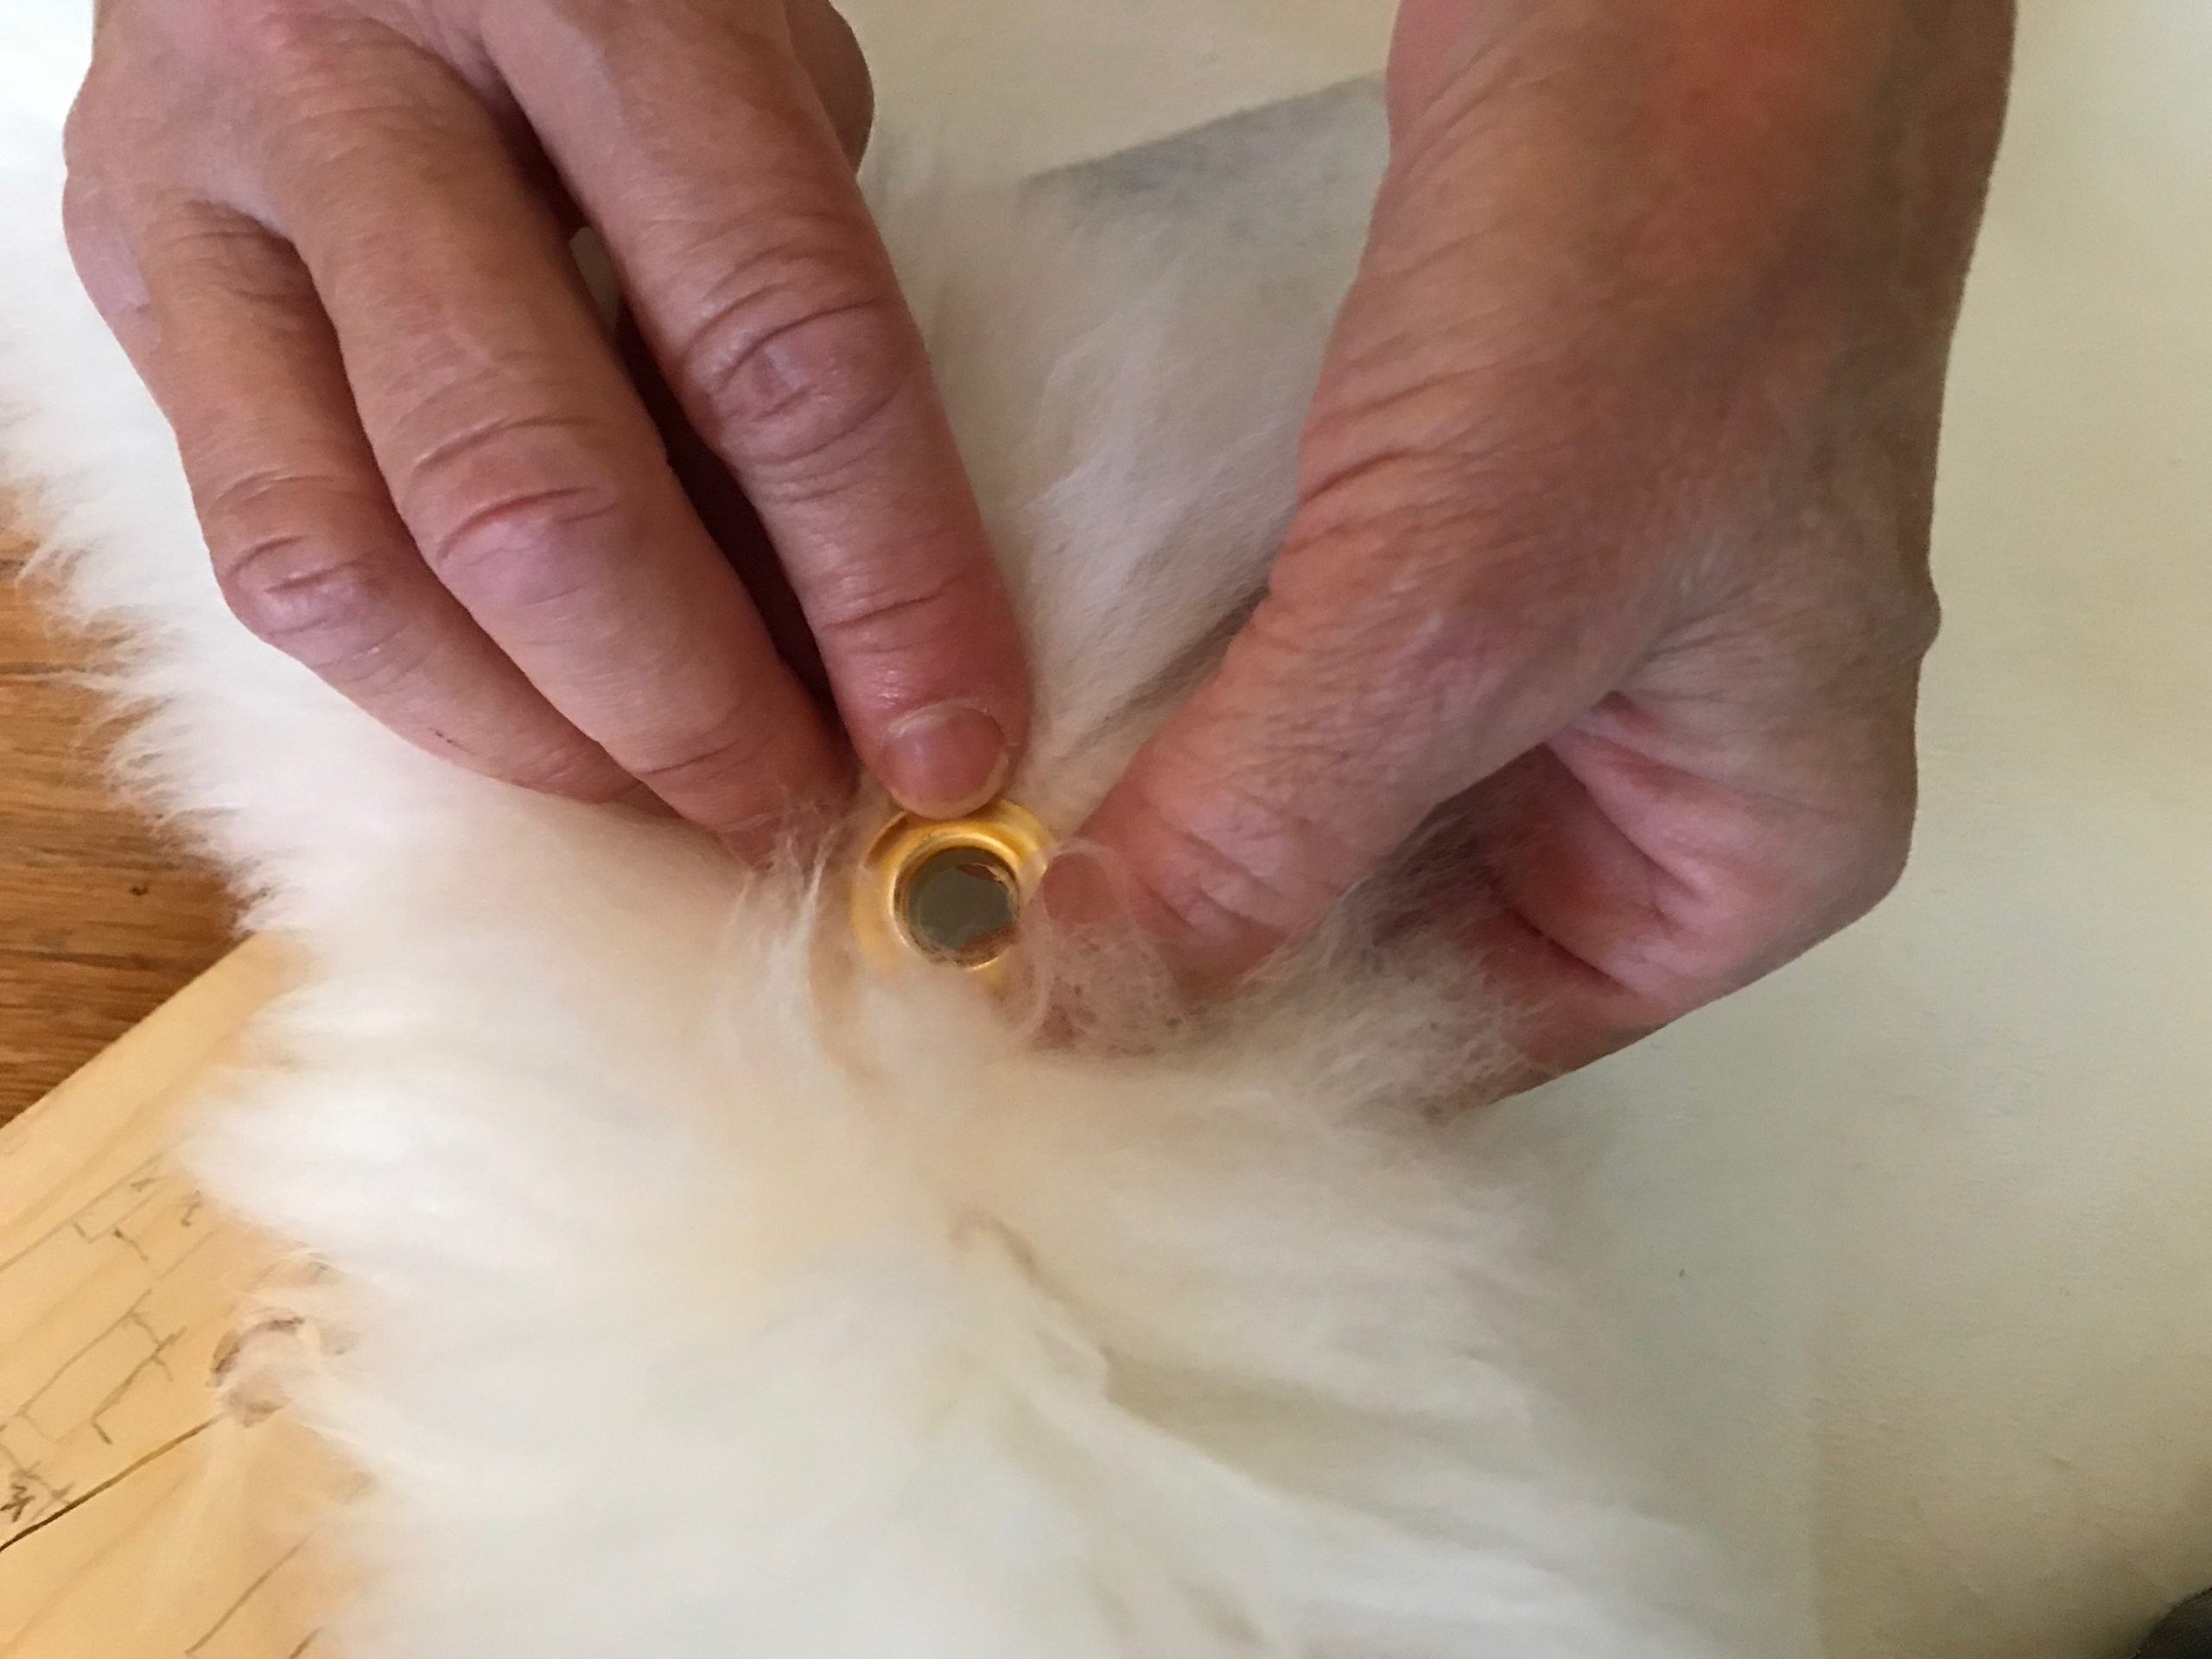
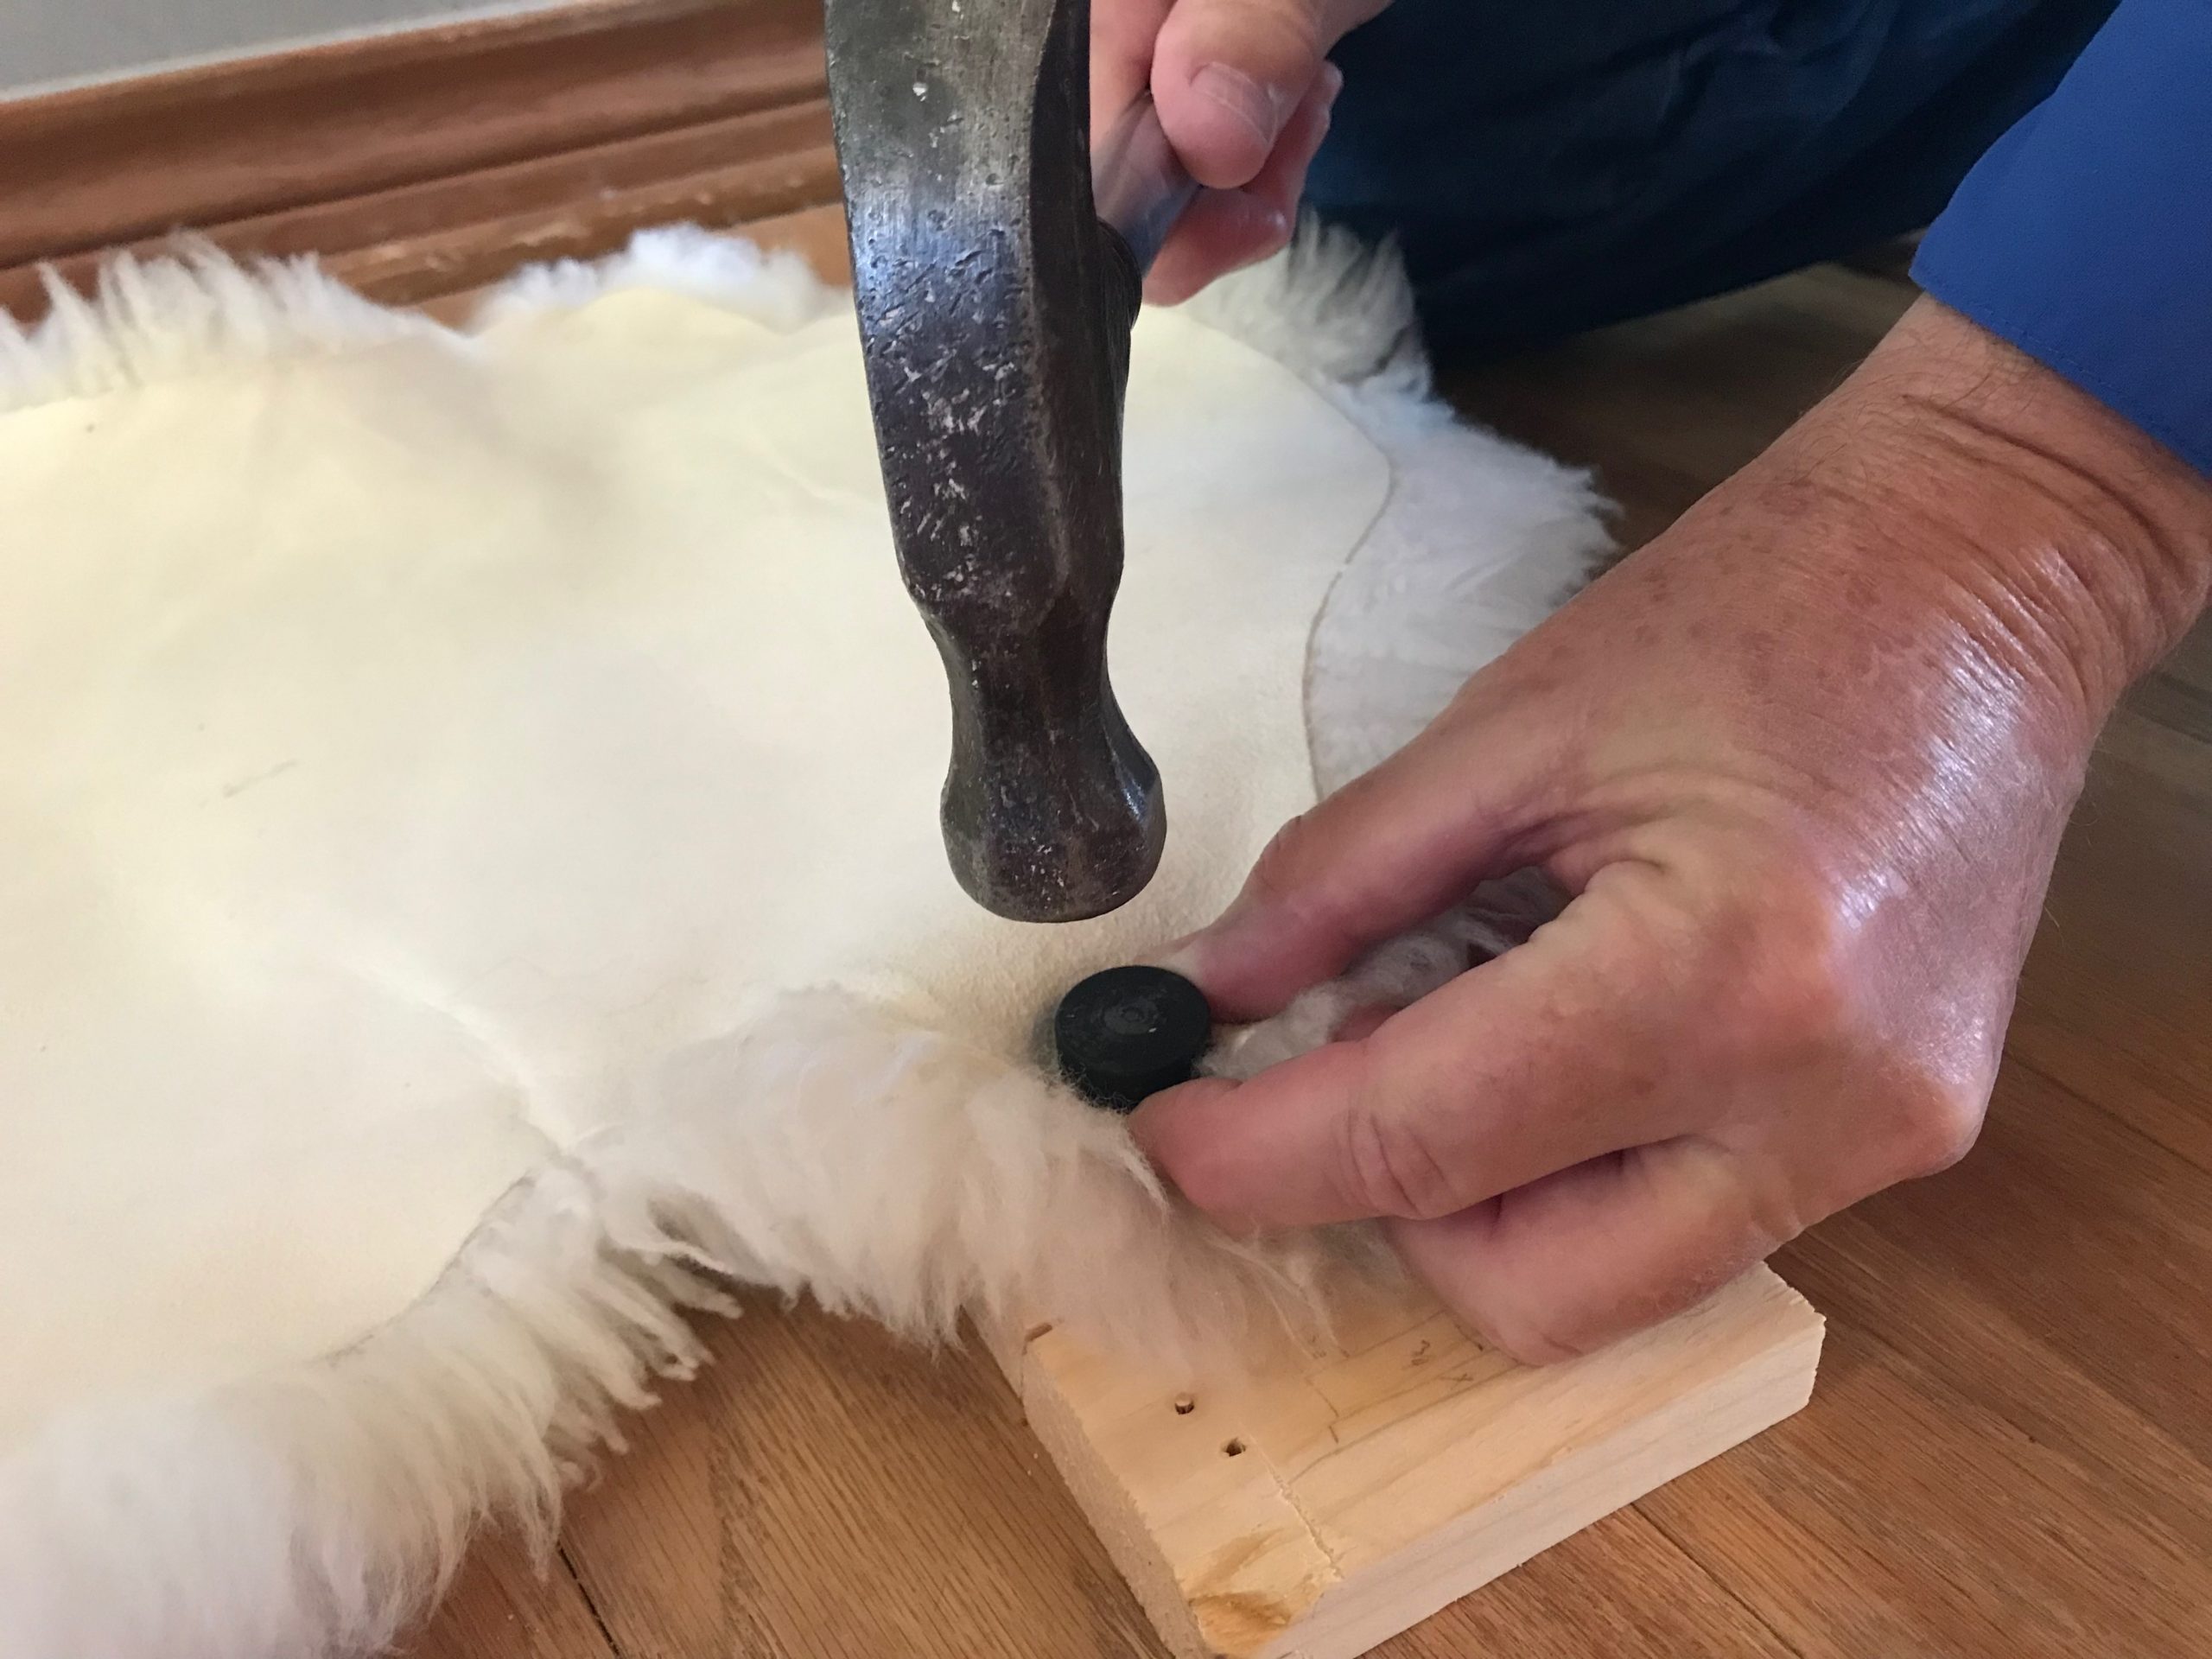
4 With fur side down on the block of wood, fit bottom grommet piece (washer) on top. Align grommet and washer between the base and flaring tool. Firmly tap with hammer until the two grommet pieces are tightly fastened together.

5 Repeat steps 2 – 4 for each of the 5 remaining grommets.

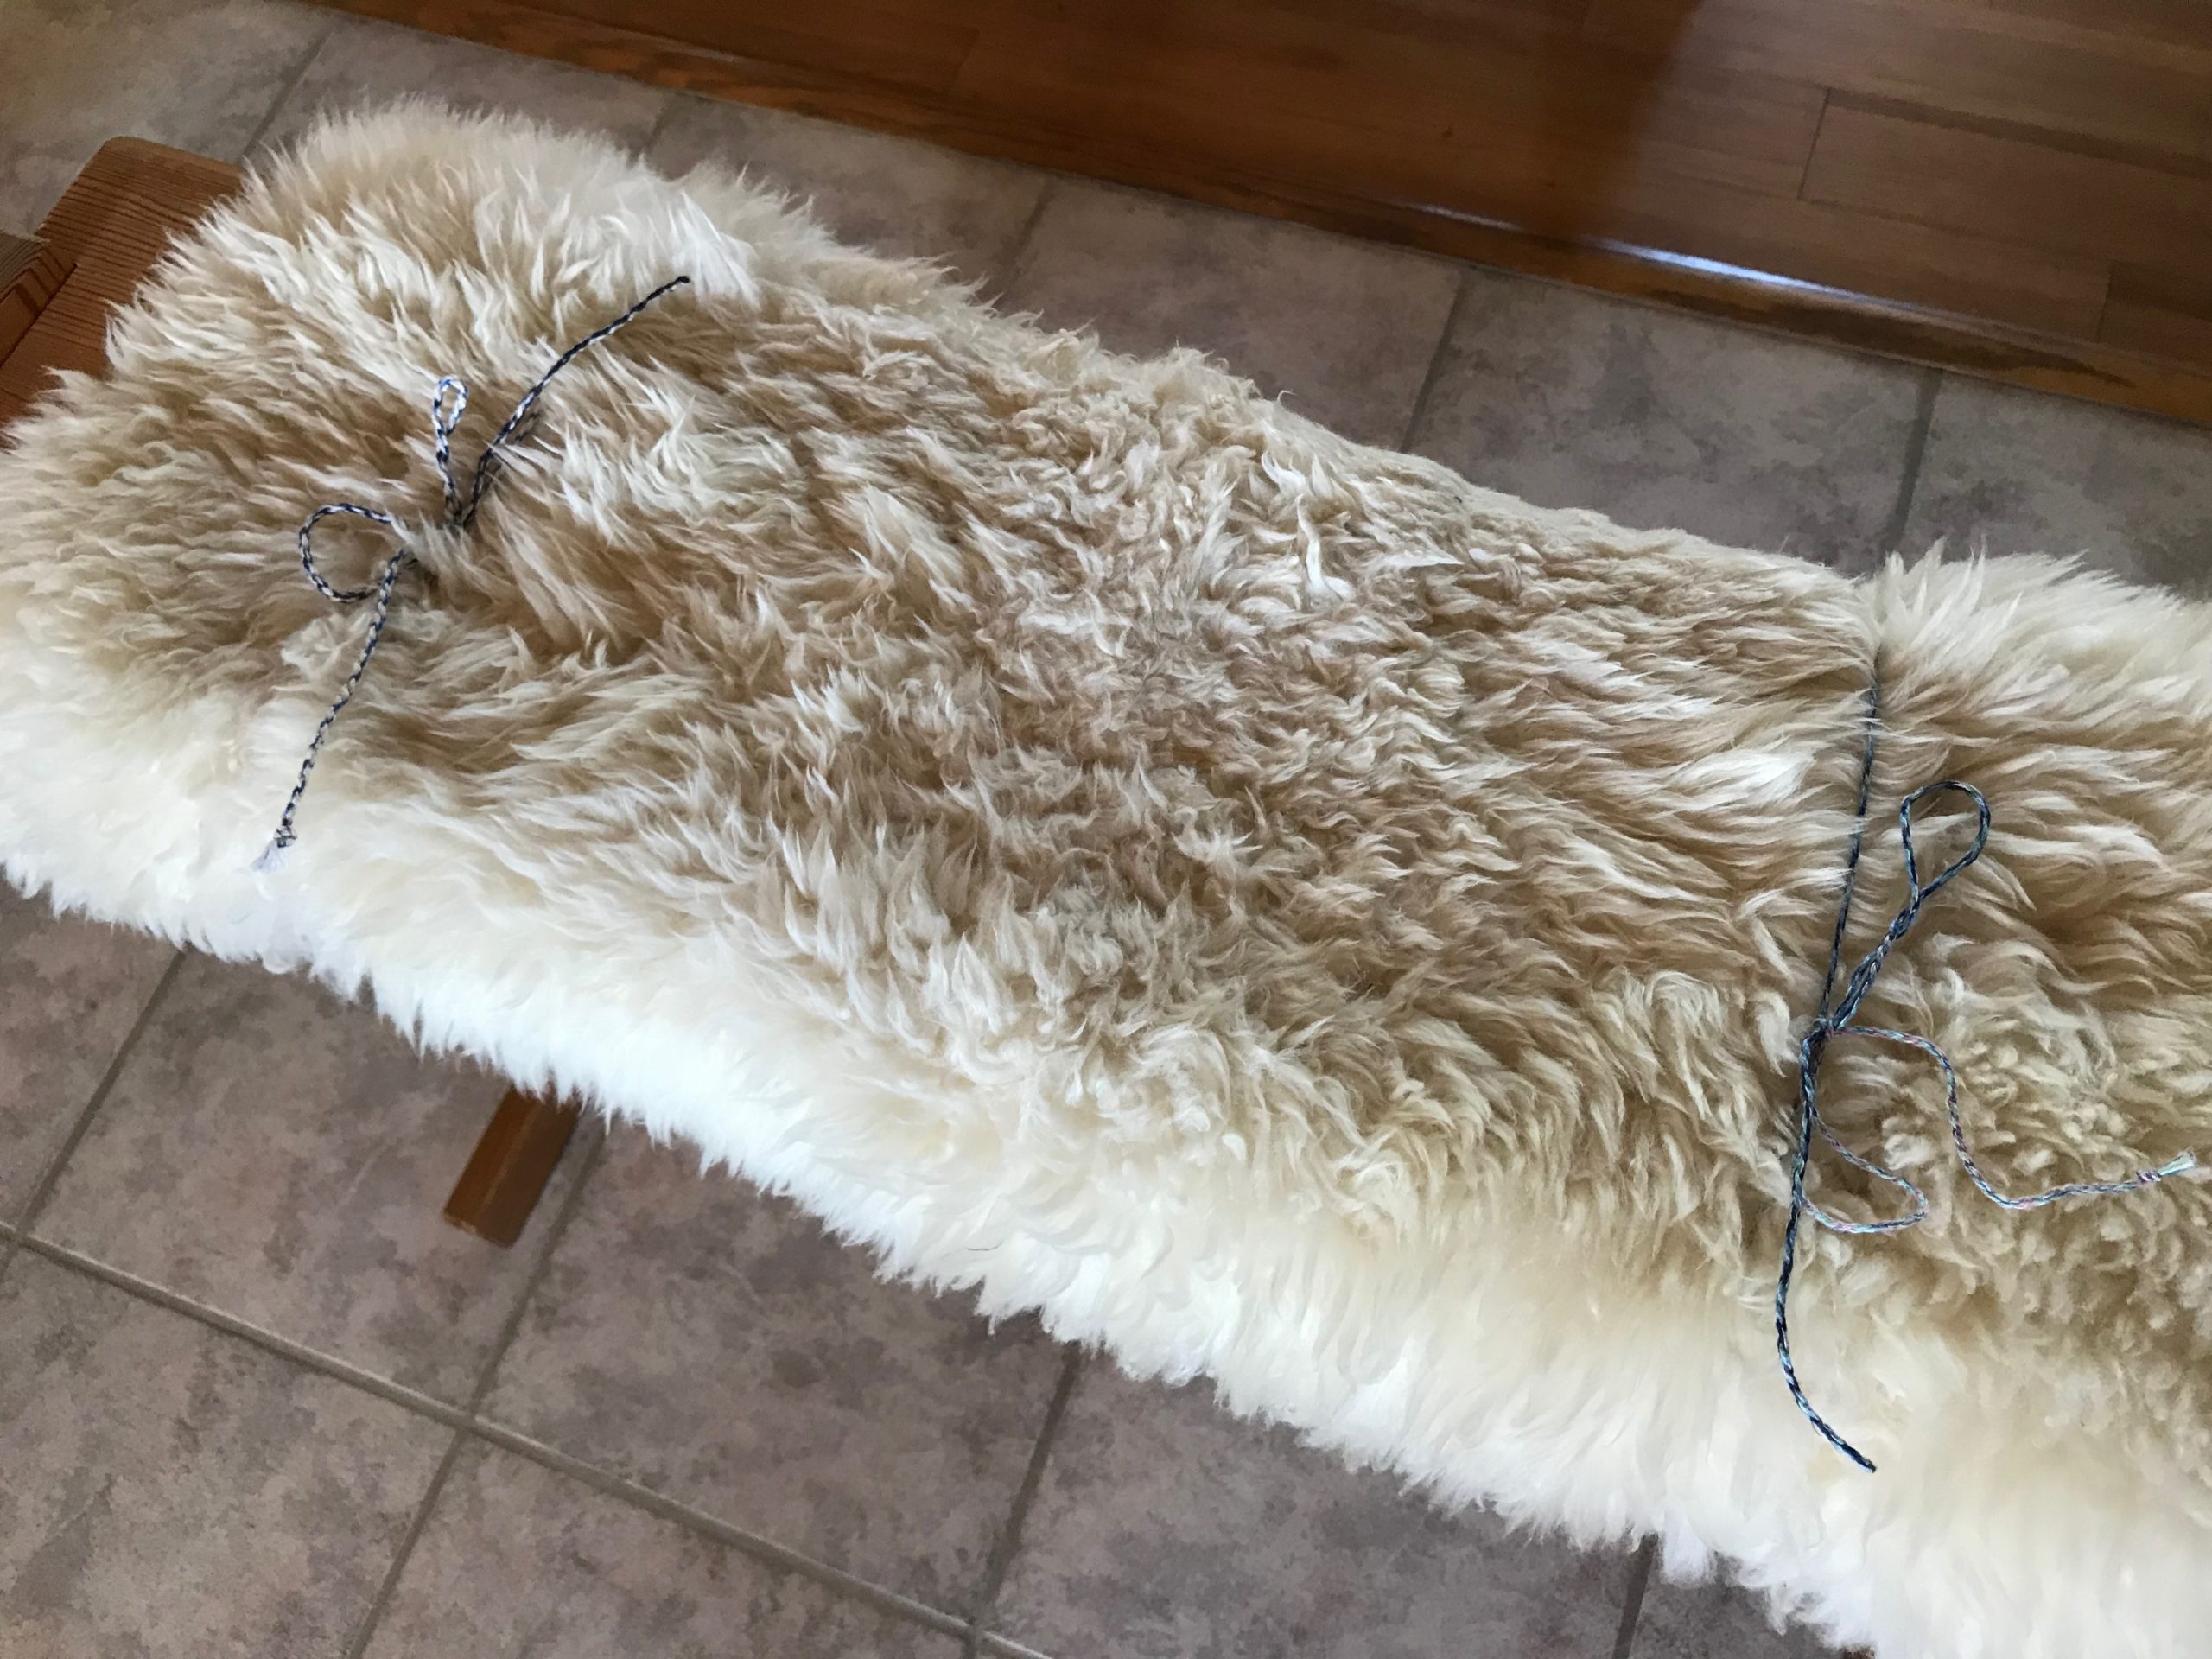
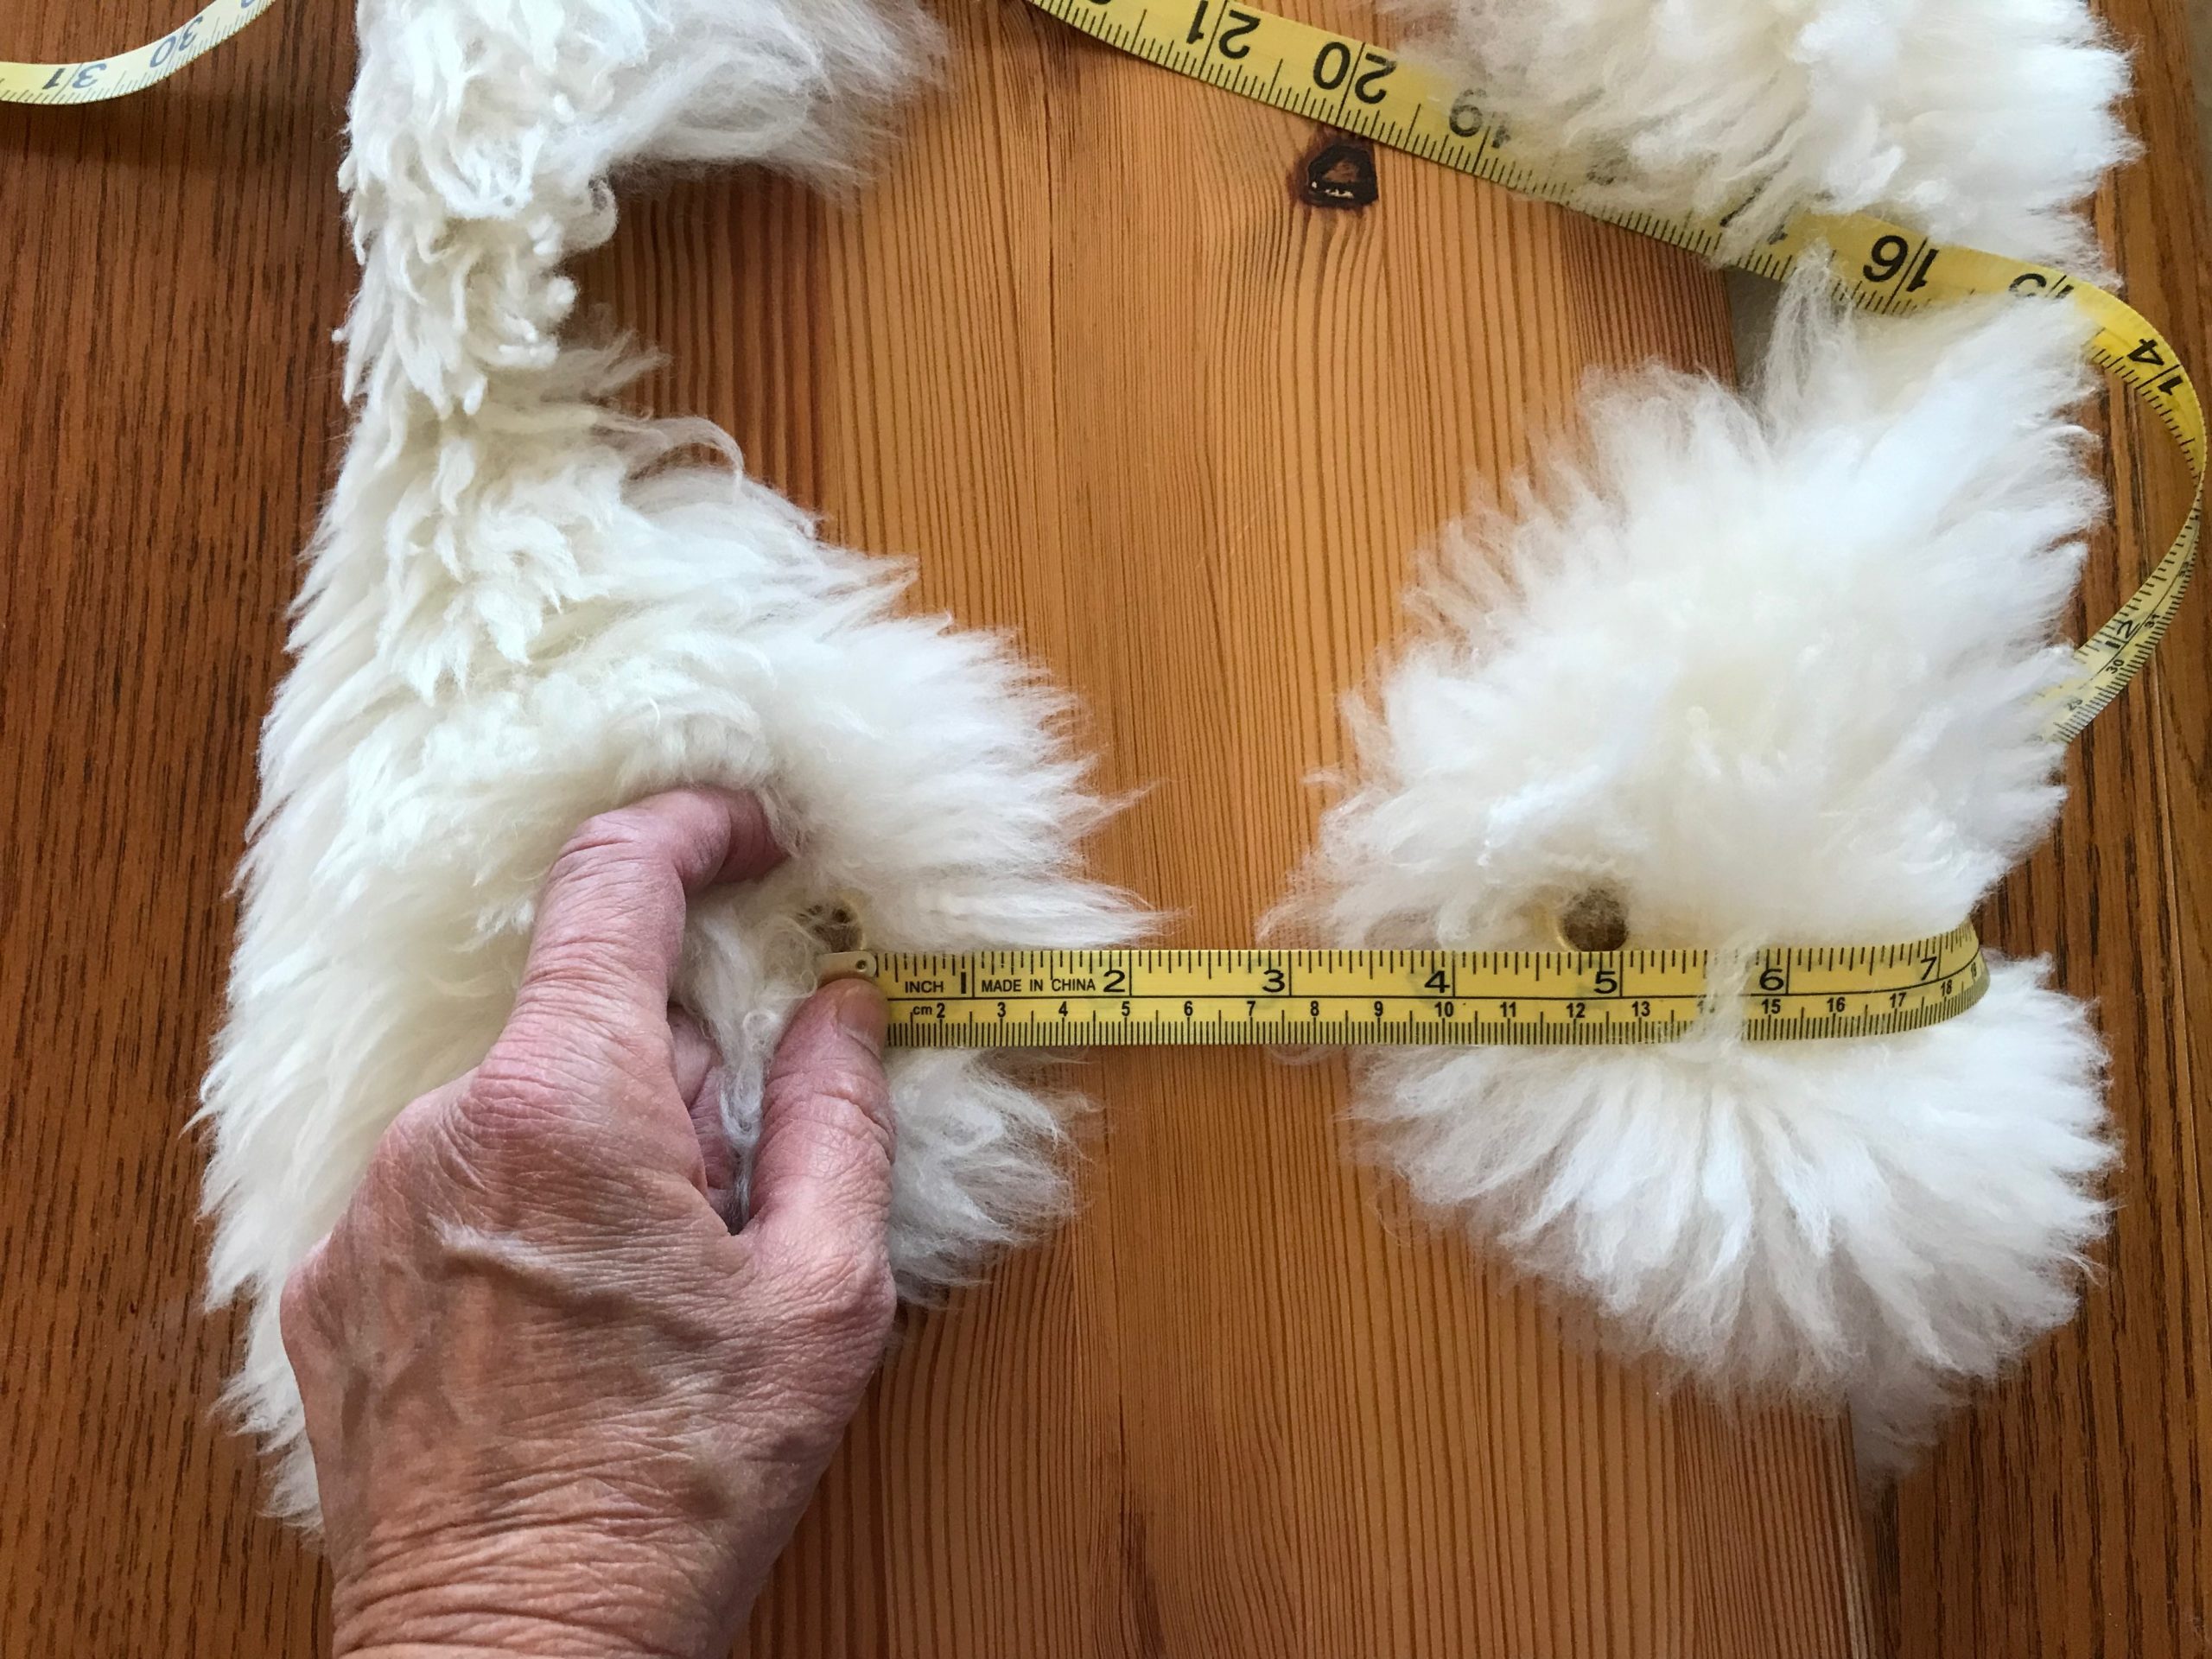
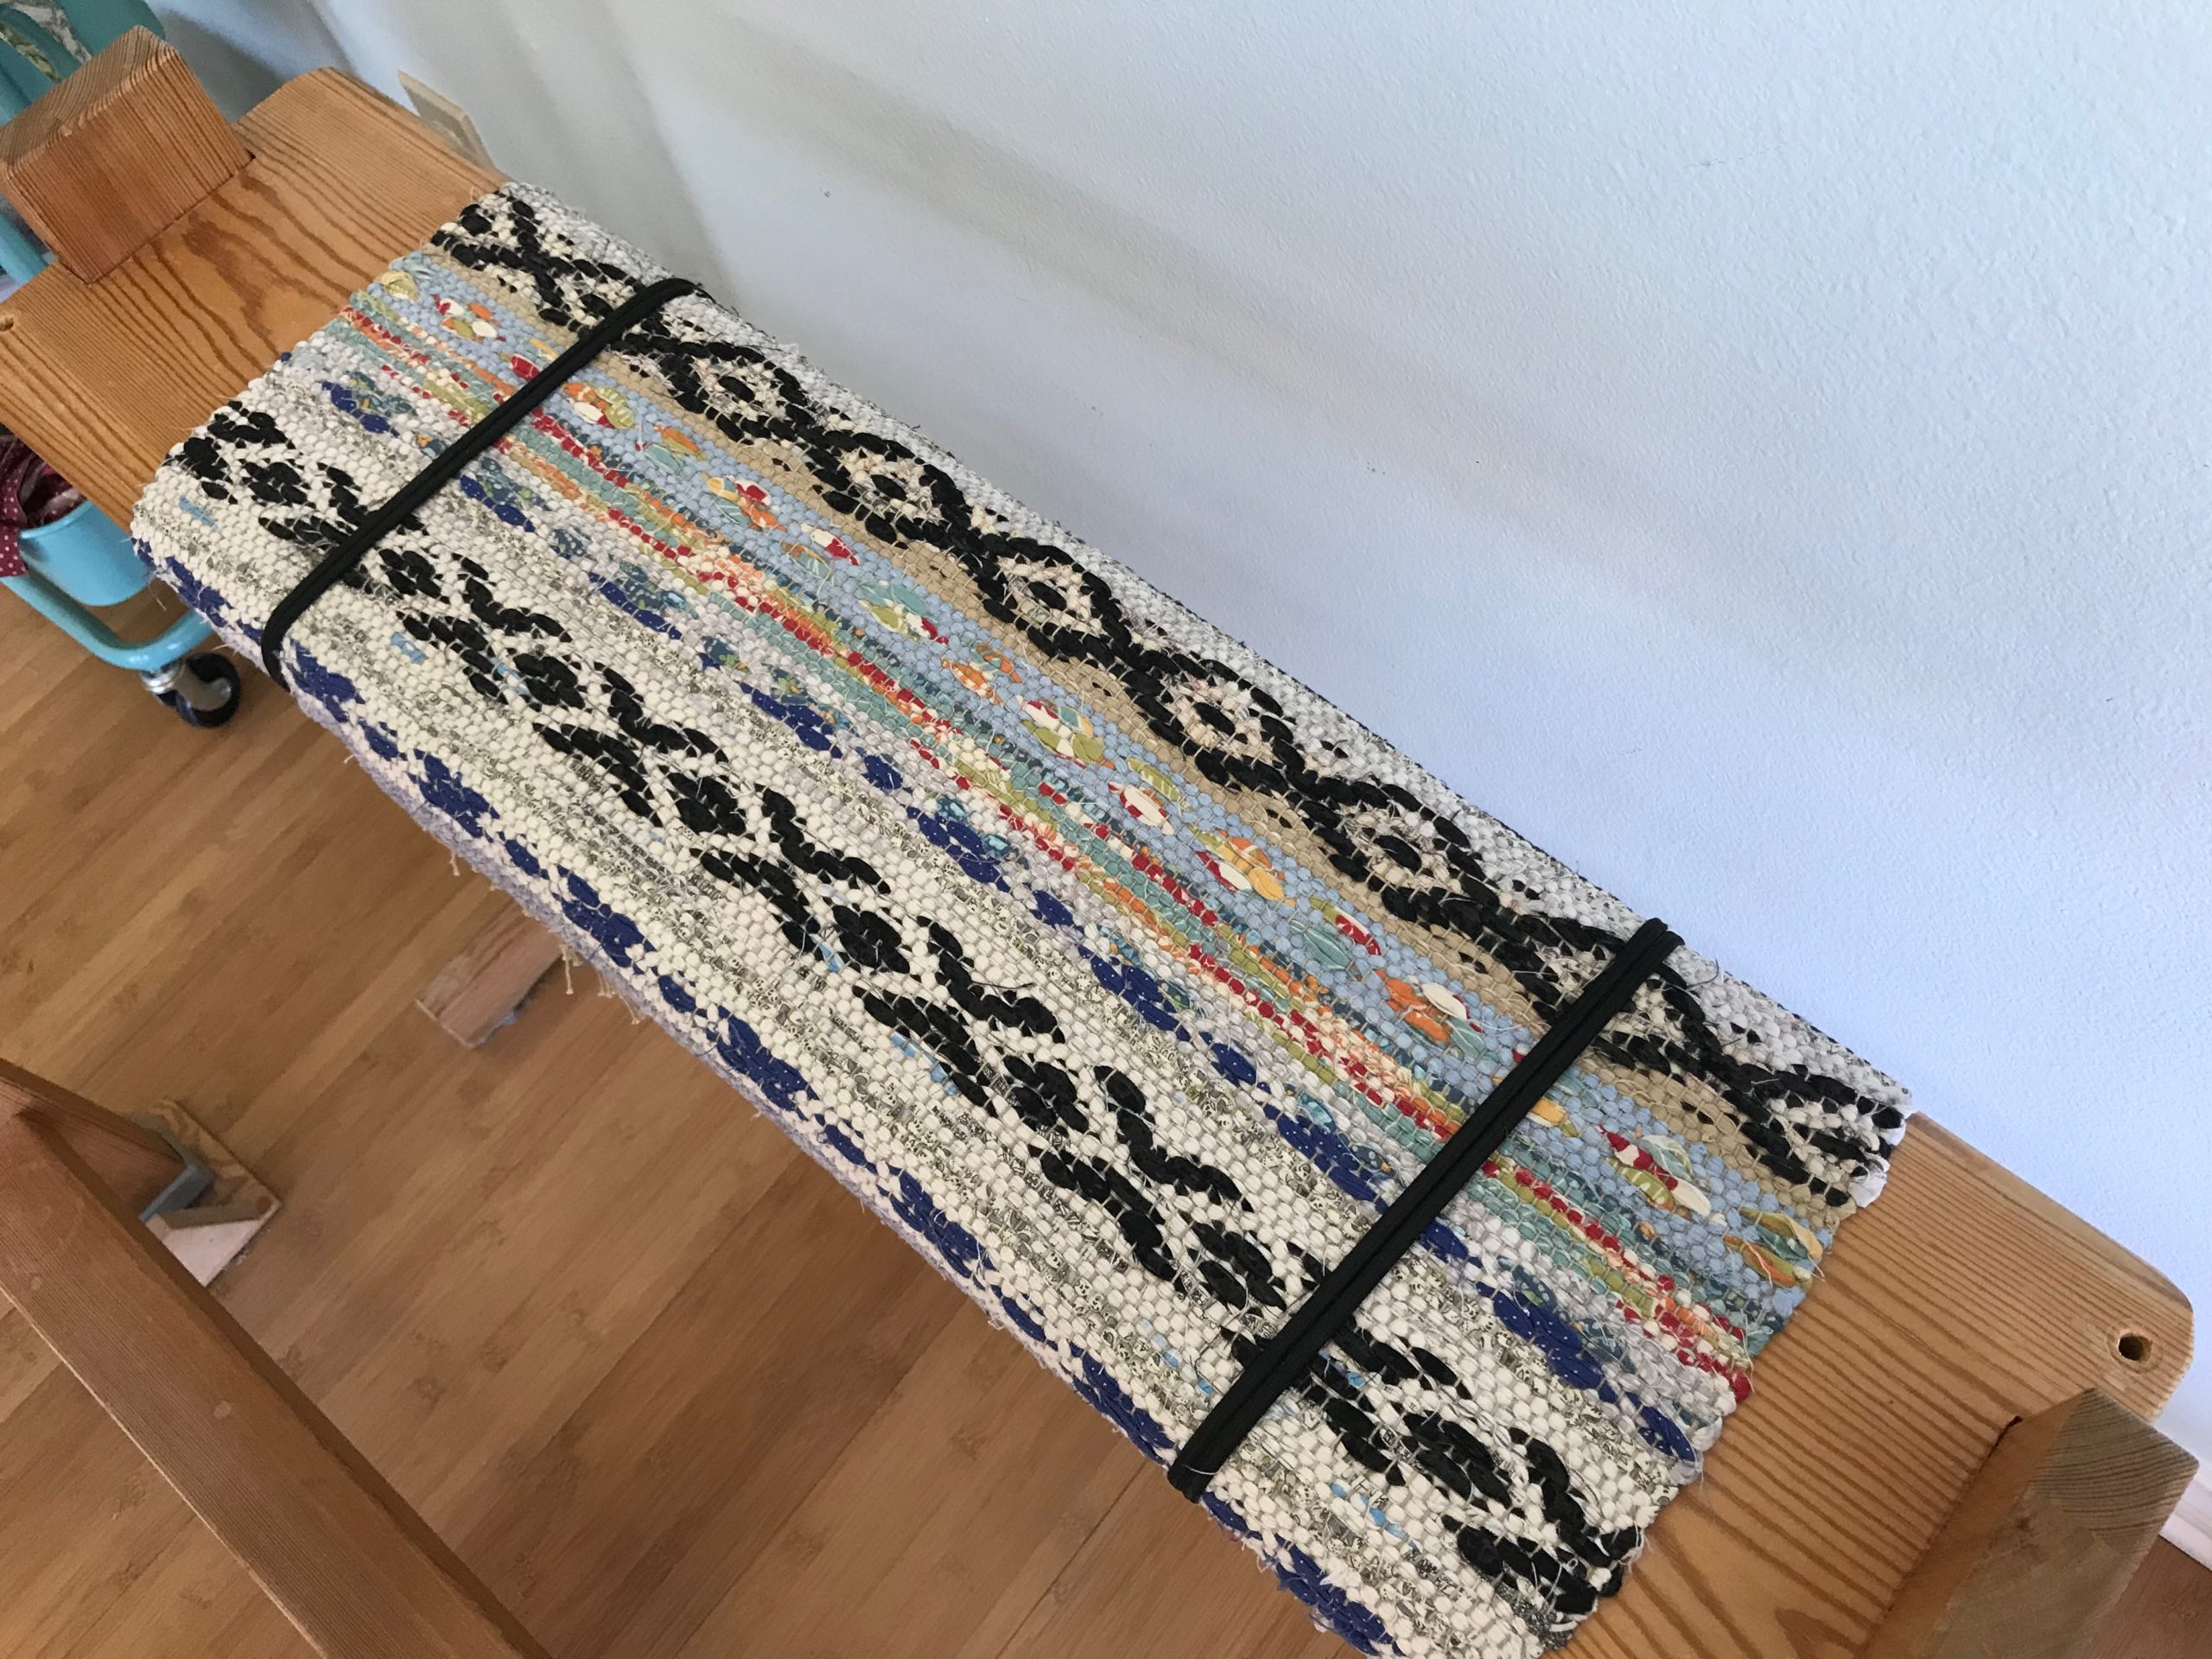
6 Lay the sheepskin fur-side down on a table or floor. Center the seat of the bench upside down on the sheepskin. Bring the sides of the sheepskin over the bench. Measure the distance between opposing grommets.

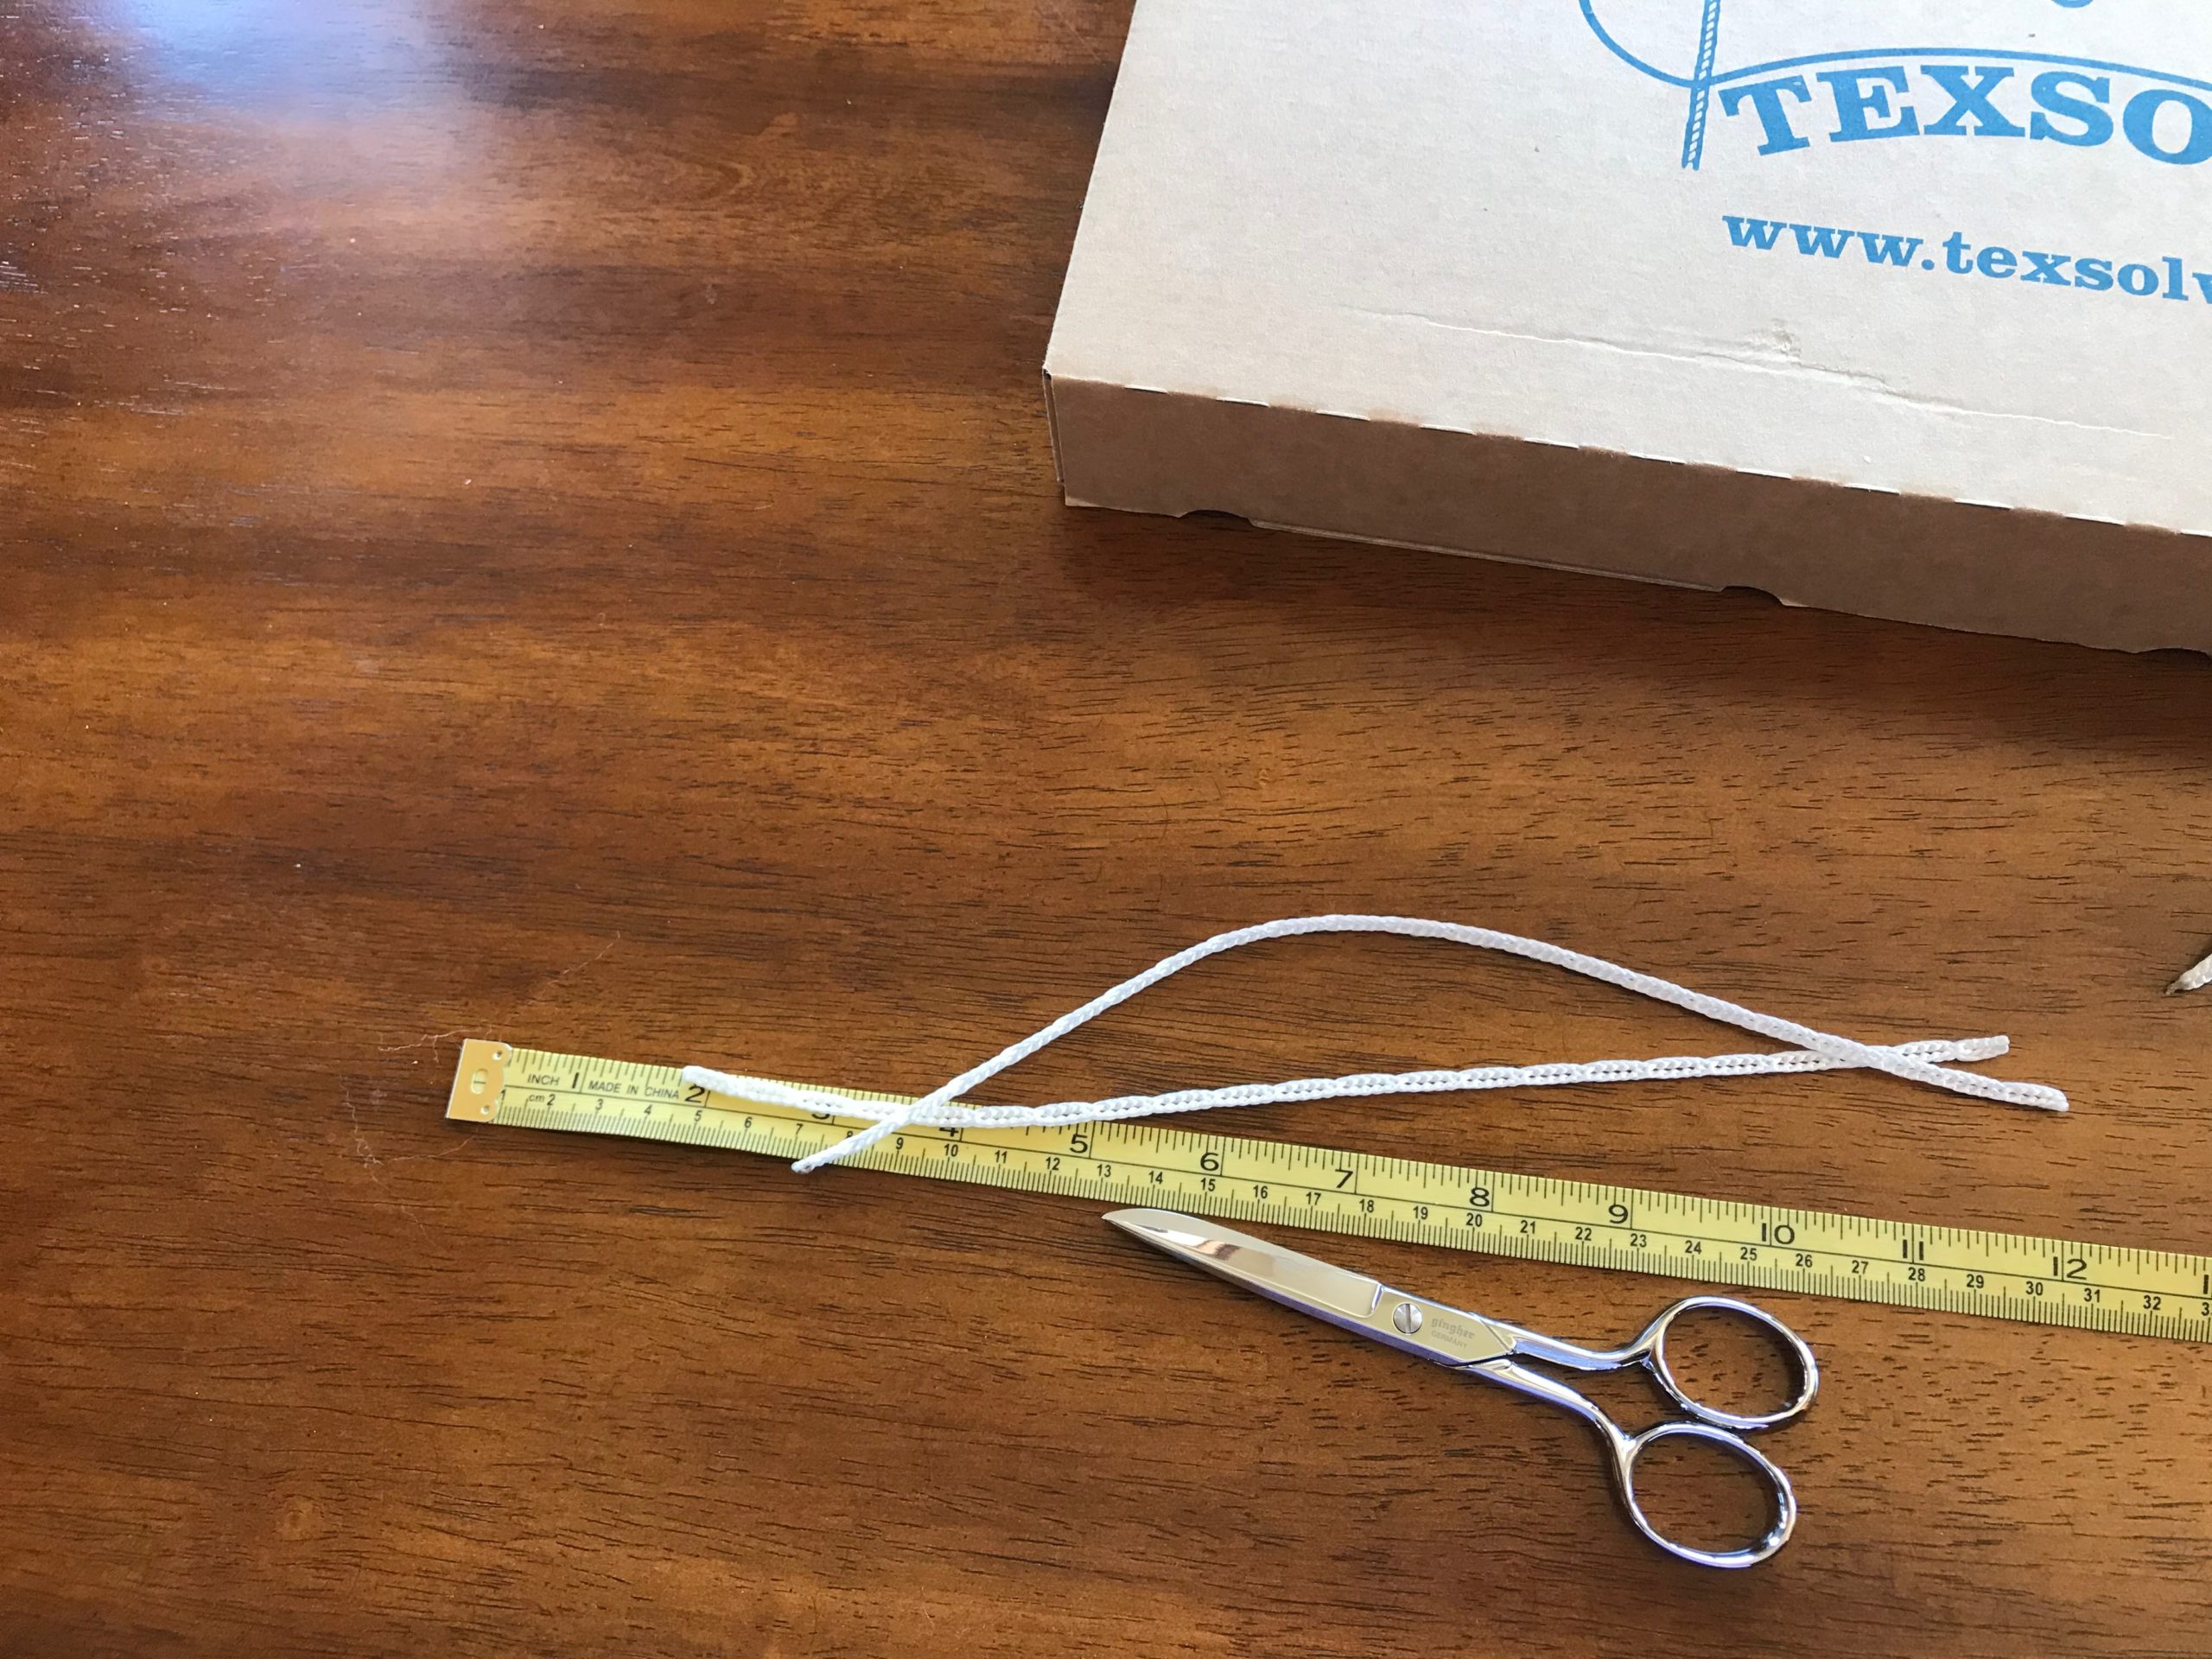
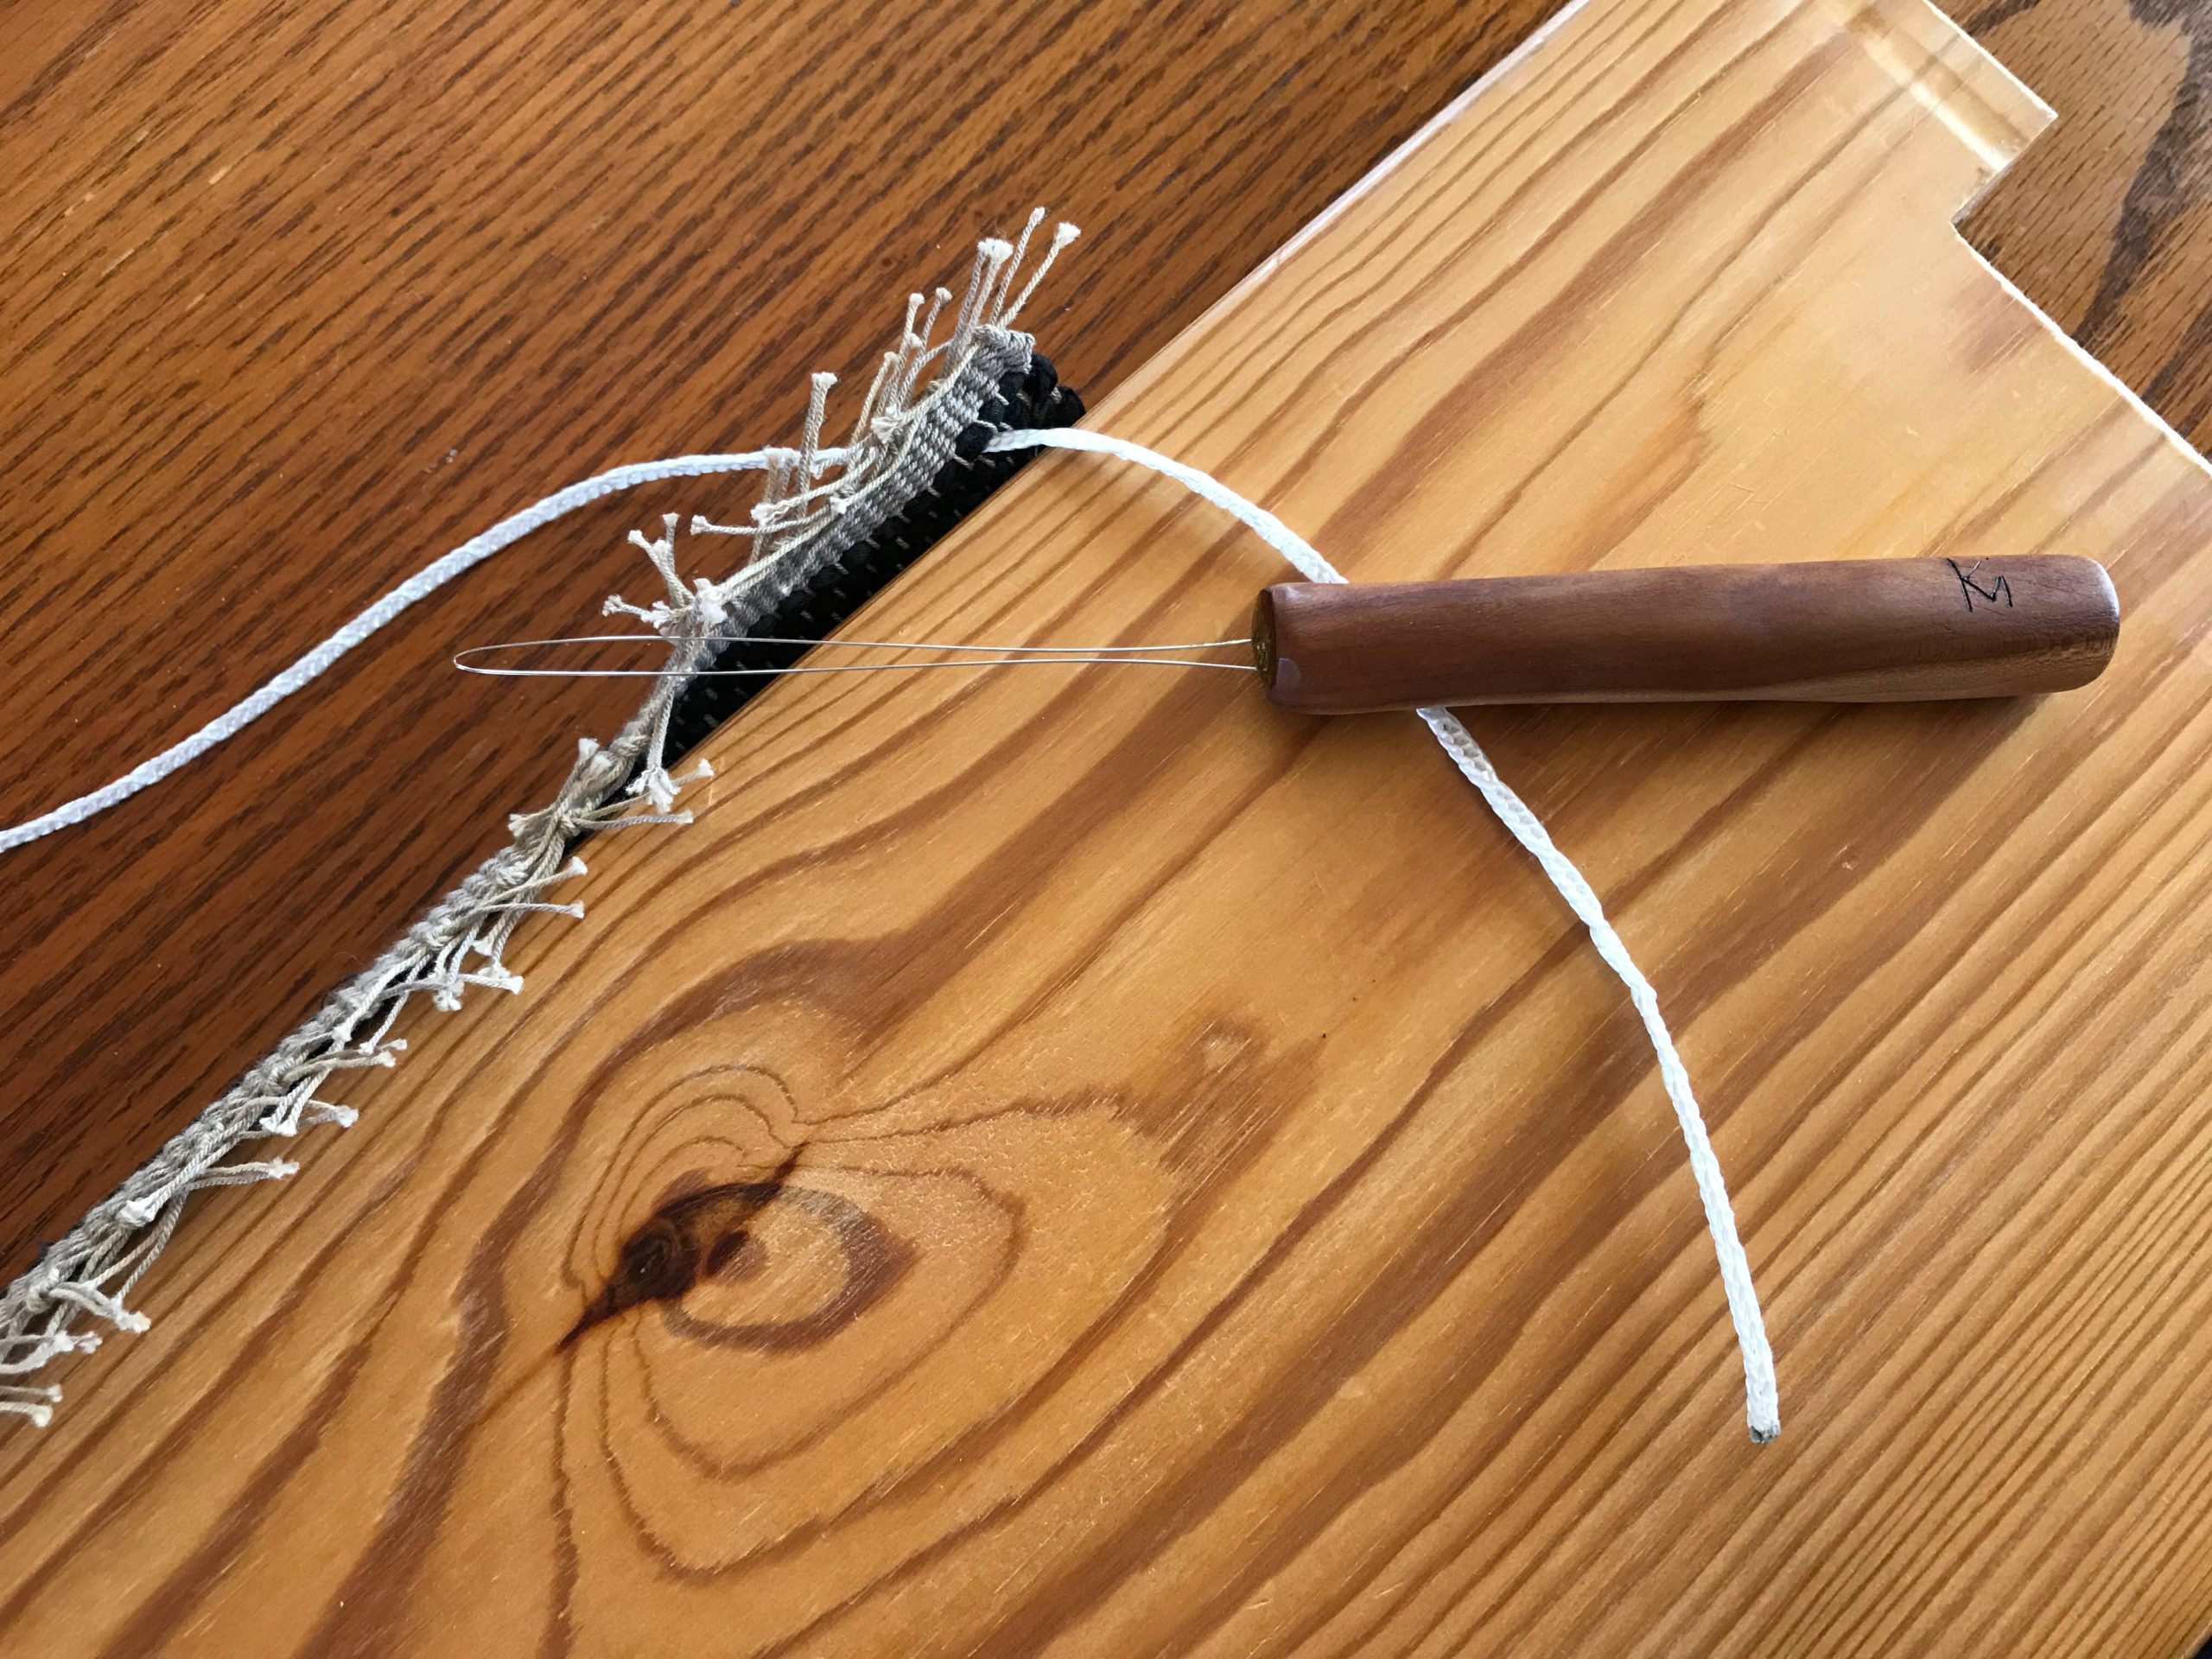
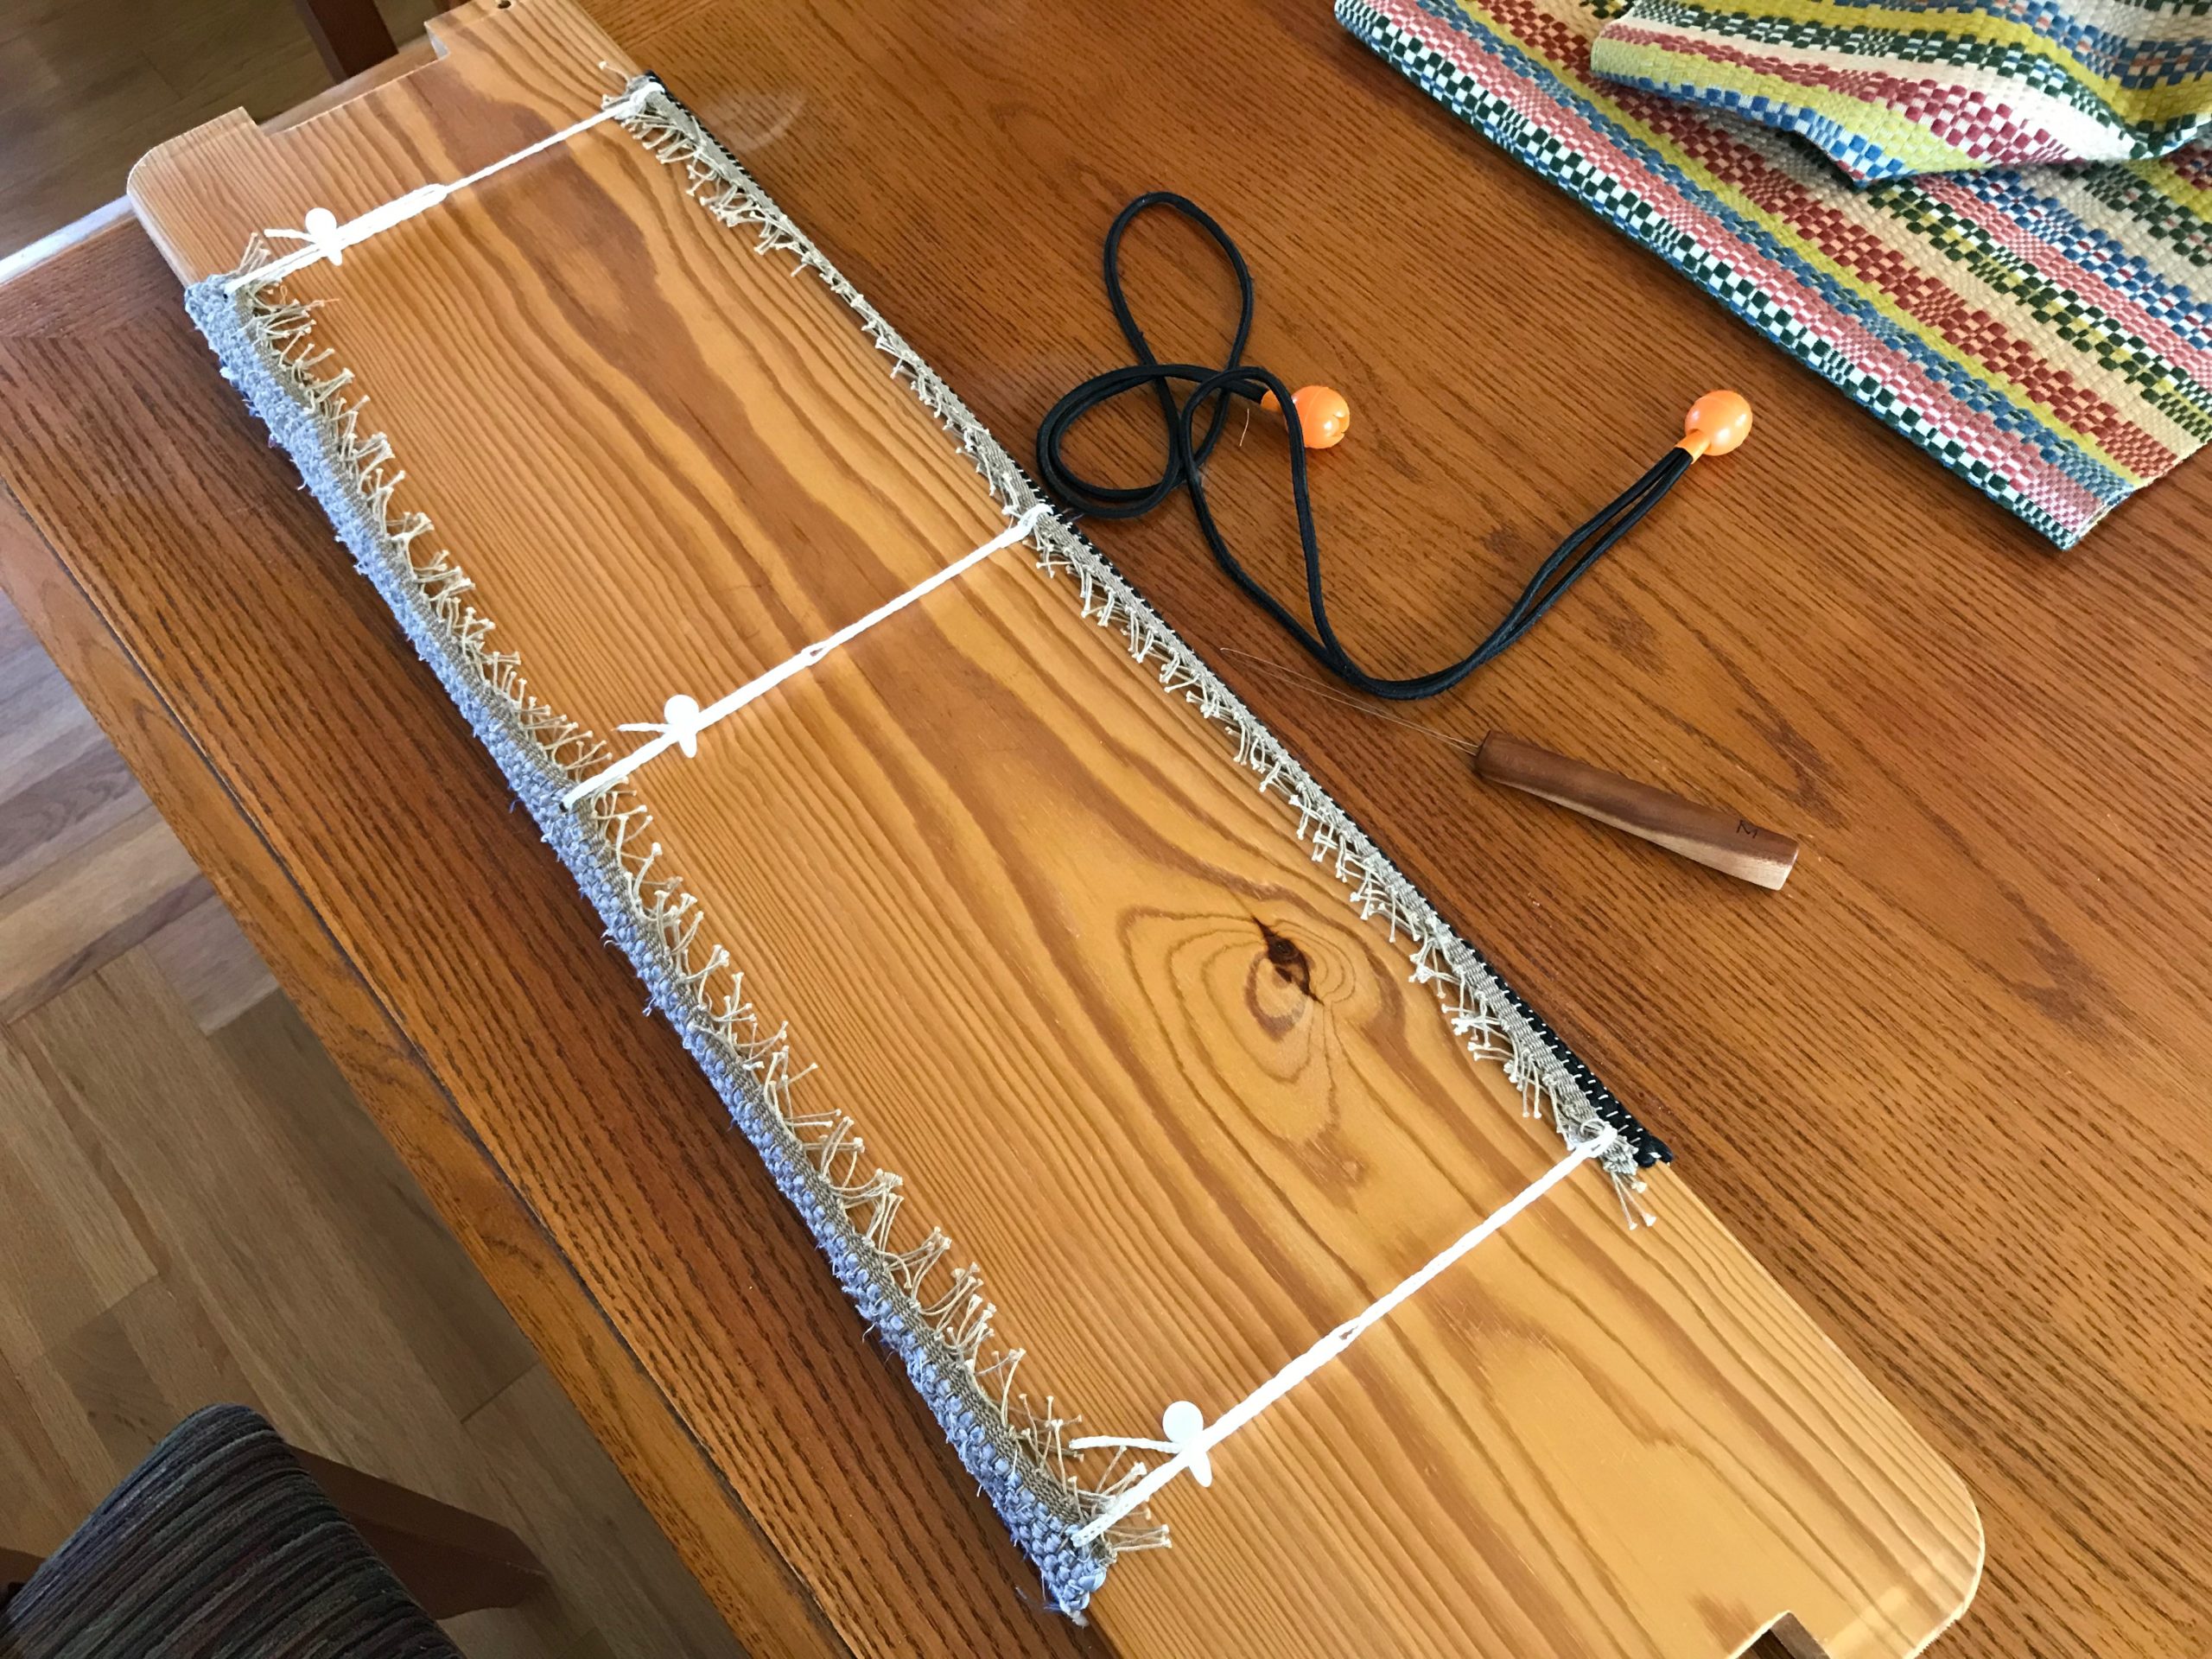
7 Double the grommet-to-grommet measurement, and cut three Texsolv cords that length. Sear the cut ends in a flame.

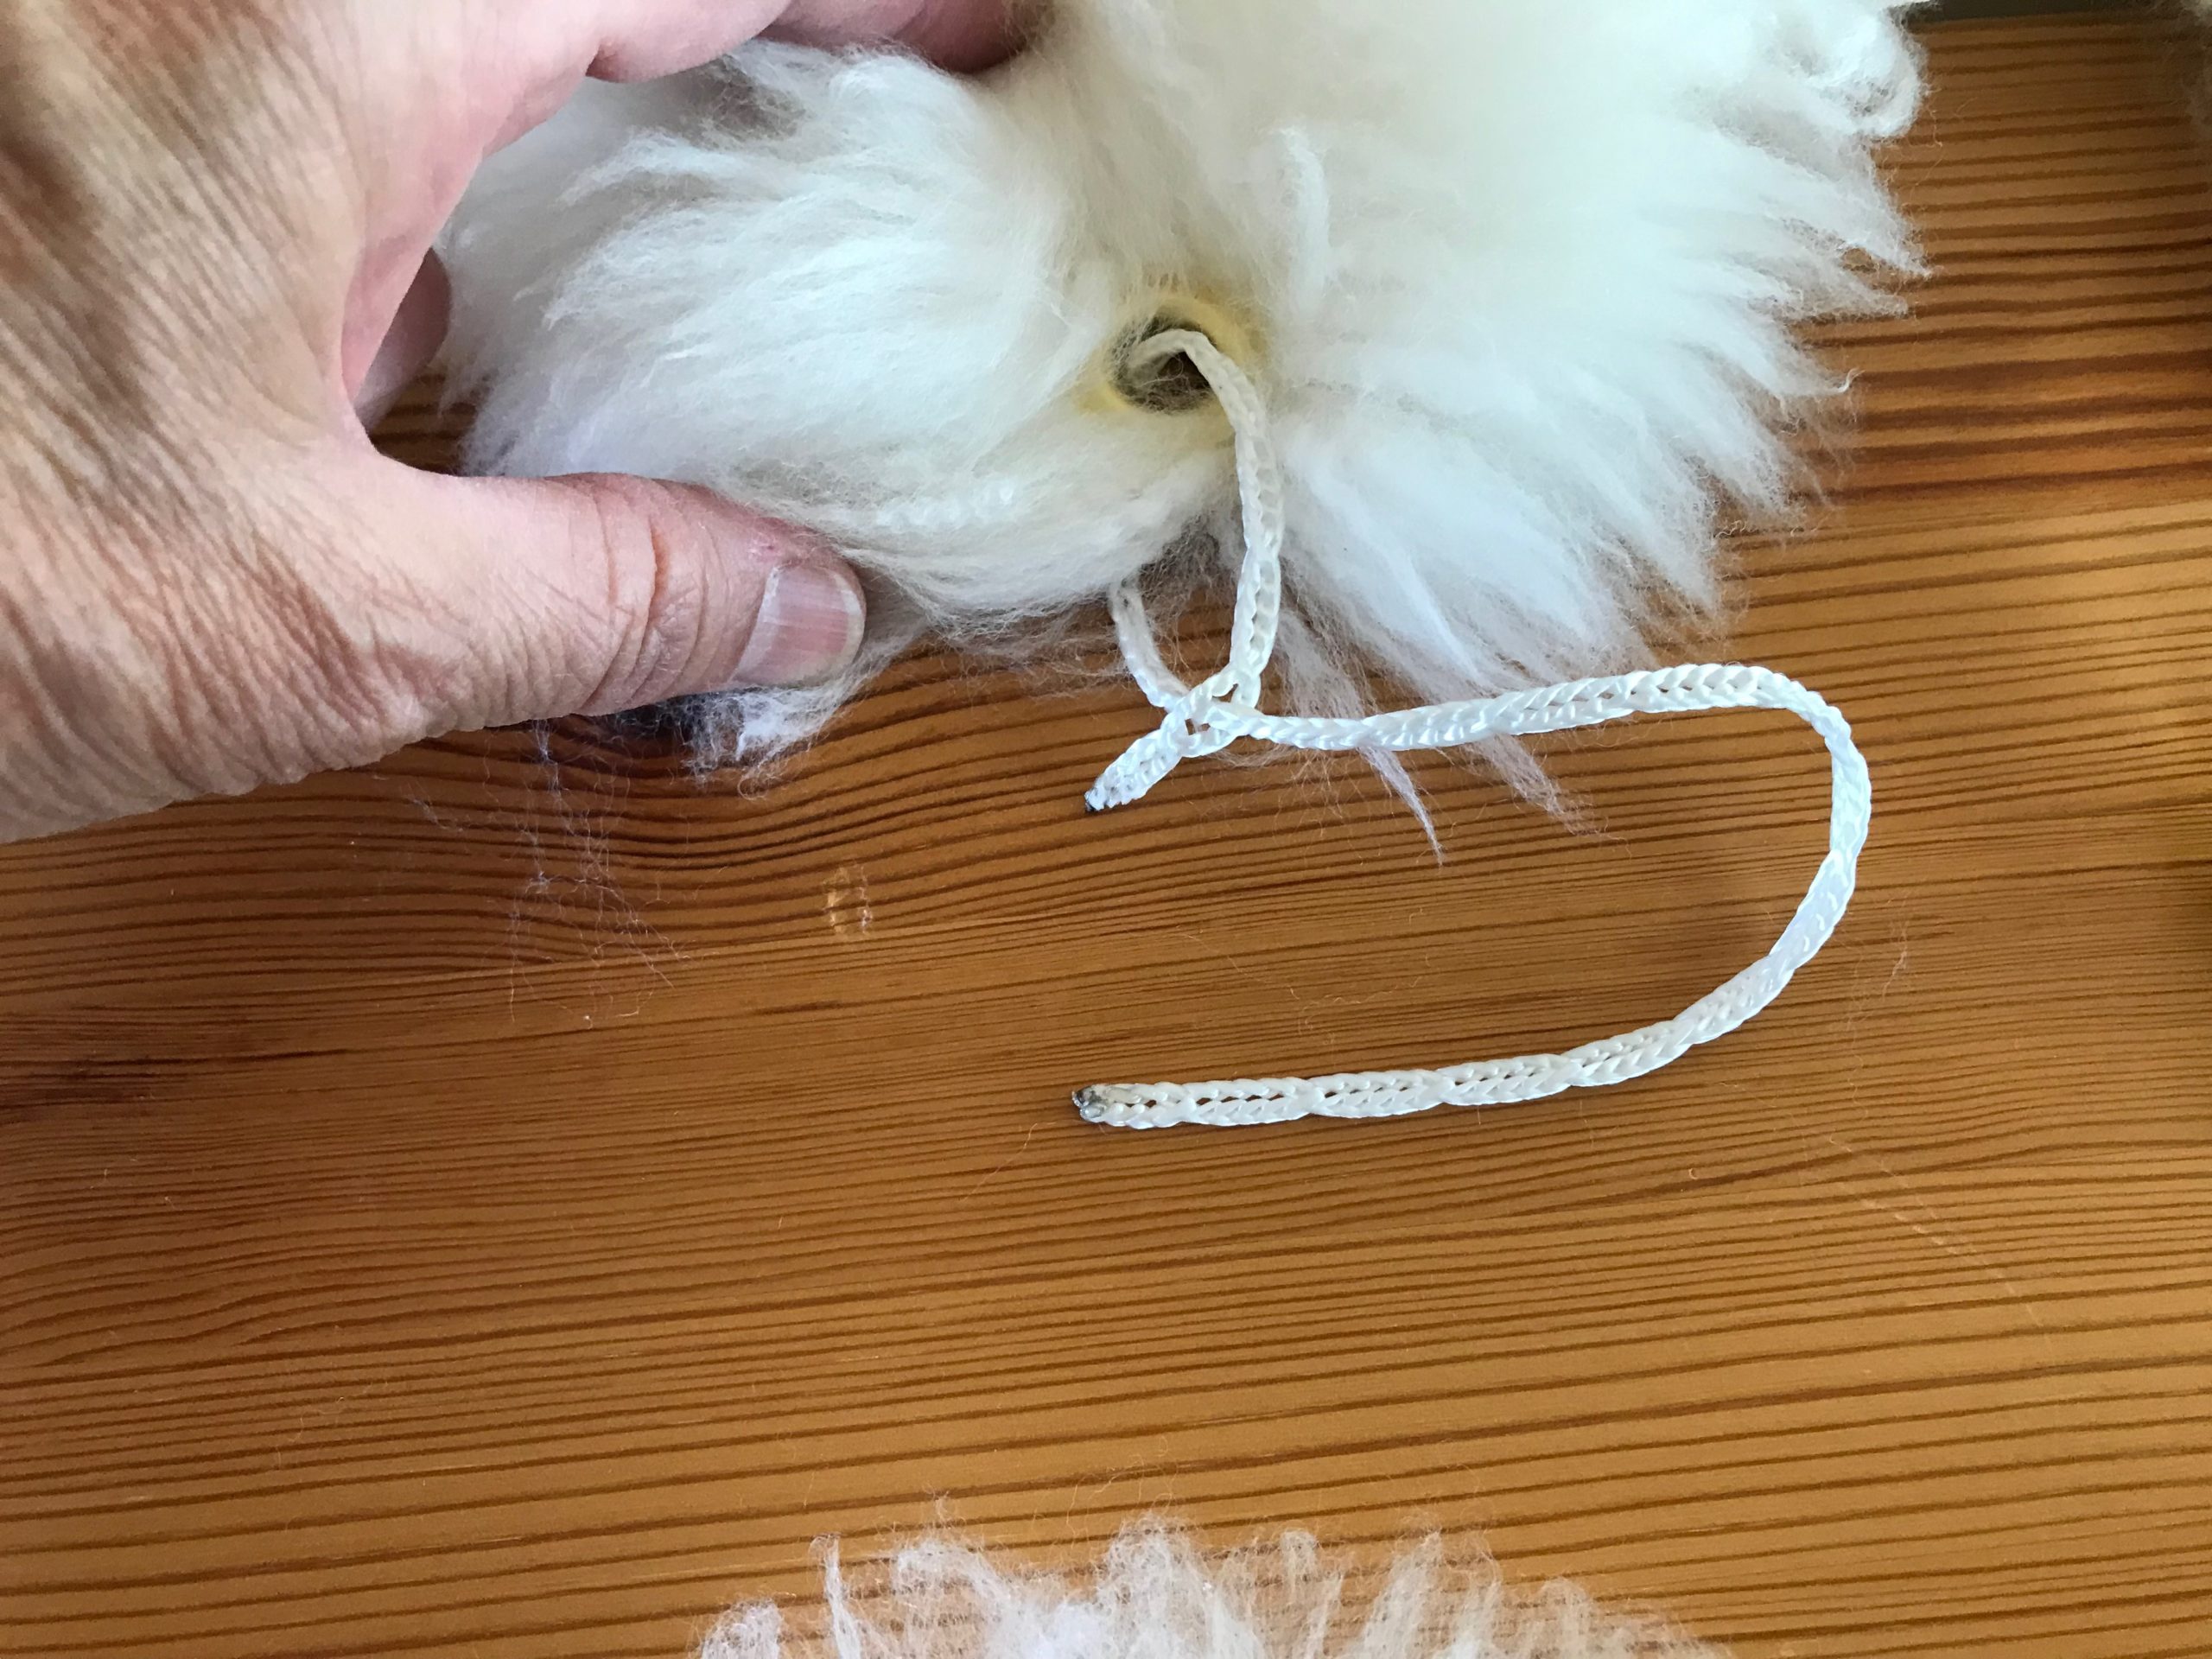
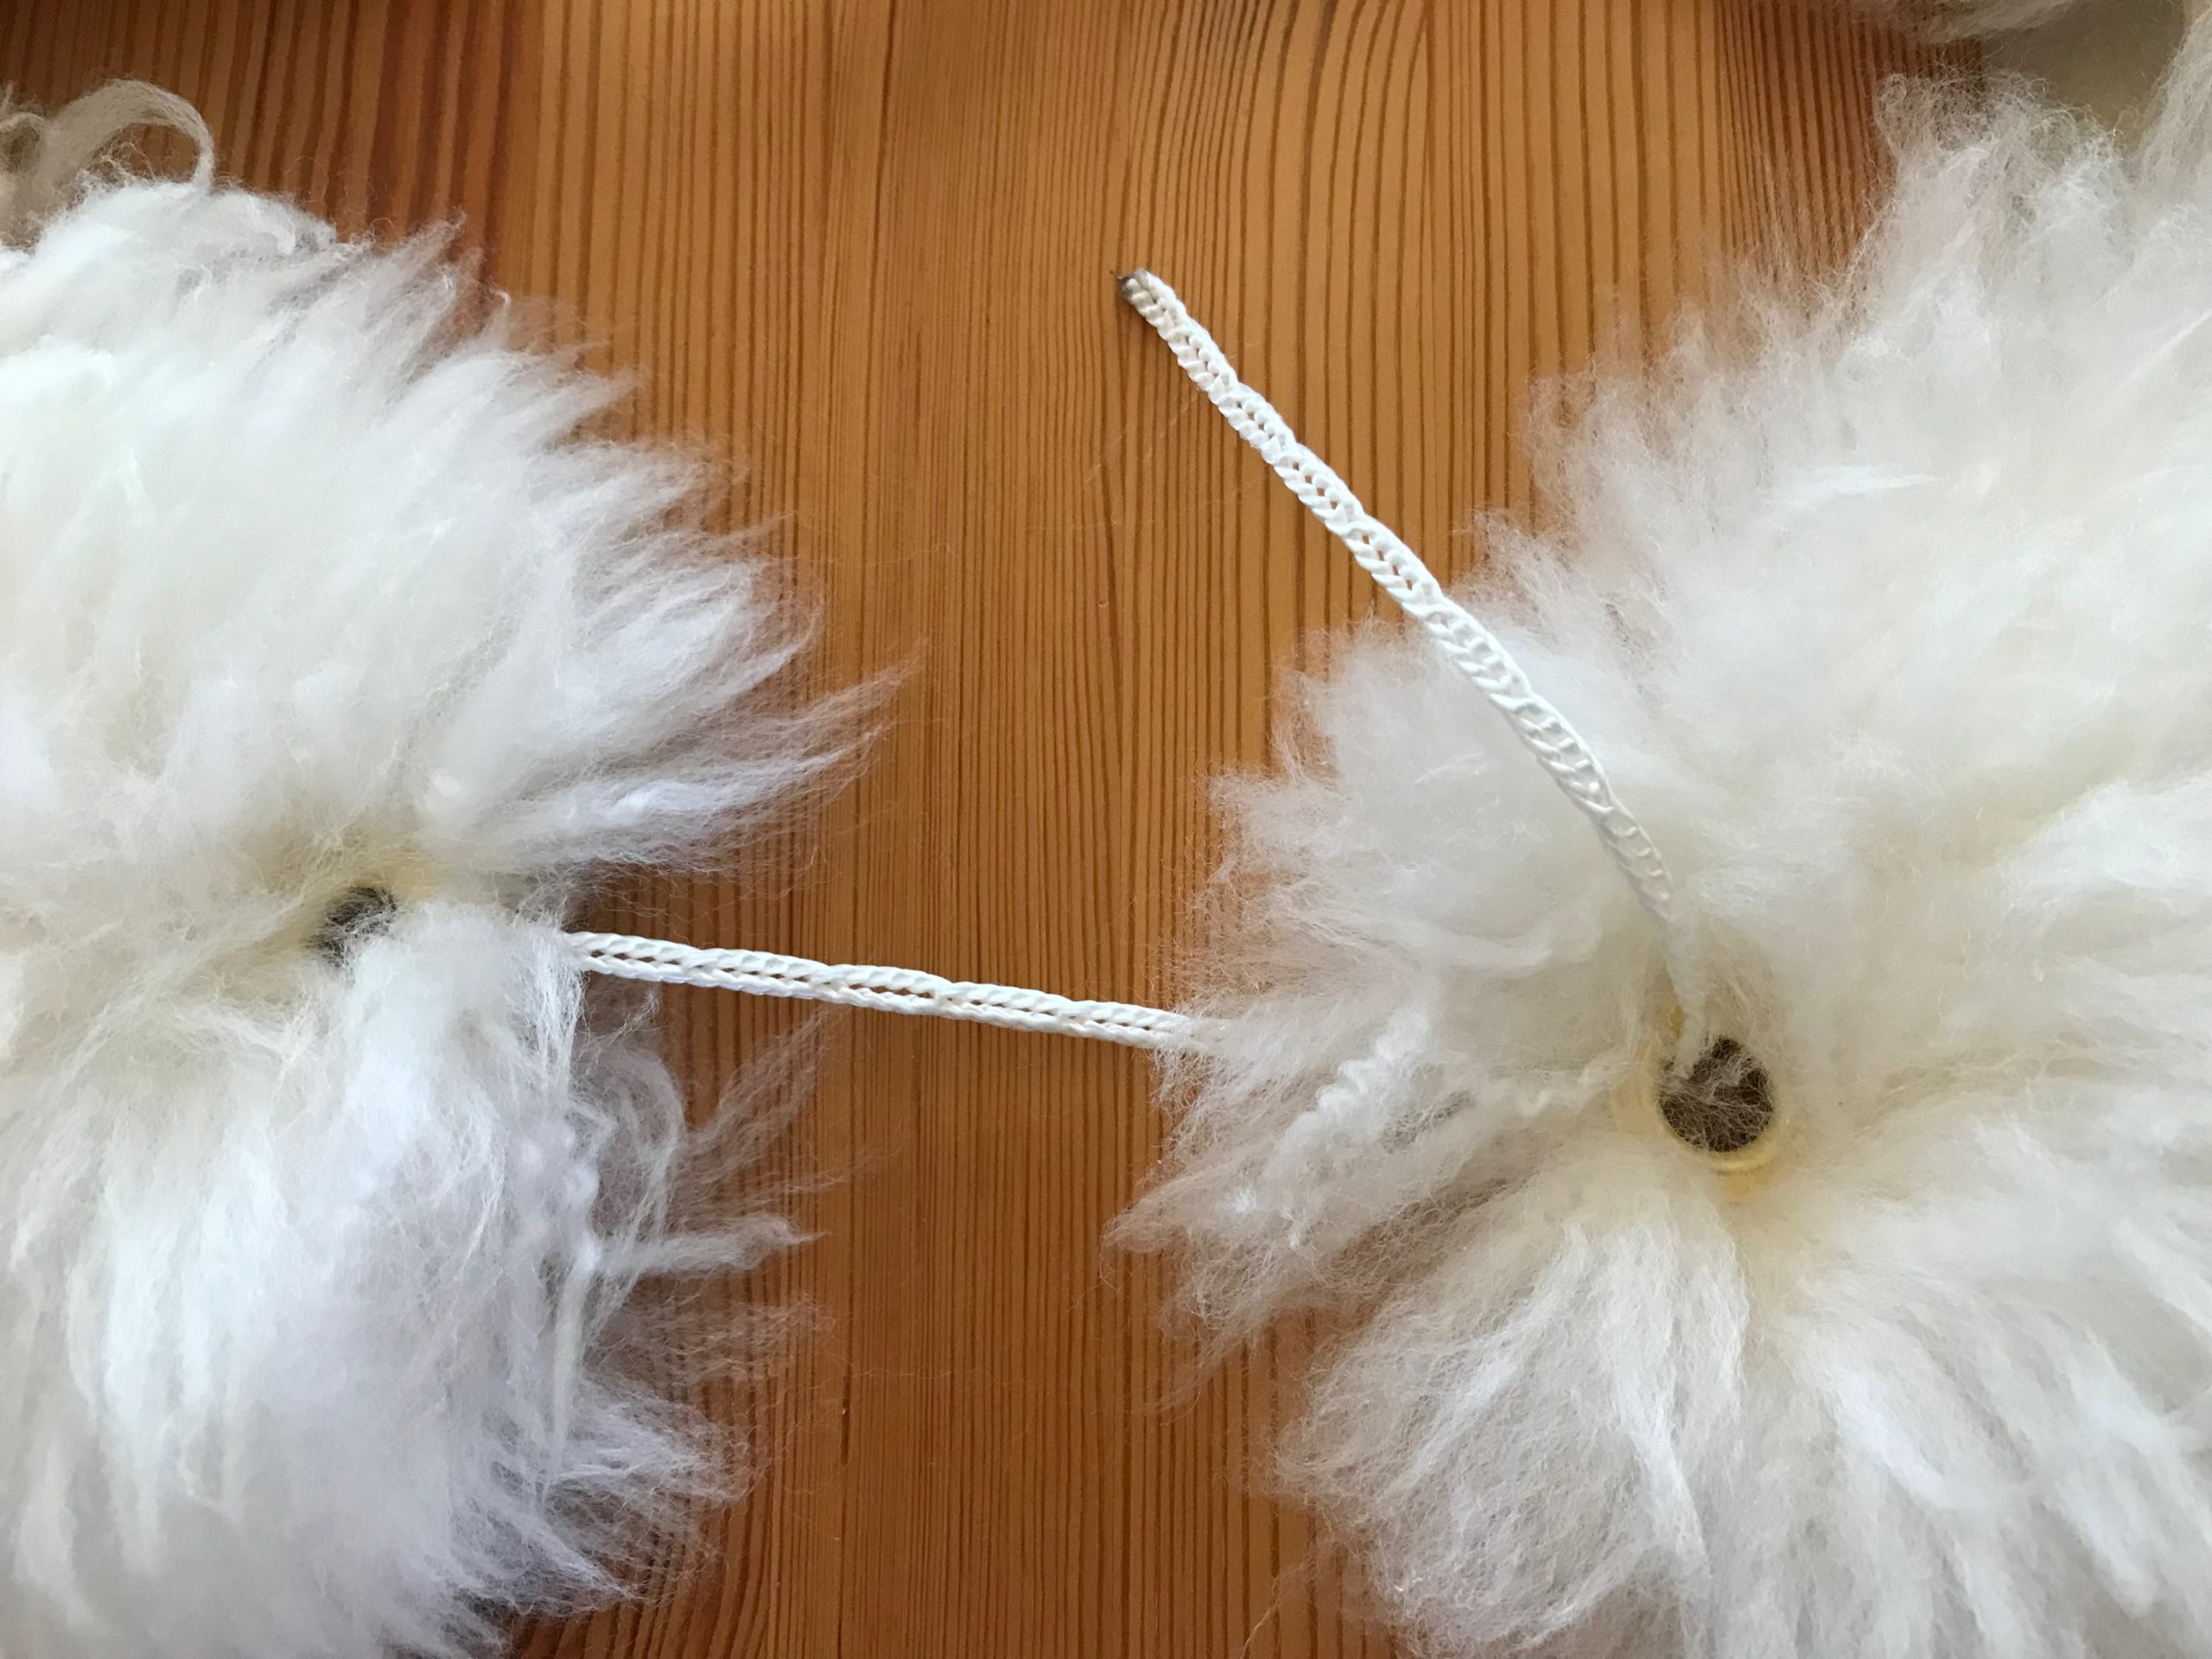
8 Secure the sheepskin to the seat of the bench by lacing one of the cut Texsolv cords through two opposite grommets. Tighten the cord and lock it in place with an arrow peg. Repeat for the remaining two cords.

Sit in immovable comfort.

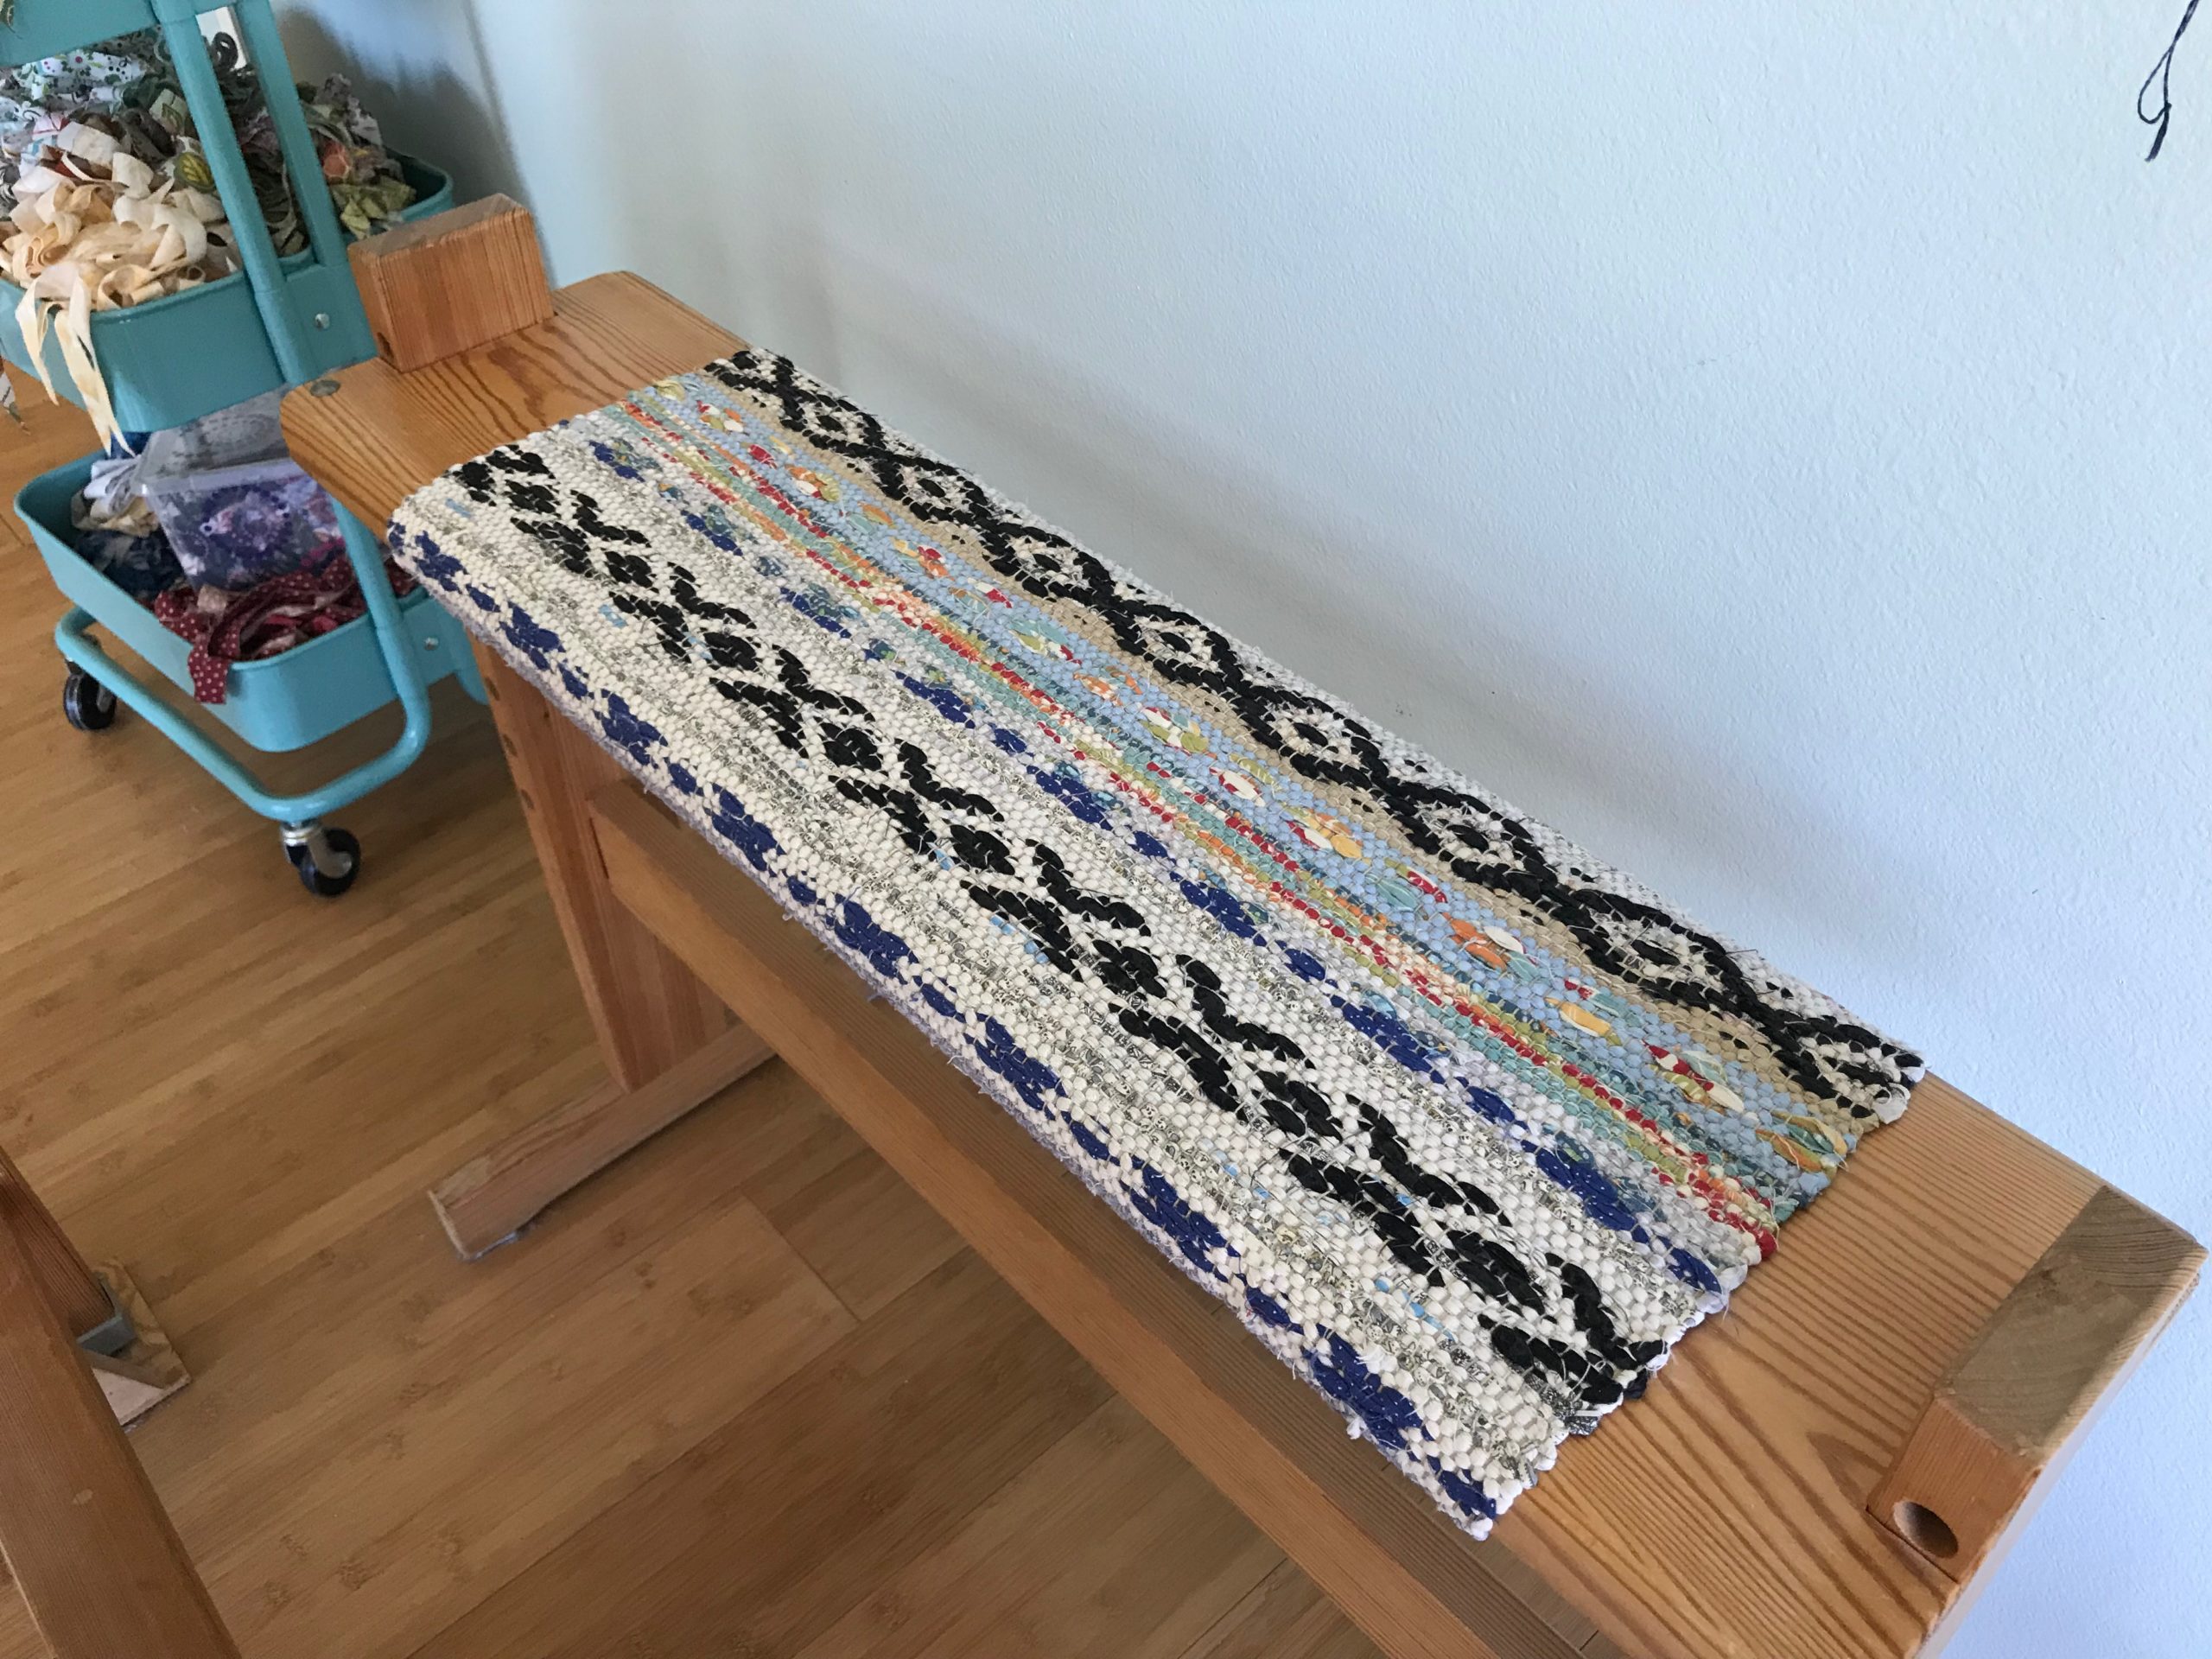
While we’re at it, let’s fix up one more bench cover…

Scrap of rosepath rag rug is held in place with bungee cords. (Bench for my Glimåkra Ideal loom)
Cord threader pulls Texsolv through. The end knots on the rug should keep the cord from pulling the weft out (I hope).
No more bungee cords!
Sitting in style.

May you see where you can soften things up.

Happy Sitting,
Karen

Tools Day: Yarn Record Book

Would you like to keep track of every type of thread and yarn you use? You need something you can refer back to for fiber content, color numbers, sett information, and where you purchased the yarn. I have a simple yarn record system that accomplishes that. Because it is easy to do, I update the records every time I start a new tube of thread or skein of yarn that is not already represented. I call it my Yarn Record Book.

How to Create a Yarn Record Book

1. Gather supplies:

  • Three-ring binder
  • 8 1/2 x 11″ white cardstock
  • Paper cutter or scissors
  • Three-ring hole punch or single-hole punch
  • Small color wheel and other color tools
  • Black fine point Sharpee
  • Pocket pages
  • New spectacular yarn and thread in colors and sizes you have never tried before!

Make a Yarn Record Book Tutorial

2. Cut cardstock. Cut a sheet of white cardstock lengthwise in half.

Making pages for yarn record book.

3. Punch holes. Punch three holes on one long side of the cut cardstock to coincide with three-ring binder, and punch five holes on the opposite side.

Preparing pages for yarn record book. Tutorial.

4. Insert color tools. Place color wheel and other color tools in front inside pocket.

Yarn Record Book Tutorial

Color tools in yarn record book.

5. Add yarn label information. Write information on front of prepared card:

  • Fiber type and size/plies; e.g., Cotton 8/2
  • Brand name
  • Fiber content
  • Where purchased
  • Length and weight

Making Yarn Record Book. How to.

6. Add yarn sample. Cut one meter of the new thread or yarn. (My loom bench, conveniently a meter in width, is my quick measuring guide.) Fold the length in half, in half again, and in half one more time. Push the loop at the fold of the yarn through a hole on the five-hole side of the card and pull the other end of the yarn through. Write the color number above the hole.

Adding yarn to yarn record book.

7. Insert yarn card into notebook. On the back of the card write the date the yarn is added. Include information about how the yarn is to be used, and the intended sett. (Later, if your plans change, or you determine the sett needs adjusting, come back and make notes here to reflect that.) Insert the card in the Yarn Record Book. I arrange fibers in alphabetical order, e.g., alpaca, cotton, linen, wool; and, within each fiber, by size of yarn from finest to coarsest.

Adding project info to yarn record book.

8. Add color cards. Put purchased yarn sample color cards in pocket pages at the end of the notebook.

Yarn samples in yarn record book.

9. Expand. When you accumulate so many types and colors of threads and yarns that your notebook is overflowing, get a bigger notebook!

Yarn Record Book. Karen Isenhower

May you make progress in putting things in order.

Happy Organizing,
Karen

Weaving Favorites

I normally pin a measuring ribbon to the cloth being woven, moving the pins as I advance the warp. This rug is different. I am using a graph paper sketch; and beside each block on the sketch I have written the number of inches to weave. The tape measure that hangs at the end of my weaving bench makes it easy to follow the plan, measuring frequently as I go. This requires mindfulness as I weave, paying attention to the pattern.

Patterned rag rug on the loom
Two cotton batik prints are used for the first section of blocks in this double binding rag rug. The graph paper pattern hangs with the weaving draft in a plastic page holder on the end of the loom for quick reference.

I have the end in mind, and this may turn out to be my favorite rag rug ever! (Have I said that before?) It is true that my favorite thing to weave is usually that which is currently on the loom…

Double binding rag rug on the loom.
Tape measure hangs on the right end of the weaving bench. This tape measure records inches and centimeters. I use both imperial and metric units, depending on what I am measuring.

The Maker of heaven and earth is mindful of you. Cherishes you as his favorite. I know that seems incredible; but as a weaver, I understand it. When you create, you care about the process and the results. As the ones created, we find ourselves in his story. The living Creator God invites us to himself. So, we come to his studio to meet the Mastermind behind the marvelous creations.

May your hands find favorite things to make.

Happy Weaving,
Karen

How Soft Is Your Pillow?

I have three short sample pieces from rug warps, where I had experimented with colors and design. I am making these samples useful by turning them into pillow covers. To complete them, I made pillow inserts to fit inside.

Rag rug cushion covers, with pillow inserts made to fit inside. Karen Isenhower
Rag rug pillow covers, with pillow inserts made to fit inside.

To get the most loft out of the polyester fiberfill, I run my fingers through clumps of it, pulling and easing it apart. I stuff these airy clouds into the pillow insert forms that I have sewn and then serge the edge of the insert closed. The durable and hearty rag rug pillow covers are pretty, but they are flimsy and floppy until the cloud-soft pillow forms are placed inside.

Like the pillow covers, your strongest asset is invisible. When we adorn our inner person with gentleness and a quiet spirit it brings clarity and courage to our outward demeanor. You would not fill the pillow cover with rocks, would you? Having cloud-soft humility instead of hard-headed stubbornness enables us to face any difficulty without becoming fearful or resentful. The beauty of your unique design is put in its best light by the loft of the pillow inside.

May you respond to difficulty with a gentle and quiet spirit.

(These three pillows are the newest additions to the Warped for Good Etsy Shop!)

Quietly,
Karen