Which Side Is Up?

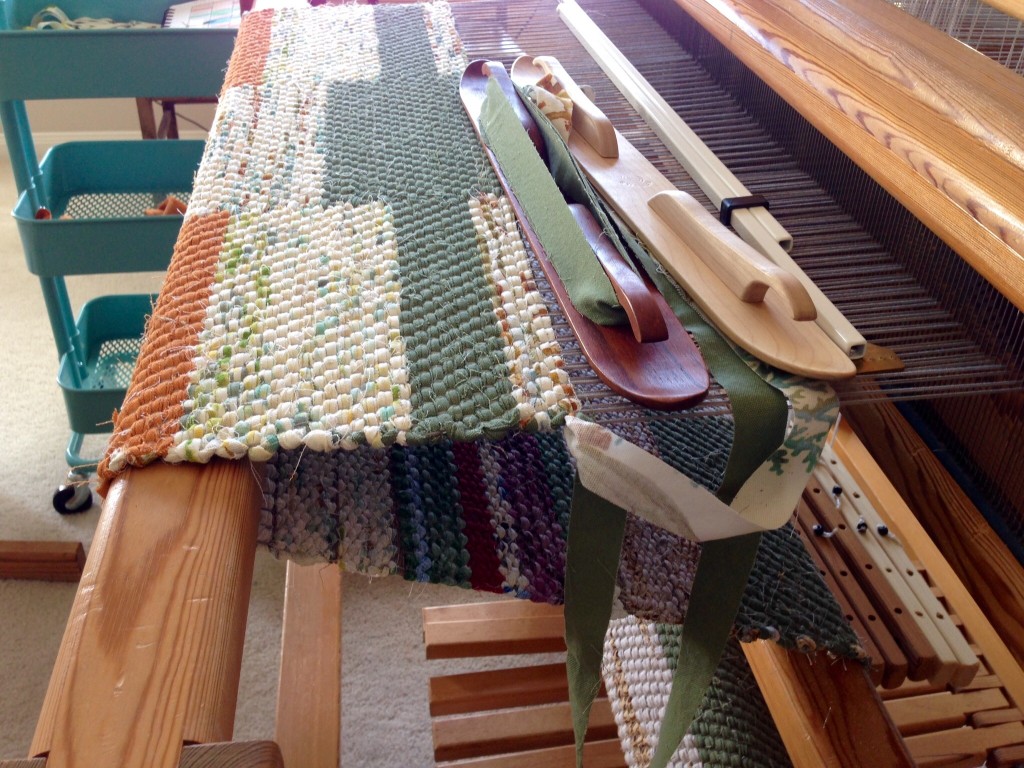
Two shuttles required! With double binding rag rugs, each weft pick is double. The two wefts fall into place above and under each other, creating a two-sided fabric. The solid green that is visible on the top of this rug forms a different shape underneath. On the top side it looks like a cross from this angle. Underneath, it looks like a capital “I.” As in, “Me, myself, and I.”

Double binding twill rag rug on the loom. Karen Isenhower
Rug design is formed two rag picks at a time. Ski shuttles are an efficient way to carry the weft picks across the warp.

One interesting thing about designing double binding rag rugs is that I end up with two rugs in one. Simply turn the rug over for a different look. When the cross is up, the “I” is not seen. Flip the rug over, and the “I” is seen, but the cross remains hidden.

Pride can ruin people. The essence of pride is comparing yourself to others, and putting yourself above. Like most people, I find it hard to deny my own flattery. But being humble means refusing an inflated view of yourself. During this week when the cross of Christ is remembered around the world, I want to make sure my “I” is under the cross. The one who humbled Himself more than we can imagine leads the way. Woven in, behind the cross, my “I” finds its true identity–no more, no less.

May you show your humble side.

Isenhower with an “I,”
Karen

Glimmer of Linen

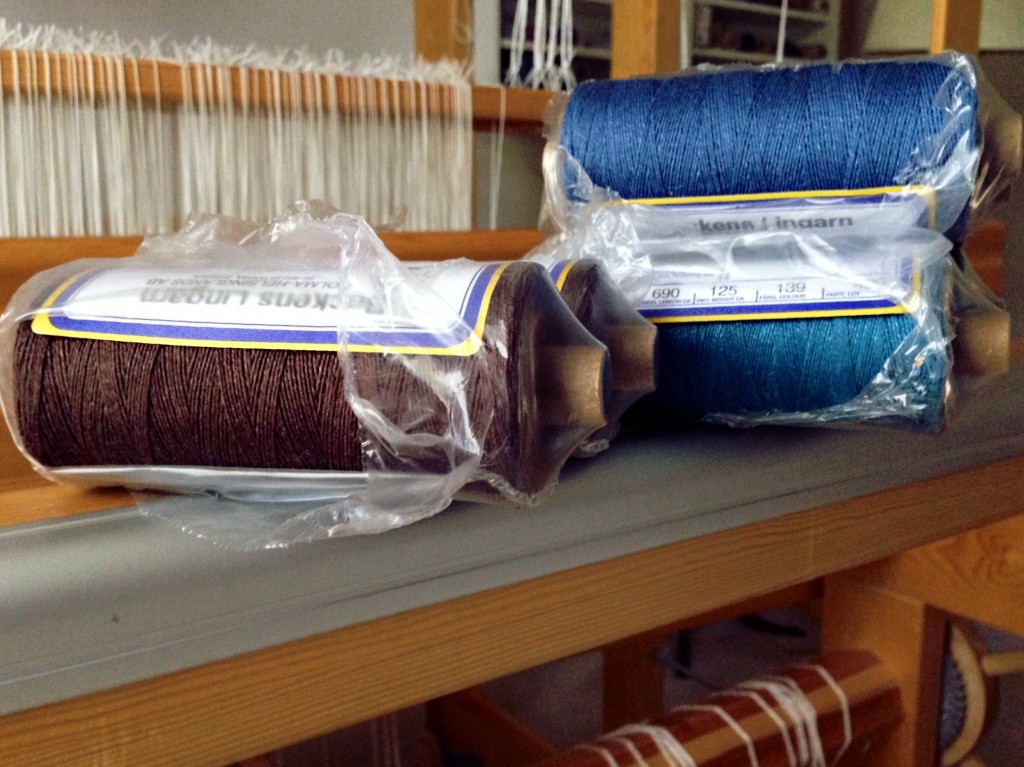
There is just enough morning light in the room to see the slight glimmer on the surface of these tubes of 16/2 linen. Line Linen has a sheen that sets it apart from other fibers; but without enough light in the room you could miss it. I am excited to get started with such exquisite thread. My mind’s eye is already trying to picture the finished cloth.

Ready to wind a linen warp!
Two shades of blue will be combined for the 16/2 linen warp. The brown 16/2 linen will be seen as floats in the dice weave fabric that I am planning.

It was late last night before I got a chance to open the box that arrived the day before. You cannot identify colors in the dark. So, in the darkened room I could barely make out the colors of the linen, much less see any brilliance from the sheen that I knew would be there.

Pride is like a blindfold; it wraps over the eyes of your heart. It’s like staying in a darkened room where colors never shine. Pride takes, assumes, expects, demands, and makes itself known. Humility, on the other hand, gives, serves, looks for the betterment of others, and expects nothing in return. Humility is like the morning light that brings out the natural sheen in everyone around you.

May your humility bring light into the room.

Your friend,
Karen

~Thank you, blog-reading friends! There is a discount coupon just for you on my About page, good for a few more days.~

The Secret to Making Lattice Fringe

First, a short tutorial for tying perfect lattice fringe, and then some thoughts about keeping our eyes open to reality. I decided to tie three rows of knots with this fringe for a pretty lattice effect, knowing the results are worth the time it takes.

How to Tie Lattice Fringe – Step-by-Step Tutorial

Supplies:

  • 7/8″ (2 cm) blue rigid foam insulation (mine is Dow Styrofoam Residential Sheathing Insulation, found at The Home Depot or Lowes), cut to 32 x 36″ (81 x 91 cm) (This great idea came from Thrums, one of my favorite weaving blogs.)
  • 16 straight pins
  • 7/8″ (2 cm) warping slat (or template of desired width)

1. The first row of overhand knots has been tied. (More detail HERE.) Lay the fabric over the foam board, with the fringe laying toward you at the front of the board.
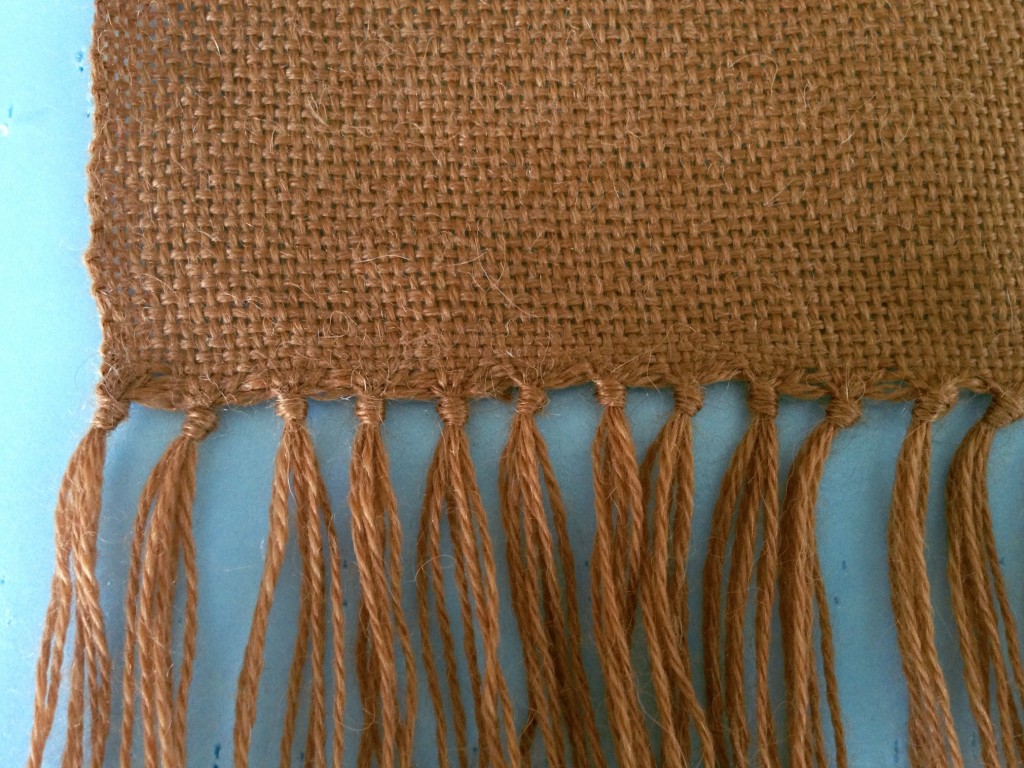
How to add lattice fringe to a row of knotted fringe. Step-by-step tutorial with pics.


2. Place a straight pin through the top thread of each of several knots in a row, into the foam board under the fabric.
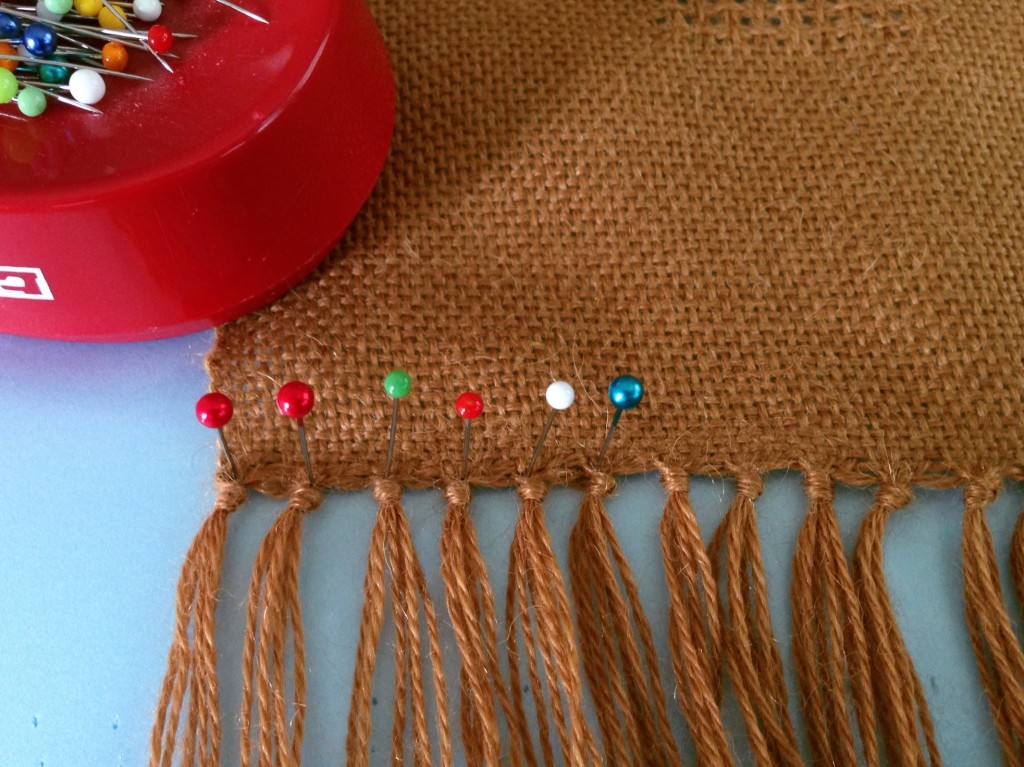
Lattice Fringe Tutorial. Step-by-step, with pics.


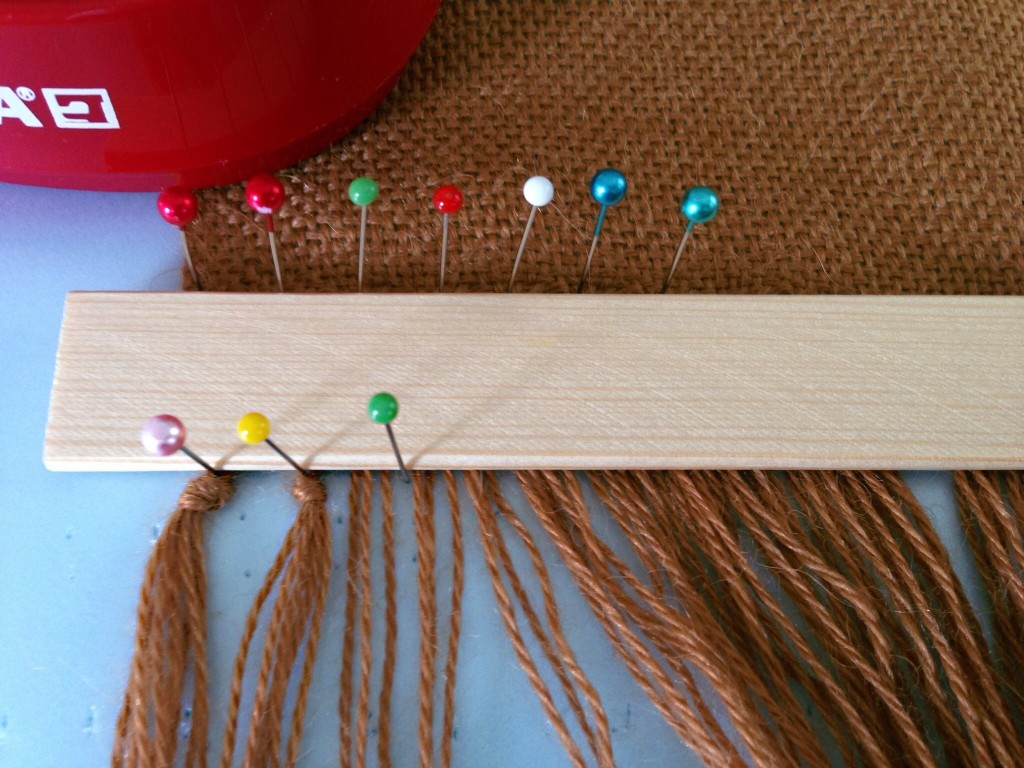
3. Use warping slat (or other template) as as spacing guide for the second row of knots. Lay warping slat flat, and place it flush against the row of pins. Using the width of the warping slat as a spacer, place a pin in the second row just below the slat, at the point where the knot will be formed.
Lattice Fringe Tutorial. Step-by-step with pics.


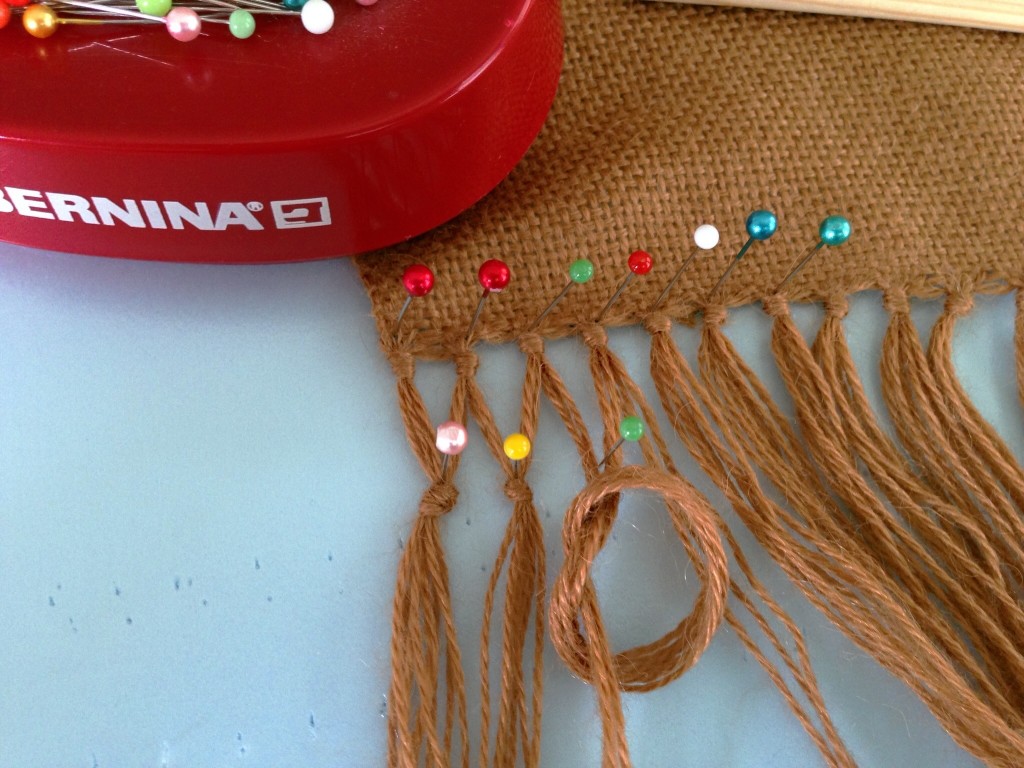
4. Remove warping slat. Loosely tie an overhand knot below the just-placed pin in the second row, leaving the center of the knot wide open.
Overhand knot in lattice fringe tutorial. Step-by-step with pics.


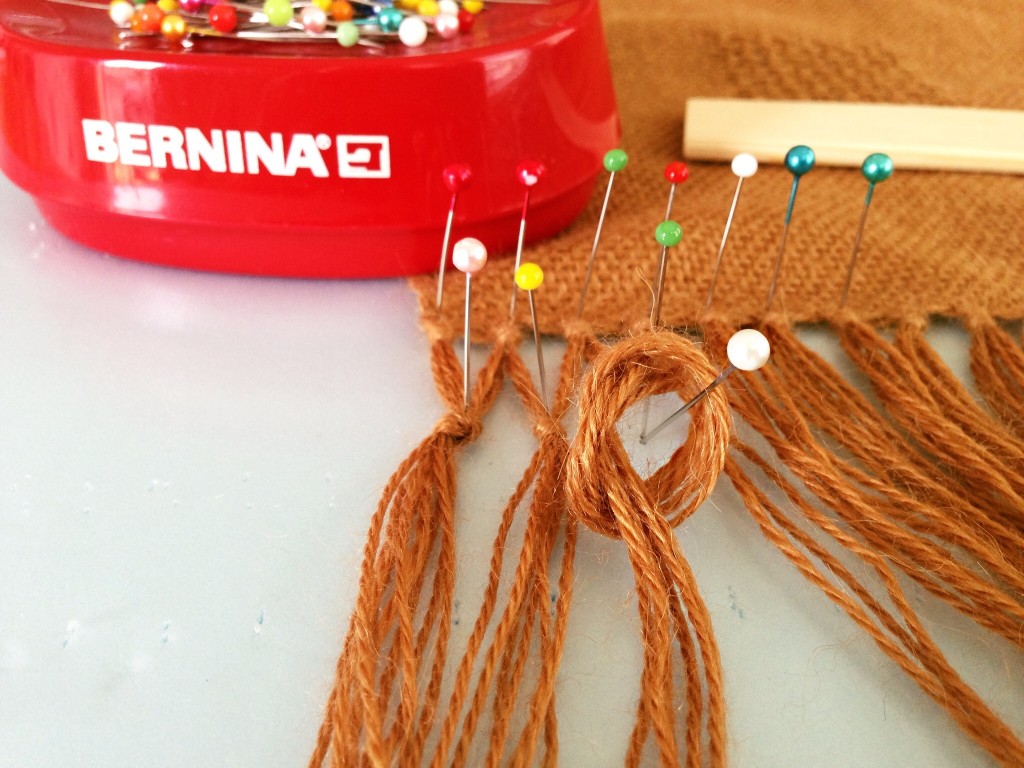
5. Insert another pin through the center of the knot just a fraction below the point of the first pin.
Making Lattice Fringe. Step-by-step tutorial with pics.


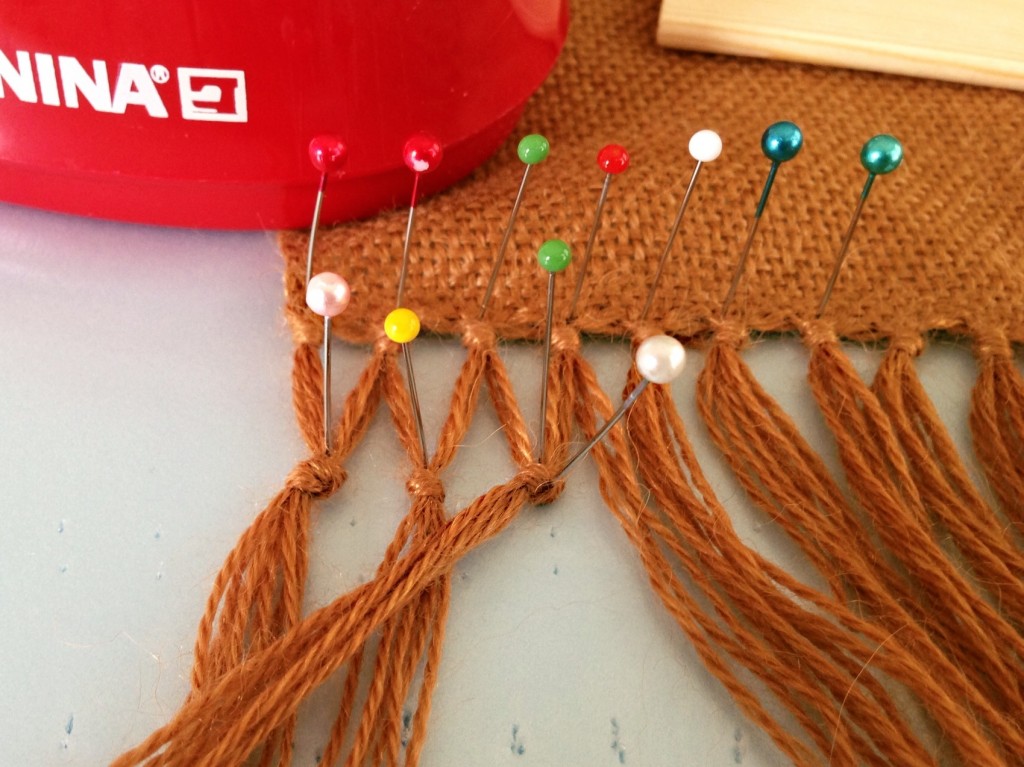
6. Slowly pull the knot to cinch it up to the point of the second pin.
Cinching the knot for lattice fringe. Tutorial with pics.


7. Holding the knot firmly between the fingers of one hand, with your other hand gently tug each strand of the knot to its full length.
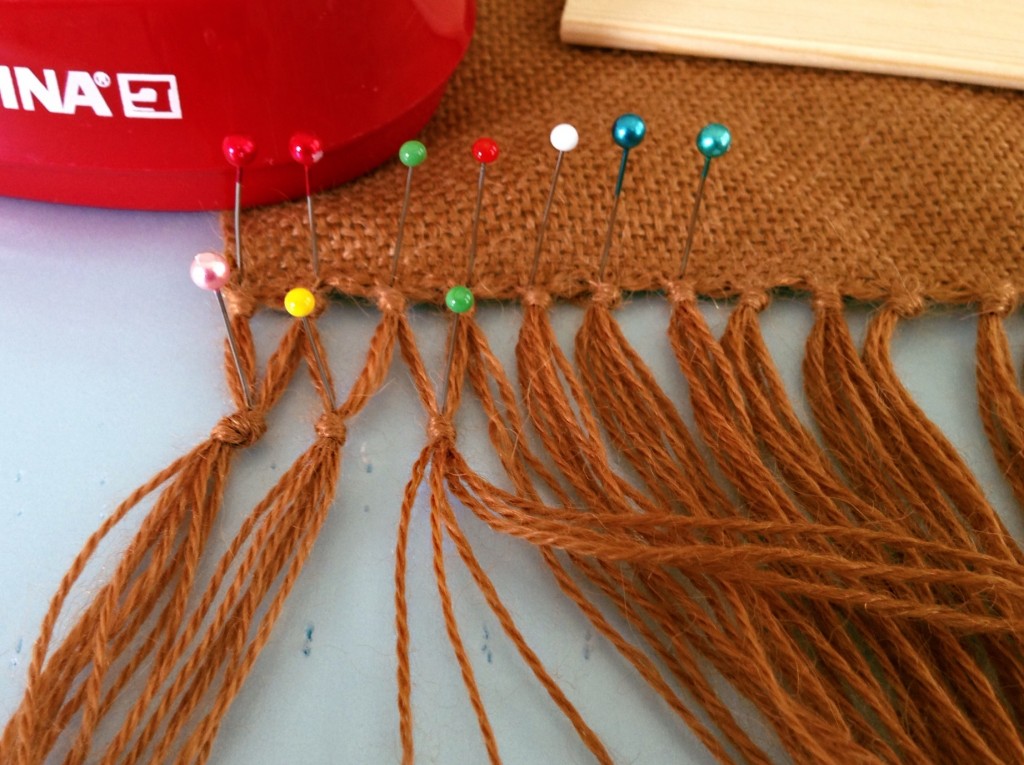
Making lattice fringe - tutorial with pics.


8. Continue tying knots across the entire row.
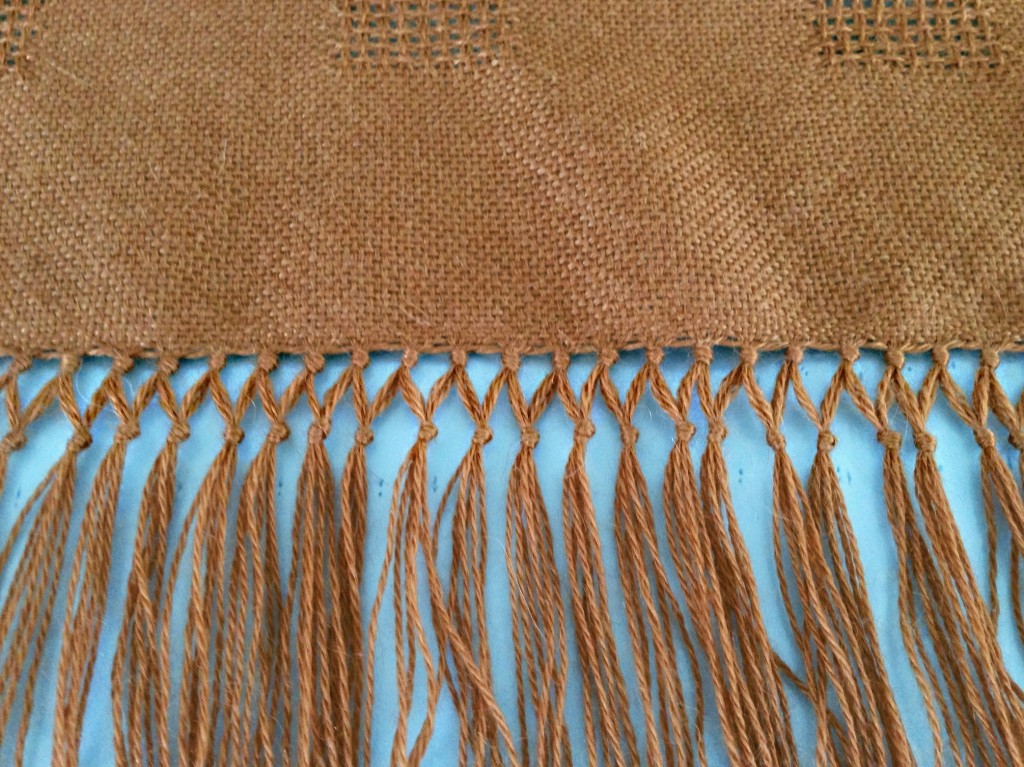
First row of lattice fringe. Tutorial step-by-step with pics.


9. Repeat the process to add another row of knots.
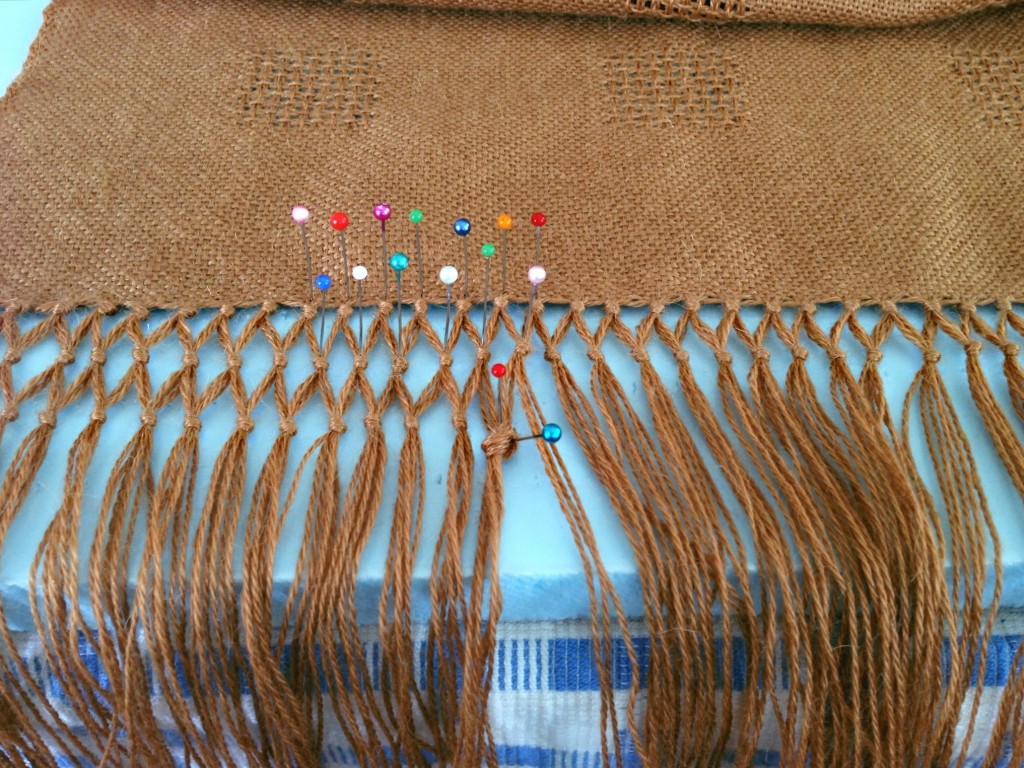
Tutorial for Making Lattice Fringe. Step-by-step with pics.


My confidence in my ability to tie these knots can drift into careless thinking. Maybe I’m good enough at this that I can leave out some steps. Do I really need that guide stick for spacing the rows? I think I can eyeball it. Pulling each strand to close the knot takes too much time. Why don’t I just skip that part? And soon, I am blind to the haphazard results I am creating. Pride is like that. In relationships and in life circumstances, though, the consequences are more severe than in fringe-tying.

Pride keeps me from seeing my own vulnerabilities. Pride puts me in harm’s way because it blinds me to the reality of my own shortcomings, and makes me think I’m above it all. I want to keep my eyes open to my need to learn and grow. Who wants to drift into haphazard results in life? Not I. Not you, either?

May you never be blind to the things that matter.

Feeling vulnerable,
Karen