
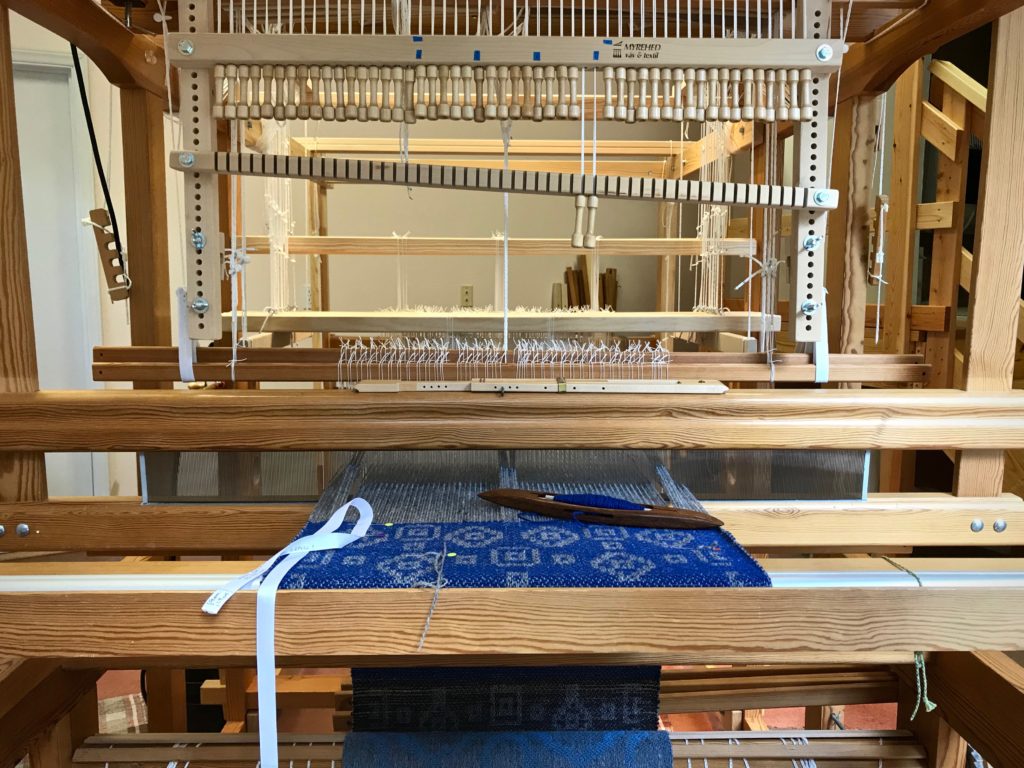
It is exciting when Maverick walks by. Although he never comes in my drawloom studio, he does stop for a moment to look my way. You’ll see him in the slideshow video below. But what happens inside the studio is even more exciting, especially when it’s time for cutting off!
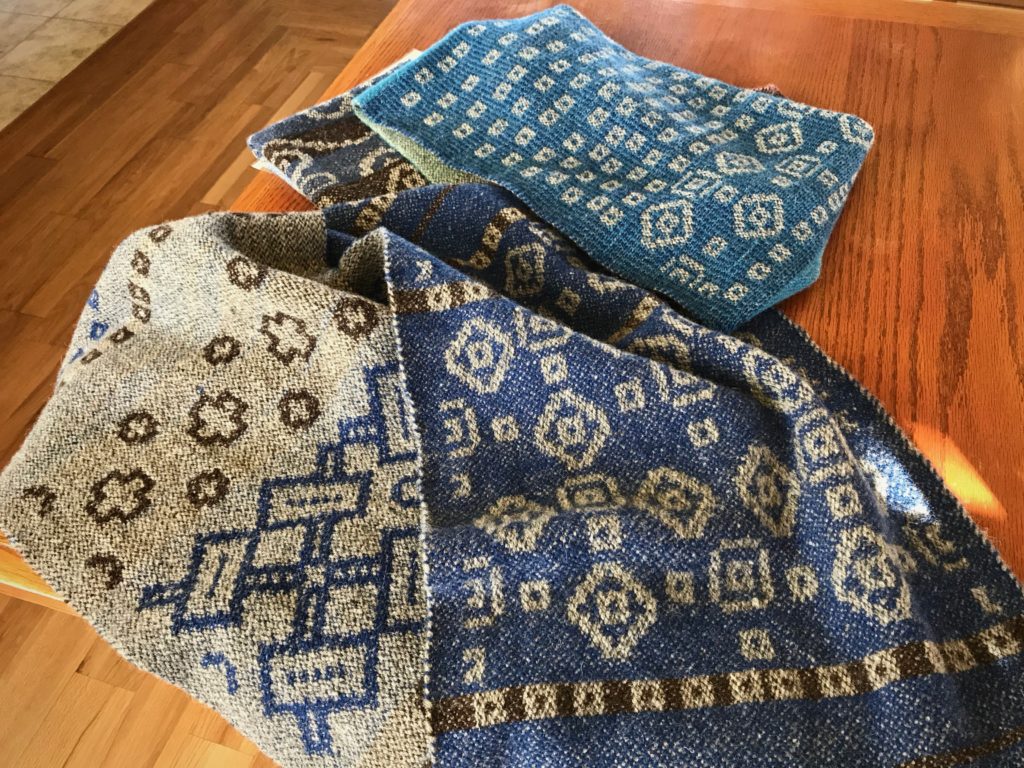
This is Tuna wool, so I expect some shrinkage, but how much? I take careful measurements before and after wet finishing. Besides the main piece of fabric that I’m using for a garment, I have two sample pieces. I can experiment with the samples before wet finishing my garment fabric.
Here are my findings:
Sample 1. Hand wash and air dry.
10% shrinkage in width; 13% shrinkage in length.
Sample 2. Machine wash (3 minutes agitation on a gentle cycle, with a short spin) and machine dry (low setting) till damp, finish with air drying.
13% shrinkage in width; 14% shrinkage in length.
~How to do the shrinkage calculations~
First measurement (on the loom) minus the second measurement (after washing and drying) equals the difference. The difference divided by the first measurement equals the percentage difference.
For example, 50 cm – 43.5 cm = 6.5; 6.5 / 50 = 0.13; 13% shrinkage.
The first sample fabric is softer than the unwashed fabric, but not as soft as I’d like. The second sample fabric is beautifully soft, like a nice warm sweater. So, with confidence, I wet finish the garment fabric—with great results. It’s perfect for the fall/winter vest that I’ll soon be wearing, made from this fabric!
Enjoy this photo show of the drawloom process.
May you enjoy the process you’re in.
Happy Weaving,
Karen
Wow, that’s going to make a stunning vest!
Hi Betsy, Thank you! I’m hopeful that it will become a favorite thing in my closet.
All the best,
Karen
Good morning Karen,
You have been busy. Love the colors interwoven to form the base colors. Blue and green ..
I had a handed down stash of ’70s yarn. Scratchy and thick. Not something good for anything but macrame planters. But I needed rug. It was crocheted and eventually washed. The result was the softest wool imaginable.
Wool can be surprising.
Nannette
Hi Nannette, Isn’t wool wonderful in the way it surprises us? And it’s so forgiving to work with.
All the best,
Karen
That will be a lovely warm vest, Karen. You are producing beautiful fabric on your new drawloom.
Hi D’Anne, This drawloom is really a treat to weave on. Thank you so much for your kind words.
Happy weaving,
Karen